
Writing Native Mobile Apps in a Functional Language Succinctly®

CHAPTER 3
Placing Widgets on the Screen
“Any sufficiently advanced technology is indistinguishable from magic.”
Arthur C. Clarke
Layout concepts in CSCS
Different frameworks use different layout methods for placing widgets on the screen—most allow you to place widgets on the screen programmatically. Many also allow you to visually drag-and-drop a widget anywhere on the screen.
For developing iOS apps with XCode, Apple created the Auto Layout concept and the Storyboard. The widgets are placed on the screen according to the constraints among themselves. When you run your app on a device or in a simulator, the layout may look different from what you see on a Storyboard, where you dropped your widgets. This is due to the different sizes of the Storyboard for different devices.
For Android development, the layout is often created defining the placement rules in the XML layout files. Xamarin.Forms uses XAML files.
For CSCS development, we won’t have a familiar drag-and-drop functionality. All the placements of widgets are done programmatically. It is the same code for Android and for iOS.
In exchange, we will have more control over where to place the widgets. The learning curve is quicker—there are no XML schemas, no XAML files, and no Auto Layouts (I personally think anyone who understands the workable concept of Auto Layouts in under a week is a genius of our time).
For the layout definition, I used a mixture of the iOS and Android approaches. From the Auto Layout, I applied the following—for the unique widget location, I need to have three concepts:
- Widget horizontal placement (relative to other widgets or to the main window).
- Widget vertical placement (relative to other widgets or to the main Window).
- Widget size.
The widget size can be absolute or relative. In the latter case, it will be automatically extended or contracted, depending on the device size.
That’s it! I am not sure why the horizontal and vertical placements are allowed to be defined multiple times, and inconsistently, in both iOS and Android, leading to conflicts; these conflicts may be resolved with unexpected results during runtime. In CSCS, no conflicts are possible by its layout design (how it works).
For the implementation, I took an approach similar to the concept of the Relative Layout in Android. The difference with RelativeLayout is that it’s not possible to have multiple definitions of the widget placement parameters—in Android, you can use the ApplyRule() method for setting the widget placement rules an unlimited number of times, and Android won’t complain about any contradicting rules.
Let’s now start with the implementation. Some parts of what follows have been published in CODE Magazine and MSDN Magazine.
Locations in CSCS
A widget definition in CSCS has either one or two statements. The first statement is the definition of a location—where to place the widget—and the second one is the actual widget definition, including its size.
Tip: The same location can be used for different widgets.
One scenario is to show the user multiple widgets, one at a time, located in the same place—an example of that is shown in sfscript.cscs.
We already saw an example of placing widgets in Code Listing 1:
locSizeLabel = GetLocation(buttonClickme, "CENTER",
buttonClickme, "BOTTOM");
AddLabel(locSizeLabel, "sizeLabel", "", 360, 60);
The general syntax of the location command is the following:
GetLocation(HorizontalReference, PlacementX,
VerticalReference, PlacementY,
AdjustmentX = 0, AdjustmentY = 0,
UseScale = true, ScaleValue = 0.0,
Parent = null);
Here is the meaning of the parameters:
- HorizontalReference: The name of another widget for the horizontal placement. It can be the string ROOT, meaning the parent widget or the main screen.
- PlacementX: A horizontal placement relative to the widget in the HorizontalReference. We’ll discuss possible values below.
- VerticalReference: The name of another widget for the vertical placement. It can be the string ROOT, meaning the parent widget or the main screen.
- PlacementY: A vertical placement relative to the widget in the VerticalReference.
- AdjustmentX: The number of pixels the widget must be moved horizontally (this number can be relative, depending on the AutoScale option which we will discuss below). It can also be negative: the positive direction goes from left to right.
- AdjustmentY: The number of pixels the widget must be moved vertically. It can also be negative: the positive direction goes from top to bottom. See also AutoScale below.
- UseScale: Whether to apply a scaling option to the widget. If true, the adjustment specified in ScaleValue, discussed next, will be used.
- ScaleValue: The measure used for adjusting the size of this widget. It overrides the value provided as an argument for the AutoScale() function.
- Parent: The parent of this widget. If null, the widget will be added to the Main Layout on Android or to the Root View Controller View on iOS.
The possible values for the PlacementX and PlacementY parameters are very similar to the constants of the Android RelativeLayout.LayoutParams class.
They can be any of the following: CENTER, LEFT, RIGHT, TOP, BOTTOM, ALIGN_LEFT, ALIGN_RIGHT, ALIGN_TOP, ALIGN_BOTTOM, ALIGN_PARENT_LEFT, ALIGN_PARENT_RIGHT, ALIGN_PARENT_TOP, or ALIGN_PARENT_BOTTOM.
The GetLocation() function is used for both iOS and Android. Check out its implementation for iOS in Code Listing 11. The Android implementation is similar.
Code Listing 11: Implementation of the GetLocationFunction Class on iOS
public class GetLocationFunction : ParserFunction Utils.CheckArgs(args.Count, 4, m_name); |
To register the GetLocation() function with the parser, the following command must be added in the initialization phase (see Code Listing 4):
ParserFunction.RegisterFunction("GetLocation", new GetLocationFunction());
Adding widgets
Once we have a location, we can create a widget. The general structure of this function is:
AddWidget(widgetType, location, widgetName, initString, width, height);
There are shortcuts of this command for each widget type, for example:
AddLabel(location, widgetName, initString, width, height);
AddButton(location, widgetName, initString, width, height);
AddImageView(location, widgetName, initString, width, height);
And so on. Calling the functions above is equivalent to calling the following:
AddWidget("Label", location, widgetName, initString, width, height);
AddWidget("Button", location, widgetName, initString, width, height);
AddWidget("ImageView", location, widgetName, initString, width, height);
Here is the meaning of the parameters:
- location: The location of the widget, defined in the previous section.
- widgetName: the name of the widget. It will be always a global variable, even if used inside of a function.
- initString: The initialization parameter of the widget. For example, it will be a text on a label or a title on a button.
- width: The width of the widget.
- height: The height of the widget.
Check out a fragment of the AddWidget() function implementation in Code Listing 12. The implementation is for iOS. The Android implementation is very similar.
Code Listing 12: A Fragment of the AddWidgetFunction Class
public class AddWidgetFunction : ParserFunction var currView = location.GetParentView(); |
The code responsible for the actual creation of the widgets is in the iOSVariable class. Its fragment is shown in Code Listing 13.
For complete implementation, including the implementation of the function UtilsiOS.String2Position(), which returns an actual point on the screen, refer to the accompanying source code.
Code Listing 13: A Fragment of the iOSVariable.GetWidget Method
public virtual iOSVariable GetWidget(string widgetType, string widgetName, string initArg, CGRect rect) iOSVariable widgetFunc = null; case "Button": ((UIButton)widget).SetTitle(initArg, UIControlState.Normal); ((UILabel)widget).Text = initArg; //All other widgets go here ... widgetFunc = new iOSVariable(type, widgetName, widget); } return widgetFunc; |
To register the functionality of adding new widgets with the parser, the following commands must be added in the initialization phase (see Code Listing 4):
ParserFunction.RegisterFunction("AddWidget", new AddWidgetFunction());
ParserFunction.RegisterFunction("AddButton",
new AddWidgetFunction("Button"));
ParserFunction.RegisterFunction("AddLabel",
new AddWidgetFunction("Label"));
And so on, for each widget.
Implementing device orientation changes
It is not so straightforward to write an app that has different layouts on different device orientations. Even the heavyweights, like LinkedIn, Facebook, Amazon, Uber, The Weather Channel, and many others, have implemented their apps only in the Portrait mode (at least for iOS, at the time of this writing); nothing happens with these apps when you change your device orientation.
In this section our goal is to simplify changing the layouts when the device orientation changes.
Here we are going to see the Android implementation (you can find the iOS implementation in the accompanying source code).
First of all, we must add the following in the MainActivity class definition:
ConfigurationChanges = ConfigChanges.ScreenSize |
ConfigChanges.Orientation |
ConfigChanges.KeyboardHidden
Basically, it means that the app will handle the orientation changes by itself. Without this change, the MainActivity.OnCreate() method would be called every time there is a change in the orientation (there are also some other cases when it would be called, in particular when the app comes back from the background to the foreground).
Next, the MainActivity.OnConfigurationChange() method is overridden:
public override void OnConfigurationChanged(Configuration newConfig)
{
OnOrientationChange?.Invoke(newConfig.Orientation ==
Orientation.Portrait ? "Portrait" : "Landscape");
base.OnConfigurationChanged(newConfig);
}
It uses the OnOrientationChange event handler, defined as follows:
public delegate void OrientationChange(string newOrientation);
public static OrientationChange OnOrientationChange;
Now we are ready to register the CSCS functions to be triggered on orientation changes:
ParserFunction.RegisterFunction("RegisterOrientationChange",
new RegisterOrientationChangeFunction());
Code Listing 14 shows the implementation of the RegisterOrientationChangeFunction class.
Code Listing 14: Implementation of the RegisterOrientationChangeFunction Class
public class RegisterOrientationChangeFunction : ParserFunction Utils.CheckArgs(args.Count, 2, m_name); DeviceRotated(); return; "\"" + (isInit ? "init" : m_currentOrientation) + "\""); |
The UIVariable.GetAction() function executes the passed action. The action is usually the name of a CSCS function. The next section shows an example of changing the device layout on orientation changes.
Example: Currency Convertor
In this section, we are going to create the Currency Convertor app in CSCS from scratch. As the source of the currency rates, we’ll be using the currencylayer.com service. Their site provides an easy-to-use web service, with the first 1,000 requests per month provided for free. It also provides the exchange rates for Bitcoin, which will be the theme of this app. To get data, you need a unique key, which you must supply with every request. You get that key upon registering at their website.
Let’s first see how the app looks in portrait mode in Figure 3, and in landscape mode in Figure 4, for both iPhone and Android phones.

Figure 3: Currency Convertor in the Portrait Mode for iOS (left) and Android (right)

Figure 4: Currency Convertor in the Landscape Mode for iOS (top) and Android (bottom)
Code Listing 15 contains the complete app implementation. The functions on_about and on_refresh are the callbacks registered with the parser via the AddAction function.
The on_about function will be executed when the user clicks on the Powered by button in the Settings tab (this tab is not shown on the screenshots). The on_refresh function is called when the user clicks on the Convert button—the actual rate calculation will be done then.
Code Listing 15: The Implementation of the Currency App in CSCS
function on_about(sender, arg) currency_request(currency1, currency2); "CNY", "MXN", "RUB", "BRL", "SAR"}; "zh_CN", "es_MX", "ru_RU", "pt_BR", "ar_SA"}; -80, 20); "settings_inactive.png"); |
Here is the CSCS function that registers the on_portrait function when the device is in portrait mode, and the on_landscape function in landscape mode:
RegisterOrientationChange("on_portrait", "on_landscape");
Note that with CSCS, you can easily configure tabs with different images for cases when the tab is active or inactive. The function to add a new tab is:
AddTab(Tab_Name, Picture_Active, Picture_Inactive);
Using the following function:
AddOrSelectTab(Tab_Name, Picture_Active, Picture_Inactive);
When the tab already exists, it won’t be added, but just selected to place widgets in it. Figure 5 shows active and inactive tabs for an iOS device.
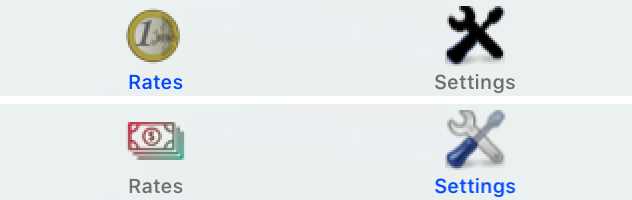
Figure 5: Active and Inactive Tabs on iOS
You probably noticed the funny currency pickers that we used with the AddSfPicker function, especially on Android.
These are not the standard pickers, but the ones provided by Syncfusion. I will explain how to add Syncfusion widgets later on, but for now, note that they are treated in CSCS code as any other widgets.
Summary
In this chapter, we saw how to place widgets on the screen in a platform-independent manner. The key concept is a location, where we place a widget. The same location can be reused for placing different widgets. We also saw how this method of widget placement can be used for the device orientation changes.
So far we have seen mostly standard iOS and Android widgets. In the next chapter, we are going to see how to implement and use custom widgets in CSCS.
- 1800+ high-performance UI components.
- Includes popular controls such as Grid, Chart, Scheduler, and more.
- 24x5 unlimited support by developers.