
Writing Native Mobile Apps in a Functional Language Succinctly®

CHAPTER 8
In-App Purchases in CSCS
“A study of economics usually reveals that the best time to buy anything is last year.”
In this chapter, we are going to see how to get our happy app users to pay us (in previous chapters, we saw how to make them happy). This concept is called In-App Purchase in the iOS world, and In-App Billing in the Android world.
In comparison to other mobile topics, setup and testing are less straightforward, and this is where the most time is spent. We are going to start with the setup.
Setting up In-App Purchases for iOS
First, you need to create your app in iTunes Connect. Then, you create your app purchases in iTunes Connect by choosing Select Your App > Features > In-App Purchases.
One of the common uses of an in-app purchase is to create a free app with some advertisements in it, and make the user pay to remove those advertisements.
In the next chapter, we are going to see how to add advertisements to an app. See Figure 26 for an example of adding an ad removal item in iTunes Connect.
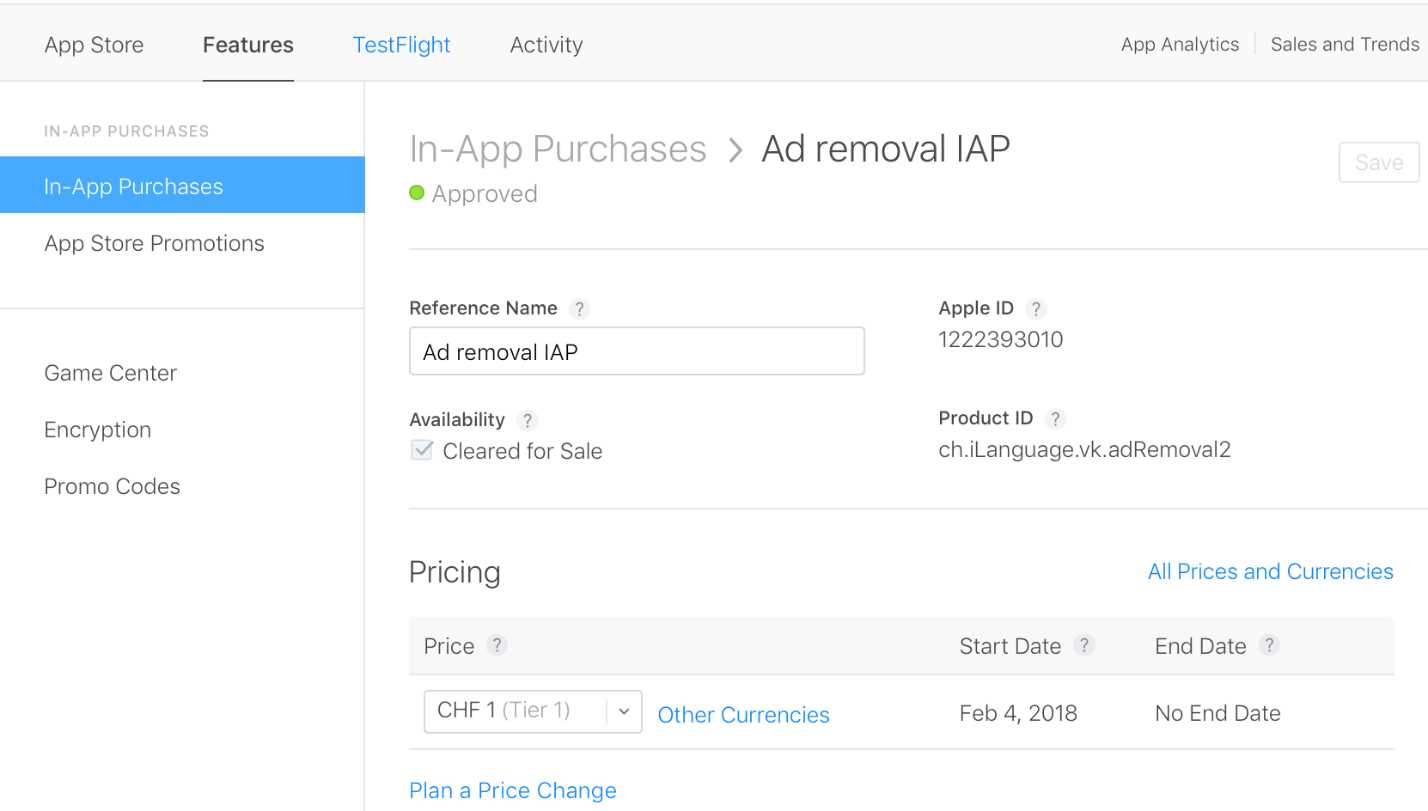
Figure 26: Setting Up In-App Purchases for iOS
Next, you need to create test users for testing the In-App Purchase functionality. This is done in iTunes Connect by selecting Users and Roles > Sandbox Testers.
You will use one of the Sandbox Test accounts when testing the In-App Purchase functionality. Note that you must sign off in Settings > iTunes & App Store on your iOS device (do not sign-in any test account there; you will do this later on directly from the app).
Last, you need to add the In-App Purchase entitlement to your project. Open the Entitlement.plist file in Visual Studio, and make sure that the Enable In-App Purchases option is enabled.
If everything is set up correctly, you should see the enabled In-App Purchase check here.
Setting up In-App Billing for Android
To add different in-app products, go to Google Play Console > Select Your App > Store presence > In-app products. Check out an example of adding an ad removal item in Figure 27.
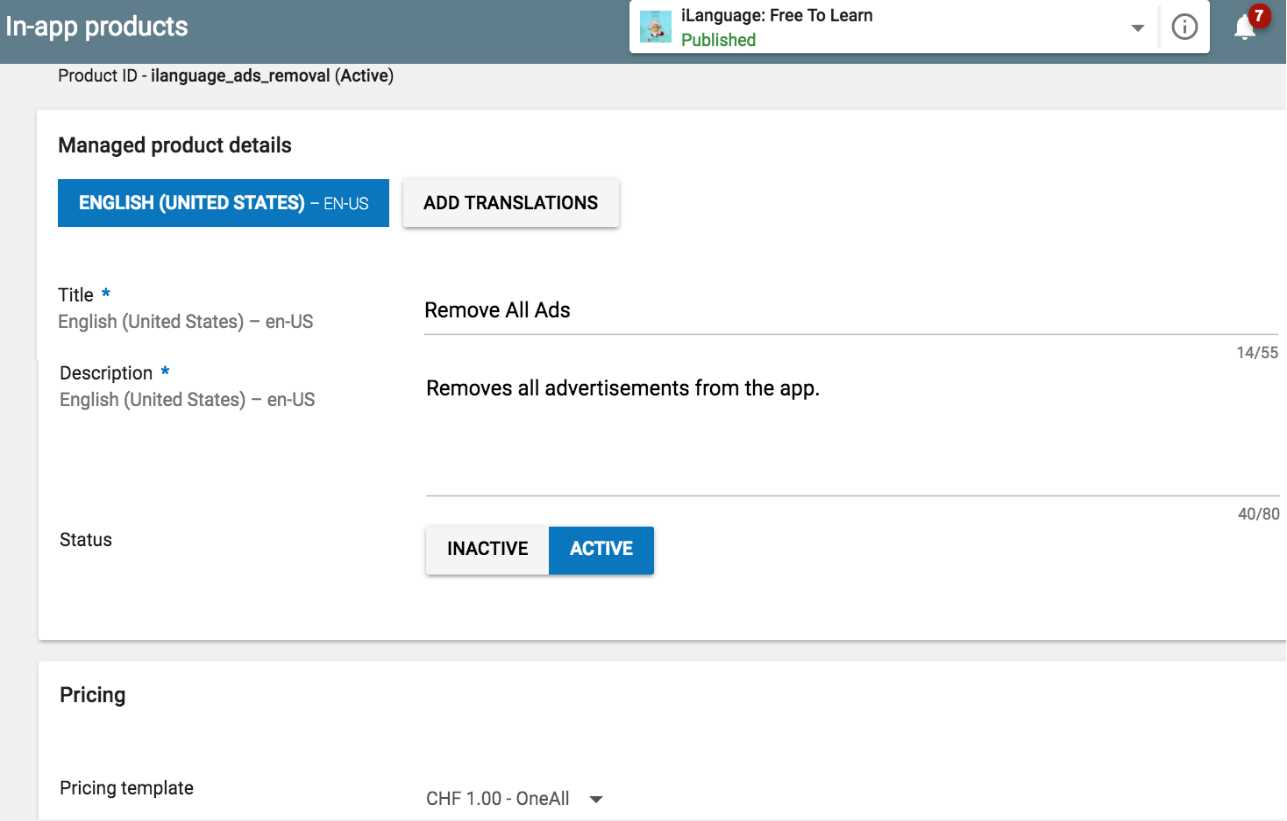
Figure 27: Setting Up in-App Billing for Android
Note that before testing the In-App Billing functionality, you have to upload an Alpha or a Beta APK to Google Play Console > Select Your App > Release management > App releases.
You also need to add test accounts for your app in Google Play Console > Settings > Manage testers, where you create a list of testers for your app.
For example, you can add testers to the Beta release in Google Play Console > Select Your App > Release management > App releases > Manage Beta > Manage testers. Make sure that you sign in on your Android device as one of these testers.
Also note that the following property must be added to your AndroidManifest.xml file:
<uses-permission android:name="com.android.vending.BILLING"/>
It is not possible to test In-App Billing using an emulator; you need a real device.
Tip: Enabling an Android device for development and USB debugging is tricky: go to Setttings > System > About phone > Build number, and tap seven times on the Build number. Then, Developer options become visible. But you are not done yet: now you can enable USB debugging in the Developer options—it is still disabled by default.
Implementation
For the implementation, I decided to use the Plugin.InAppBilling NuGet by James Montemagno from Xamarin. It hides quite a few of the tedious implementation details, making the C# code short and concise.
Using CSCS as a wrapper, the code is even more short and concise—we are going to see it in the next section.
There is good documentation on this plug-in, so I am going to give just an example of its usage in Code Listing 48, which extracts all available In-App Purchase items.
Code Listing 48: Extracting All the In-App Purchase Items Using the InAppBilling Plug-in
public async static Task GetInventory(string productId = "") m_id2Description.ContainsKey(productId)) { |
The usage in CSCS is even more straightforward: there are just three functions, which are registered with the parser as follows:
ParserFunction.RegisterFunction("Purchase", new PurchaseFunction());
ParserFunction.RegisterFunction("Restore", new RestoreFunction());
ParserFunction.RegisterFunction("ProductIdDescription",
new ProductIdDescriptionFunction());
PurchaseFunction, RestoreFunction, and ProductIdDescriptionFunction are just thin wrappers over the InAppBilling plug-in.
The ProductIdDescription returns the user-friendly In-App Purchase name—it is cached into the m_id2Description dictionary in the GetInventory() method shown in Code Listing 48.
The signatures of the three CSCS functions are:
Restore("restore_callback", productId1, productId2, ...);
Purchase("purchase_callback", productId);
ProductIdDescription(productId);
We are going to see how to use them in the next section.
CSCS example
Code Listing 49 contains the CSCS code for both restoring previously made purchases, and making a new purchase.
Note: The product IDs in Code Listing 49 must exactly match the product IDs in Figure 26 and Figure 27.
Code Listing 49: Restoring and Purchasing in CSCS
if (_IOS_) { |
Note: The “_IOS_” and “_ANDROID_” CSCS functions return true for their corresponding platforms.
The results of running the purchasing part are shown in Figure 28 for real iOS and Android devices. Note that the purchases on both devices are test purchases because of the way we set up the test users in the beginning of this chapter.
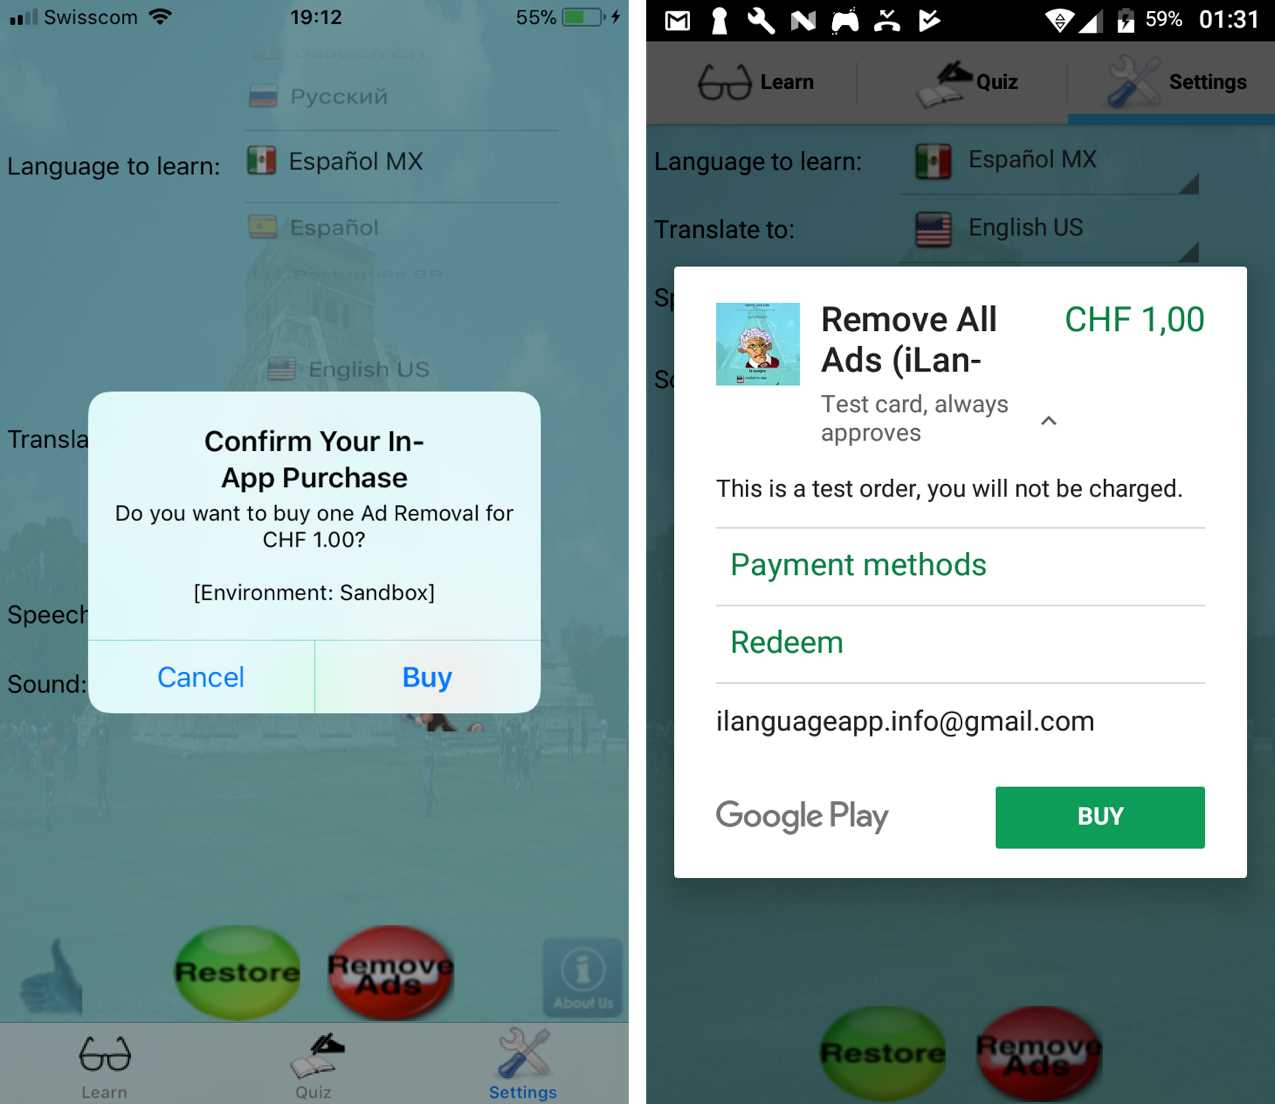
Figure 28: A Test Purchase on iOS and Android
Summary
Implementing the In-App Purchase and In-App Billing functionality is very time consuming because there are many things that can go wrong.
Using CSCS, there are just three functions. However, you still need to give a lot of attention to the exact product IDs, app names, permissions, and the test users being used. On Android, it’s also important to upload an Alpha or Beta APK before testing.
In the next chapter, we are going to see how to add advertisements to an app and look at debugging, localization, user defaults and settings, scheduling events, and some other topics.
- 1800+ high-performance UI components.
- Includes popular controls such as Grid, Chart, Scheduler, and more.
- 24x5 unlimited support by developers.