
Windows Azure Websites Succinctly®

CHAPTER 6
Source Control Integration
Source control is an extremely important part of your development environment, whether you are working as part of a team of 300 developers on an enterprise-class product or as a single developer building a website for a friend. Source control (or revision control as it is also referred to as) provides a safety net to your development that provides a central point of backup as well as a way to easily revert back to previous versions of your code after a change introduces unanticipated side effects that keep your application from working correctly. In this chapter, we will look at two popular source-control providers: Team Foundation Server and Git. Each represent two different approaches to version control, and you will see how they can be easily integrated into your Azure Web Site development.
Team Foundation Server
Microsoft’s Team Foundation Server product comes in two flavors: the Enterprise tool that is typically installed on an organization’s on-premises server and the Azure offering that is now known as Visual Studio Online. While version control is one aspect of the tool, it is intended to be a complete application lifecycle management (ALM) solution with features to manage not only the source code but requirements, testing, and schedule as well. In this section, we’ll be looking at Visual Studio Online tool’s integration with Azure Web Sites.
Because Visual Studio Online is a complete ALM solution and not just a version-control system, Microsoft has actually tooled it to allow for selection between a centralized approach to version control (which is provided in the Team Foundation Version Control product) and a more distributed approach (using Git). Git will get its own coverage later in this chapter so, in this section, we will focus solely on Team Foundation Version Control. I will, however, point out decision points where your choice of version control strategy might cause you to take different actions in Visual Studio Online if you are using version control other than Team Foundation Version Control.
As of the time of this writing, Microsoft is making it easy for small teams to get started using Visual Studio Online by providing free accounts to service teams of up to five members in a service offering called Visual Studio Online Basic. This free offering allows adding team members for an additional monthly cost, and includes the following features:
- Unlimited number of projects
- Hosted code repositories using Team Foundation Version Control or Git. These repositories are private and available only to members of your team
- Project planning tools such as Sprint and Kanban boards and other tools commonly used both in agile and waterfall development
- Integration with Visual Studio, Xcode, and Eclipse
- Continuous integration using cloud build services
In addition to Visual Studio Online Basic, Microsoft also has the paid Visual Studio Online Professional product that adds the Visual Studio Professional IDE and Visual Studio Online Advanced product, which still uses Visual Studio Express but adds more advanced collaboration features, project management tools, and opportunities for stakeholders to make their voices heard. As a final option, Visual Studio Premium with MSDN also includes a Visual Studio Online subscription that adds test case management and the option to host team projects on-premises in addition to the cloud.
Assuming that you are going to start out exploring the Visual Studio Online Basic offering, you can start getting set up by navigating a web browser to http://www.visualstudio.com. On this page, you should find a promotional spot advertising Visual Studio Online with a call to action labeled “Get started for free” (if it has changed since the time of writing, you may have to search for something similar on the page). Select the call to action and you should be taken (after possibly stopping to log into your Microsoft Account) to a page where you are asked for additional information such as your name and a name to assign to your Visual Studio Online account. Complete and submit the form.
Once you’ve submitted your registration form, Visual Studio Online will create your account and transfer you to your account dashboard, which will include a form prompting you to create your first project. The form expects the following information:
- Project Name: This is the name that you assign to the project and it will show up on project links and reporting. This field is required.
- Description: This is an optional field but, as a good practice and in preparation for when you are managing several projects out of this portal, you should include a reasonable description of the purpose of the project.
- Version Control: This allows you to choose whether Team Foundation Version Control or Git will be used as version control for the project. Depending on your selection, an appropriate repository will be created to service your project.
- Process Template: A process template is used to define the tools and processes that will be used to manage the work of building the software product that is the goal of your project. Depending on the way the team will work, the tools and how they are leveraged can vary greatly. Because of this, Microsoft has created three templates to capture the way that a large number of modern development teams work today:
- Microsoft Visual Studio Scrum
- Microsoft Solutions Framework (MSF) for Agile Software Development
- Microsoft Solutions Framework (MSF) for Capability Maturity Model Integration (CMMI) Process Improvement
For the purpose of this walk-through, select Team Foundation Version Control for your version control and Microsoft Visual Studio Scrum for your process template and select “Create Project”. Visual Studio Online should respond by initiating creation of your Team Project and, after a few moments, navigates to your project portal which will look similar to Figure 44.
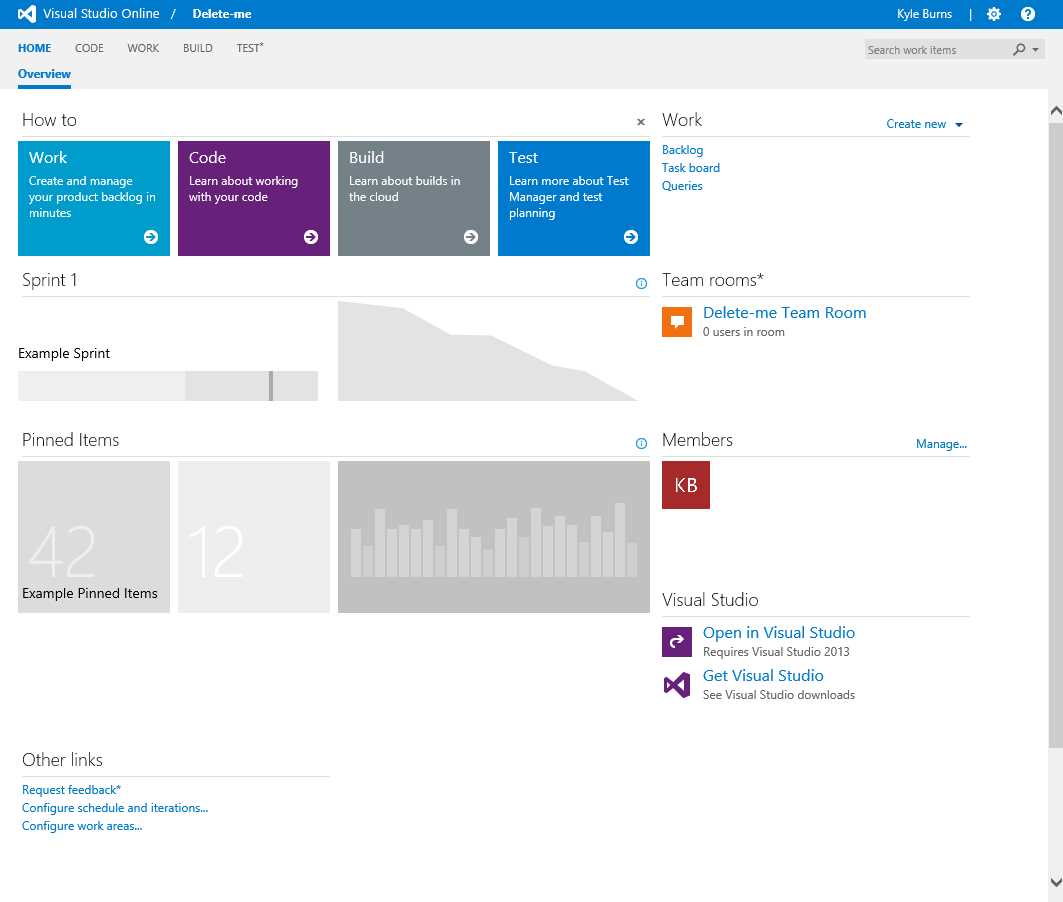
- Visual Studio Online Project Portal
There are many options from which to choose in the Project Portal such as inviting additional users to the team and starting to add work items to your backlog. But, for now, just select “Open in Visual Studio” which will cause Visual Studio to open and attempt to connect to your team project. You’ll notice that you cannot begin working immediately because you have not yet configured a local workspace. Visual Studio’s “Team Explorer” should appear as pictured in Figure 45:

- Team Explorer Configure Workspace prompt
The Team Explorer window provides several opportunities to select “Configure Workspace” or “configure your workspace”. Select one of these commands to continue and the Team Explorer window will provide the opportunity to map the project root to local folders as shown in Figure 46. Accept the defaults and select the “Map & Get” command:

- Team Explorer Configure Workspace options
After connecting to the Team Project and mapping your workspace, Team Explorer will indicate that no solutions currently exist for the Team Project (because you just created it) and give you the option to add a new one or open an existing one as shown in Figure 47. For this walk-through, you will create a new Visual Studio Solution so select the “New” command:

- Team Explorer New Solution
After selecting “New…” Visual Studio will display the “New Project” dialog. You should select the ASP.NET Web Application project type and observe that the “Add to source control” option is selected as shown in Figure 48:

- New Project dialog
Select OK in the New Project dialog and, when prompted for additional options applicable to ASP.NET Web Applications, select the Empty project template and leave “Create remote resources” unselected because we’re going to use the Azure Management Portal for that part in this walk-through. After selecting OK, Visual Studio will create your web project.
In order to provide something to visually verify the source control integration later, add an HTML page called “default.html” to your project in the Solution Explorer. Place whatever content you would like in the webpage. Once you’re happy with the contents, save the HTML file and also ensure that your project and solution files have been saved by invoking the “Save All” command (Ctrl-Shift-S).
At this point, you have a local solution file with content in a workspace that is connected to source control but you have not yet committed any files to the remote repository. Right-click the solution file in Solution Explorer and select the “Check In” command. This will cause the Team Explorer window to display check-in options as shown in Figure 49. Complete the options and select “Check In”. Visual Studio may confirm that you really want to check in your changes and will then interact with the Visual Studio Online Team Foundation Server Version Control service to commit your changes. After a few moments, the Team Explorer windows should display a message indicating that your change set has been successfully checked in.
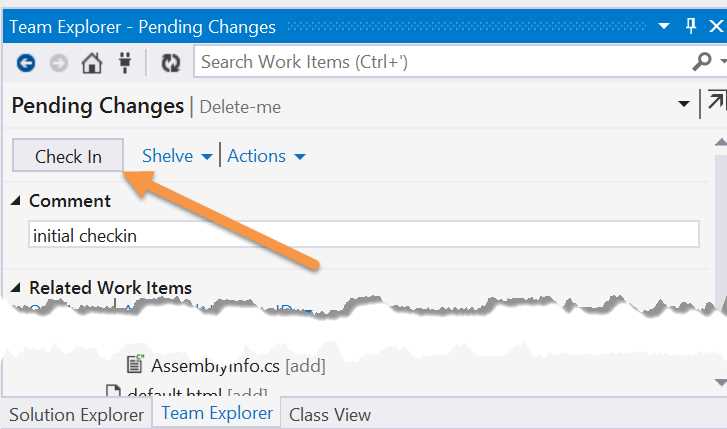
- Check In Pending Changes
Now that you have checked in your changes and they are sitting in TFS Version Control, open the Azure Management Portal. Using what you learned in the “Provisioning Resources” chapter, create a new Azure Web Site using the “Quick Create” option. Once Azure has finished provisioning the website, you should be taken to the Quick Start screen for the new website. This is where the option to set up deployment from source control will be presented in the “Integrate source control” section as shown in Figure 50:
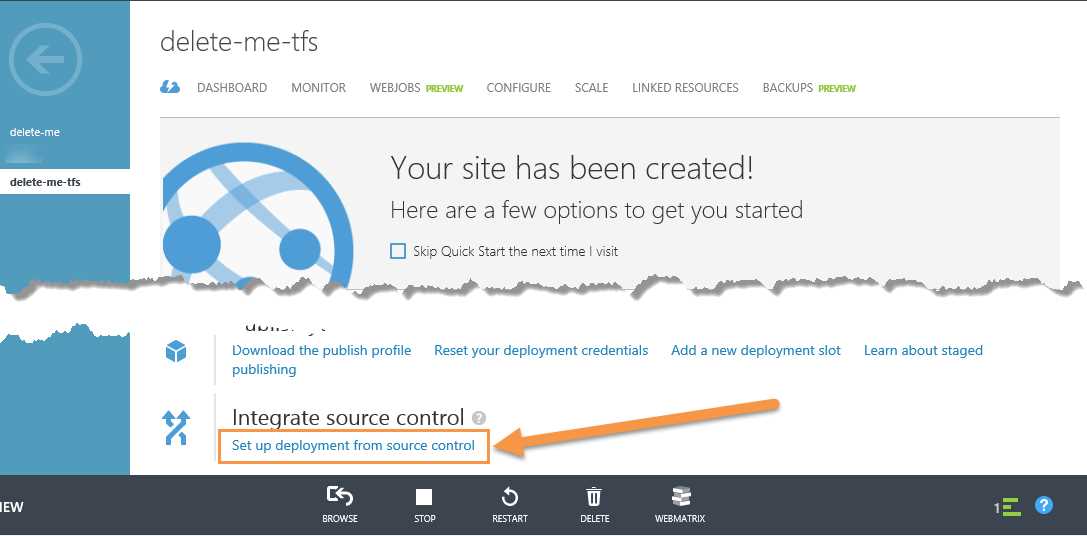
- Quick Start source control integration
Invoke the “Set up deployment from source control” command and the Azure Portal responds by first asking where the source for your project is located. The list contains a number of preconfigured providers as well as a configurable option to allow advanced configuration to point to a source control provider that is not on the list but uses a supported protocol. For this walk-through, select “Visual Studio Online” and advance to the next step in the wizard. At this point, you will be prompted for the URL of your Visual Studio Online account and asked to authorize the Azure Portal as a user of your Visual Studio Online repositories. Grant the requested permissions. The wizard will then ask you to select the appropriate repository from which your code for this website should be deployed. Select the project that you created at the beginning of the walk-through and invoke the “Complete” command.
At this point, your Team Project in Visual Studio Online should be successfully linked to your Azure Web Site and a message should be displayed in the Azure Management Portal indicating that the next check-in operation to source control will initiate a build-and-deploy cycle to your website. At this point, there are two options that can be used to cause the code to be deployed from TFS Version Control:
- Return to the Visual Studio Online project and go to the Build tab. Find the only entry under “Build definitions”, right-click the entry, and select “queue build…”. This will bring up the Queue Build dialog and you can simply select OK, accepting the default arguments. Use the refresh command while viewing the queue until the build and deployment complete.
- Within Visual Studio, edit “default.html”. Save your changes and check them into source control. Visual Studio Online will show a new build in the build queue for the project. Use the refresh command while viewing the queue until the build and deployment complete.
Regardless of which method you chose (or maybe you chose both), once the deployment completes, you can view your Azure Web Site and see the content that you created in Visual Studio and checked into Team Foundation Server Version Control. You can also view deployment activity in the Azure Management Portal’s Deployments tab.
Git
Tip: This section gives a basic overview of Git and its integration with Azure Web Sites. For more complete coverage of Git, check out Git Succinctly, a book written by Ryan Hodson. It is freely available as part of Syncfusion’s Succinctly series.
Git fundamentally differs from Team Foundation Server Version Control in that TFS is grounded around the concept of developers connecting to a single centralized “server” repository while Git is based on developers working in a more distributed manner, each having their own local repository and their changes pushed to and pulled from a shared repository as they are considered mature enough to introduce into the shared codebase.
For this walk-through, create a new folder on your computer and a file called default.html created with a text or HTML editor of your choice. This will be the content that is eventually deployed to your Windows Azure Web Site.
Now that you have content to deploy, go to the Azure Management Portal and, using what you learned in the “Provisioning Resources” chapter, create a new Web Site using the “Quick Create” option. Once Azure has finished provisioning the website, you should be taken to the Quick Start screen for the new website where the option to set up deployment from source control is presented in the “Integrate source control” section.
Invoke the “Set up deployment from source control” command and the Azure Portal responds by asking where the source for your project is located. Select “Local Git repository” from the list. At this point, the Azure Management Portal will create a new Git repository hosted in Azure and connected to your new Azure Web Site. Pushing to this repository will trigger a deployment from the repository. Note the Git URL that is provided on this screen (conveniently, Microsoft has included a “copy to clipboard” command for this element) because you will need it in future steps.
Back on your local machine, open a Git client of your choice and create a new repository with the folder and file created earlier. If you are using a command-line client, navigate to the desired directory and use the following commands to create the repository and perform the initial commit:
git init |
Once the initial commit is complete, you can set up your Azure Web Site as a remote repository and push from your local repository to Azure. On a single line, enter the following command to add a connection to the remote repository (remember to use your own value for the Git URL in bold):
git remote add azure https://[email protected]:443/delete-me-git.git |
Now, issue the following command to push from your local repository to the remote:
git push azure master |
Git will prompt you for the password that you have set up for your deployment credentials and then proceed with pushing from your local master repository to the remote Azure repository. At this point, your content is deployed to your Azure Web Site and you can view this both by viewing the website in a browser and seeing the updated content, and by viewing the Deployments tab for the website in the Azure Management Portal.
Summary
In this chapter, you have learned about Team Foundation Server Version Control (and with it, Visual Studio Online) and Git, and seen how these can be used to achieve an Azure Web Site that is integrated with source control. This base can be built upon to achieve a solution in which changes can be quickly integrated into your live site simply by checking in code. For smaller sites with less stringent audit and control requirements, this can be an ideal deployment solution where you test changes on your local machine and then simply commit the changes to source control. In instances where a check-in should not be allowed to automatically change a live site, you may instead choose to use continuous integration with a target of a staging site that is then migrated to your live site once it is deemed production-ready.
- 1800+ high-performance UI components.
- Includes popular controls such as Grid, Chart, Scheduler, and more.
- 24x5 unlimited support by developers.