
Web Servers Succinctly®

CHAPTER 7
HTTPS
Chapter 7 does not have a source code example in the repository, as this chapter deals mainly with setting up an SSL certificate.
HTTPS is a requirement today for all web servers. For this reason, I’ve put the chapter on HTTPS here, so that it is not ignored or left as “optional reading” at the end of the book. This chapter will show you how to create your own certificate to enable HTTPS communication with your web server. Creating your own certificate requires users to accept an unknown publisher certificate, but nonetheless, this is still informative for how to set up your web server to handle HTTPS.
Please note that these instructions are written for Visual Studio 2012 and Windows 7.
There are three levels of SSL certificates:
- Domain Validation
- Organization Validation
- Extended Validation
Among other things, the more validation the certificate provides, the more expensive it is to obtain.
Domain Validation
Domain Validation (DV) establishes a baseline level of trust with a website, ensuring that the website you are visiting is really the website you intend to visit. This is the certificate we’ll be creating here. The disadvantage of this certificate is that it is easily obtainable and only secures the communication between your browser and the server.
Organization Validation
Organization Validation (OV) is a more secure certificate because it requires some company information to be verified, along with the domain and owner information. In addition to encrypting data, you have an added level of trust about the company that runs the website.
Extended Validation
The Extended Validation (EV) level of certification requires the company to go through a vetting process in which all the details of the company are verified. Only companies that pass a thorough vetting can use this level of certificate.
How to Make a Domain Level Certificate
In this process, we’ll make our own certificate. Because we are not a certificate authority, the browser will still question whether the certificate is legitimate. It will do this the first time you visit a page on your web server. Creating your own certificate is useful for testing though, and to enable SSL so that the client’s data is at least encrypted.
The steps described here look daunting but have been thoroughly tested, and if you follow them precisely, you should not have any issues.
To begin, launch the Visual Studio Command Line prompt. For example, if you're using VS2012 in Windows 7, click All Programs on the Start menu. Choose Microsoft Visual Studio 2012, click Visual Studio Tools, and choose Developer Command Prompt for VS2012.
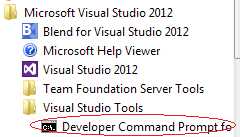
Figure 15: Developer Command Prompt
At the console window, type the following (all on one line), but replace [computername] with either your computer name or a domain name. You can read more about makecert options on MSDN.
Makecert -r -pe -n CN="[computername]" -eku 1.3.6.1.5.5.7.3.1 -ss my -sr localmachine -sky exchange -sp "Microsoft RSA SChannel Cryptographic Provider" -sy 12 |
Code Listing 57
For example (I'm using "test" and the computer name):

Figure 16: Makecert Example
Make the Certificate Trusted
From the console window, after the certificate has been created, type MMC to launch the Microsoft Management Console.
Add the Certificates Snap-in
From the File menu, select Add/Remove Snap-in.
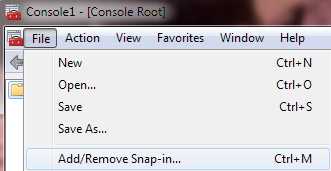
Figure 17: Add Certificates Snap-in
Select Certificates and click Add.

Figure 18: Select Certificates
Select Computer account.
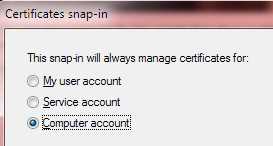
Figure 19: Select Computer account
Then click Next > Finish > OK.
Verify Certificate Creation
Double-click on the Personal folder, then the Certificates folder.
Double-click on the certificate, and you should see a dialog stating: "This CA Root certificate is not trusted."
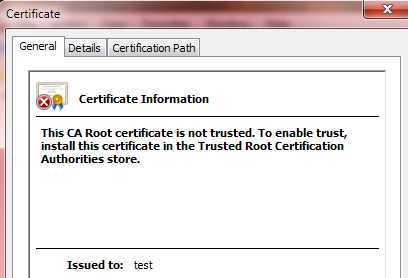
Figure 20: Certificate Information
If you get any other message, the certificate will not work correctly.
Get the Certificate Thumbprint
Click on the Details tab and scroll down to select the Thumbprint field. Copy the value into Notepad, as this will be used later:
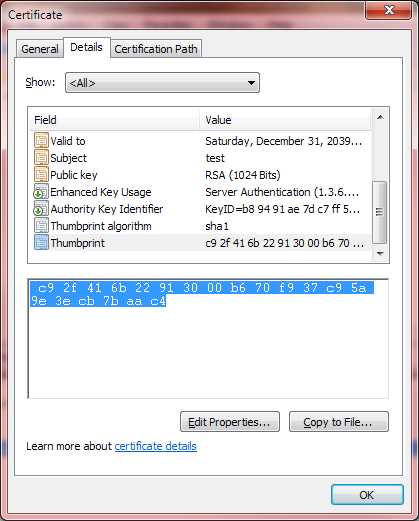
Figure 21: Certificate Thumbprint
Use Notepad's Search and Replace functionality to remove all the whitespace:
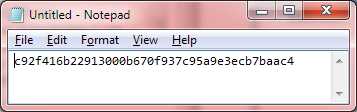
Figure 22: Remove Whitespace
Copy the Certificate to the Trusted Root Certification Authorities Folder
- In the same Details tab, click Copy to File.
- Click Next.
- Click Next (do not export the private key).
- Click Next (DER encoded binary X.509).
- Enter a file name for your certificate, such as c:\temp\mycert.cer.
- Click Finish.
- Close the Certificate dialog by clicking OK.
Now, open the Trusted Root Certification Authorities\Certificates folder.
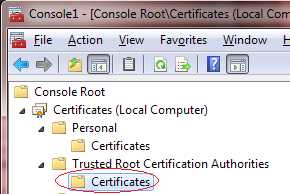
Figure 23: Certificates Folder
Right-click on the Certificates folder and select All Tasks > Import.
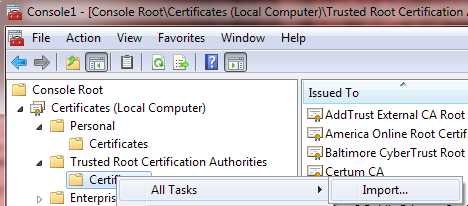
Figure 24: Import Certificate
- Click Next.
- Enter the file name of the certificate you just exported.
- Click Next.
- Click Next (Place all certificates in the following store: Trusted Root Certification Authorities).
- Click Finish.
Verify the Certificate is Now Trusted
Go back to the Personal/Certificate folder and double-click on the certificate that you created earlier. Verify that you now see "This certificate is intended for the following purpose(s):".
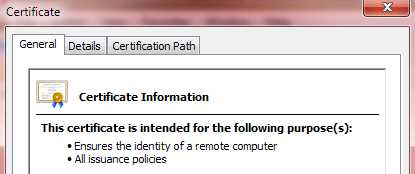
Figure 25: Verify Certficate is Trusted
Bind the Certificate to All IP Addresses and Port on the Machine
In the VS2012 command line console window we opened earlier, use netsh (you can read more about it on MSDN), bind the certificate to all IP addresses and the SSL port, replacing [yourhash] with the thumbprint we obtained:
netsh http add sslcert ipport=0.0.0.0:443 certhash=[yourhash] appid={[your app ID]} |
Code Listing 58
The value of [your app ID] should be a GUID associated with your application. For example, I used the GUID in the Properties\AssemblyInfo.cs folder for the assembly: Guid key.
So, your netsh command, using the thumbprint we acquired and a GUID from an application, would look like this (all on one line):
netsh http add sslcert ipport=0.0.0.0:443 certhash=c92f416b22913000b670f937c95a9e3ecb7baac4 appid={1a1af1ff-1663-4e58-915a-6ea844508a33} |
Code Listing 59
That’s All
Your computer is now ready to respond to HTTPS web requests (assuming you set up the web server to listen to HTTPS). The first time you browse to a page, Windows will prompt you to accept the certificate from an unknown authority. For example, Opera gives you this message:
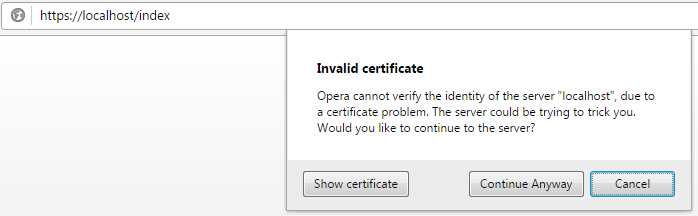
Figure 26: Certificate Warning
To avoid this warning, you would have to obtain a certificate from a trusted authority, such as Verisign. There are a variety of such authorities and the pricing for a certificate varies tremendously, so it is worth the effort to investigate the differences. Also, your host provider may provide SSL certificates as well.
Enabling the Web Server to Receive Port 443 Requests
We do, however, have to set up our web server to listen to SSL requests, which by default are on port 443:
listener.Prefixes.Add("https://localhost:443/"); |
Code Listing 60
Conclusion
As stated at the beginning of this chapter, HTTPS is a requirement today for all web servers—not just for handling credit card information (if you’re putting together a merchant website, for example), but ideally for handling all data transactions between the browser and the server. However, using HTTPS is not the end of the picture when it comes to securing your user’s data: for example, you might consider encrypting sensitive data, or if the data never needs to be decrypted (passwords are a good example), you might use a one-way hash. There are also legal requirements that you need to be familiar with, depending on the kinds of data your website handles.
It cannot be overemphasized that security should be the first consideration of a website, which includes all levels in which the data can be intercepted, starting with the browser, continuing with the transport layer, and ending with the server and any persistent store of sensitive information.
- 1800+ high-performance UI components.
- Includes popular controls such as Grid, Chart, Scheduler, and more.
- 24x5 unlimited support by developers.