
Visual Studio 2017 Succinctly®

CHAPTER 4
XAML Improvements
The eXtensible Application Markup Language (XAML) is the language for designing the user interface of Windows Presentation Foundation (WPF) and Universal Windows Platform (UWP) applications. Therefore, it’s crucial for Microsoft. In Visual Studio 2017, the tooling for XAML has been dramatically enhanced. On the performance side, switching between tabs in the XAML code editor is more than 90% faster in some cases, and many investments have been made to avoid delays when typing XAML markup in the editor. Additionally, many other improvements have been made to the coding experience and the diagnostic tools. This chapter will describe such improvements, showing how much more productive you can be in Visual Studio 2017. If you want to try it yourself, simply create a blank UWP or WPF project and open a .xaml file.
Note: This chapter describes features that are common to both WPF and UWP. Chapter 8, “Visual Studio 2017 for mobile development,” will address additional improvements that target UWP. Topics discussed in this chapter are not available to XAML for Xamarin.Forms.
XAML Edit and Continue
One of the most important additions to the XAML tooling in Visual Studio 2017 is XAML Edit and Continue. This feature allows us to edit XAML code while the application is running in Debug configuration. The application will immediately reflect those edits without the need to break the application execution and restart after making some edits. Figure 33 shows how you can edit property values in debugging mode (demonstrated by the orange color of the status bar at the bottom of the main Visual Studio shell).
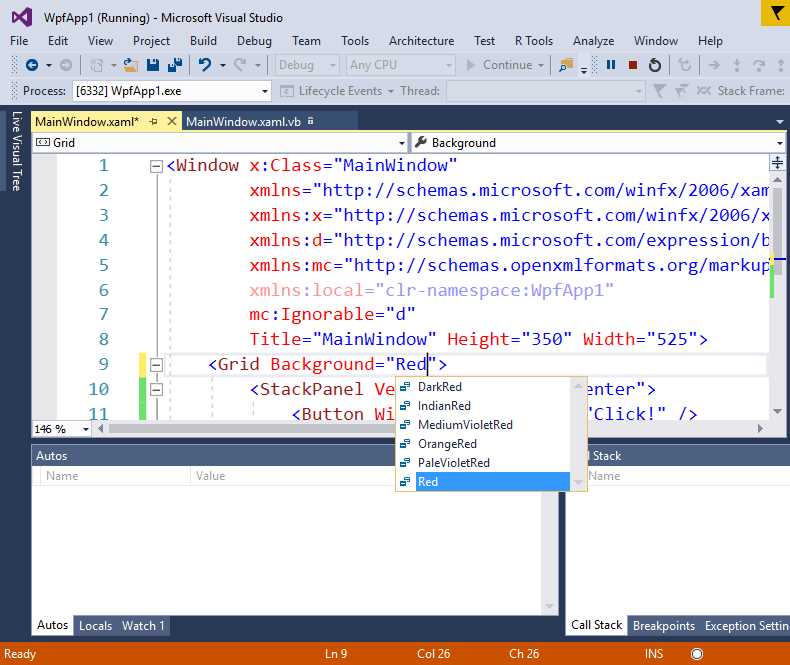
Figure 33: Modifying XAML at Runtime with Edit and Continue
You are not limited to editing controls’ or panels’ property values—you can also add new controls, new panels, and everything you might need to improve your user interface. You can combine using this feature with the Live Visual Tree and Live Property Explorer windows to get an enhanced experience. Edit and Continue has been a heavily requested feature and is finally available to all editions of Visual Studio 2017.
XAML code editor improvements
More often than not, you will write XAML code manually in order to design or at least to fine-tune the user interface of a WPF or UWP app. For this reason, Microsoft has introduced additional improvements to the XAML code editor that will greatly improve your coding experience. Among others, the XAML editor now has the structure guide lines feature we examined in Chapter 3. Additional features address IntelliSense and code refactoring, and they are described in the following paragraphs.
Note: Figures in this chapter have been captured from a UWP project, but the same applies to WPF.
Navigating code with Go To
In Chapter 3, we looked at the Go To feature, which makes navigating code easier and faster. This is also available for the XAML code editor and can be enabled by pressing Ctrl+G.
IntelliSense filtering
IntelliSense for XAML has been updated to show only those members that best match what you type. Additionally, if you type only the capitalized letters of a control name, IntelliSense will show the list of full control names that match those capitalized letters. For instance, if you type SV in UWP, IntelliSense will filter the completion list showing only the ScrollViewer and SplitView element names (see Figure 34).
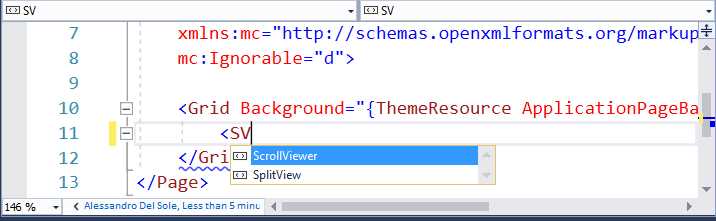
Figure 34: IntelliSense Filtering
Refactoring namespaces
Numerous improvements have been introduced for better management of XAML namespaces. These include features that were previously available to C# and Visual Basic, such as inline renaming, resolving missing namespaces, and removing redundant namespaces.
Removing and sorting namespaces
The XAML code editor detects redundant namespaces by presenting them with a lighter syntax colorization, exactly as with C# and Visual Basic since Visual Studio 2015. You can easily remove redundant namespaces with the help of the light bulb as shown in Figure 35.
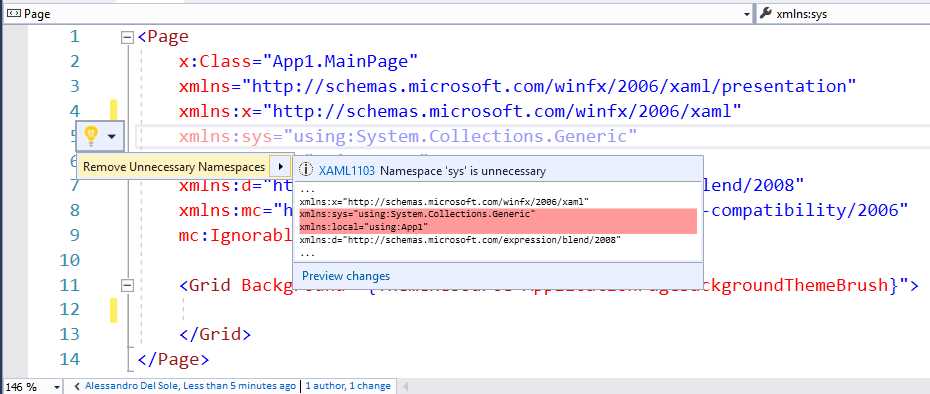
Figure 35: Removing Redundant Namespaces
You can also quickly remove redundant namespaces and sort the remaining namespaces by right-clicking the XAML code then selecting Remove and Sort Namespaces, or by pressing Ctrl+R, then Ctrl+G.
Inline namespace rename
The inline rename feature was first introduced in Visual Studio 2015 for the C# and Visual Basic languages, and it allows renaming a symbol directly in the editor, without any modal dialogs. In Visual Studio 2017, this feature now comes to the XAML code editor, providing an option to rename namespaces more efficiently. You can right-click the name of a namespace, then select Rename. This will also highlight all the references to the selected namespaces, as shown in Figure 36.
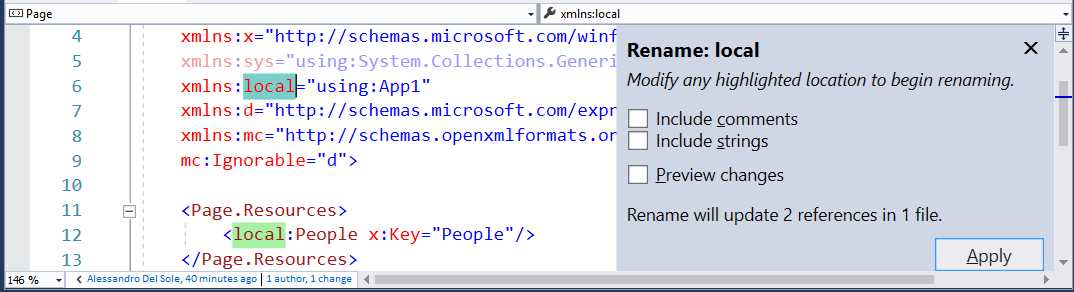
Figure 36: Enabling Inline Rename on Namespaces
Simply type the new name on any highlighted location and it will be applied to all references in the entire solution (see Figure 37).
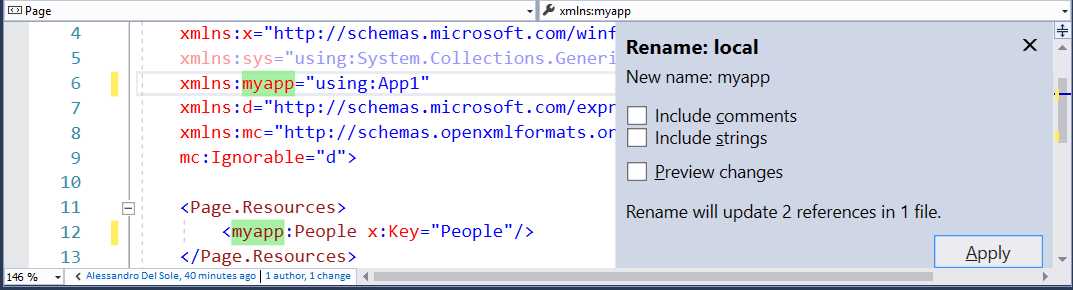
Figure 37: Renaming Namespaces as You Type
As with C# and Visual Basic, you can also include namespace references within comments and strings for a consistent rename.
Resolving missing namespaces
Note: In order to demonstrate this feature, I have added the Microsoft.Toolkit.Uwp.Controls NuGet package to a blank UWP project. However, it applies to any control in any library and namespace, both to UWP and WPF
We often need to add a reference to a library that provides some controls, which can be a Microsoft or third-party library. However, you might not know which XAML namespace exposes the control, which can result in time wasted searching for the proper namespace and adding its declaration. In Visual Studio 2017, the code editor can easily resolve missing namespaces, adding the proper declaration on your behalf. Figure 38 shows how you can type the name of a control with the light bulb and then suggest a quick action to add the proper, missing namespace declaration.
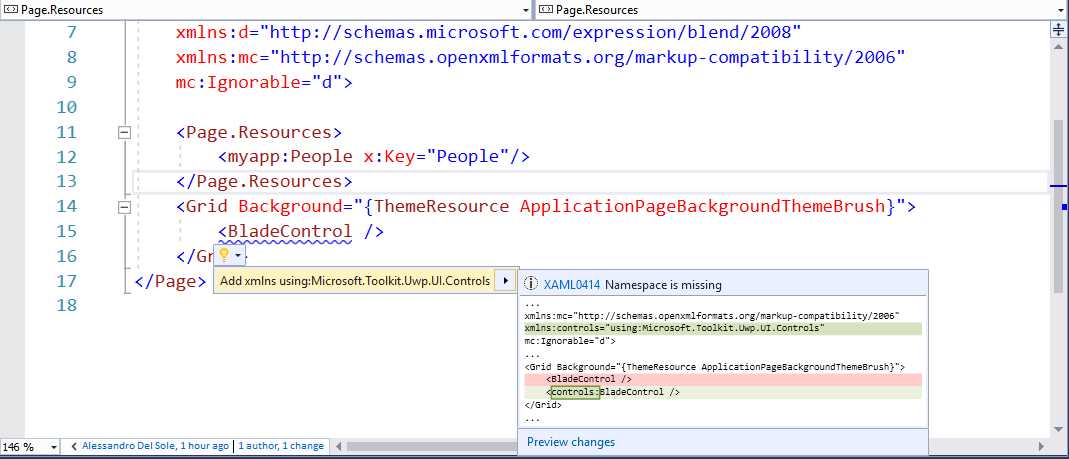
Figure 38: The Light Bulb Suggests Quick Actions for Missing Namespaces
As a result of the quick action, Visual Studio adds the proper XAML namespace. In this particular case, it adds a xmlns:controls directive that points to a namespace called Microsoft.Toolkit.Uwp.UI.Controls, as shown in Figure 39.
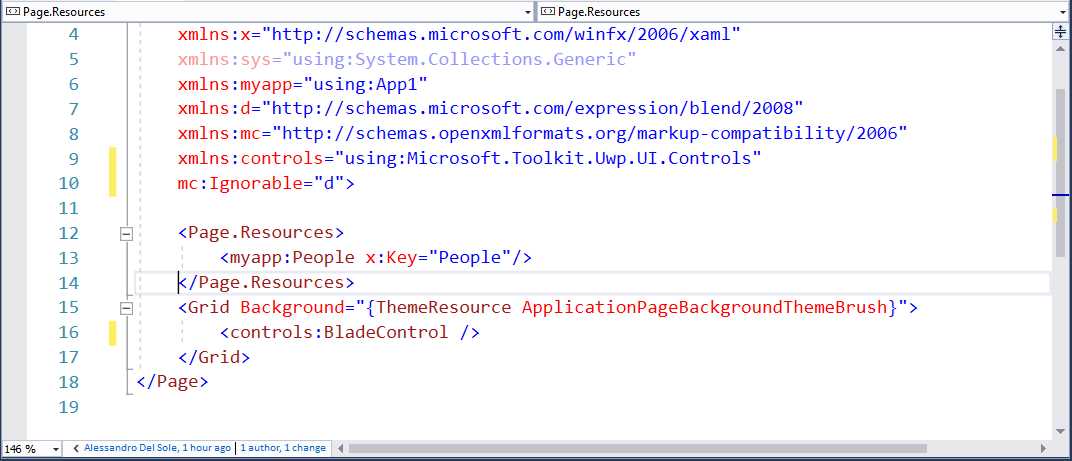
Figure 39: Namespace Added and Issue Fixed
Notice that the identifier for the directive (control in this case) is generated based on the .NET namespace name. You can then use inline renaming to provide a different identifier and automatically update all references.
XAML Diagnostics
Visual Studio 2017 includes a feature called XAML Diagnostics. This feature was first introduced with Visual Studio 2015 Update 2 under the name XAML In-App Menu, but it deserves some explanation, especially if you are new to the Visual Studio development environment. XAML Diagnostics consists of a black, collapsible toolbar that appears when you debug a WPF or UWP application. Figure 40 shows this toolbar over a very simple app.
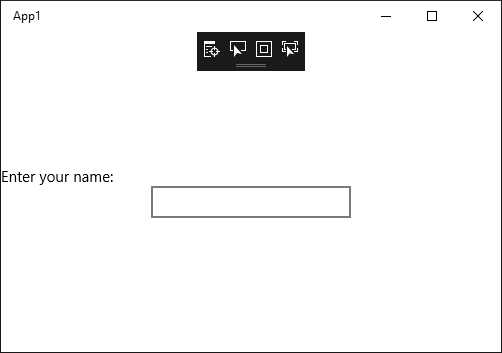
Figure 40: The XAML Diagnostics Toolbar
Tip: The In-App Menu is enabled by default. If you want to disable it, go to Tools > Options > Debugging, and clear the Show runtime tools in application option.
The In-App Menu can be minimized, which is useful for avoiding overlaying parts of the UI—but for now, leave it open. The menu has four buttons, each described in the next paragraphs (starting from left to right).
Go to Live Visual Tree
As the name implies, this button simply opens the Live Visual Tree tool window. I suggest that you dock the Live Visual Tree window so that you will immediately see the result of the other buttons. More information about the Live Visual Tree can be found in the MSDN documentation.
Enable Selection
This button allows you to select controls on the user interface. When you select a control, it is surrounded with a red border, and the Live Visual Tree window automatically shows the selected control within the visual tree. Figure 41 shows an example.

Figure 41: Enabling Element Selection in XAML Diagnostics
This is useful for focusing more precisely on a specific control or UI element, including primitive elements in the visual tree.
Display Layout Adornments
This button allows you to highlight the surface of a control or UI element. If combined with Enable Selection, an element is highlighted and selected. Selection is also reflected in the Live Visual Tree window. This is useful for understanding the delimiters of a control. Figure 42 shows an example based on the combination of both buttons.
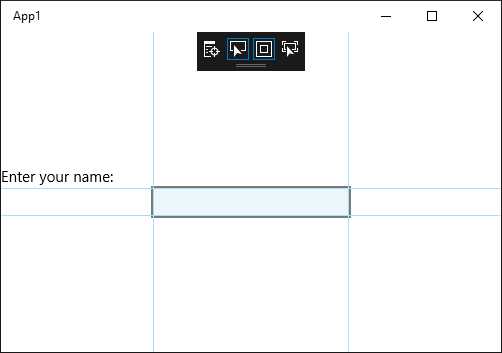
Figure 42: Displaying Layout Adornments
Track Focused Element
The Track Focused Element is similar to Enable Selection in that it allows selecting a control and reflecting the selection in the Live Visual Tree, but you should note that it only allows selecting controls that can receive focus (for instance, TextBox controls).
Chapter summary
Due to its importance in the Universal Windows Platform and Windows Presentation Foundation, the XAML code editor has received a number of improvements in Visual Studio 2017. With Edit and Continue, you can now modify the visual tree and see changes while the application is in debugging mode. IntelliSense has improved filtering, Go To allows you to quickly navigate your markup, and new refactorings have been introduced to support namespace management. But Visual Studio 2017 is not simply the environment for managed languages and XAML. It is the development environment for any development on any platform. In the next chapter, you will discover amazing new features for developers who do not work with MSBuild solutions and projects.
- 1800+ high-performance UI components.
- Includes popular controls such as Grid, Chart, Scheduler, and more.
- 24x5 unlimited support by developers.