
Visual Studio 2015 Succinctly®

CHAPTER 2
Shared Projects
One of the most desirable features for developers is the ability to write code once and share that code across multiple types of applications. Visual Studio 2015 simplifies the process of sharing code by introducing Shared Projects. If you have created Universal Windows apps in the past with Visual Studio 2013 Update 2 or higher, you have an idea of what a shared project is, but now you can use them to share code between additional project types. This chapter discusses shared projects and explains their structure and usage.
Note: This chapter assumes you have some experience with creating and managing solutions and projects, adding references to other projects, and that you know the terminology for these tasks.
Understanding Shared Projects
Shared Projects allows sharing code, assets, and resources across multiple project types. More specifically, the following project types can reference and consume shared projects:
- Console, Windows Forms, and Windows Presentation Foundation.
- Windows Store 8.1 apps and Windows Phone 8.1 apps.
- Windows Phone 8.0/8.1 Silverlight apps.
- Portable Class Libraries.
Visual Studio 2013 Update 2 first introduced shared projects to provide an easy opportunity to build Universal Windows apps supporting the Windows 8.1/Windows Phone 8.1 pair; now, shared projects are available to all the aforementioned projects and to both C# and Visual Basic. The important thing to underline is that you not only share code but also assets and resources, such as (but not limited to) images and XAML templates. Technically speaking, shared projects are loose assortments of files that are then added, exactly like linked files, to whichever projects reference them. They actually do not target any specific .NET subset and do not produce a .dll library; behind the scenes, when building your solution, the MSBuild tool executes against shared projects the same rules as for linked files.
Creating and Consuming Shared Projects
Shared projects are available through specific project templates in the New Project dialog. To understand how they work, create a new solution containing a shared project, a WPF project, and a Windows 8.1 Store app project. In Visual Studio 2015, select File > New > Project. Instead of creating a new project directly, create a new blank solution by selecting Blank Solution under Other Project Types/Visual Studio Solutions (see Figure 8). Name the new solution SharingSample and click OK.
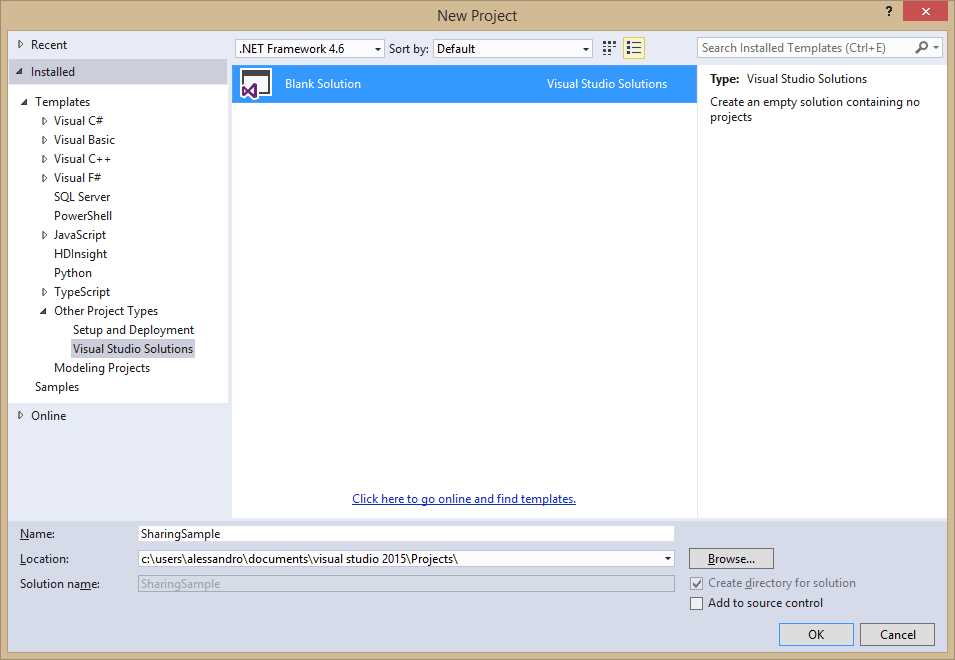
- Creating a blank solution.
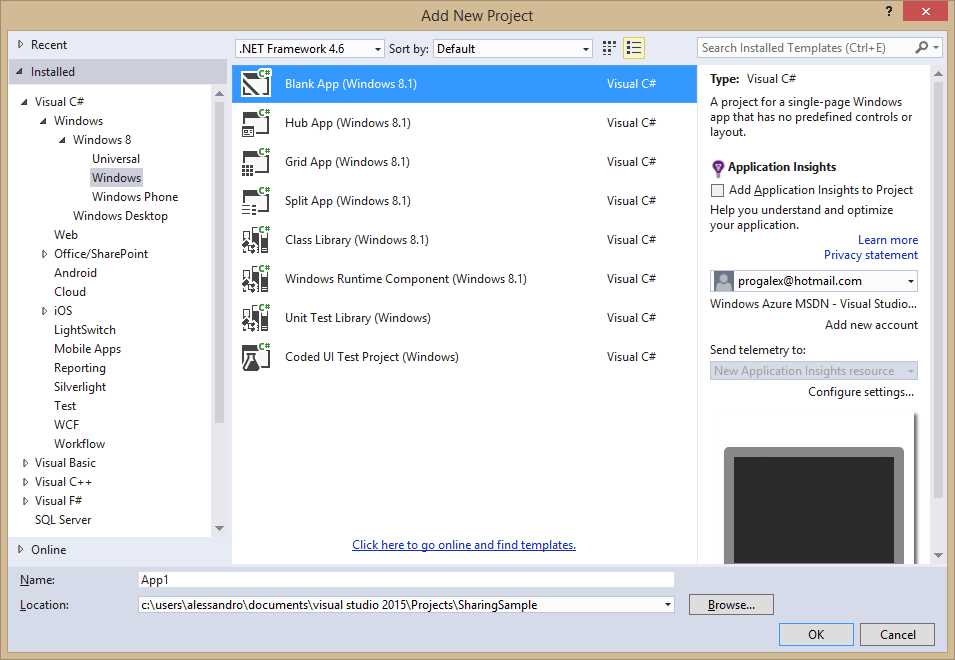
The next step is adding the shared project. You can either right-click the solution name in Solution Explorer and then select Add > New Project or select File > Add > New Project. As you can see in the Add New Project dialog (see Figure 9), the Shared Project template is available in the list. You can select either C# or Visual Basic (there will be an example for both).
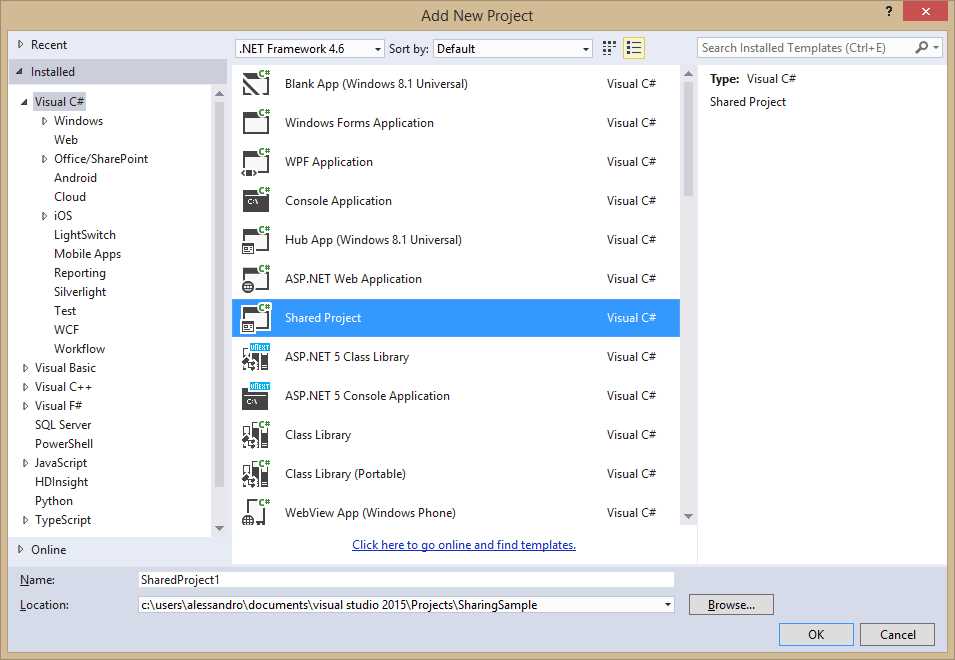
- Adding a shared project.
You can choose whatever name you want or leave the default name and click OK. As you can see in Solution Explorer, the shared project has a very simple structure; it is represented by a green icon, as shown in Figure 10.
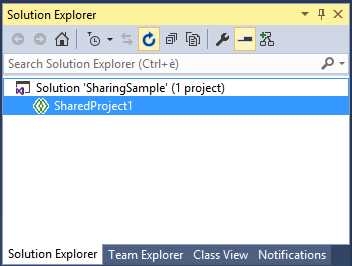
- The shared project in Solution Explorer.
Note: Behind the scenes, shared projects are represented by files with the .shproj extension, which basically contains the MSBuild rules required for the compilation process, plus a file with a .projitems extension, which instead contains the list of items to be shared.
The goal of a shared project is to make it easier to share code, resources, and assets. Add three folders to the project called Code, Resources, and Assets. Now, suppose you want to share a XAML template, an image, and some code between a WPF project and a Windows 8.1 Store project. Right-click the Code folder and select Add > New Item. In the Add New Item dialog, select the Class template and name the new class Person.cs (see Figure 11).
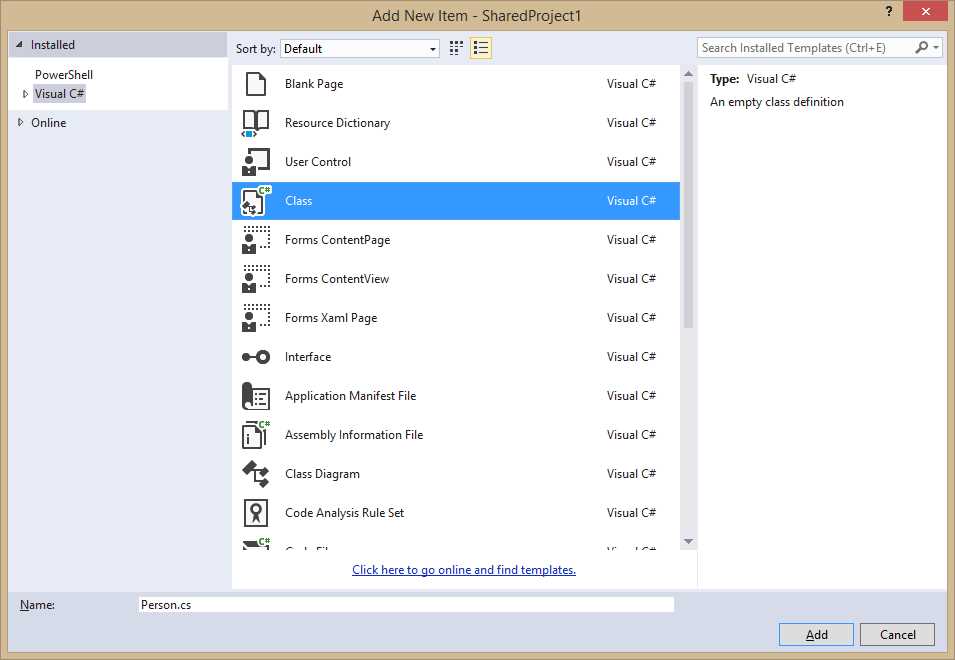
- Adding a shared class.
The following code example contains a definition for the Person class and a collection called People, which contains some sample instances of the Person class.
C# Code Example
using System.Collections.ObjectModel; namespace SharedProject1 { public class Person { public string FirstName { get; set; } public string LastName { get; set; } public int Age { get; set; } } public class People : ObservableCollection<Person> { public People() { //Add sample data var p1 = new Person(); p1.LastName = "Del Sole"; p1.FirstName = "Alessandro"; p1.Age = 37; var p2 = new Person(); p2.LastName = "White"; p2.FirstName = "Robert"; p2.Age = 40; this.Add(p1); this.Add(p2); } } } |
Visual Basic Code Example
Imports System.Collections.ObjectModel Public Class Person Public Property FirstName() As String Public Property LastName() As String Public Property Age() As Integer End Class Public Class People Inherits ObservableCollection(Of Person) Public Sub New() 'Add sample data Dim p1 = New Person() p1.LastName = "Del Sole" p1.FirstName = "Alessandro" p1.Age = 37 Dim p2 = New Person() p2.LastName = "White" p2.FirstName = "Robert" p2.Age = 40 Me.Add(p1) Me.Add(p2) End Sub End Class |
The People collection is the data that both the WPF and the Windows Store applications will show on screen; since both application types are based on XAML, it is a good idea to create a data template that will be shared in the solution. To accomplish this, right-click the Resources folder and select Add > New Item. In the Add New Item dialog, locate the XAML node and select Resource Dictionary, as shown in Figure 12.
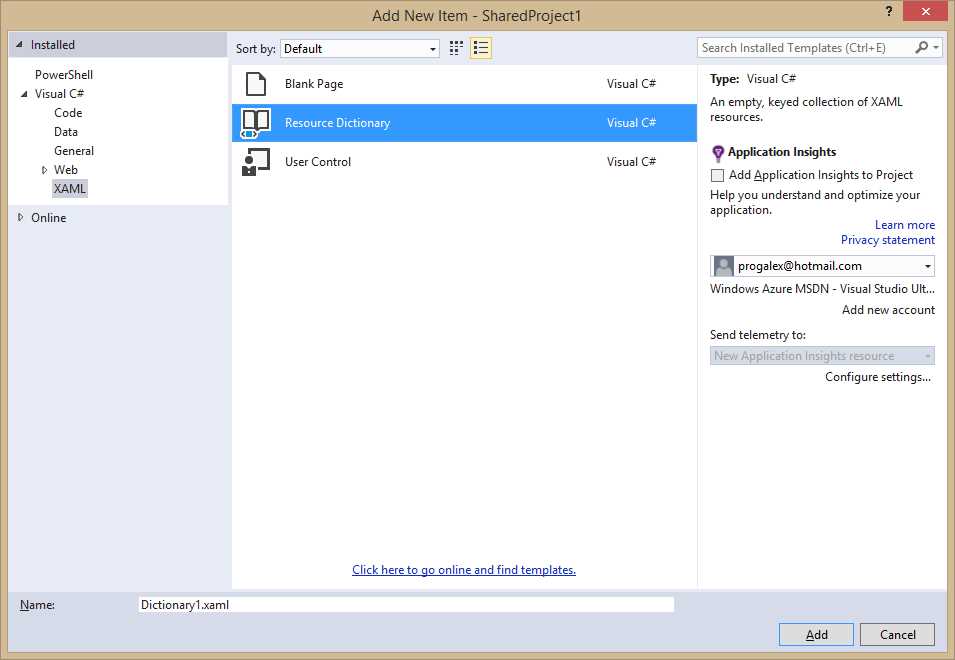
- Adding a shared resource dictionary.
In the code you specify a new DataTemplate object, which contains some TextBlock controls, arranged within StackPanel containers, that are bound to the properties of the Person class.
<ResourceDictionary xmlns="http://schemas.microsoft.com/winfx/2006/xaml/presentation" xmlns:x="http://schemas.microsoft.com/winfx/2006/xaml"> <DataTemplate x:Key="MyTemplate"> <Border Width="240" BorderBrush="Black" BorderThickness="2" Margin="3"> <StackPanel Orientation="Vertical" Margin="3"> <StackPanel Orientation="Horizontal"> <TextBlock Text="Last name:" FontWeight="Bold" /> <TextBlock Text="{Binding LastName}"/> </StackPanel> <StackPanel Orientation="Horizontal"> <TextBlock Text="First name:" FontWeight="Bold"/> <TextBlock Text="{Binding FirstName}"/> </StackPanel> <StackPanel Orientation="Horizontal"> <TextBlock Text="Age:" FontWeight="Bold"/> <TextBlock Text="{Binding Age}"/> </StackPanel> </StackPanel> </Border> </DataTemplate> </ResourceDictionary> |
In order to successfully share the resource dictionary to both targets, you must remove the following XML namespace alias, which is specific to Windows Store and Windows Phone.
xmlns:local="using:SharedProject1.Resources" |
The last step in the shared project is adding a sample image. Right-click the Assets folder and select Add > Existing Item, then select an image file of your choice among one of the supported file formats, such as JPG, PNG, GIF, or BMP. In order to make the image file usable by WPF, in the Properties window set the Copy to Output Directory property to Copy if newer. Figure 13 shows how the shared project appears in Solution Explorer and how to set the property for the image file in the Properties window.
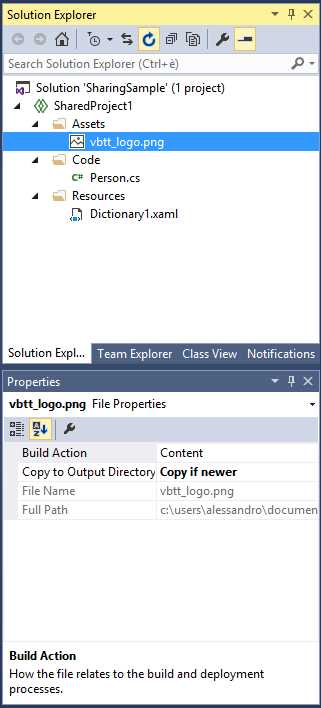
- The current appearance for the shared project.
At this point, you want to add the first client project. Select File > Add > New Project and in the New Project dialog select the WPF Application project template; for the sake of the example’s consistency, name the new project as MyWPFApp (see Figure 14).
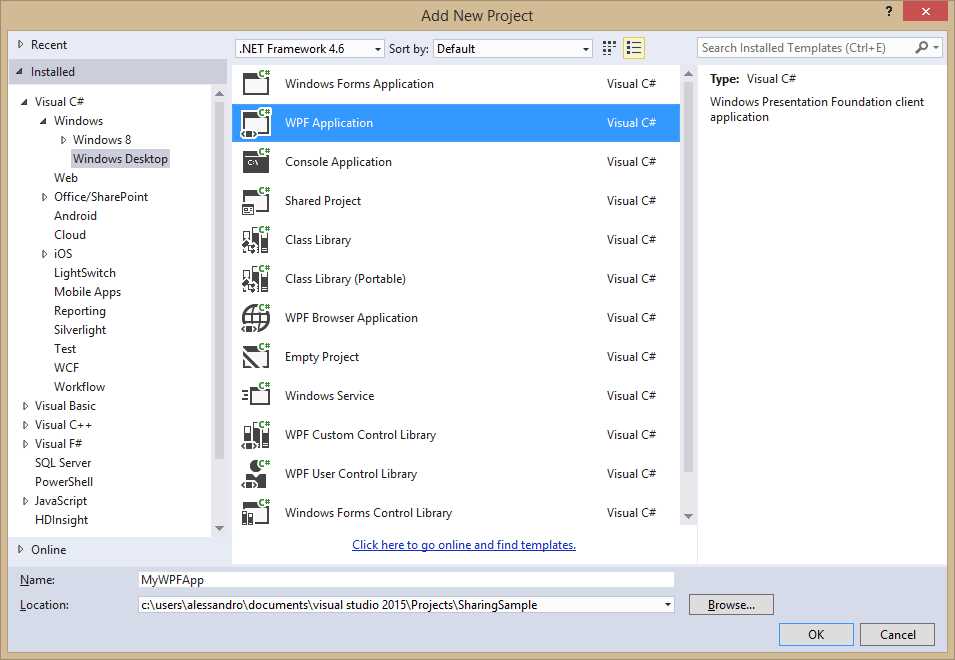
- Adding a WPF client project.
Once the project is available, the first thing to do is add a reference to the shared project. As I told you before, shared projects do not produce assemblies, so adding a reference to a shared project means actually linking code files in the shared project to the current project. When you add a reference to a shared project, the Reference Manager dialog shows a special node called Shared Projects, where you can find a list of shared projects in your solution (see Figure 15).
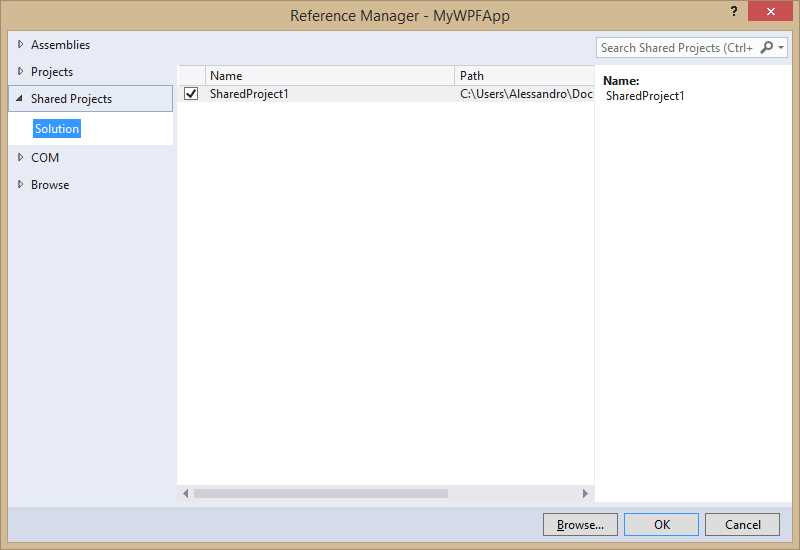
- Adding a reference to a shared project.
Select the shared project and click OK.
Tip: If you expand the Reference node in the Solution Explorer, you will see that the icon for the shared project is different than the icon for assemblies. This is a reminder that shared projects do not produce an assembly.
In the WPF application you want to use resources residing in the shared resource dictionary. To accomplish this, you need to add a resource dictionary into the App.xaml file (or Application.xaml in Visual Basic) like in the following code.
<Application.Resources> <ResourceDictionary> <ResourceDictionary.MergedDictionaries> <ResourceDictionary Source="/Resources/Dictionary1.xaml"/> </ResourceDictionary.MergedDictionaries> </ResourceDictionary> </Application.Resources> |
Notice how you specify the dictionary location via a relative uniform resource identifier (URI), which includes the subfolder name in the shared project. Do not worry if the Source property value is underlined with an error squiggle (semantic error notification), the resource dictionary will definitely be resolved at runtime. The user interface for the sample application is very simple. In the MainWindow.xaml file, place a Grid container; this will show the image file as the application logo and a ListBox control to present the list of data. Notice how you can use a simplified relative URI to point to the image file; the URI includes the subfolder name as it appears in the shared project.
<Window x:Class="MyWPFApp.MainWindow" xmlns="http://schemas.microsoft.com/winfx/2006/xaml/presentation" xmlns:x="http://schemas.microsoft.com/winfx/2006/xaml" xmlns:d="http://schemas.microsoft.com/expression/blend/2008" xmlns:mc="http://schemas.openxmlformats.org/markup-compatibility/2006" xmlns:local="clr-namespace:MyWPFApp" Loaded="Window_Loaded" mc:Ignorable="d" Title="MainWindow" Height="350" Width="525"> <Grid> <Grid.RowDefinitions> <RowDefinition Height="80"/> <RowDefinition/> </Grid.RowDefinitions>
<!--Replace with a file name of your choice...--> <Image Source="../SharedProject1/Assets/LogoVBTT.jpg"/>
<ListBox ItemTemplate="{StaticResource MyTemplate}" Name="DataBox" Grid.Row="1"/> </Grid> </Window> |
As highlighted in the code, you also have to provide an event handler for the Window.Loaded event, which is the place where data is loaded. Concerning the ListBox, you assign the DataTemplate called MyTemplate, defined in the shared resource dictionary, as the item template to present each instance of the Person class. The Window.Loaded event handler simply creates an instance of the People collection; the instance is assigned to the ListBox.ItemsSource property to populate it.
C# Code Example
//Requires a using SharedProject1.Code directive private void Window_Loaded(object sender, RoutedEventArgs e) { this.DataBox.ItemsSource = new People(); } |
Visual Basic Code Example
Private Sub Window_Loaded(sender As Object, e As RoutedEventArgs) Me.DataBox.ItemsSource = New People() End Sub |
Tip: Remember that C# defines a namespace for each subfolder in the project that contains code. For this reason you have to place a using SharedProject1.Code directive to import the subfolder’s content.
If you now run the sample project, you will get a result similar to Figure 16 (of course you have probably used a different image file).
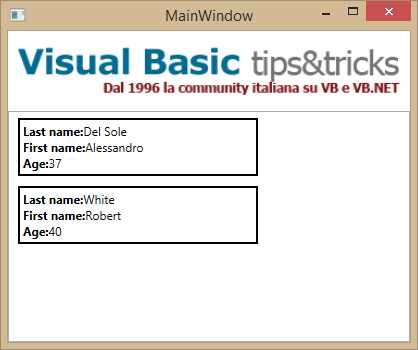
- Adding a reference to a shared project.
This is certainly a simple example, but the goal is to understand how to share different type of resources. At this point, add a new Windows Store app by using the Blank App (Windows 8.1) template, as shown in Figure 17. Name the new project as MyWindowsApp and click OK.
- Adding a Windows Store project.
Now do the following:
- Add a reference to the shared project, exactly as you did in the WPF project.
- In the App.xaml file (or Application.xaml in Visual Basic), add the same XAML code that you already wrote in the App.xaml of the WPF project.
- In the MainPage.xaml file, add the same Grid content definition that you already wrote in the MainWindow.xaml file of the WPF project.
Add an event handler for the Page.Loaded event. The full XAML code of MainPage.xaml is as follows.
<Page x:Class="MyWindowsApp.MainPage" xmlns="http://schemas.microsoft.com/winfx/2006/xaml/presentation" xmlns:x="http://schemas.microsoft.com/winfx/2006/xaml" xmlns:local="using:MyWindowsApp" Loaded="Page_Loaded" xmlns:d="http://schemas.microsoft.com/expression/blend/2008" xmlns:mc="http://schemas.openxmlformats.org/markup-compatibility/2006" mc:Ignorable="d"> <Grid Background="{ThemeResource ApplicationPageBackgroundThemeBrush}"> <Grid.RowDefinitions> <RowDefinition Height="80"/> <RowDefinition/> </Grid.RowDefinitions> <Image Source="Assets/vbtt_logo.png"/> <ListBox ItemTemplate="{StaticResource MyTemplate}" Name="DataBox" Grid.Row="1"/> </Grid> </Page> |
The Page.Loaded event handler is identical to its WPF counterpart, except that here you have a Page rather than a Window.
C# Code Example
//Requires a using SharedProject1.Code directive private void Page_Loaded(object sender, RoutedEventArgs e) { this.DataBox.ItemsSource = new People(); } |
Visual Basic Code Example
Private Sub Page_Loaded(sender As Object, e As RoutedEventArgs) Me.DataBox.ItemsSource = New People() End Sub |
Set the Windows Store project as the startup one and press F5. As you can see, the app shows the same image and data, which has been presented by using the same data template as in the WPF counterpart (see Figure 18).

- The Windows Store app running.
It is easy to understand how you can leverage shared projects to share a variety of items between multiple project types, including code, assets, and resources. Sharing XAML and C#/VB code is probably the most interesting opportunity that shared projects offer.
Note: both shared projects and portable class libraries (PCL) allow sharing code, XAML resources, and assets, but of course there are some differences that might be summarized as follows. A shared project does not produce a reusable assembly, so it can only be consumed from within the solution. A shared project has support for platform-specific code, because it supports environment variables such as WINDOWS_PHONE_APP and WINDOWS_APP that you can use to detect which platform your code is running on. Finally, shared projects cannot have dependencies on third-party libraries. By comparison, a PCL produces a reusable .dll library and can have dependencies on third-party libraries, but it does not support platform environment variables.
Chapter Summary
First introduced in Visual Studio 2013 Update 2 for building Universal Windows apps, Visual Studio 2015 shared projects are available to a variety of project types, such as WPF, Windows Forms, Windows Store, Windows Phone, and Portable Libraries. With shared projects, you can write C#/VB code once and share it to multiple projects in your solution, and you can easily share XAML resources like styles, control templates, and data templates, as well as assets such as image files. Shared projects are not always the ultimate solution for sharing items; in fact, there are situations in which you might want to prefer Portable Libraries, such as if you need to create a reusable .dll that targets a specific .NET subset. Regardless, shared projects are definitely an easy and lightweight opportunity to save time.
- 1800+ high-performance UI components.
- Includes popular controls such as Grid, Chart, Scheduler, and more.
- 24x5 unlimited support by developers.