
Visual Studio 2019 Succinctly®

CHAPTER 7
What’s New for Web and Cloud Development
Web and cloud development go hand in hand, and Visual Studio 2019 enhances support for cross-platform web development with .NET Core and integrates new scenarios and tools based on Microsoft Azure. This chapter provides guidance on how to leverage the new tools available for web development with Visual Studio 2019, with a strong focus on ASP.NET Core and Azure integration.
Creating web projects
The new user interface for creating projects in Visual Studio 2019 makes it easier to discover templates for web applications. You can simply filter the list by selecting Web in the Project Type combo box (see Figure 70).
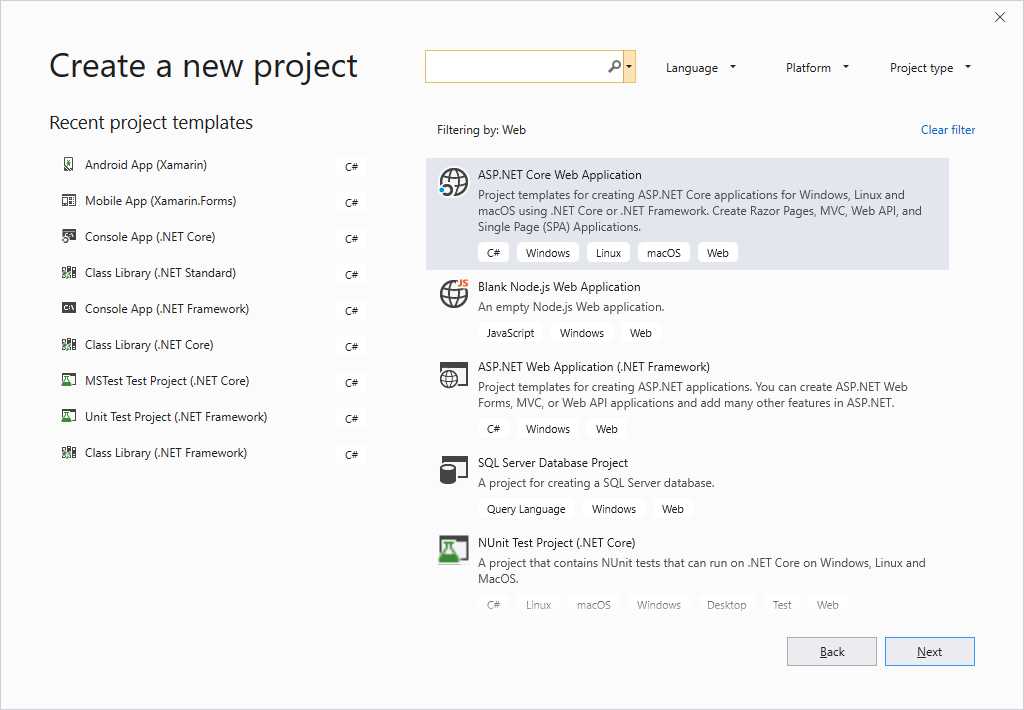
Figure 70: Creating web projects
You can refine filtering by selecting a specific language or platform, but this is the way you will find the list of project templates for the web, including ASP.NET, Node.js, and ASP.NET Core. ASP.NET and ASP.NET Core deserve some additional explanation, expressed in the next paragraph.
Creating ASP.NET Core projects
If you select the ASP.NET Core Web Application project, you will be asked to select a more specific template. Figure 71 demonstrates this.
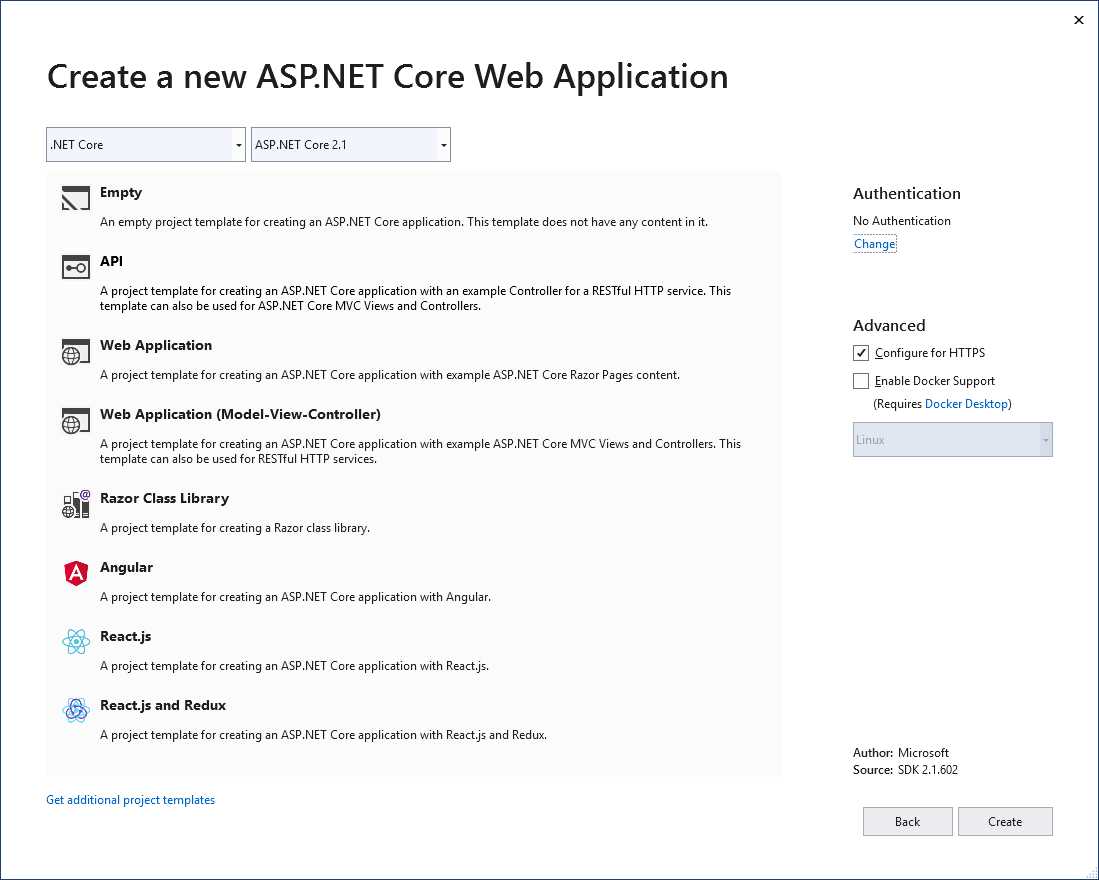
Figure 71: Creating an ASP.NET Core web project
While the list of project templates is self-explanatory, for .NET Core, it’s worth mentioning that:
- You can quickly enable Docker support (this must be installed on your machine).
- For the API and all the web application projects, you can easily implement authentication. Supported providers are Microsoft Azure, Office 365, and Windows authentication.
- You are not limited to pure C# projects, since you can use different front-end technologies such as React.js and Angular.
Notice how you can select a different version of ASP.NET Core at the top of the dialog (which will also be useful if you install the .NET Core 3.0 SDK). It is important to note that you can also switch between .NET Core and .NET Framework web projects by simply selecting the desired technology from the combo box at the top-left corner of the dialog. For .NET Core, Visual Studio 2019 introduces several productivity improvements, described in the next section.
Productivity improvements for .NET Core
Most of the improvements that Visual Studio 2019 brings to web development are related to .NET Core. Since the focus on cross-platform development is at the heart of Microsoft’s vision, this totally makes sense. This section describes the most relevant productivity improvements that Visual Studio 2019 introduces to .NET Core development.
Supporting .NET Core 3.0
Microsoft is working hard on .NET Core 3.0, the next major version of the popular cross-platform technology. At this writing, .NET Core 3.0 is available in preview, and the SDK can be downloaded from the .NET Core download page. If you wish to give it a try or to work with .NET Core 3.0 in Visual Studio, version 2019 is a requirement because VS 2017 will not support .NET Core 3.0. Once you download and install the SDK, you will see .NET Core 3.0 listed as an option in the project creation user interface.
CodeLens and Find All References for Razor files
A specific code editor improvement allows CodeLens and Find All References to include any references to objects declared inside Razor (.cshtml) files. To understand how this works, simply create a new ASP.NET Core project using the Web Application (Model-View-ViewController) template. Locate and open the ErrorViewModel.cs file (under the Models subfolder). If you click the number of references for the RequestId property (see Figure 72), not only will you see references to this property in other C# code files, but also one reference in the Error.cshtml file.
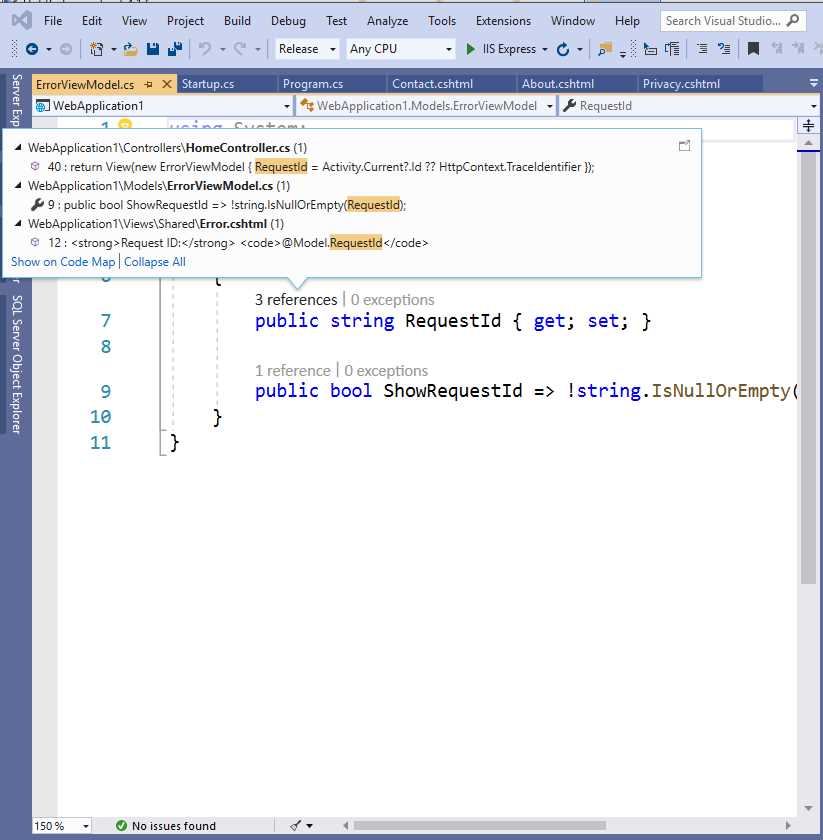
Figure 72: CodeLens displaying references inside Razor files
You will also be able to see references from Razor files inside the results view of the Find All References window. This is an extremely useful addition, especially with Razor files that use model binding.
Calculating code metrics
Code metrics are a set of software measures that provide developers better insight into the code they are developing. With code metrics, developers can understand how reliable and maintainable the code is. Code metrics have always been part of the analysis tools in Visual Studio, but now they are also available to .NET Core applications (and not just ASP.NET Core).
With a .NET Core solution opened, select Analyze > Calculate Code Metrics. Then you can decide to analyze the entire solution or an individual project. Once the analysis is complete, you will see the results in the Code Metrics Result tool window (see Figure 73).
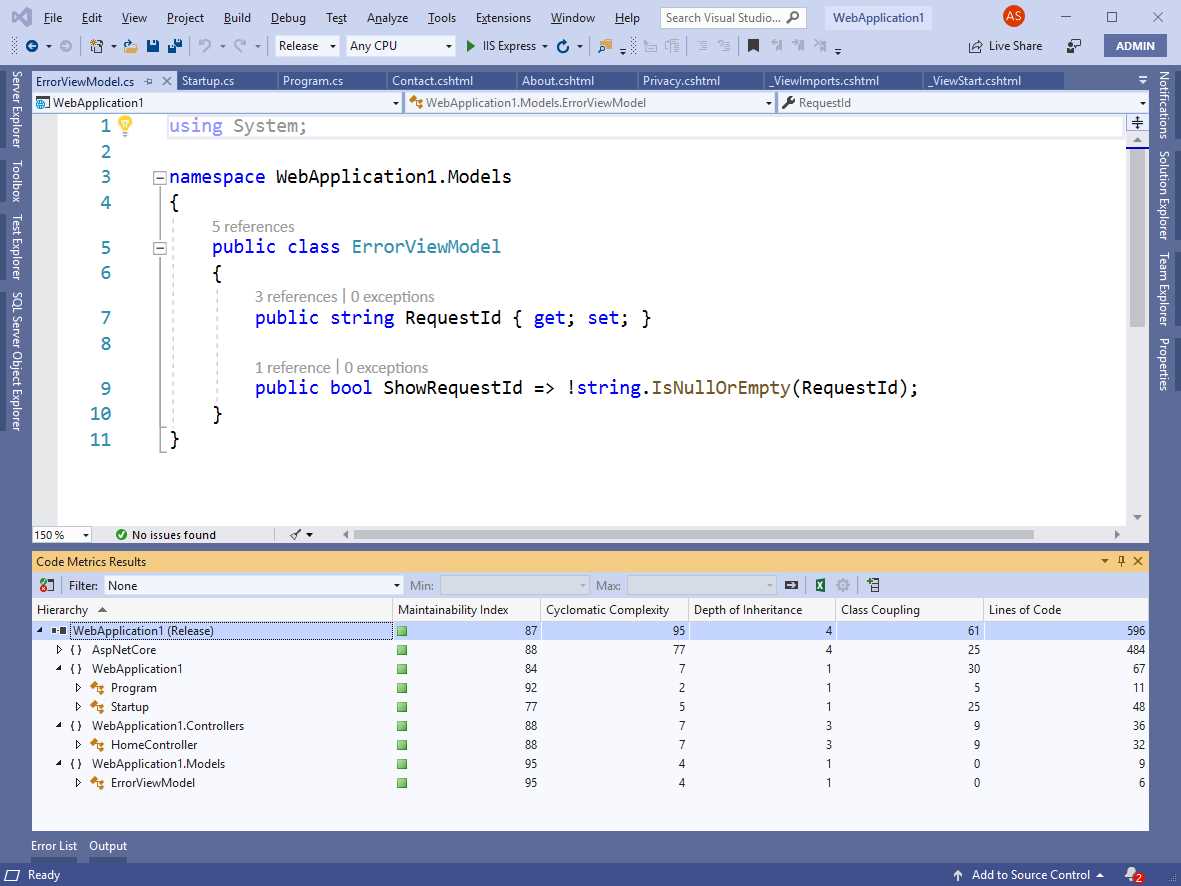
Figure 73: Code Metrics results
Table 3 describes code metrics in more detail.
Table 3: Code metrics in Visual Studio
Code metrics in Visual Studio | |
|---|---|
Maintainability Index | Measures the ease of maintainability of the code with an index value. If such index is between 20 and 100, maintainability is good and a green indicator is displayed. If it is between 10 and 19, maintainability is moderate and an orange indicator is displayed. If it is between 0 and 9, maintainability is poor and a red indicator is displayed. |
Cyclomatic Complexity | Measures the code complexity by calculating different code paths in the program flow. For example, several nested for loops or nested if blocks might increase the cyclomatic complexity. |
Depth of Inheritance | Determines the number of class definitions that extend the root of a class hierarchy. A high value might make it difficult to understand the inheritance level and might make the code more difficult to maintain. |
Class Coupling | Measures interdependencies of a class on other types. For this measurement, Visual Studio considers parameters, local variables, return types, method calls, base classes, interface implementations, fields defined on external types, and even attribute decoration. |
Lines of Code | Measures the approximate number of lines of IL code. A high value might indicate that a method is doing too much work. Notice that this index is not related to C# or Visual Basic source code, but the Intermediate Language code that .NET generates at compile time. |
You can find more detailed information about code metrics in the official documentation. Remember that code metrics were already available to all .NET solutions, and that support for .NET Core is an addition.
Tip: Code metrics results can be exported to Excel with the Open List in Microsoft Excel button on the Code Metrics Result window’s toolbar.
Analyzing CPU performance
Another addition to the .NET Core tooling is the possibility of executing the CPU Usage analysis tool included in the Performance Profiler hub. This tool is useful for understanding where the CPU is spending more time in executing your code. Like code metrics, CPU Usage has been available for several years to other .NET applications, and now is finally available in .NET Core. Its usage is simple. First, make sure the build configuration is Release and select Analyze > Performance Profiler. When the user interface for the Performance Profiler appears (see Figure 74), select the CPU Usage option.
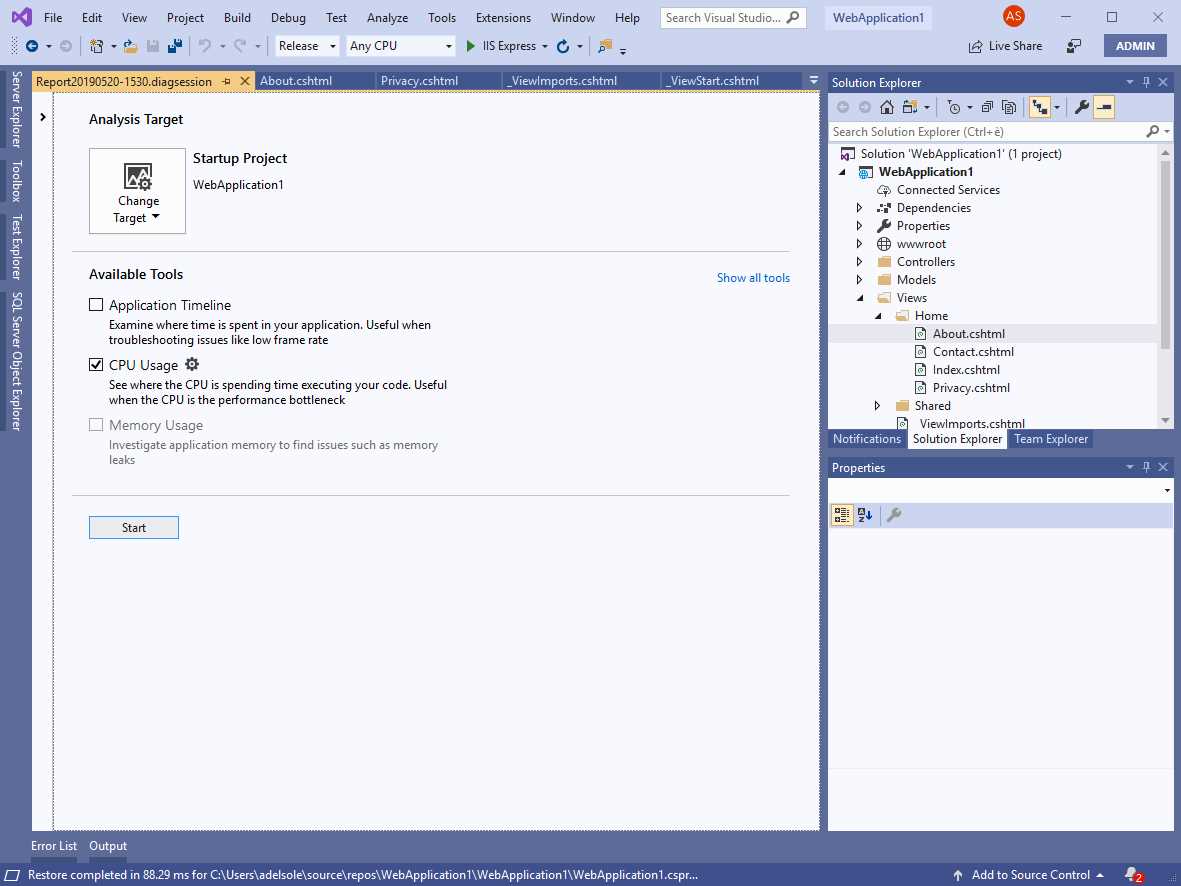
Figure 74: Enabling CPU Usage as an analysis tool
When you’re ready, click Start. The application will start (without an instance of the debugger), and VS will profile it during the execution. You can simply close the application to stop profiling, or you can click the Stop collection to view CPU usage data hyperlink in Visual Studio. After a few seconds, Visual Studio will show the analysis results in a visual report (see Figure 75).
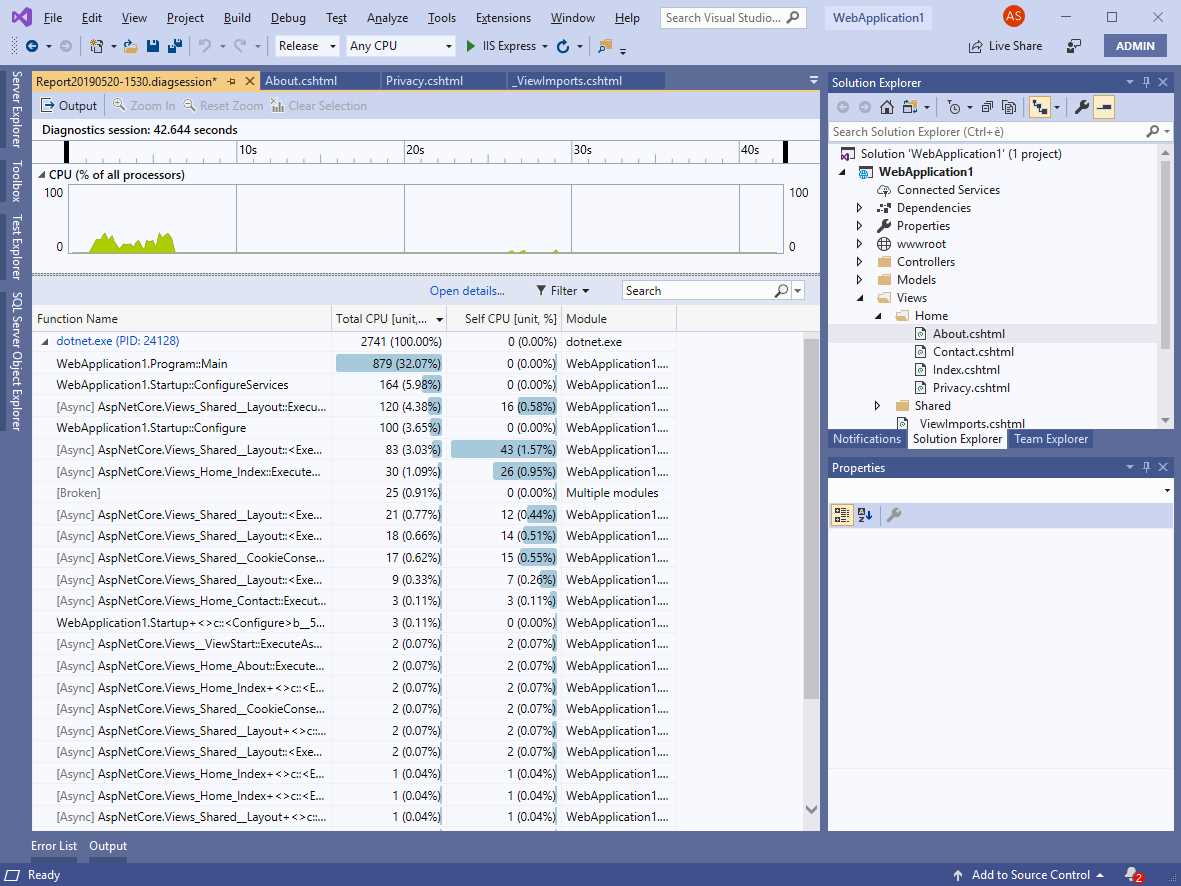
Figure 75: The report of the CPU Usage analysis
Notice how, for each method (Function Name column) you can see the percentage of CPU usage. If you double-click a method name, Visual Studio will display a detail window where you can see the current method, caller methods, and called methods. Figure 76 shows an example where the calling and called methods are inside external code.
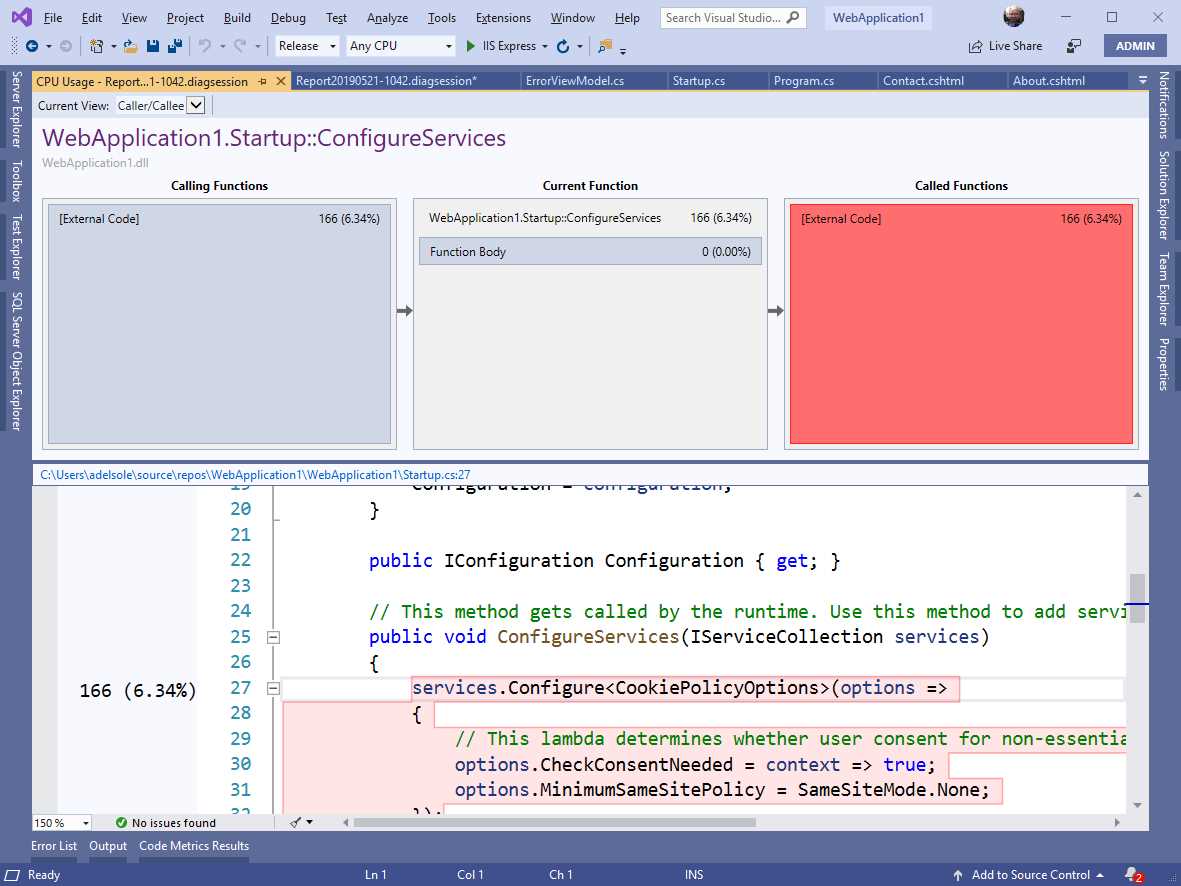
Figure 76: CPU Usage across method calls
Notice how Visual Studio highlights the code that had an impact on the CPU usage and displays the percentage of usage next to the code. You can also click inside the Calling Function and Called Function areas to see additional details on caller and called methods, including their source code, when available.
Publish experience enhancements
Visual Studio 2019 also provides a redesigned experience for publishing a web application. When you right-click the project name in Solution Explorer and click Publish, you will see the Publish tab of the project’s welcome page. Click Start to start configuring the app deployment. You will be first asked to specify a publish target, as you can see in Figure 77.
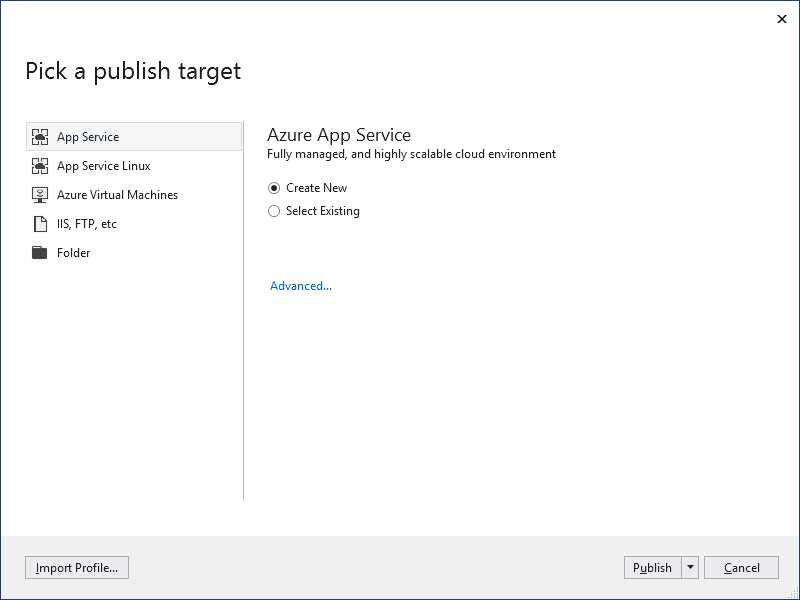
Figure 77: Selecting a publish target
For both the App Service and App Service Linux targets, you will be able to publish your web app directly to your Azure subscription.
Note: The App Service, App Service Linux, and Azure Virtual Machines options require an active Microsoft Azure subscription. If you want to try out these features, you can request a free trial.
The only difference is that for the App Service option, you can create a new app service or select an existing one, whereas for the App Service Linux option, you can only create a new app service on Azure. In both cases, if you click Publish, you will be able to configure your app service, as demonstrated in Figure 78.
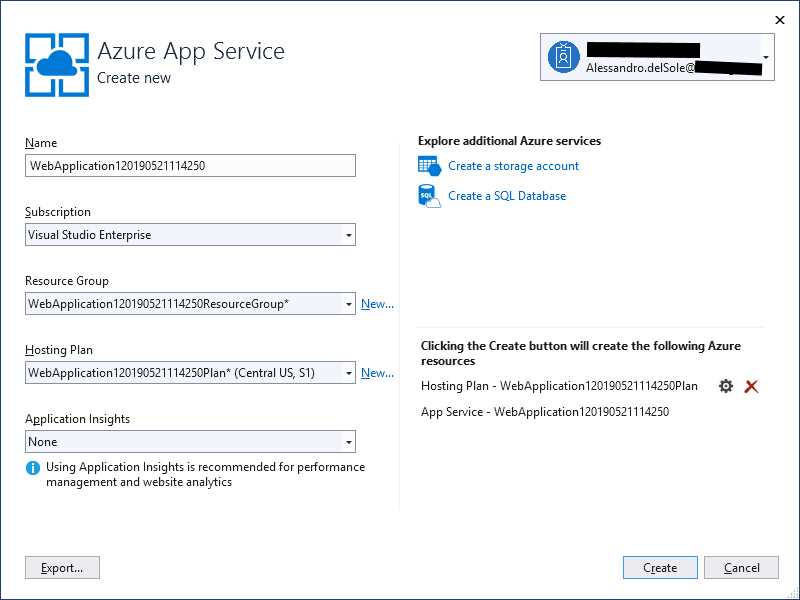
Figure 78: Azure App Service configuration
Visual Studio will automatically search for an Azure subscription associated with the Microsoft Account you used to sign into the IDE. If one is found, Visual Studio will also automatically prefill the configuration form with a service name, a resource group name, and a hosting plan. Replace the app service name with a more meaningful name and make sure you select the appropriate hosting plan, as these are paid services.
Note: App services, resource groups, hosting plans, and subscription types are not covered in this e-book. If you are new to Azure, refer to the official Microsoft Azure portal for all the information you need before publishing any resource to your full or trial subscription.
In a similar way, you will be able to select an existing Azure Virtual Machine as a publish target. The IIS and FTP publish option will open the well-known dialog for configuring the deployment to an IIS or FTP server, so there’s nothing new here. The Folder option allows you to publish the web application to a local folder for manual deployment (see Figure 79) with a slightly different user interface, due to the whole experience redesign.
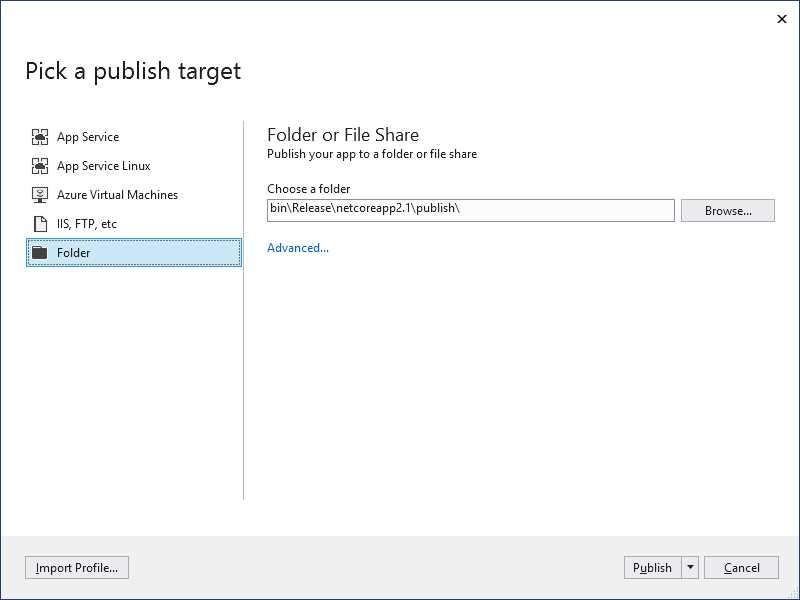
Figure 79: Publishing to a local folder
This redesigned publish experience not only makes the user interface consistent with VS 2019’s look and feel, but it also provides a much better integration with the Azure services.
Note: To stay up to date on new or updated features (especially with .NET Core 3.0 around the corner), don’t forget to look at the official ASP.NET blog and read the release notes when Visual Studio 2019 releases updates.
Chapter summary
The focus of the improvements for web development in Visual Studio 2019 is on extending support for .NET Core and its ASP.NET Core flavor. Creating an ASP.NET Core project is now a better-organized experience.
Analysis tools such as Code Metrics and CPU Usage are now available to .NET Core apps. CodeLens and Find All References in .NET Core can now show references from Razor files. Publishing a web application is still as easy as it was in the past, but with better integration with several Azure services.
Actually, for .NET Core development there is something very interesting that is almost ready to see the light: desktop development with Windows Presentation Foundation and Windows Forms, as you will see in the next chapter.
- 1800+ high-performance UI components.
- Includes popular controls such as Grid, Chart, Scheduler, and more.
- 24x5 unlimited support by developers.