
Svelte Succinctly®

CHAPTER 3
Setting Up a Back End
Quick intro
If you’ve read some of my other Succinctly series books, you’ve probably noticed that I’m a frequent user (and big fan) of Google Firebase.
Firebase makes it easy to get a back end up and running for any web application (independently of the front-end framework used).
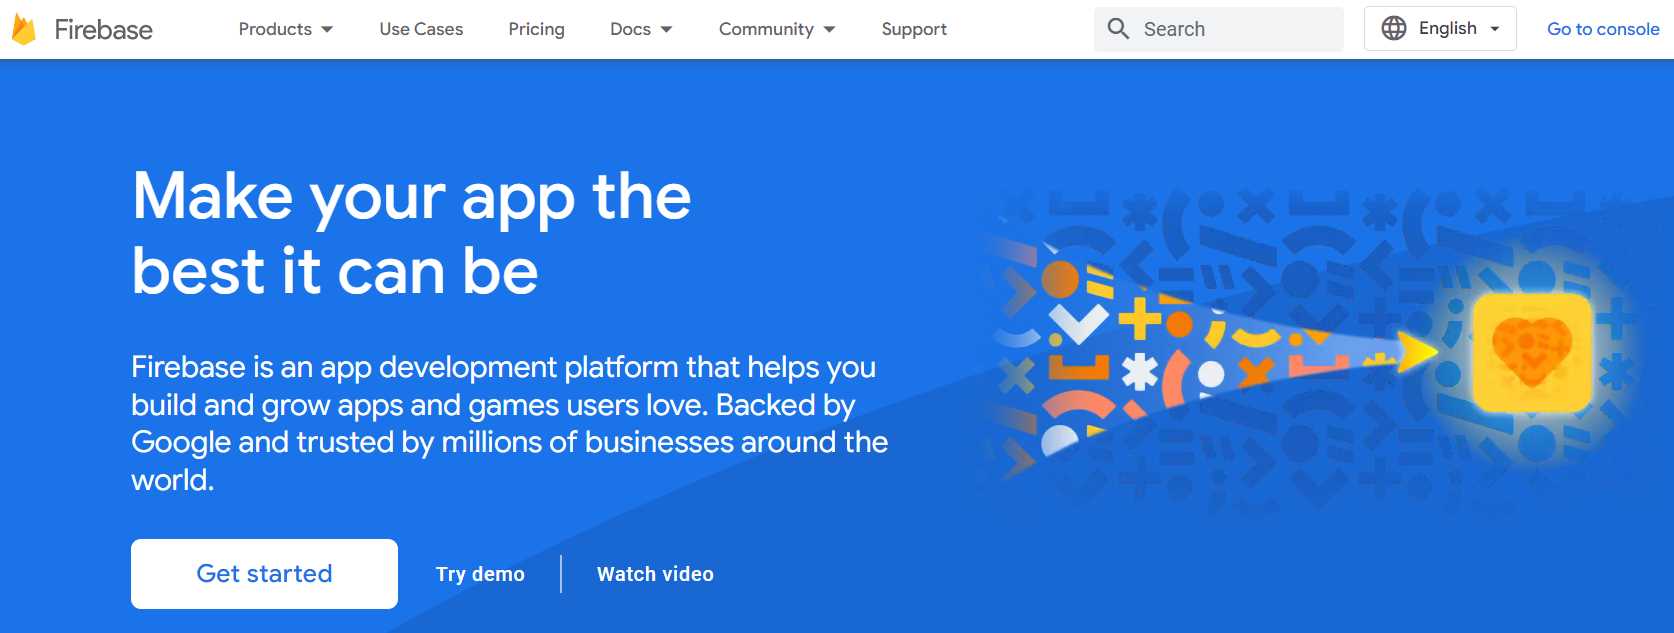
Figure 3-a: Firebase Front Page
Note: The Firebase webpages shown throughout this chapter might change over time. However, you should still be able to continue with the steps provided easily.
Most of the time, I leave the process of setting up the back end for the last part of my books, but this time around, I will do the opposite.
I’m going to focus on the back end and leave it ready so that in the remaining chapters, we can focus exclusively on the creation of the application with Svelte. Let’s do that.
Getting started with Firebase
Getting started with Firebase is very easy. You need to be signed in with a Google Workspace or Gmail account.
On the Firebase home page, click Get started—this will take us to the Firebase console.
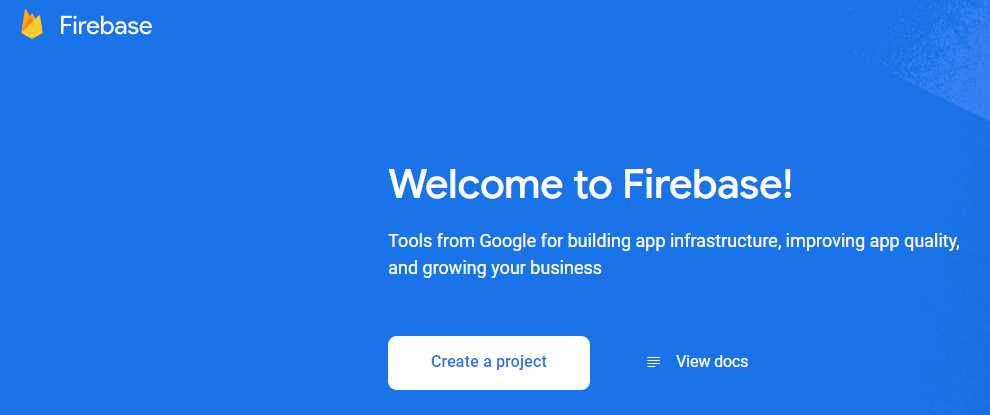
Figure 3-b: Firebase Console Front Page
Next, click Create a project. At this stage, we can indicate our Firebase project name. In my case, I’ll be calling the project SvelteSuccinctlyApp.
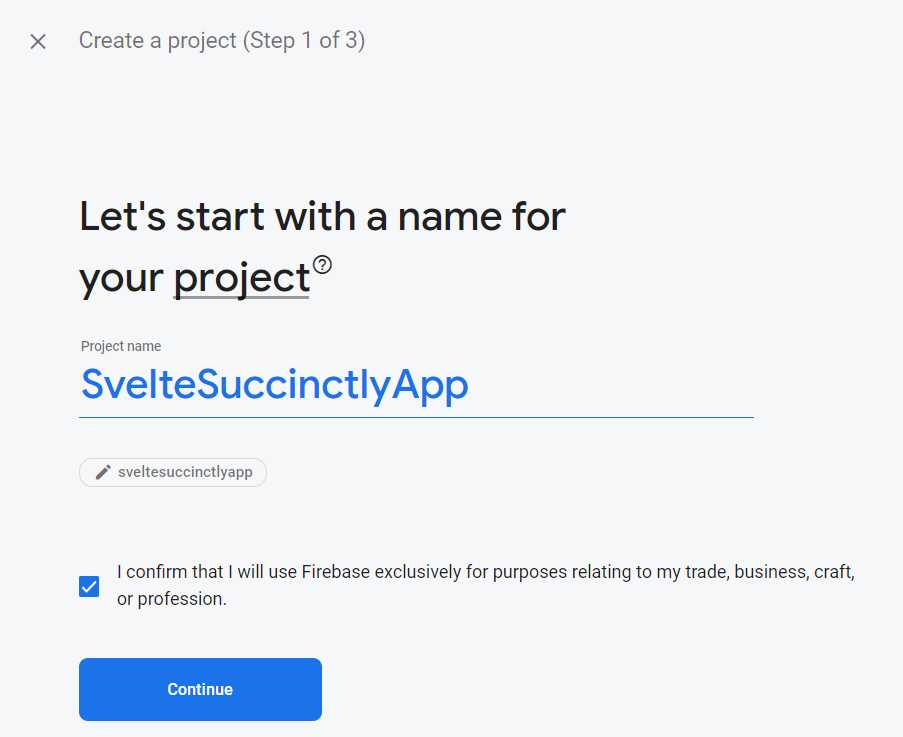
Figure 3-c: Creating a Firebase Project (Step 1 of 3)
Once you’ve entered the project name, click Continue.
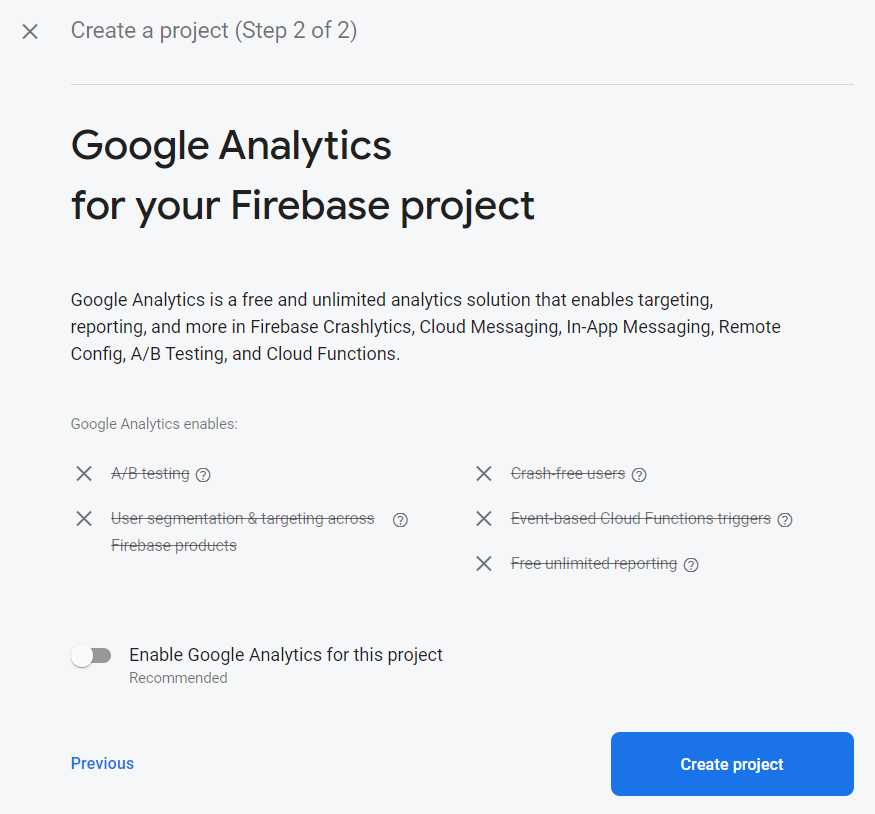
Figure 3-d: Creating a Firebase Project (Step 2 of 3)
By default, Firebase enables Google Analytics for this project, but we’ll disable it since we don’t need it.
Now, click Create project to create the Firebase project.
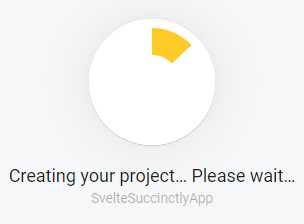
Figure 3-e: Creating a Firebase Project
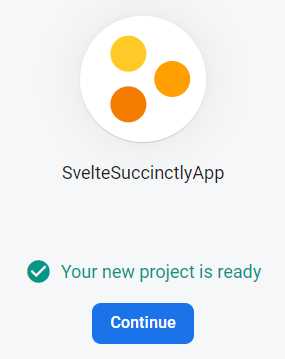
Figure 3-f: Creating a Firebase Project (Step 3 of 3)
Once the Firebase project is ready, click Continue, and we’ll be directed to the project’s overview page within the Firebase console.

Figure 3-g: Firebase Project Overview Page
Click the web icon (highlighted in red in Figure 3-g) to add an app to the Firebase project. In our case, we will be building a web application using Svelte, so we need to click the web icon.
Next we’ll see the Add Firebase to your web app page, where we can register our app. In my case, I’ll name it SvelteWebApp.
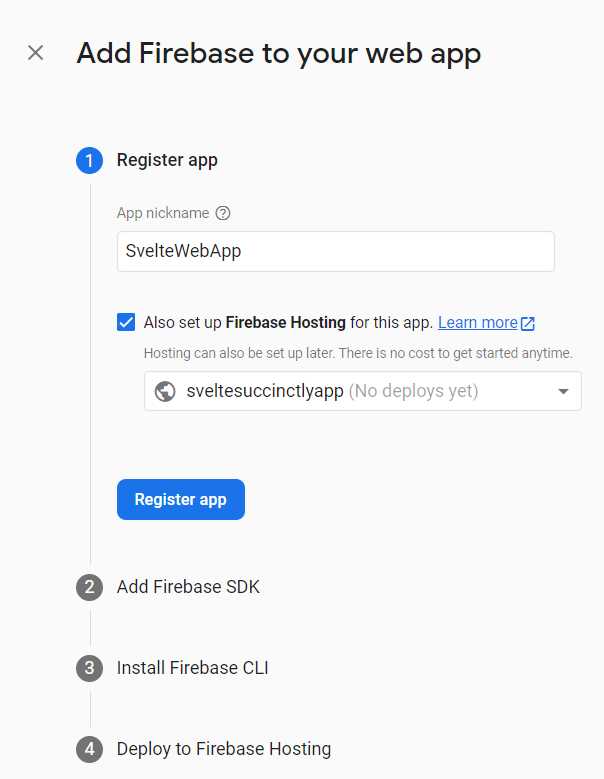
Figure 3-h: Add Firebase to your web app
I’m also going to select the option Also set up Firebase Hosting for this app, which will later allow us to deploy the application to Firebase Hosting without breaking a sweat. To continue, click Register app.
We’ll see the steps to include the Firebase SDK in our Svelte project, as shown in the following figure.
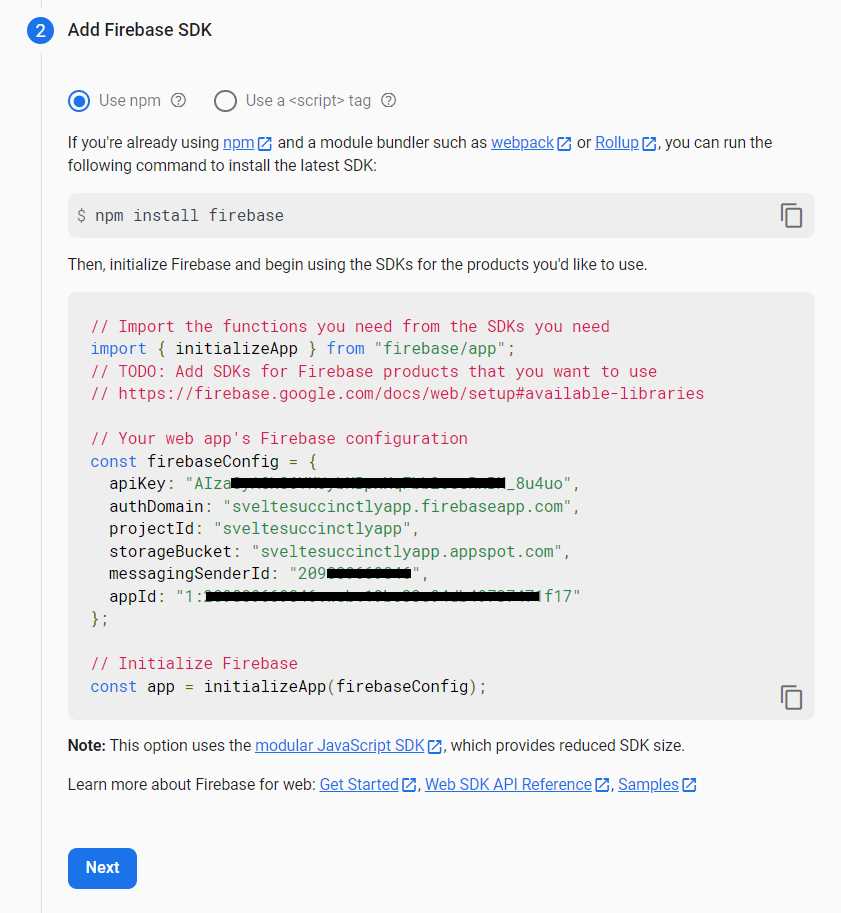
Figure 3-i: Add Firebase SDK
Note: I’ve hidden the apiKey, messagingSenderId, and appId, as these are specific to my Firebase environment and cannot be shared. For your Firebase environment, you’ll have different values.
Adding the Firebase SDK includes two steps. The first step is to install Firebase in the project by executing the npm install firebase command.
Let’s switch over to our project in VS Code and execute the following command using the built-in terminal.
Code Listing 3-a: Installing Firebase in Our Project
npm install firebase |
After executing this command, you’ll see within the built-in terminal an output similar to the following.
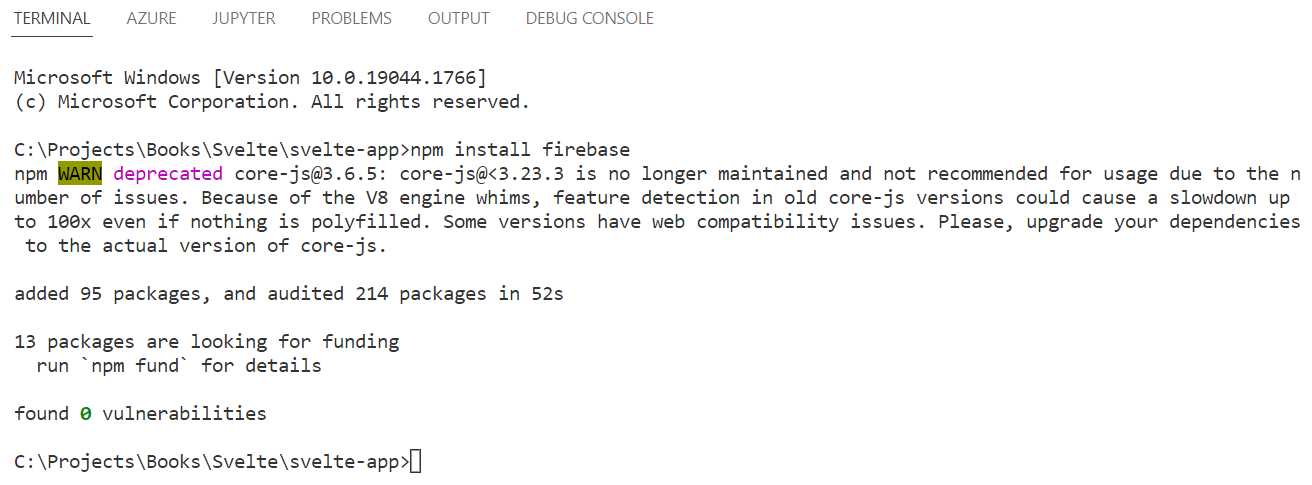
Figure 3-j: Installing Firebase within VS Code
With the Firebase SDK installed, let’s initialize Firebase. To do that, let’s create within the src folder of our Svelte project a new file called firebase.js. Copy the code shown in Figure 3-i. This is how it appears in VS Code on my environment.
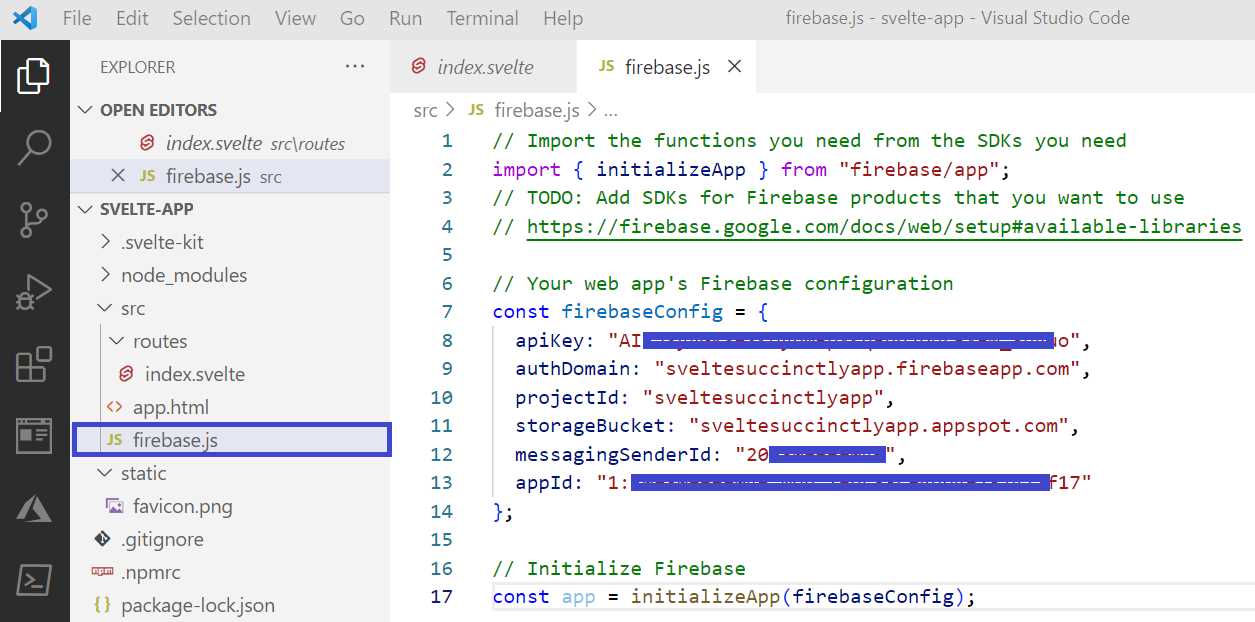
Figure 3-k: The firebase.js File (VS Code)
Note: I’ve hidden the apiKey, messagingSenderId, and appId, as these are specific to my Firebase environment and cannot be shared. For your Firebase environment, you’ll have different values.
Here is the actual firebase.js code.
Code Listing 3-b: The firebase.js Code
import { initializeApp } from "firebase/app"; const firebaseConfig = { apiKey: "Aiz...", authDomain: "sveltesuccinctlyapp.firebaseapp.com", projectId: "sveltesuccinctlyapp", storageBucket: "sveltesuccinctlyapp.appspot.com", messagingSenderId: "209...", appId: "1:209..." }; // Initialize Firebase const app = initializeApp(firebaseConfig); |
Note: I’ve removed the apiKey, messagingSenderId, and appId values (highlighted in yellow), as these are specific to my Firebase environment and cannot be shared. For your Firebase environment, you’ll have different values.
Now that we’ve set up the Firebase SDK and created the firebase.js file within VS Code, we can click Next within the Firebase console.
Figure 3-l: Add Firebase SDK (Final Step)
The next step is to install the Firebase CLI, which will allow you to deploy the application to Firebase Hosting later (if you wish to do that).
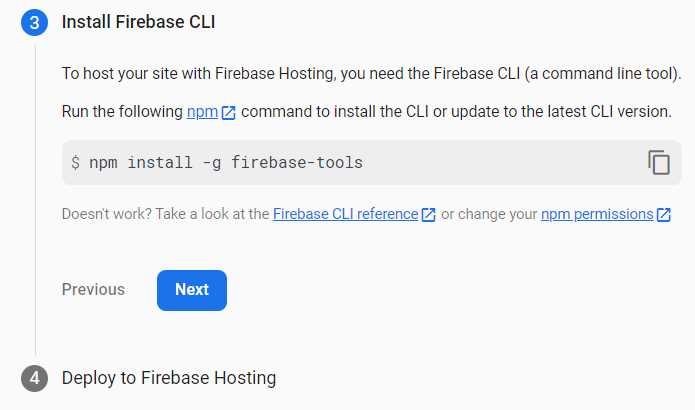
Figure 3-m: Install Firebase CLI
Let’s switch back to VS Code, and within the built-in terminal, execute the npm install -g firebase-tools command.
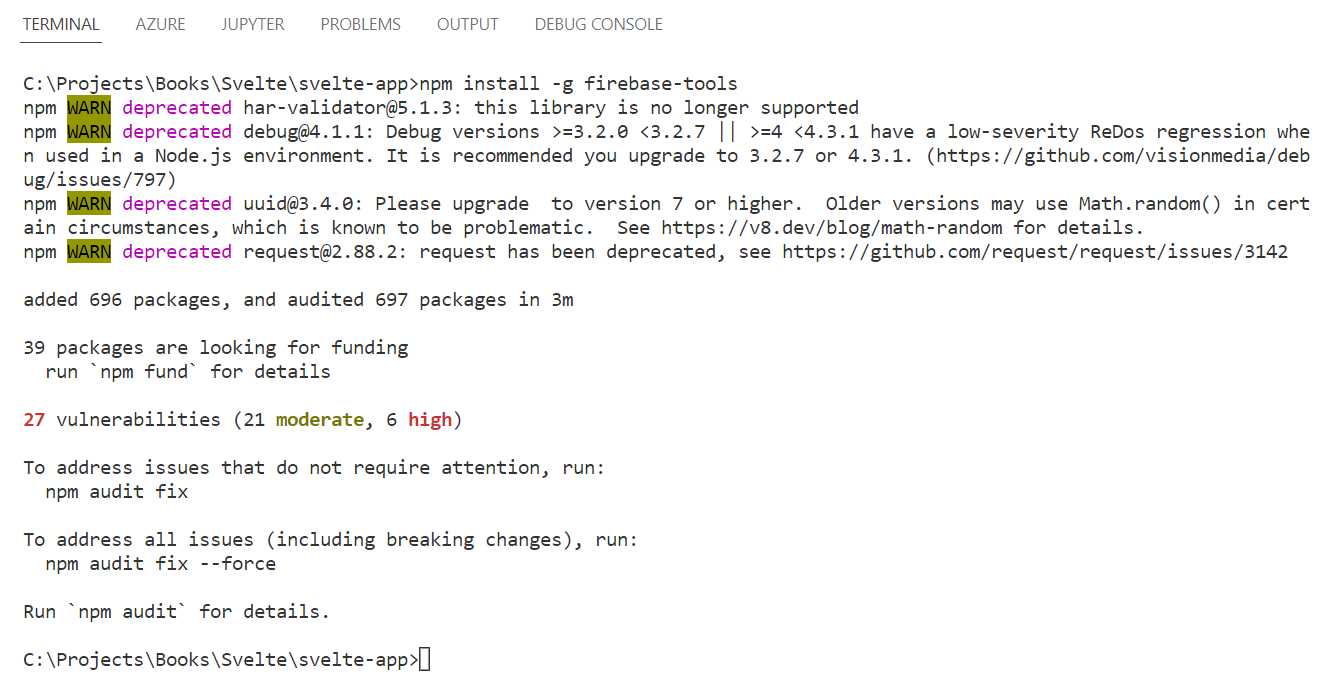
Figure 3-n: Installing the Firebase CLI
Once the Firebase CLI is installed, let’s click Next in the Firebase console.
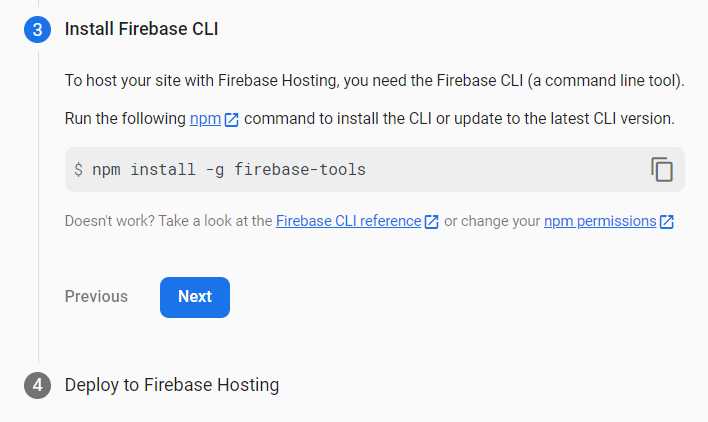
Figure 3-o: Installing the Firebase CLI (Final Step)
We’ll now be able to see the following.
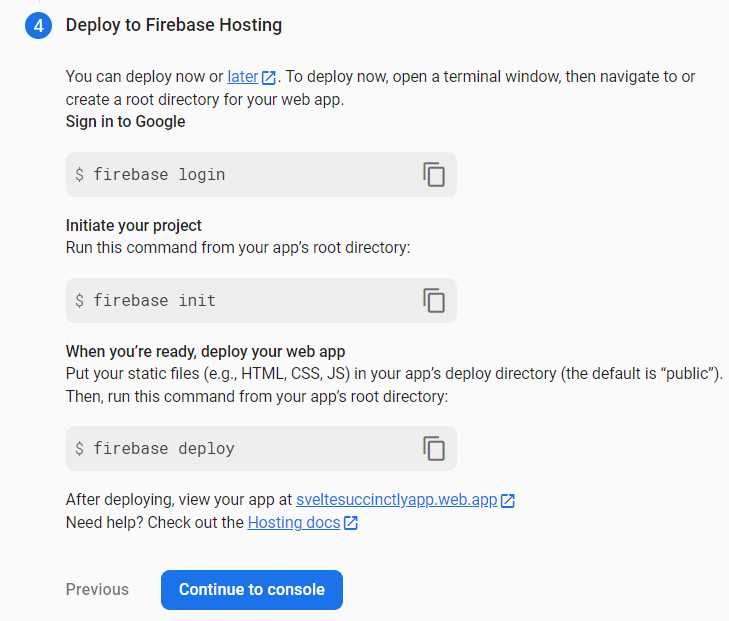
Figure 3-p: How to Deploy to Firebase Hosting
Within this step, you’ll see the commands you can later use to deploy the Svelte application to Firebase Hosting (if you wish to do so).
Note: Copy these commands individually and save them, so they can be used later to deploy to Firebase Hosting the Svelte application you will build.
To finalize this phase, let’s click Continue to console. Notice that the application appears on the console’s main page (highlighted in red).
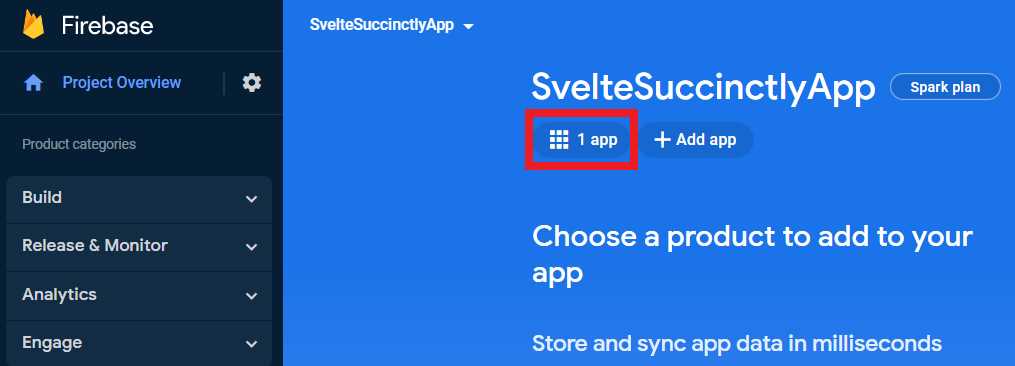
Figure 3-q: Firebase Console (With the App Created)
Creating a datastore
Now that we have created the Firebase application, we need a Firestore database, where the application’s data will be kept. So, click this option and then click Create database.
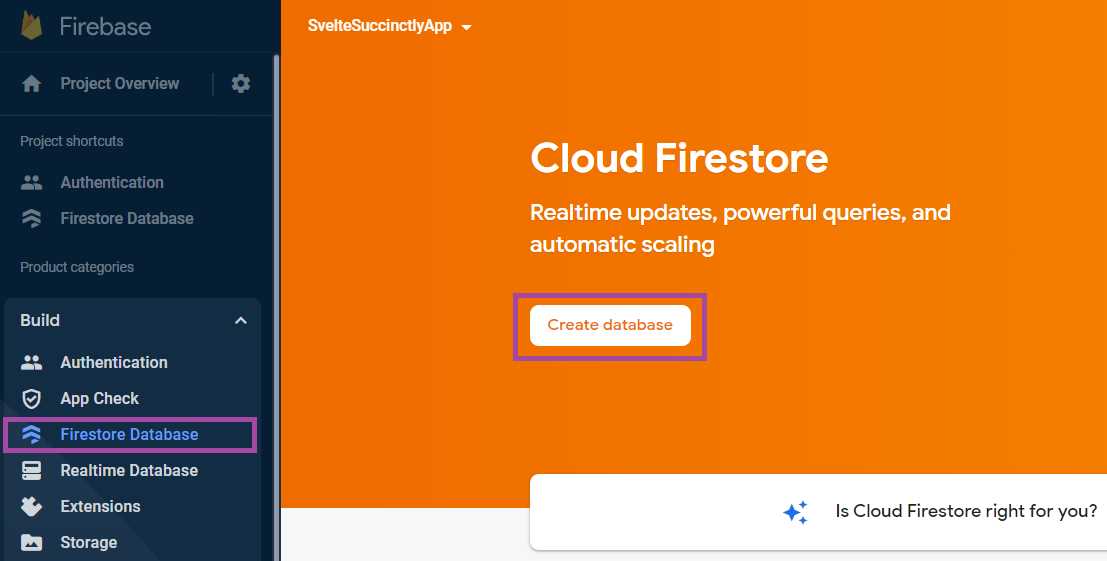
Figure 3-r: Firebase Console (The Firebase Database Option—Cloud Firestore)
We’ll be presented with the following screen.
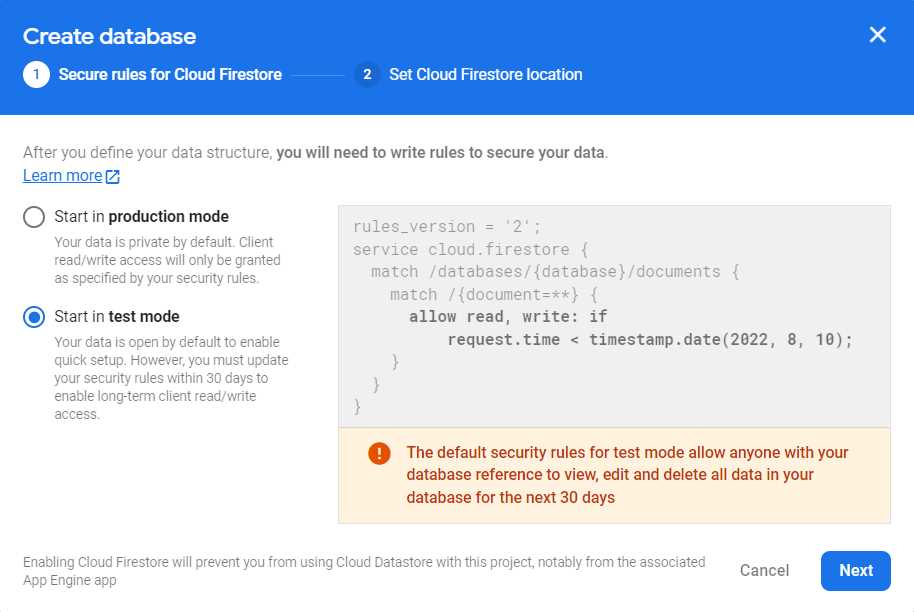
Figure 3-s: Firebase Console (Create database—Step 1)
Make sure you select the option Start in test mode and click Next. You’ll see the following screen.
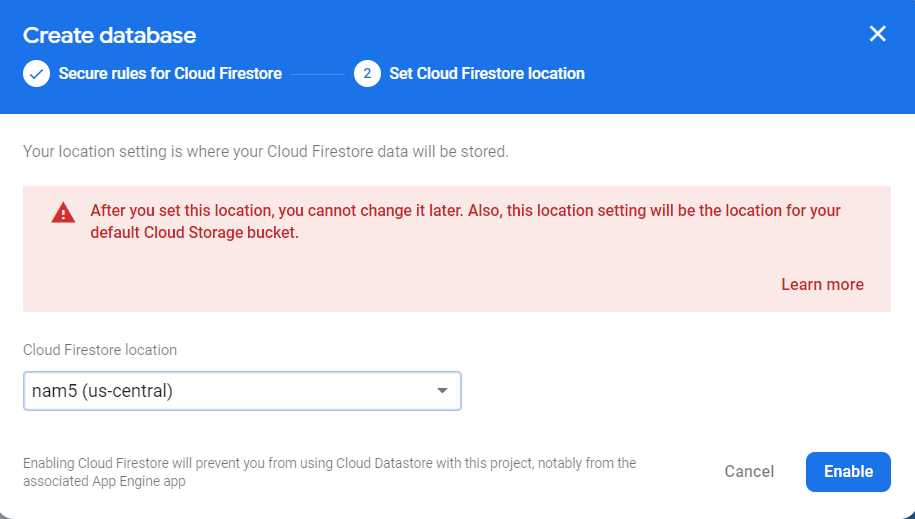
Figure 3-t: Firebase Console (Create database—Step 2)
At this point, you can choose a different option for the Cloud Firestore location. In my case, I will go with the default option with which I’ve been presented.
If you would like your database hosted in a different region, please select another location now, since you won’t be able to change it later.
Click Enable, and you’ll be directed to the following screen.
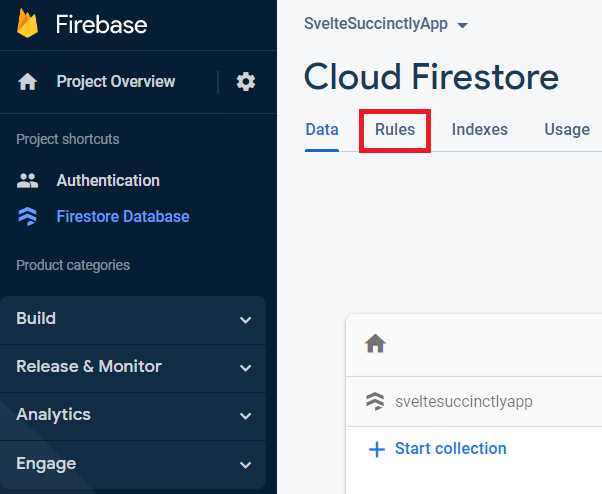
Figure 3-u: Firebase Console—Cloud Firestore Dashboard
Setting permissions
Our application must handle multiple users, so we must ensure that the correct permissions are in place. To do that, click the Rules tab (as highlighted in red in Figure 3-u).
Now you’ll be able to change the default rule. We’ll set the rule to Allow authenticated access on all collections, which is nicely explained on this Stack Overflow thread.
Changing the rule is easy, so copy the snippet from the following code listing (the same one I used on my Firebase environment) and paste it into the editor on the Firebase console.
Code Listing 3-c: New Rule—Allow Authenticated Access on All Collections
service cloud.firestore { match /databases/{database}/documents { match /{document=**} { allow read, write: if request.auth != null; } } } |
The editor will detect unpublished changes, and you must click Publish.

Figure 3-v: Firebase Console—Cloud Firestore (Edit Rules)
Enabling authentication
With the correct permissions in place, the next thing to do is enable user authentication. To do that, click the Authentication option, then click on the Sign-in method tab > Add new provider > Email/Password, as highlighted in red in the following figure.
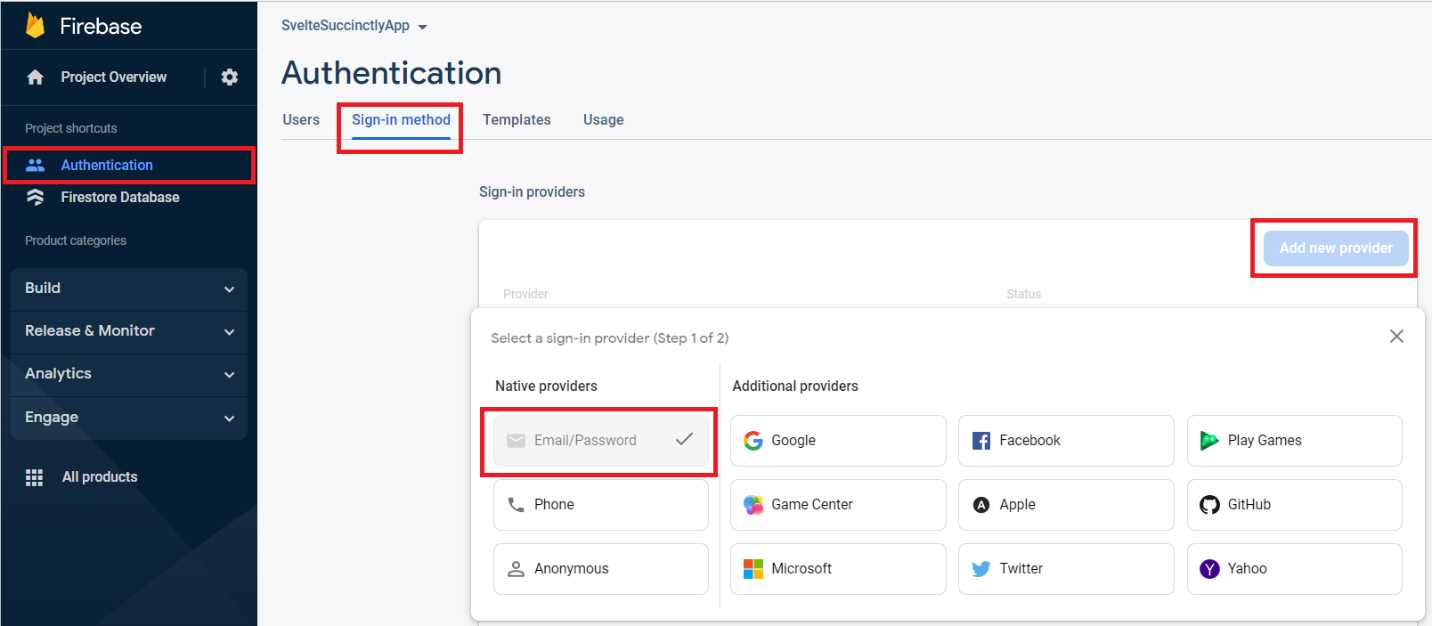
Figure 3-w: Firebase Console—Enabling Email/Password Authentication (Step 1)
Click Enable and Save, as highlighted in red in the following figure. There’s no need to enable the Email link (passwordless sign-in) option, since we won’t use this feature.
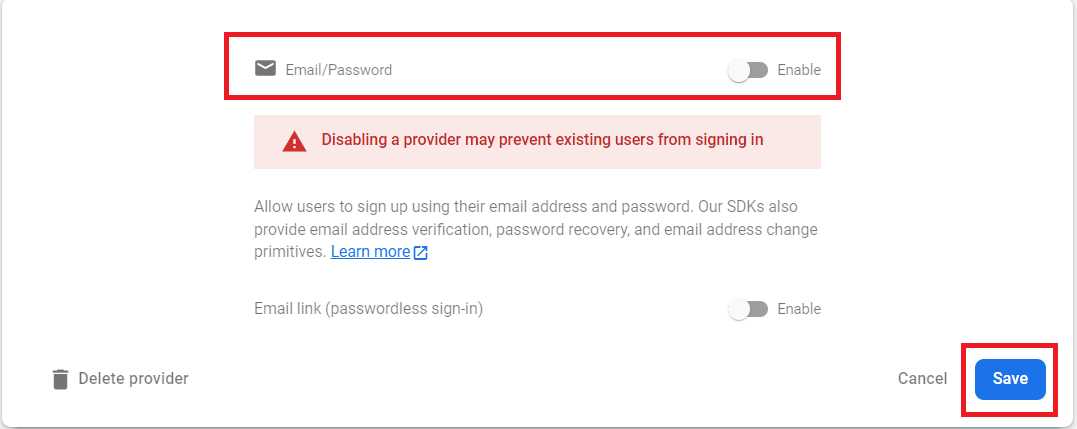
Figure 3-x: Firebase Console—Enabling Email/Password Authentication (Step 2)
Now we have all our back end configured, and there’s nothing else we need to do with Firebase except add code for our app to work with it (which we’ll see later).
Recap
We’ve created the back end that our Svelte application will use—well done! Next, we’ll start exploring the features of our application.
- 1800+ high-performance UI components.
- Includes popular controls such as Grid, Chart, Scheduler, and more.
- 24x5 unlimited support by developers.