
Svelte Succinctly®

CHAPTER 1
Getting Started
Svelte architecture
To understand how Svelte works, let’s explore the following diagram.

Figure 1-a: Svelte Architectural Design
A Svelte application, just like a React or Vue application, also includes components. The Svelte compiler reads these components, and the result is JavaScript that directly updates the DOM.
In contrast, a React or Vue application's architecture uses the virtual DOM approach, which we can observe in the following figure.

Figure 1-b: Virtual DOM Architectural Design
So we have an app that also has components, and there’s a virtual representation of how the application’s UI looks, kept in memory and synced with the current DOM.
Those UI differences between the virtual and actual DOM are reconciled, and then the DOM that the browser executes is updated as needed. In other words, with a React or Vue application, there’s much more going on behind the scenes.
Technically speaking, there’s nothing wrong with the virtual DOM approach used by frameworks like React and Vue—otherwise, they wouldn’t be as popular as they are. It’s just a different way of doing things with Svelte.
There are certain performance advantages and less code overhead when using a nonvirtual DOM approach. To better understand what inspired Svelte’s creator to use a compiled method, take a look at this article that dives a bit deeper into the subject.
Now that we have a high-level understanding of Svelte’s architecture, let’s install it.
Installing Node.js
To get started with Svelte, we need to have Node.js installed. You can verify if you have Node.js installed by opening the command prompt or terminal and executing the following command.
Code Listing 1-a: Check if Node.js Is Installed
node --version |
In my case, I have version 16.14.0 installed.

Figure 1-c: Node.js Version Installed
Any version of Node.js later than version 8 is sufficient for working with Svelte. However, I encourage you to use one of the most recent versions, which you can download from the Node.js website. The long-term support (LTS) version is always a safe bet.
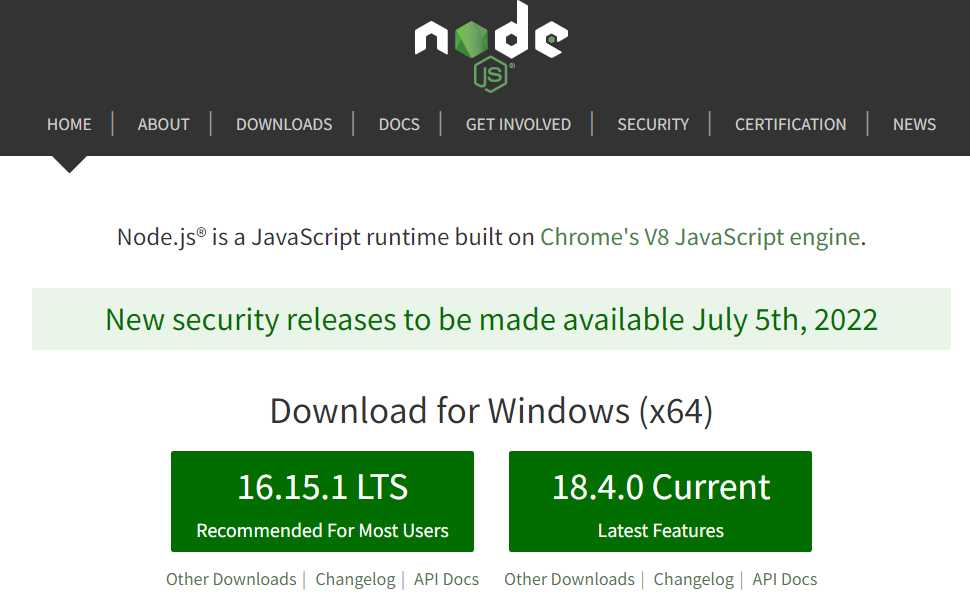
Figure 1-d: Node.js Website Front Page
Once you have downloaded Node.js, execute the installer file. Once you have run the installer, you'll see the following screen. Click Next to continue the installation process.
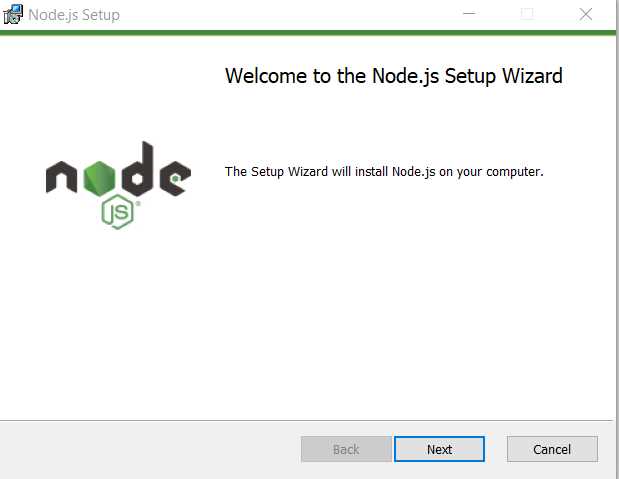
Figure 1-e: Initial Node.js Installation Screen
You’ll be asked to accept the license terms and click Next to carry on with the installation. At this stage, you'll see the screen where you can select the Node.js installation folder.

Figure 1-f: Node.js Installation (Destination Folder Screen)
I usually leave the default installation folder and click Next; however, you can choose a different folder if you prefer. With that done, click Next to continue the installation.
At this point, you'll see the Custom Setup screen. In my case, I always use the default options, as you can see in the following figure.

Figure 1-g: Node.js Installation (Custom Setup Screen)
To continue the installation, click Next. After doing that, you should see the following screen.
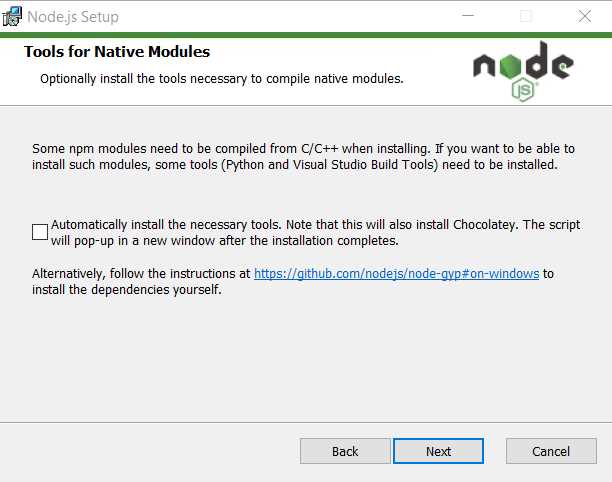
Figure 1-h: Node.js Installation (Tools for Native Modules Screen)
You may select the option Automatically install the necessary tools, which allows the Node.js installer to install any other dependency needed using Chocolatey. To continue the installation, click Next.

Figure 1-i: Node.js Installation (Ready to install Node.js Screen)
Click Install to deploy the Node.js runtime and files in the installation folder previously selected. The process is usually quick.
If a previous version of Node.js exists on your machine, that version gets removed before deploying the newer version. Once the new files have been installed, you'll see the following screen.

Figure 1-j: Node.js Installation (Node.js Setup Wizard Screen—Finish)
To finalize the installation, all we need to do is click Finish. Now that Node.js is installed, the next step is to prepare the development environment.
Svelte with VS Code
I’ll use Visual Studio Code (VS Code) as my editor and development environment of choice throughout this book. You should add the Svelte for VS Code extension, because it is a requirement and will provide the necessary tooling to work with Svelte components, templates, and syntax.
We can get this extension by clicking the extension's icon in VS Code, writing the word Svelte under the extensions search box, and then clicking the extension’s Install button.
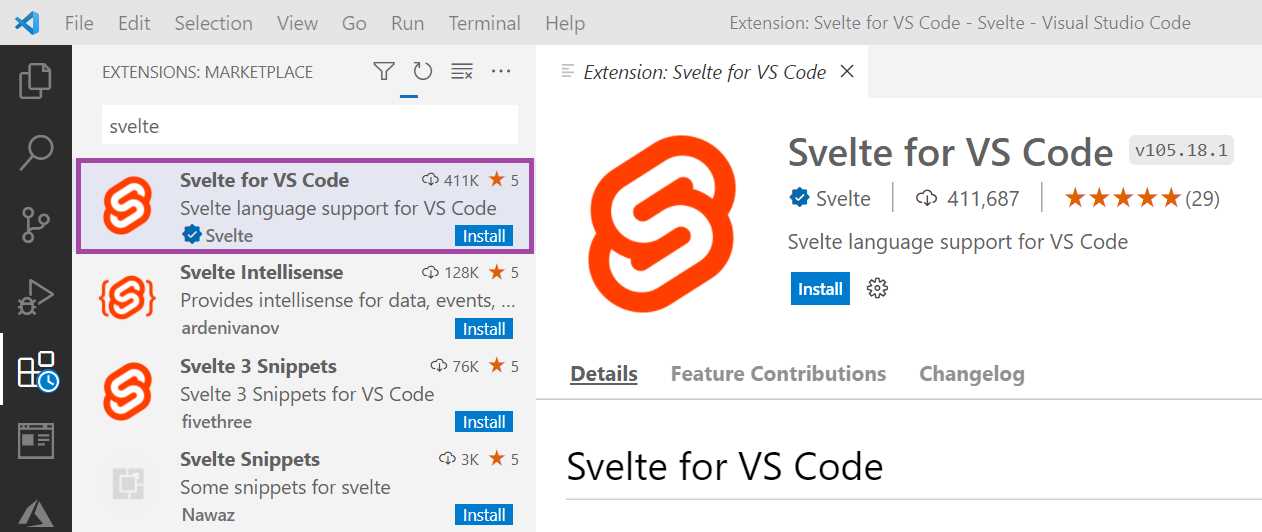
Figure 1-k: Svelte for VS Code Extension
Creating a Svelte project
With VS Code and the Svelte extension ready, we can create a Svelte application. The easiest (but no longer maintained) way to do this is using the Svelte template—which you can do by executing the following commands.
Code Listing 1-b: Creating a Svelte Project (Using the Svelte Template)—No Longer Maintained
npx degit sveltejs/template svelte-app |
cd svelte-app |
Another way is to use Vite (pronounced “Veet”) and select the svelte option by running the following command.
Code Listing 1-c: Creating a Svelte Project (Using Vite)
npm init vite |
A third (and my preferred) way is to use SvelteKit, a Svelte framework for creating web apps with file system-based routing and server-side rendering, among other benefits. This is the option we’ll be using.
Within VS Code, open the built-in terminal by clicking the Terminal menu option, then click New Terminal and enter the following command.
Code Listing 1-d: Creating a Svelte Project (Using the SvelteKit)
npm create svelte svelte-app |
If the create-svelte package is not installed, you’ll be prompted to install it. So, to continue, enter y.

Figure 1-l: Installing create-svelte (SvelteKit)
Once create-svelte has been installed, you’ll have to choose a Svelte template: SvelteKit demo app or the Skeleton project.
You can use the arrow keys to choose the template you’re interested in establishing as the base for the project and then press Enter.
In my case, I choose the Skeleton project, which is the barebones Svelte project—for following along quickly, I suggest you choose the same one.
Following that, we can choose whether to add type checking with TypeScript. I select No, given that this is not an essential feature for beginners.
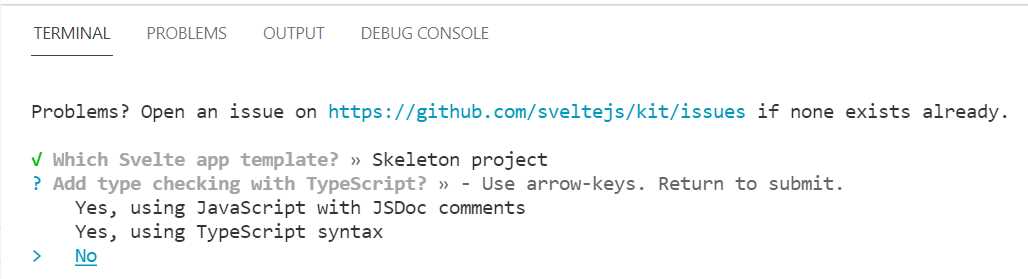
Figure 1-m: Selecting Type Checking
Next, we’ll be asked whether or not to add ESLint for code linting, and I’ll also select No.
Following that, we’re asked whether we want to add Prettier for code formatting, and I choose No.
There’s also an option to add Playwright for browser testing, and I select No.
With that done, the project is ready, and the following steps can be executed.
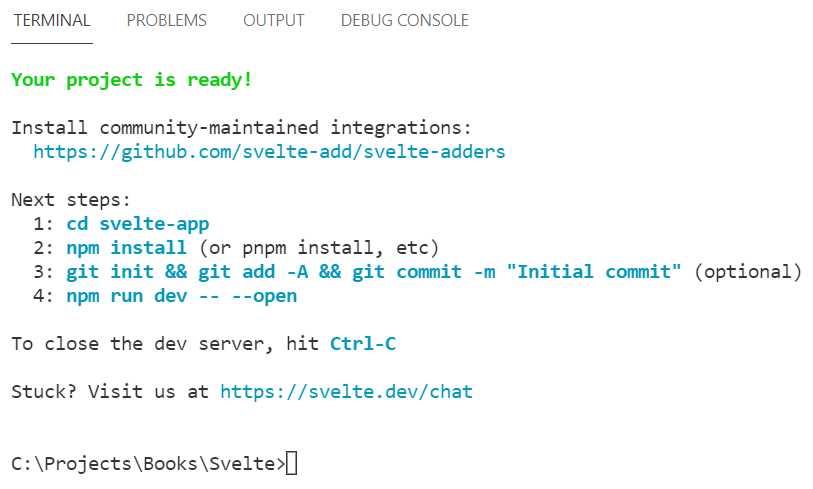
Figure 1-n: SvelteKit Skeleton Project Ready
To run the project as is, we can type in the cd svelte-app command within the built-in VS Code terminal, then run npm install to get all the required project dependencies installed, and then execute npm run dev.
Code Listing 1-e: Final Preparation Steps (SvelteKit Skeleton Project)
cd svelte-app |
npm install |
npm run dev |
Once done, you’ll be able to open your browser and point to the Local URL. In my case, this is http://localhost:3000/.

Figure 1-o: SvelteKit Skeleton Project Running (Built-in Terminal View)
When you open the browser, you’ll see the following webpage.

Figure 1-p: SvelteKit Skeleton Project Running (in the Browser)
Recap
If you’ve followed along until now, well done. We now have our barebones Svelte project created and ready, and we have everything we need to explore Svelte features and transform this into a practical application.
- 1800+ high-performance UI components.
- Includes popular controls such as Grid, Chart, Scheduler, and more.
- 24x5 unlimited support by developers.