
Svelte Succinctly®

CHAPTER 7
Back-end App Functionality
Quick intro
We’ve covered quite a bit of ground and are now ready to wrap up this book with this final chapter, which will cover application-specific, back-end functionality. Let’s begin by talking about the static list of available books.
api/index.js
The list of books on the application’s main page is retrieved from the index.js file within the src/routes/api folder.
Code Listing 7-a: The Finished index.js File (src/routes/api Folder)
export const get = () => { return { body: [ { b_id: 1, title: 'MonoGame Role-Playing Game Development Succinctly', cover: 'https://cdn.syncfusion.com/ content/images/downloads/ ebook/ebook-cover/ monogame-role-playing-game-development-succinctly.png', description: 'For MonoGame developers looking to build their own role-playing game.', url: 'https://www.syncfusion.com/succinctly-free- ebooks/ monogame-role-playing-game-development-succinctly' }, { b_id: 2, title: 'Database Design Succinctly', cover: 'https://cdn.syncfusion.com/ content/images/downloads/ ebook/ebook-cover/ database-design-succinctly.png', description: 'Model the user’s information into data in a computer database system.', url: 'https://www.syncfusion.com/succinctly-free- ebooks/database-design-succinctly' }, { b_id: 3, title: 'Azure Virtual Desktop Succinctly', cover: 'https://cdn.syncfusion.com/ content/images/downloads/ ebook/ebook-cover/ azure-virtual-desktop-succinctly.png', description: 'Azure Virtual Desktop is a way to serve Windows resources over the internet.', url: 'https://www.syncfusion.com/succinctly-free- ebooks/azure-virtual-desktop-succinctly' }, { b_id: 4, title: 'Azure Durable Functions Succinctly', cover: 'https://cdn.syncfusion.com/ content/images/downloads/ ebook/ebook-cover/ azure-durable-functions-succinctly.png', description: 'Using Durable Functions, create stateful objects entirely managed by the extension.', url: 'https://www.syncfusion.com/succinctly-free- ebooks/azure-durable-functions-succinctly' }, ], }; }; |
Note: The items and lines highlighted in yellow in the preceding listing are single-line strings, and I’ve split them into multiple lines to make the listing more readable. However, if you are going to copy and paste the content of this listing elsewhere, make sure those highlighted items aren’t split into multiple lines.
Let’s review what’s going on. Essentially, we are exporting a single function called get that returns a hard-coded JSON object containing a body property with an array of objects (each representing a book).
Each book object has various properties, such as the book ID (b_id), the book title (title), the book cover (cover), the book description (description), and the book URL (url).
index.js is exposed as an API endpoint, which means that if you run the application from the built-in terminal in VS Code using the npm run dev command, you’ll be able to access the endpoint as http://localhost:3000/api (if your app runs on port 3000, like mine).
Following is how it looks in my environment.

Figure 7-a: The Static List of Available Books (Exposed as an API Endpoint)
Note: I just included four books within that list. You can add others if you wish. You can also think for the future about how to make this list dynamic and store the available books in Firebase instead.
The list of static books is retrieved within index.svelte (found under the root of the src/routes folder) by the load function, which uses the browser’s built-in fetch API to access the application’s API endpoint (/api) and get the data.
export const load = async({fetch}) => {
const res = await fetch("/api")
const books = await res.json()
return {
props: {
books,
},
}
}
That’s how the list of available books is retrieved. As you can see, it’s straightforward to create an API endpoint with SvelteKit.
utils.js
Another key aspect of our application is the set of utility functions available for validating data used by the Sign in and Sign up pages. Let’s have a look at these functions.
Code Listing 7-b: The Finished utils.js File (src/lib Folder)
export const checkEmail = (email) => { const pattern = new RegExp("([!#-'*+/-9=?A-Z^-~-]+(\.[!#-'*+/-9=?A-Z^-~-]+)*|\"\(\[\]!#-[^-~ \t]|(\\[\t -~]))+\")@([!#-'*+/-9=?A-Z^-~-]+(\.[!#-'*+/-9=?A-Z^-~-]+)*|\[[\t -Z^-~]*])") return pattern.test(email) } export const loginChecks = (email, pwd) => { let res = undefined
if (!checkEmail(email)) { res = { content: "The email is not formatted correctly.", title: "Invalid email", alertType: "alert-primary", } } else if (pwd?.length < 8) { res = { content: "The password must be at least 8 characters long.", title: "Password too short", alertType: "alert-secondary", } } return res } export const registerChecks = (email, pwd, pwd2) => { let res = undefined if (!checkEmail(email)) { res = { content: "The email is not formatted correctly.", title: "Invalid email", alertType: "alert-primary", } } else if (pwd?.toLowerCase() !== pwd2?.toLowerCase()) { res = { content: "The passwords provided do not match.", title: "Passwords do not match", alertType: "alert-secondary", } } else if (pwd?.length < 8 || pwd2?.length < 8) { res = { content: "The password must be at least 8 characters long.", title: "Password too weak", alertType: "alert-secondary", } } return res } export const fbLoginChecks = (e) => { let res = undefined if (e.toString().indexOf("wrong-password") > 0) { res = { content: "The password is incorrect. Please try the correct one.", title: "Incorrect password", alertType: "alert-secondary", } } else if (e.toString().indexOf("user-not-found") > 0) { res = { content: "This user does not exist. Please use a different user or sign up.", title: "User does not exist", alertType: "alert-secondary", } } else { res = { content: "Internal database error. Please try again later.", title: "Internal error", alertType: "alert-danger", } } return res } export const fbRegisterChecks = (e) => { let res = undefined console.log(e.toString()) if (e.toString().indexOf("in-use") > 0) { res = { content: "This user already exists. Please try with a different email.", title: "User exists", alertType: "alert-secondary", } } else { res = { content: "Internal database error. Please try again later.", title: "Internal error", alertType: "alert-danger", } } return res } |
First, we have the checkEmail function. As its name implies, this function validates (using a regular expression) that the email provided is valid (correctly formatted as a proper email address).
Then, we have the loginChecks function, which invokes the checkEmail function and checks the minimum password (pwd) length, returning a message to the user if validation fails. This function is used by the Sign in page.
export const loginChecks = (email, pwd) => {
let res = undefined
if (!checkEmail(email)) {
res = {
content: "The email is not formatted correctly.",
title: "Invalid email",
alertType: "alert-primary",
}
}
else if (pwd?.length < 8) {
res = {
content: "The password must be at least 8 characters long.",
title: "Password too short",
alertType: "alert-secondary",
}
}
return res
}
Then, we have the registerChecks function, which performs the same validations as the loginChecks function.
The only difference is that the registerChecks function also validates that both the password (pwd) and the repeated password (pwd2) are the same. The registerChecks function is used by the Sign up page.
export const registerChecks = (email, pwd, pwd2) => {
let res = undefined
if (!checkEmail(email)) {
res = {
content: "The email is not formatted correctly.",
title: "Invalid email",
alertType: "alert-primary",
}
}
else if (pwd?.toLowerCase() !== pwd2?.toLowerCase()) {
res = {
content: "The passwords provided do not match.",
title: "Passwords do not match",
alertType: "alert-secondary",
}
}
else if (pwd?.length < 8 || pwd2?.length < 8) {
res = {
content: "The password must be at least 8 characters long.",
title: "Password too weak",
alertType: "alert-secondary",
}
}
return res
}
Next, we have the fbLoginChecks function, which executes if an error occurs when attempting to authenticate the user with Firebase.
This function is used by the Sign in page and interprets possible Firebase errors, and it outputs a user-friendly version of the error.
export const fbLoginChecks = (e) => {
let res = undefined
if (e.toString().indexOf("wrong-password") > 0) {
res = {
content:
"The password is incorrect. Please try the correct one.",
title: "Incorrect password",
alertType: "alert-secondary",
}
}
else if (e.toString().indexOf("user-not-found") > 0) {
res = {
content:
"This user does not exist. Please use a different user or sign up.",
title: "User does not exist",
alertType: "alert-secondary",
}
}
else {
res = {
content: "Internal database error. Please try again later.",
title: "Internal error",
alertType: "alert-danger",
}
}
return res
}
Then, we have the fbRegisterChecks function, which has a similar purpose and functionality as the fbLoginChecks function but is used by the Sign up page.
export const fbRegisterChecks = (e) => {
let res = undefined
console.log(e.toString())
if (e.toString().indexOf("in-use") > 0) {
res = {
content:
"This user already exists. Please try with a different email.",
title: "User exists",
alertType: "alert-secondary",
}
}
else {
res = {
content: "Internal database error. Please try again later.",
title: "Internal error",
alertType: "alert-danger",
}
}
return res
}
These are the utility functions used by the Sign in and Sign up pages, primarily for data validation and handling any possible Firebase errors during authentication or user registration.
firebase.js
The firebase.js file, which resides in the root of the src folder of our project, as its name implies, handles everything to do with Firebase.
If you recall, we added the required Firebase parameters in one of the earlier chapters. Here is the finished file.
Code Listing 7-c: The Finished firebase.js File (src Folder)
import { initializeApp } from "firebase/app"; import { getAuth } from "Firebase/auth" import { collection, query, where, doc, addDoc, getDocs, getFirestore, serverTimestamp, deleteDoc } from "Firebase/firestore/lite" // Your web app's Firebase configuration const firebaseConfig = { apiKey: "<< Your Firebase apiKey goes here >>", authDomain: "<< Your Firebase authDomain goes here >>", projectId: "<< Your Firebase projectId goes here >>", storageBucket: "<< Your Firebase storageBucket goes here >>", messagingSenderId: "<< Your Firebase messagingSenderId goes here >>", appId: "<< Your Firebase appId goes here >>" } let app = initializeApp(firebaseConfig); const auth = getAuth(app); let db = getFirestore(app); const favCollection = collection(db, "favs"); const userDoc = (userId) => doc(db, "users", userId); const favDoc = (id) => doc(db, "favs", id) const delFav = async(id) => { await deleteDoc(favDoc(id)) } const addFav = async(book) => { const q = query(collection(db, "favs"), where("title", "==", book.title), where("owner", "==", auth?.currentUser?.uid)) const querySnapshot = await getDocs(q)
if (querySnapshot?.docs?.length === 0) { await addDoc(favCollection, {...book, owner: auth.currentUser.uid, timestamp: serverTimestamp()}) } } const getFavs = async() => { let books = [] let fv = collection(db, "favs") if (auth?.currentUser?.uid !== undefined) { const q = query(fv, where("owner", "==", auth?.currentUser?.uid))
const snapshot = await getDocs(q) books = snapshot.docs.map(doc => { return { ...doc.data(), uuid: doc.id } }) }
return books } export { auth, db, favCollection, userDoc, favDoc, addFav, getFavs, delFav } |
Let’s have a look at what’s going on. We import the required libraries and modules, such as the Firebase SDK and authentication library.
import { initializeApp } from "firebase/app";
import { getAuth } from "Firebase/auth"
Then, we import the objects and methods we need to use to interact with the Cloud Firestore database.
import { collection, query, where, doc, addDoc, getDocs, getFirestore,
serverTimestamp, deleteDoc } from "Firebase/firestore/lite"
Then, we specify the Firebase configuration parameters. As explained earlier, please note that these will be specific to your Firebase project.
const firebaseConfig = {
apiKey: "<< Your Firebase apiKey goes here >>",
authDomain: "<< Your Firebase authDomain goes here >>",
projectId: "<< Your Firebase projectId goes here >>",
storageBucket: "<< Your Firebase storageBucket goes here >>",
messagingSenderId: "<< Your Firebase messagingSenderId goes here >>",
appId: "<< Your Firebase appId goes here >>"
}
After that, we declare the constants and variables we will use to interact with Firebase. I’ve added a comment to each so you can understand what each represents.
let app = initializeApp(firebaseConfig); // Firebase app reference
const auth = getAuth(app); // Firebase authentication object
let db = getFirestore(app); // Cloud Firestore database reference
const favCollection = collection(db, "favs"); // List of favorite books
const userDoc = (userId) => doc(db, "users", userId); // Specific user
const favDoc = (id) => doc(db, "favs", id) // Specific book within favorites
Then we have the delFav function, which invokes the deleteDoc method from Firebase that removes a document (a specific book—favDoc(id)) from the Cloud Firestore database.
const delFav = async(id) => {
await deleteDoc(favDoc(id))
}
Next, we have the addFav function. As its name implies, this function is responsible for adding a specific book to the list of favorites for the signed-in user, if it’s not been added before.
This function works because the book to be added to the list of favorites is passed as a parameter to the function.
Then, the favs Cloud Firestore collection that contains the list of favorite books is queried for a book with a title equal to book.title and whose owner is the user currently signed in (auth?.currentUser?.uid).
const addFav = async(book) => {
const q = query(collection(db, "favs"),
where("title", "==", book.title),
where("owner", "==", auth?.currentUser?.uid))
const querySnapshot = await getDocs(q)
if (querySnapshot?.docs?.length === 0) {
await addDoc(favCollection, {...book,
owner: auth.currentUser.uid,
timestamp: serverTimestamp()})
}
}
Suppose that query yields no result (meaning that the book is not yet part of the list of favorite books). In that case, the book is added to the collection by invoking the Firebase addDoc method, indicating the owner (the currently signed-in user: auth.currentUser.uid) and the server timestamp.
Moving on, we find the getFavs function, which retrieves the list of all the favorite books for a specific user (the user currently signed in: auth?.currentUser?.uid).
const getFavs = async() => {
let books = []
let fv = collection(db, "favs")
if (auth?.currentUser?.uid !== undefined) {
const q = query(fv, where("owner", "==",
auth?.currentUser?.uid))
const snapshot = await getDocs(q)
books = snapshot.docs.map(doc => {
return {
...doc.data(),
uuid: doc.id
}
})
}
return books
}
The list of favorite books for the user currently signed in is returned as books.
And finally, we export all the objects, variables, and functions that the rest of the application code will consume as follows.
export {
auth,
db,
favCollection,
userDoc,
favDoc,
addFav,
getFavs,
delFav
}
As you have seen, the Firebase-related functionality of our application was pretty straightforward.
hooks.js
There’s one last item I’d like to cover before we finish the application: Svelte Hooks and server-side rendering (SSR) with the handle function.
Within the root of the src folder of our project, I’ve added a file called hooks.js. Let’s have a look at the finished code for hooks.js.
Code Listing 7-d: The Finished hooks.js File (src folder)
// See: https://kit.svelte.dev/docs/hooks#handle /** @type {import('@sveltejs/kit').Handle} */ export async function handle({ event, resolve }) { const response = await resolve(event, { ssr: event.url.pathname.startsWith('/favorites') });
return response; } |
We can override how SvelteKit does server-side rendering by default for a specific route within our application, in this case, for the Favorites page (/favorites).
By default, SvelteKit prerenders the page on the server-side instead of delivering a blank HTML to the client (browser).
However, by using the handle function, we can indicate if we want to disable SSR for a specific route.
If you think about it, we don’t need the Favorites page to be prerendered, as it’s a protected page and can only be accessed once a user is authenticated.
Disabling SSR for that specific page is as simple as setting the value of the ssr property to false. So, if we want to disable SSR for the Favorites page, we must do the following.
ssr: !event.url.pathname.startsWith('/favorites')
We would need to negate the value of event.url.pathname.startsWith('/favorites') as highlighted in yellow in the preceding code.
In other words, hooks.js doesn’t alter the functionality of the application. Still, it’s a nice feature that can give you more control over how you can interact with SvelteKit’s default behavior.
Running the app
Running the application in development mode is easy, and you must execute the npm run dev command from the built-in terminal within VS Code.
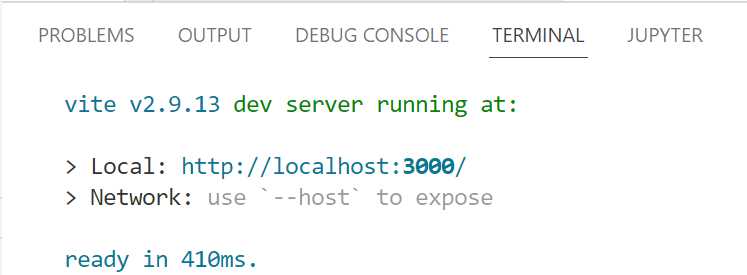
Figure 7-b: Built-in Terminal in VS Code—Running the App
If you’re on a Windows machine and press the Ctrl key and then click on the Local URL (in my case, http://localhost:3000/), you’ll see that your default browser (in my case, Edge) will open and show the application.

Figure 7-c: Running the App—Edge Browser
Note: If you’re using a Mac instead of a Windows machine, press the Command key instead of Ctrl.
Note: As a reminder, you can find the code repository of the finished application on Github.
Let’s give the application a try. Perform these steps:
- Click Sign in on the app’s main page.
- Click the Don’t have an account? link on the bottom of the Sign in page.
- On the Sign up page, enter the new account details using a valid email address you own, and click Submit.
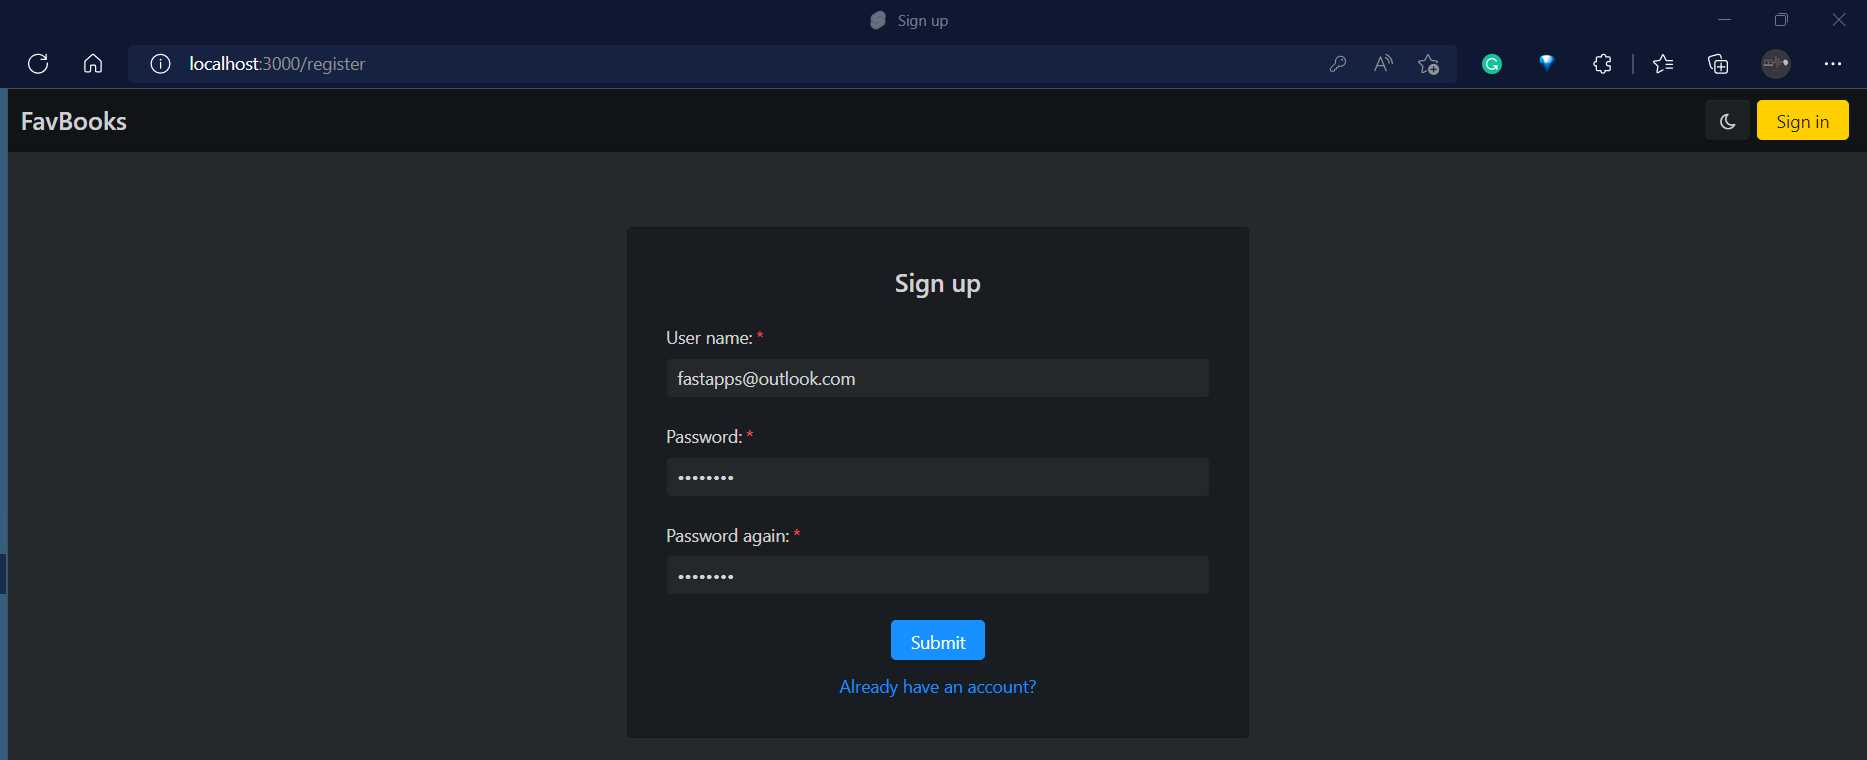
Figure 7-d: Testing the App (Signing up)
If this is a new user, you’ll automatically register, authenticate, and see the following on the Favorites page.

Figure 7-e: Testing the App (Empty Favorites Page)
Notice that the Favorites page is empty, and the Sign out button is now visible.
You’ll have to click the Click here to add one :) link to add a book to the favorites list, which will take you to the application’s main page.
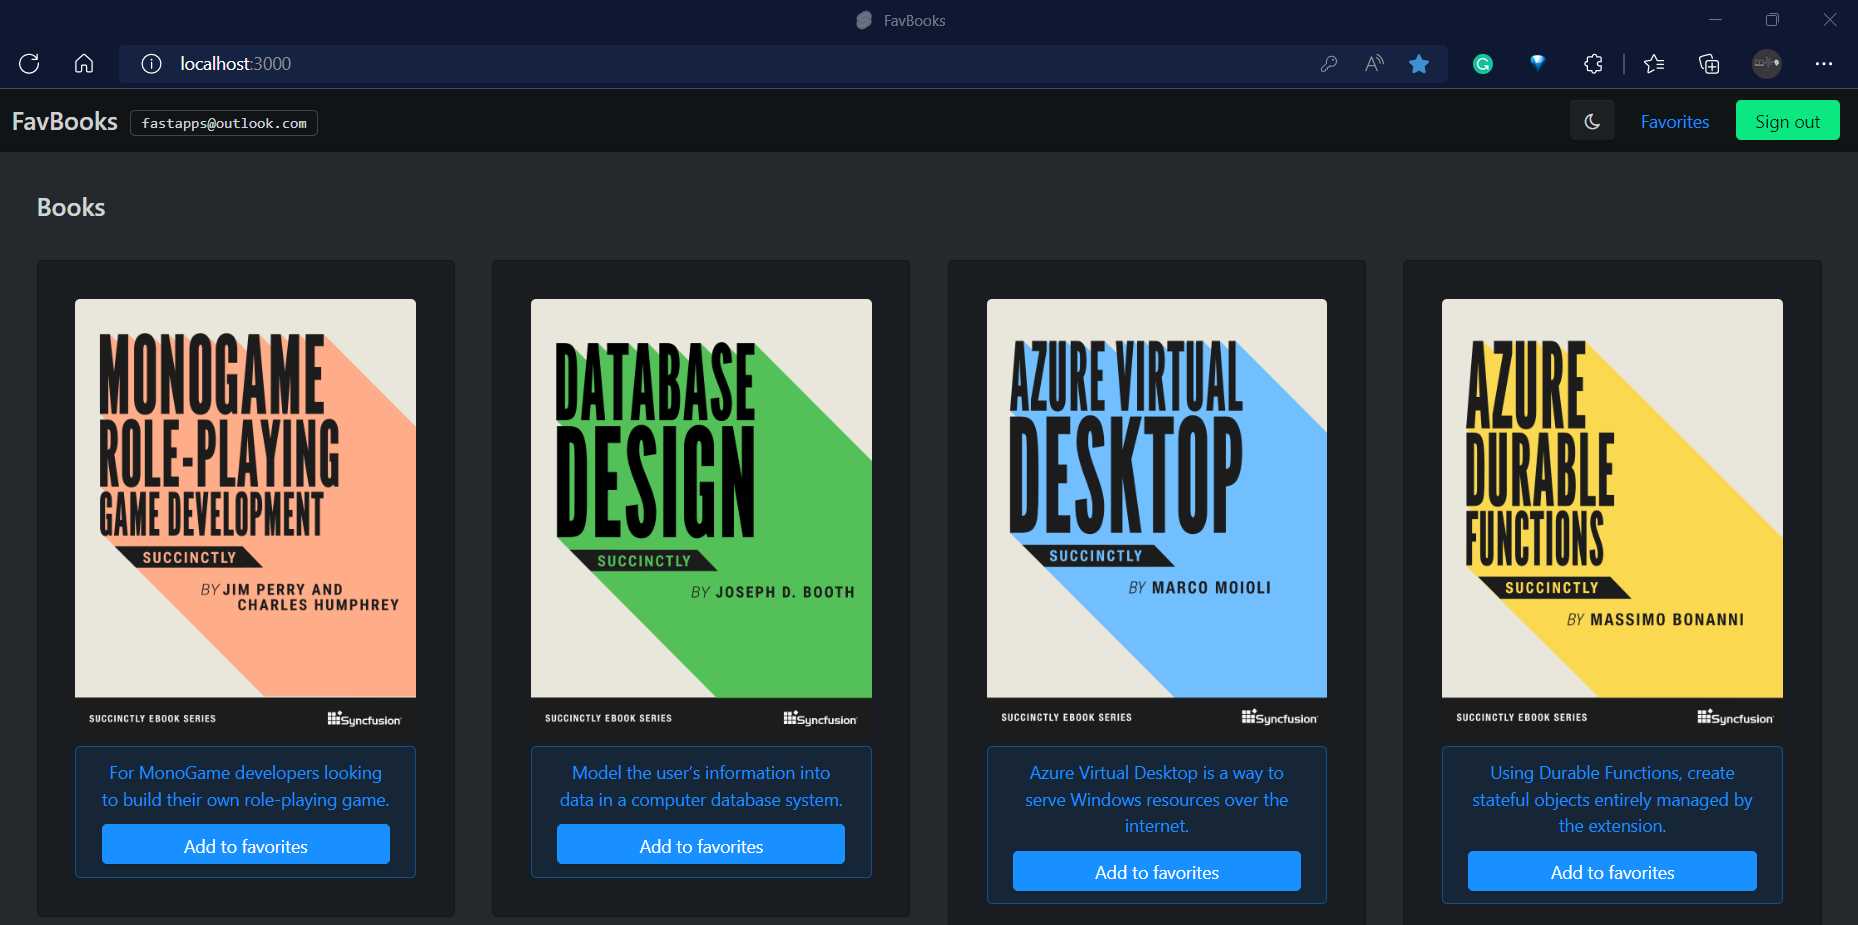
Figure 7-f: Testing the App (Main Page—User Signed In)
On the application’s main page, notice the Sign out button is also visible, and for each book available, there’s an Add to favorites button.
So, click Add to favorites for the first book (as seen from left to right). Once you do that, you’ll be redirected to the Favorites page, and the book should appear on your list of favorites.
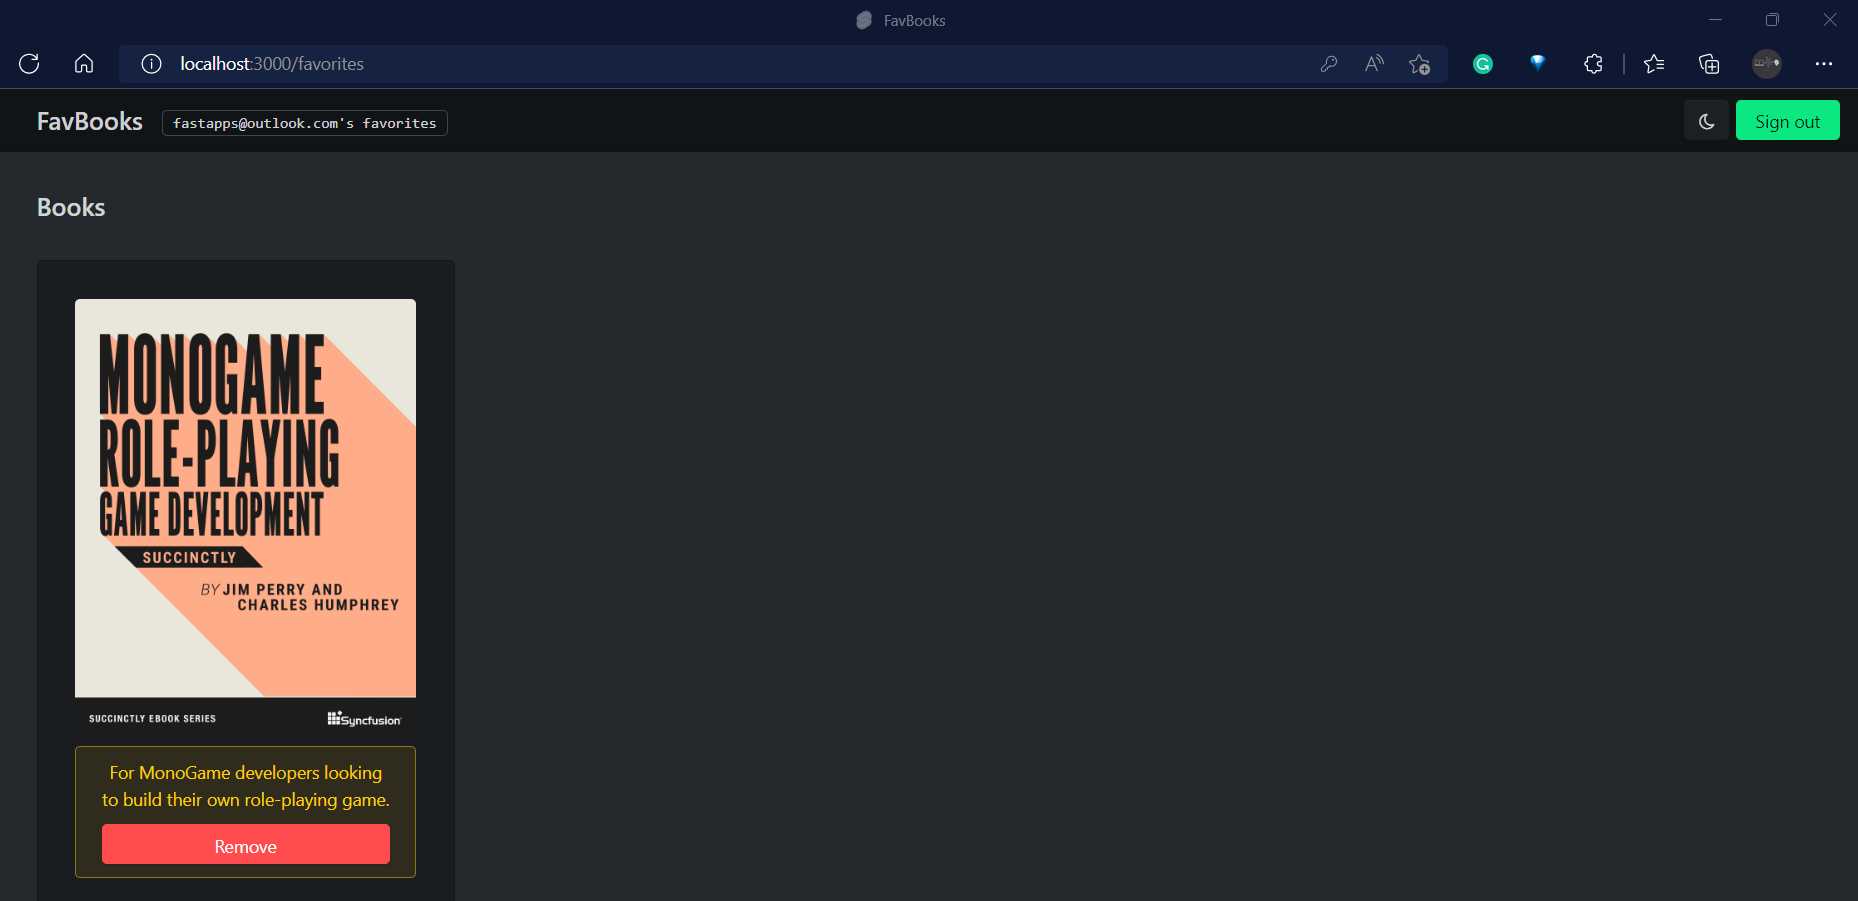
Figure 7-g: Testing the App (Favorites Page with a Book Added—User Signed In)
Great, you have added a book to the list of favorites for this new user!
If you navigate to your Firebase console, click your project, then navigate to the Firestore Database section, you should see your new book within the favs collection, which in my case, looks as follows.
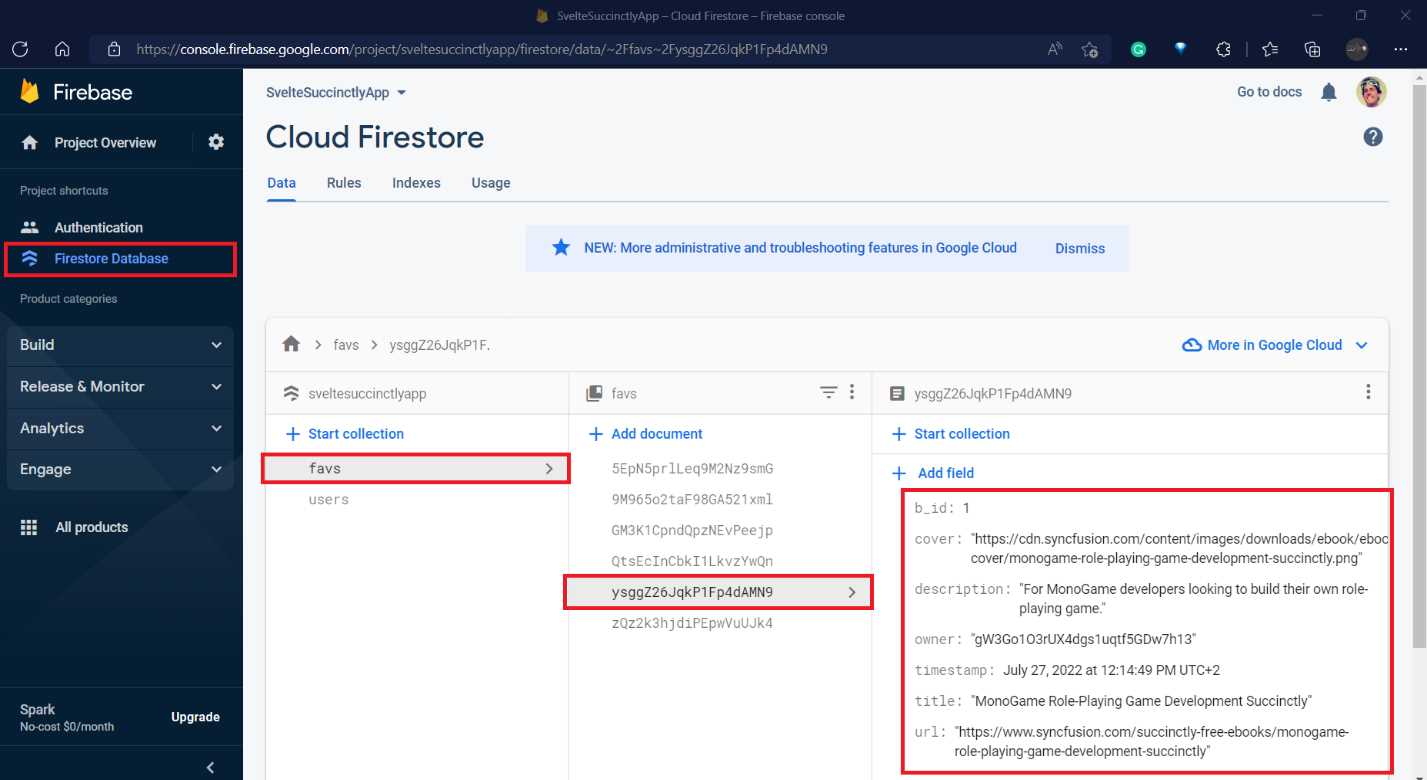
Figure 7-h: Testing the App (Checking the Newly Added Favorite Book—Firebase Console)
You can continue testing the application further and playing with it by creating other user accounts and adding or removing more books from the favorites list for those other users.
Next steps and final thoughts
Well done! It’s exciting that you’re here and have followed along. Hopefully you’ve managed to get everything up and running.
Throughout this book, my goal was to give you a condensed overview of how to build something with Svelte using SvelteKit. I believe we managed to achieve that with the app that we created.
Although we couldn’t cover everything that Svelte and SvelteKit have to offer, we did manage to get acquainted with the essential aspects of Svelte in a short period, and in a succinct way.
Deployment is one aspect we couldn’t cover, given that it depends on the back-end platform of choice. However, we did enable Firebase Hosting as a deployment option, something you might want to explore in your spare time. Nevertheless, many other deployment options are available in the market to consider and explore.
Before closing, I’d like to leave you with some challenges and thoughts on possible next steps in your Svelte learning journey. Something you might want to explore is how to refactor the existing code even further.
For instance, there are quite a few similarities between login.svelte and register.svelte, so it’s perfectly possible to create a common component with shared functionality that both pages can use.
You could also think of making the list of books available non-static and creating an admin panel (accessible only for authenticated users) where you could add and remove those books directly from Firebase.
You could add other authentication features for Google or Microsoft accounts to the application's user authentication mechanism.
Those examples come to mind, but there could be many things to do with the application. If you pursue any of them, implement something extraordinary, and improve on what I’ve done, I’d love to hear from you.
Hopefully, this is just the start of your journey in learning Svelte. Thank you for reading. Until next time, all the best.
- 1800+ high-performance UI components.
- Includes popular controls such as Grid, Chart, Scheduler, and more.
- 24x5 unlimited support by developers.