
Successful Remote Working Succinctly®

CHAPTER 2
Remote Office Setup and Tools
You can work remotely basically everywhere, but to be productive, you need some useful equipment. In this chapter, we’ll see many options, from a basic configuration to a full remote office.
The basics
Of course, you can work some days from the kitchen table, or from other rooms, but if remote working is something you’re doing all day, for a lot of time, you need a dedicated space—ranging from an office in your house, to a dedicated remote office, to a coworking space.
Some hotels offer rooms as “virtual offices” during the day in the low-season, and that can be an interesting choice for important meetings that cannot be interrupted by crying babies or noisy neighbors with leaf blowers.
In every case, in your dedicated room or in every kind of office, you need a comfortable chair, a good desk, and good lighting, possibly from the side (not in front of or behind the monitor).
Note: Some companies have policies in place to fund such furniture, but that also depends on the tax regulations of a given country.
Note: In some countries, working remotely for a company is regulated by law, and the worker should sign a special agreement with the company saying that all the regulations for work safety are respected, including physical ergonomics and other rules.
Laptop or desktop computer and good connectivity
It doesn’t matter if it’s a company device or a personal device (BYOD)—it should be silent, powerful enough to do the job, and the keyboard, mouse (optional), and monitor should be placed ergonomically.
If you’re using a laptop, try to use a laptop stand that allows you to put the monitor in a higher position while keeping the keyboard accessible, or, even better, use an external keyboard.
You can find some tips to improve the ergonomics of your remote workplace here.
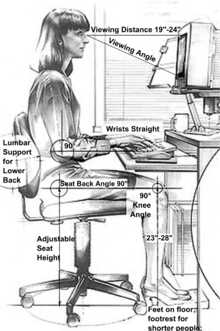
Figure 4: An ergonomic position in front of a PC. Source: Yamavu, Wikipedia.
We don’t need to talk about good connectivity, considering that modern work requires higher amounts of bandwidth every day, and that (if working from home) bandwidth should probably be shared with other people working or studying from home (or chilling on the sofa while streaming movies).
Headphones (with microphone)
I’m a little bit rude on this point, but people shouldn’t be allowed to join meetings if they have poor audio. Most people can tolerate bad video (or no video at all), but they can’t stand bad audio with noise, reverberations, Larsen effects, and so on.
If you’re using your laptop’s integrated speakers and microphone, the effect will be poor in most situations. The simple way to solve most audio problems is by using dedicated headphones (even better if wired) with a built-in microphone. This way, you don’t rely on software echo-cancellation features; your computer has more power to handle other tasks; and as a side effect, people in the room with you only hear your voice and not all the other participants in your video calls.
I own many kinds of headphones: wired, wireless (with and without noise cancellation), over-the-ear, and earbuds. Depending on the length of the meeting, and the kind of involvement that’s required from me, I choose the best headphone for the task.
For example, I’ll use noise-cancelling headphones only for short meetings (one or two hours maximum), because for longer meetings I suffer with the noise cancellation (I can feel some pressure on my eardrum when I’m using those, which can be stressful in the long run).
For meetings lasting all day, I tend to use light wired headphones, so I don’t feel tired after a while (less stress on my neck), and I’m not cut off during important parts of the meeting because of an empty battery.
We’ll see in a following section that we can avoid using headphones if we have a dedicated room with good sound isolation and a good microphone.
Webcam
A webcam is needed in most video calls. You can use the integrated webcam of your laptop, or you can buy one (that’s the only option if you have a desktop computer).
The most important thing about the webcam is its positioning. You should be able to look at the webcam directly, in a natural position, so people on the other side of the “line” will feel your eye contact.
If you’re using your integrated laptop camera, try to position your laptop higher than the normal position, so the webcam doesn’t show the inside of your nose.
Note: An external keyboard can make the positioning of your laptop more ergonomic for your body. Using an external keyboard is mandatory if you’ve put your laptop on a stand or a box for a better view from the built-in webcam. If you start typing when your laptop is not firmly on the desk, it will start bouncing all around, and the video will be terrible to see.
Many people keep the webcam off when they aren’t in a good mood. I’ve seen that turning on the webcam during meetings and sessions improves results, especially when you have to speak a lot.
If you’re not in a good mood, work for it. Try to relax before the call or the session; try to have some quality time in advance so you can give your best during the session. If a call or a session is crucial, reserve the right amount of time before it to prepare physically and mentally.
Note: Knowing that many people have the webcam on the top of their monitor, much conferencing software displays meeting attendees on the top of the screen, so when you look at them, you look nearer the webcam, giving the impression of eye contact.

Figure 5: A good session, messed up by the speaker not looking at the audience all the time.
Always check how you look on camera before the call or the session.
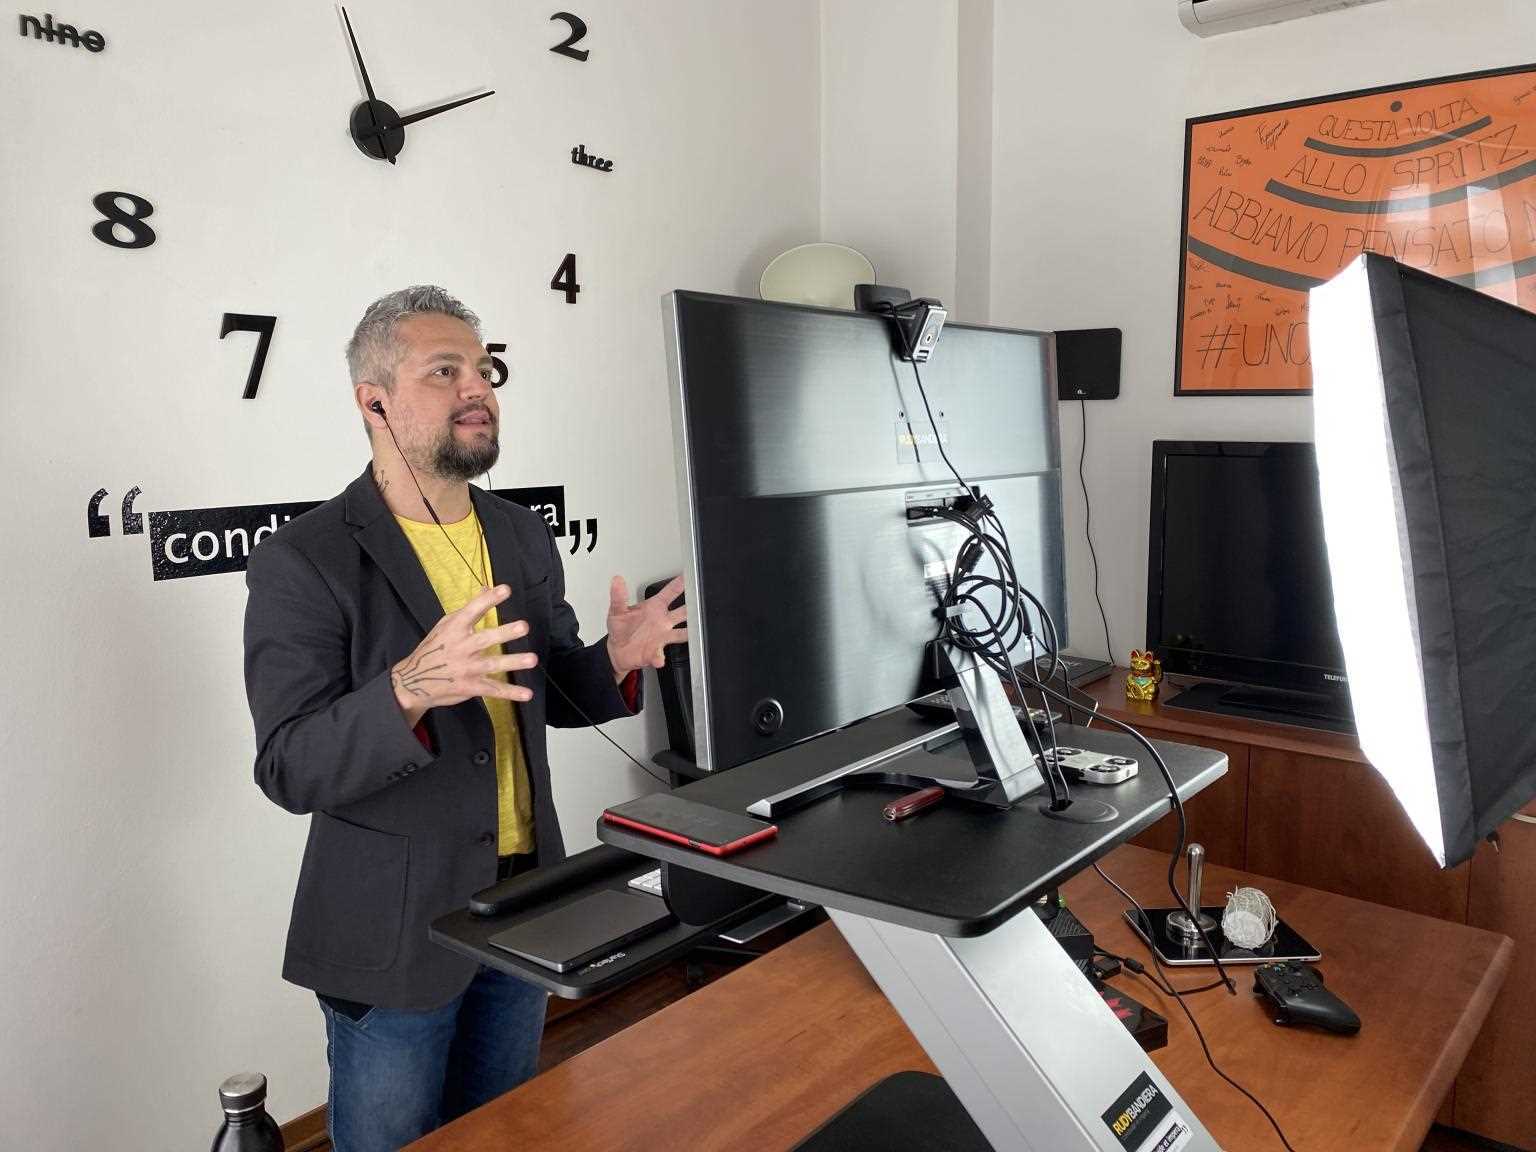
Figure 6: Look at how Rudy Bandiera (famous Italian influencer) is looking directly in the camera when recording a video.
Equipment that enhances productivity and well-being
If you plan to work remotely for a long time, go beyond the basic setup, and buy some extra hardware to maximize your productivity and improve your well-being.
Multiple monitors
I started using a second monitor with my laptop, and then I bought another one. Now, working with only one monitor feels very unproductive for me.
If you have limited space, try to go for a widescreen external monitor, and use your laptop monitor only for secondary tasks. Beware of ultra-widescreen monitors because you’ll keep turning your head to view all the content.
My current setup is a widescreen 34” monitor in front of me, the laptop 13” monitor under it (I reversed the Surface Book 2 monitor so the built-in keyboard is behind it), an external keyboard so I can move it in a more natural position, and a third 27” full-HD monitor on the side, turned 90 degrees, so I can use it to host messaging and mail applications or other non-essential applications.
When I don’t need to concentrate, I’ll keep many apps running on the screens. If I need to concentrate, I minimize all the windows apart from the applications that I’m actively using at that moment.
When presenting, I use the laptop monitor to project the slides, and I use the lower part of the widescreen monitor to show the software that I’m using, and eventually, the attendees with the camera on. That way I can look at my laptop’s webcam and see the slides at the bottom, and the meeting at the top of the webcam.
Better audio
Good audio is enough when you use it for calls or when you do sessions from time to time. If you’re doing sessions all the time, if you have a podcast or YouTube channel, if you’re streaming on Twitch, or if you plan to create a lot of audio and video content, you should go for more expensive solutions, like:
- Soundproofing (with foam wedges) to avoid echo
- A high-quality microphone
- A voice processor, to filter unwanted sounds from the microphone
- (Optional) A high-quality audio interface, PCIe, or USB, if the onboard audio interface of your PC is not good
- A good set of speakers, instead of headphones
If you want to know more about all of those elements, you can take a look at my post from March 2020.

Figure 7: An example of a professional audio setup, from my colleague Fardau.
Printer and scanner
Someday we’ll live in a paperless world, but until then, it’s useful to have a printer and a scanner available from time to time. I prefer ink-jet all-in-ones, since I’m not using those all the time, but you can go to more expensive solutions if you need better quality or speed.
Docking station
If you’re working on your laptop, having a docking station is essential when you have multiple monitors, an external webcam and microphone, a wired network connection, a USB printer/scanner, and so on.
Of course, when we are forced to work from home all the time, it’s not a problem to keep everything connected—but if you’re working remotely only part of the week, or if you’re traveling a lot, connecting and disconnecting all the cables is time-consuming.
You can go for a dedicated docking station, or you can buy “generic” USB-C or Thunderbolt ones. For a better experience, be sure that the docking station is also charging your device.
A good chair and a standing desk
After using normal chairs for years, I invested in a “good” chair, and my life improved: my back pain was reduced and my posture during sessions and calls improved—all thanks to a chair.
I also bought a standing desk with a motor so I can use it both when standing and when sitting. I enjoy changing positions during the day, considering the types of activities that I’m doing.
Note: One good side effect of having a standing desk is that on the floor you can use a walking pad, perhaps while attending calls or trainings.
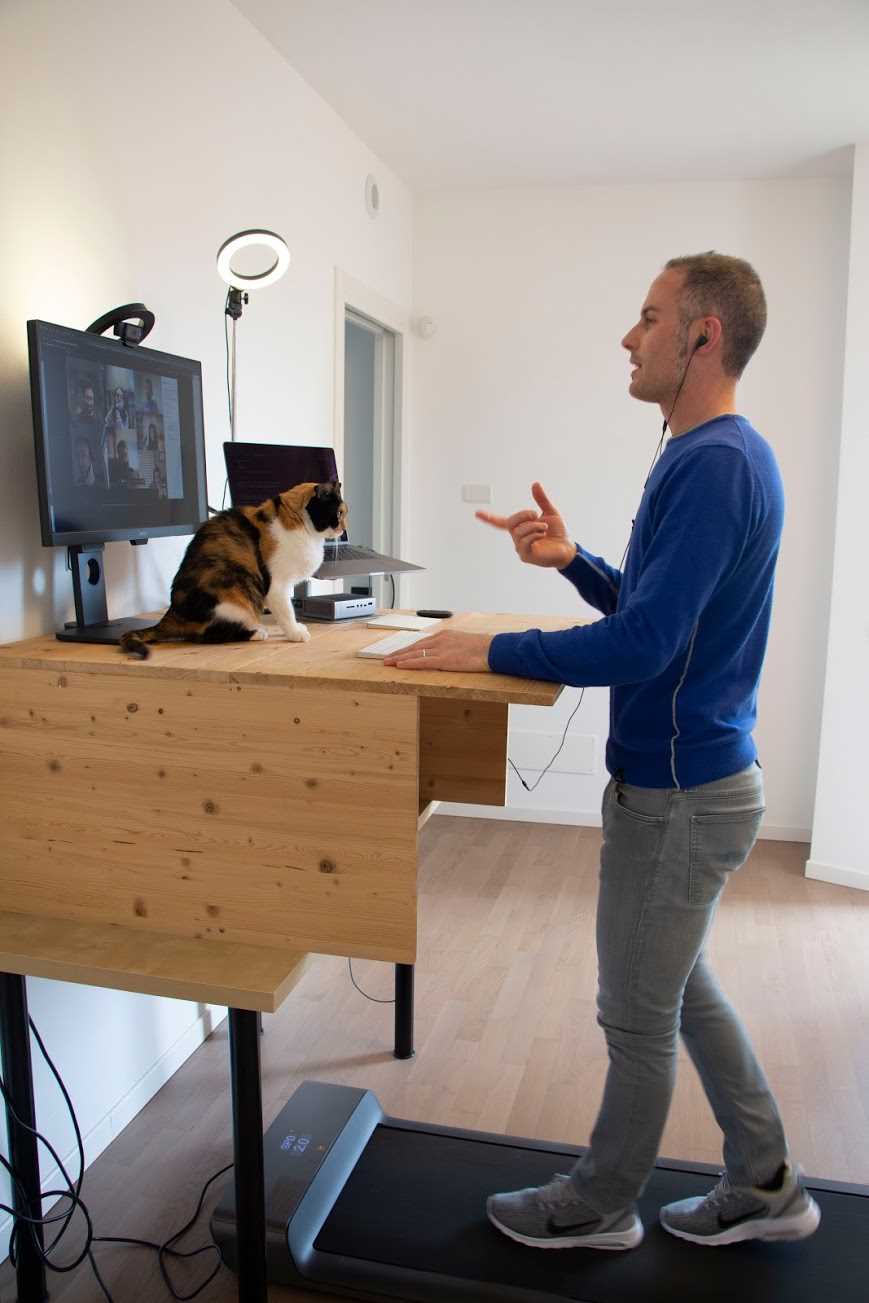
Figure 8: The perfect companions for a virtual meeting: standing desk, walking pad, and a cat! (Featuring Stefano Magni)
Additional lights for video calls and presentations
Good lighting is essential when doing calls or sessions, but also to ease your eyes.
Look at the picture from Rudy Bandiera in Figure 6. He’s using a professional light, but you can also use cheaper lights, like white paper lanterns, webcam ring lights, LED strips, LED panels, or many other solutions (like the photo in Figure 8, where Stefano is using two ring lights: one for background lightning, and one directed onto the PC).
The right solution depends on the room and on the position of the webcam(s). In general, your lights shouldn’t cast a lot of shadows, which will look awful on screen.
A good background, a “fake” background, or a green screen
It’s important to have a good background for your video calls or sessions. It should be interesting enough, but it shouldn’t distract people.
A bookshelf with a good selection of books, a nice picture, a wall-mounted whiteboard (see the following section), or your company logo—there are many options for a good background. Most conferencing apps offer the ability to blur backgrounds or to use a virtual background. These options are interesting for normal calls, but I prefer to avoid them for important calls and sessions.
Another option is to use a fake background with a support kit, which you can position behind your chair to produce a good result on a low budget. The same system can be used to mount a green screen, if the conferencing software allows it.
The results are much better than virtual backgrounds, in terms of artifacts. In this case you should pay attention to the way you dress, because some colors and fabrics can be mistaken for the green screen—and part of you will become the background.
If your conferencing software doesn’t support a green screen, another option is to use a virtual webcam that applies the green-screen effect. You can then use the virtual webcam in the software instead of the real one.
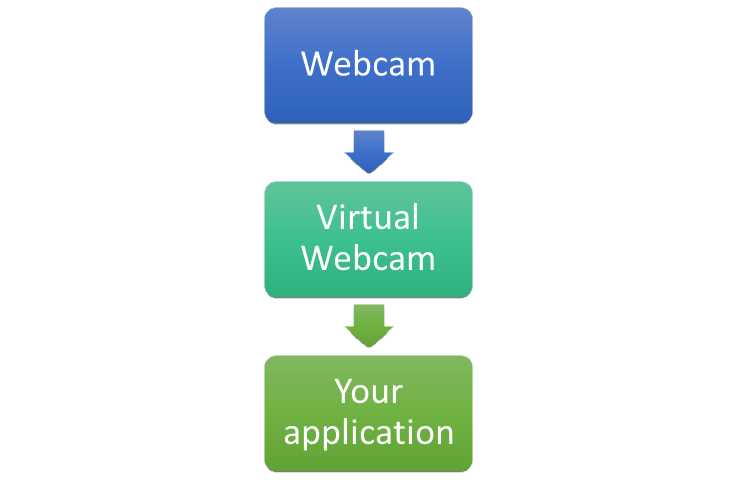
Figure 9: Video flow when a virtual webcam is used.
A virtual webcam is software that creates a virtual device on your system that can be used by all the applications. The virtual webcam can be configured to process the video stream from a physical webcam by adding some effects, images, and so on. Green screen (also known as chroma-key) is one of the possible effects, but you can also use a virtual webcam to add a fixed logo to your video stream, or to combine two physical webcams using picture-in-picture techniques, for example.
OBS (Open Broadcaster Studio, which we’ll discuss later in this chapter) also offers a powerful virtual webcam for Windows and Mac.
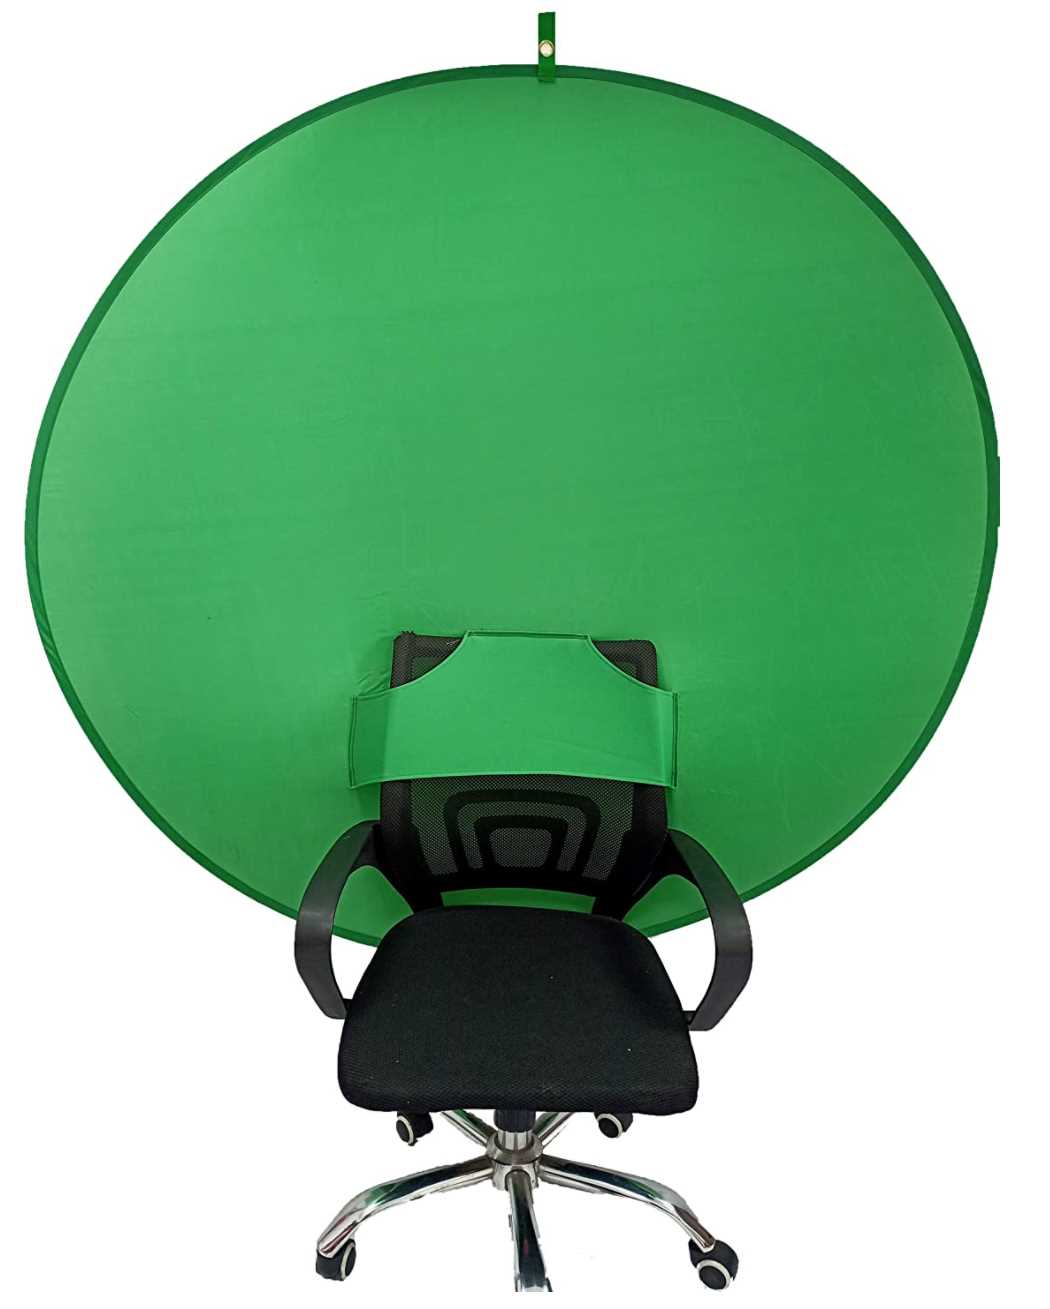
Figure 10: A great solution when you have a small room—green screen mounted on a chair.
Source: Amazon.
Physical whiteboard
There are many software whiteboards, and most of them have great collaboration features. What I’ve seen is that with virtual meetings, the feeling of writing on a physical whiteboard is better for brainstorming and communication.
Of course, the whiteboard should be visible to the webcam (I’m using a second webcam mounted on a tripod), and you should avoid covering the whiteboard when you’re not using it.
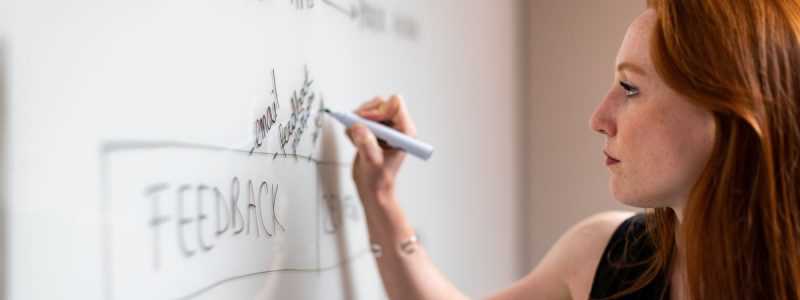
Figure 11: Handwriting in a virtual meeting enhances communication and the flow of ideas. Photo by ThisisEngineering RAEng on Unsplash
If you don’t have space for a wall-mounted whiteboard, you can go for a small, portable one, or a bigger one mounted on a support.
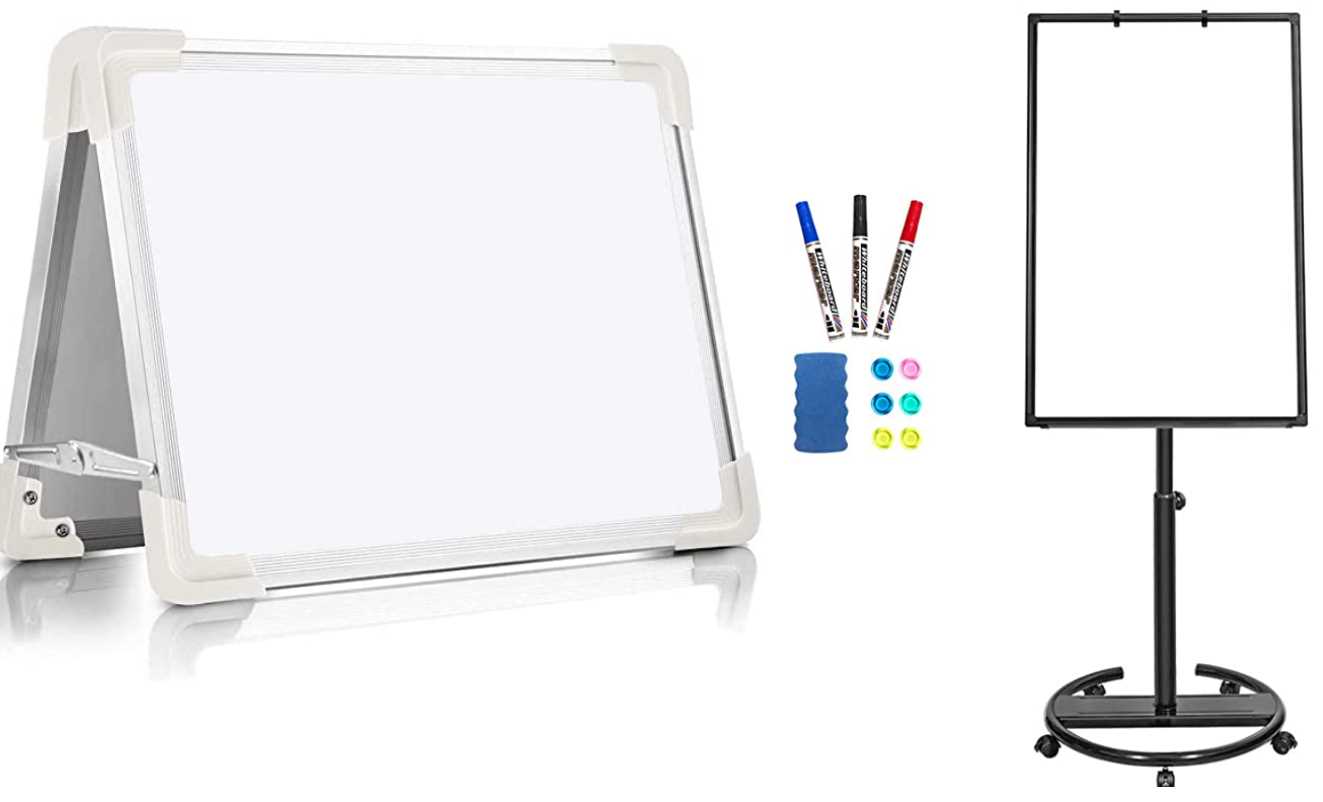
Figure 12: Two examples of portable whiteboards. Source: Amazon
The portable ones are good for lists and quick notes but will fill up quickly, so they’re not ideal for flowcharts or extended brainstorming.
(Graphics) Tablet with a pen
Some people prefer to write on a digital whiteboard, but they don’t like to use the mouse, touchpad, or even the touchscreen, because those items are not ergonomic enough for writing.
You can use a touchscreen with pen support, but most of the time the screen is upright, and it’s not easy writing that way. On some devices you can use the device in a flat position, but most times this requires you to change its position, or orientation.
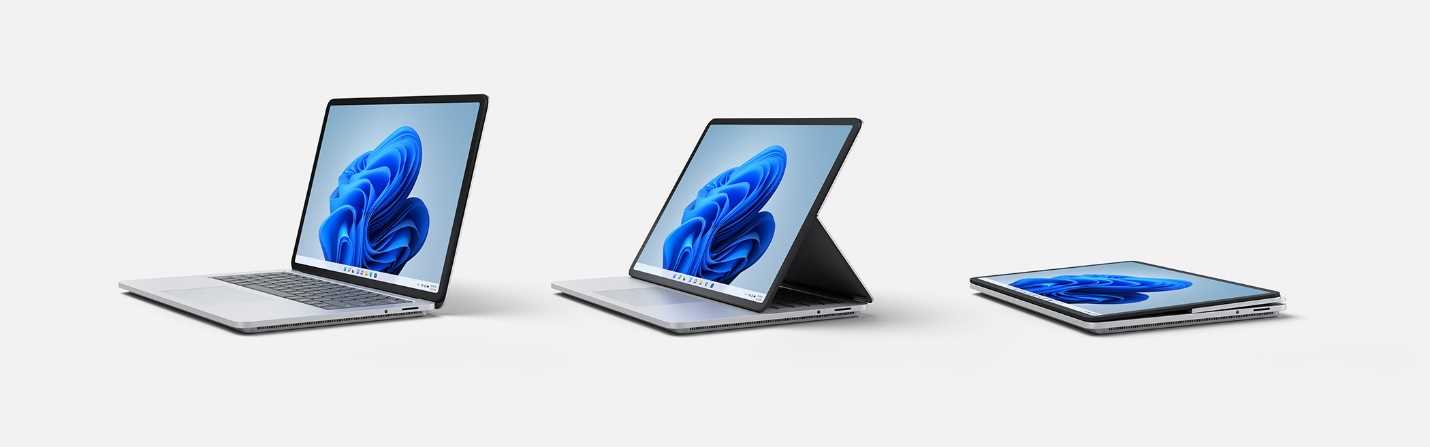
Figure 13: The Surface Studio Laptop is an example of a device that can be used with a pen, where the screen can go from upright to full-flat position without changing device position and screen orientation. You only need an external keyboard and webcam in your setup. Image courtesy of Microsoft News Center.
You can buy a graphics tablet and “feel the pen” while having all the capabilities of a software whiteboard. You can also use a tablet, joined in the same meeting, and use its pen (or pencil, if you have an iPad).
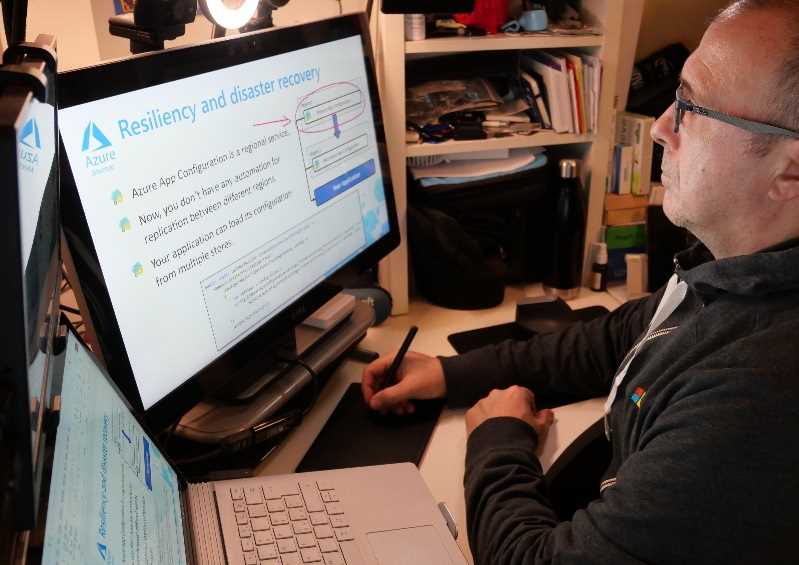
Figure 14: Azure Technical Trainer Massimo Bonanni drawing on a slide using a graphics tablet, while presenting on camera.
Using a pen is also great when presenting in PowerPoint (or other tools) because you can create a slide with part of the content and "draw over it" to show the interactions of different parts in a way that is more natural than using animation.
Note: Drawing on a graphics tablet is not as easy as it seems. There are many articles with tips on improving it, like this one by Malcolm Monteith.
“Busy” lights
In the next chapters, we’ll discuss techniques for working at home or in other places where other people are around. In this section, we’ll talk about equipment that you can use to improve your experience.
A “busy” light can be a good solution to show people that you’re online when the door is closed, like in radio and TV studios. There are many commercial solutions available for the most common communication platforms, and you can also create one yourself using one of the tutorials that you can find online.

Figure 15: Do-it-yourself busy light. Source: “DIY: Building a busy light to show your Microsoft Teams presence” by Elio Struyf
External programmable controller or keyboard
If presenting online (live or recorded) is an important part of your working day, it can be useful to have a dedicated tool that you can use to send commands to the software; for example, to mute or unmute the microphone, play jingles, switch between showing slides and your image from the webcam, or change the active webcam when you have multiple ones.
There are many dedicated devices available, like the Elgato Stream Deck:
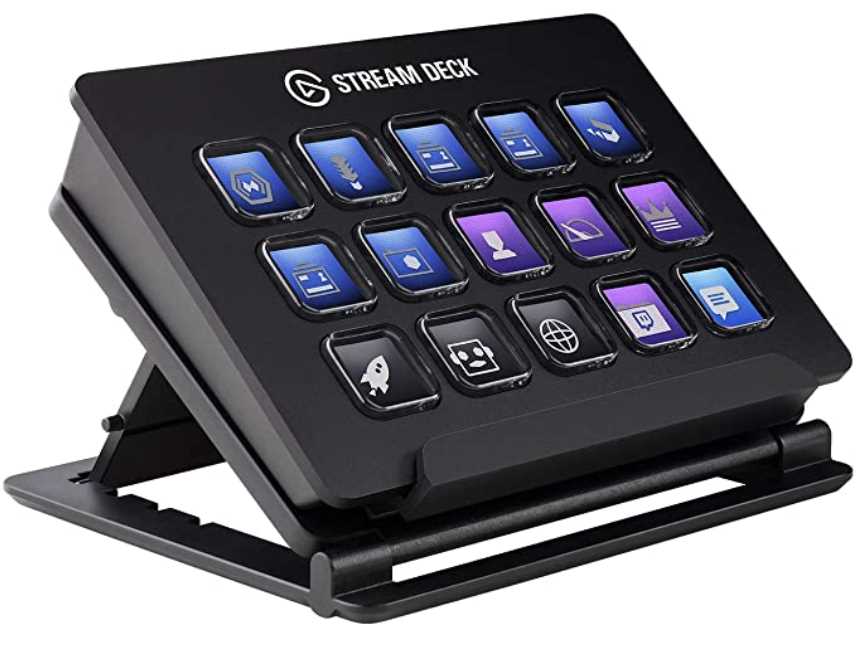
Figure 16: Elgato Stream Deck: a dedicated programmable device. Source: Amazon
You can also make one yourself, like this one created by my friend Valter Minute:
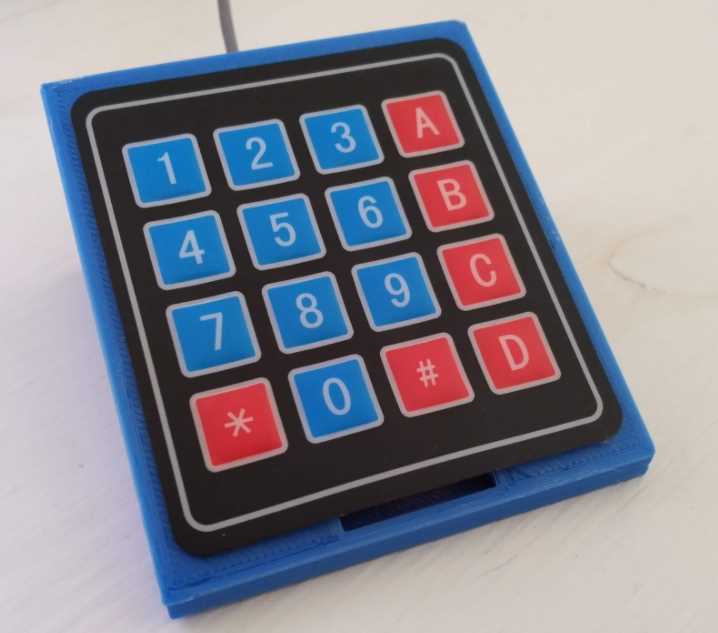
Figure 17: A DIY keypad to control applications. Source: Github
If you prefer a DIY solution, but you don’t want to build the hardware, you can buy an external numeric keypad and follow this tutorial to configure it.
Webcam cover
Some tools allow you to remotely enable a webcam during a meeting. I don’t like them, so I use a webcam cover when I don’t want to take the risk. Even a piece of black tape can do the trick.
Challenges of working outside of a dedicated place
A dedicated workplace could be your office, your home office, or another place that you set up correctly. There are four main problems when working outside of your dedicated place. The first one is being able to find good connectivity, which is essential for most remote workers.
I’ve invested in a mobile hotspot, so I can use it when working from bars, hotels, conferences, or when working for customers and partners that have strict network policies in place and no guest access.
The second problem is power supply. If you’re working outside a dedicated place, your laptop, phone, or other devices can run out of battery power. Some years ago, for my laptop I bought a big power bank like this one:
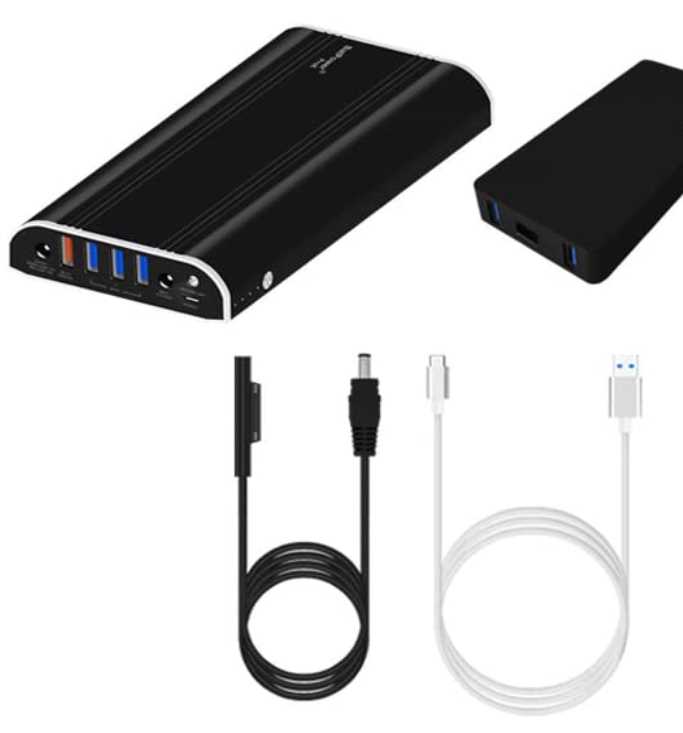
Figure 18: BatPower ProE ES9: a high-capacity power bank. Source: Amazon.
The third problem is finding a good environment that’s not too noisy, with a large enough table, a comfortable chair, and good lighting. For the noise, you can temporarily use noise-suppressing headphones or some kind of earplugs. For the lightning, many LED panels or LED rings are good portable solutions that can help when the lightning is not enough.
The fourth problem with working outside of a dedicated space is about connecting to other equipment, which we’ll discuss in the next section.
“Batman’s utility belt”
Remote workers that travel to meet customers or partners, or that speak at conferences, need to have their own version of “Batman’s utility belt,” with all the adapters that they need when they’re outside. You should never rely on other people to be able to connect your PC, do your work, or present your ideas.
Note: If your devices are using batteries, keep a set of those with you, or use devices that charge from a USB cable.
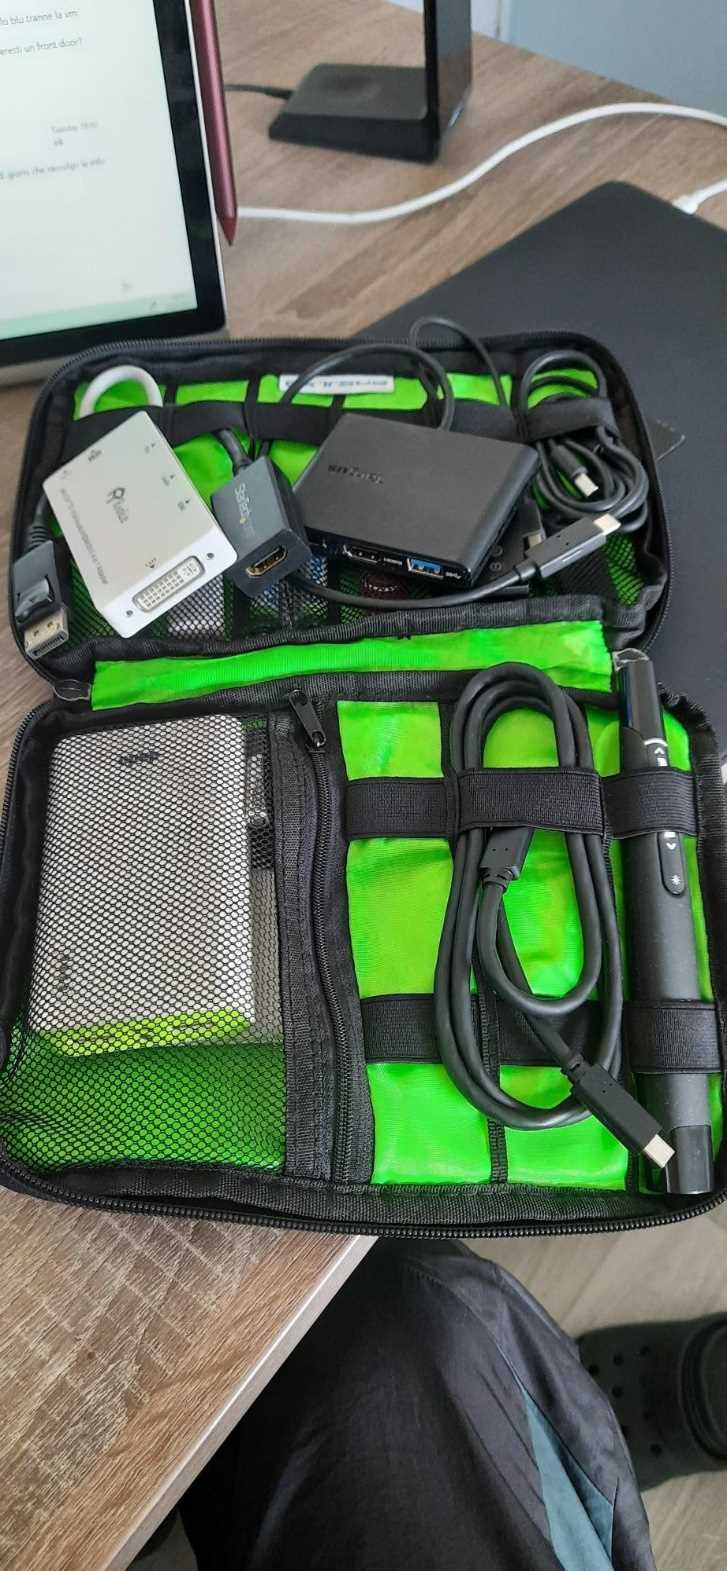
Figure 19: Travel kit used by my colleague Marcello. He can always connect to projectors or external monitors, everywhere.

Figure 20: My travel kit, with USB-C adapter (USB-C, 2xUSB-A, microSD, HDMI), a remote for PowerPoint, an Ethernet adapter, an HDMI to VGA adapter, and a slim mouse.
Know your software tools!
Having the best hardware is useless if you don’t know how to use the software that you need, especially some little-known features and tricks.
Mail, calendar, and tasks
Let’s start with the basics. Everybody needs to know how to use mail, calendar, and tasks. There are plenty of resources for every tool that you can use. We’ll only consider some specific aspects.
Check mail only at specific times
I have disabled mail notifications both on my PC and on my phone, and I only check email at specific times of the day, which I schedule on the calendar. Of course, there are days that I’ll check email in other moments, but my productivity is negatively impacted when I spend too much time working on other’s people priorities.
State your mail rules in your signature
I send mails at strange times during the day, and sometimes during the night. I created this mail signature, borrowing from many different colleagues, so other people know that I’m not putting pressure on them, unless I say something different in the subject line:
We work flexibly at Microsoft. Email rules that I use:
- If you receive an email from me outside of your normal business hours, I’m sending it at that time because it suits me. I am not expecting you to read or reply for two working days unless I request otherwise in the subject.
- I’m only checking emails twice a day because I care about my productivity.
- If you need an answer from me, please include me in the To line.
Thank you for your understanding.
Note: I use the exact same signature both on PC and on the phone. Sometimes, even when I’m at the PC with email closed, I will answer quick emails using the phone while waiting for long tasks to complete.
Leave empty spaces between meetings and add an option to attend the meeting online automatically
Many calendar apps have the option to shorten meetings by default, to leave empty spaces to recharge, and for a bio break. Use it!
Always add the option to follow the meeting online, even if most colleagues are in the office. This will give people the flexibility to attend the meeting without affecting other commitments during the day. If it’s mandatory to be present in person, state it in the meeting and explain why it’s required.
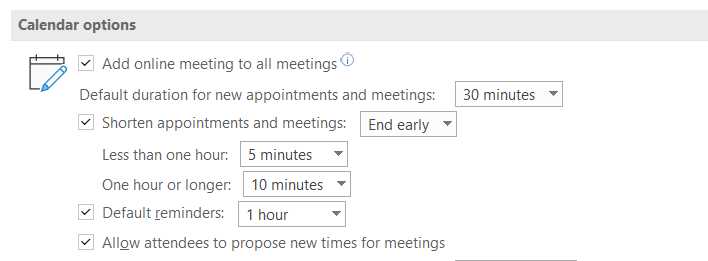
Figure 21: Options to shorten appointments automatically
Schedule tasks in the calendar
A lot of people, author included, struggle with managing tasks. One simple trick is reviewing your list of tasks (once per day or during the week) and scheduling the tasks that you want to do in the calendar for the following days. Scheduling specific hours to work on a task, instead of just having a deadline and a reminder, is a better way to deal with it.
Chapter 3 is completely dedicated to the vast topic of managing time while working remotely.
Web conferencing and communication
When working remotely, you’ll probably have more web conferencing and communication tools on your PC and phone than any other kind of app. All of them have their own strengths and weaknesses. In this section, we’ll see what’s important to know to get the most from them.
Allow people to enter before the host, or have multiple hosts
Some tools allow all the people from one organization to enter a meeting when the host is absent. Others have the ability to let people enter by themselves even when part of different organizations. Some tools automatically make all the people from one organization be meeting hosts, enabling them to let other people enter the meeting.
If you’re scheduling the meeting, know how to work with those options so the meeting can start on time, even if you’re not there at the beginning.
Choose AV sources
All the tools let you define your audio and video sources before joining the meeting. Know how to use those options: check your camera stream, check the quality of your audio, and be sure to be muted or unmuted so you don’t disturb other people when joining, especially if the meeting has already started.
Muting and unmuting
Know how to mute and unmute yourself, even temporarily, with a keypress, an external controller, or active headphones. “We can’t hear you,” “You’re muted,” and so on, are phrases we hear way too often. The phrase is now so common, you can find it on coffee mugs, like this one made by Accompanied.
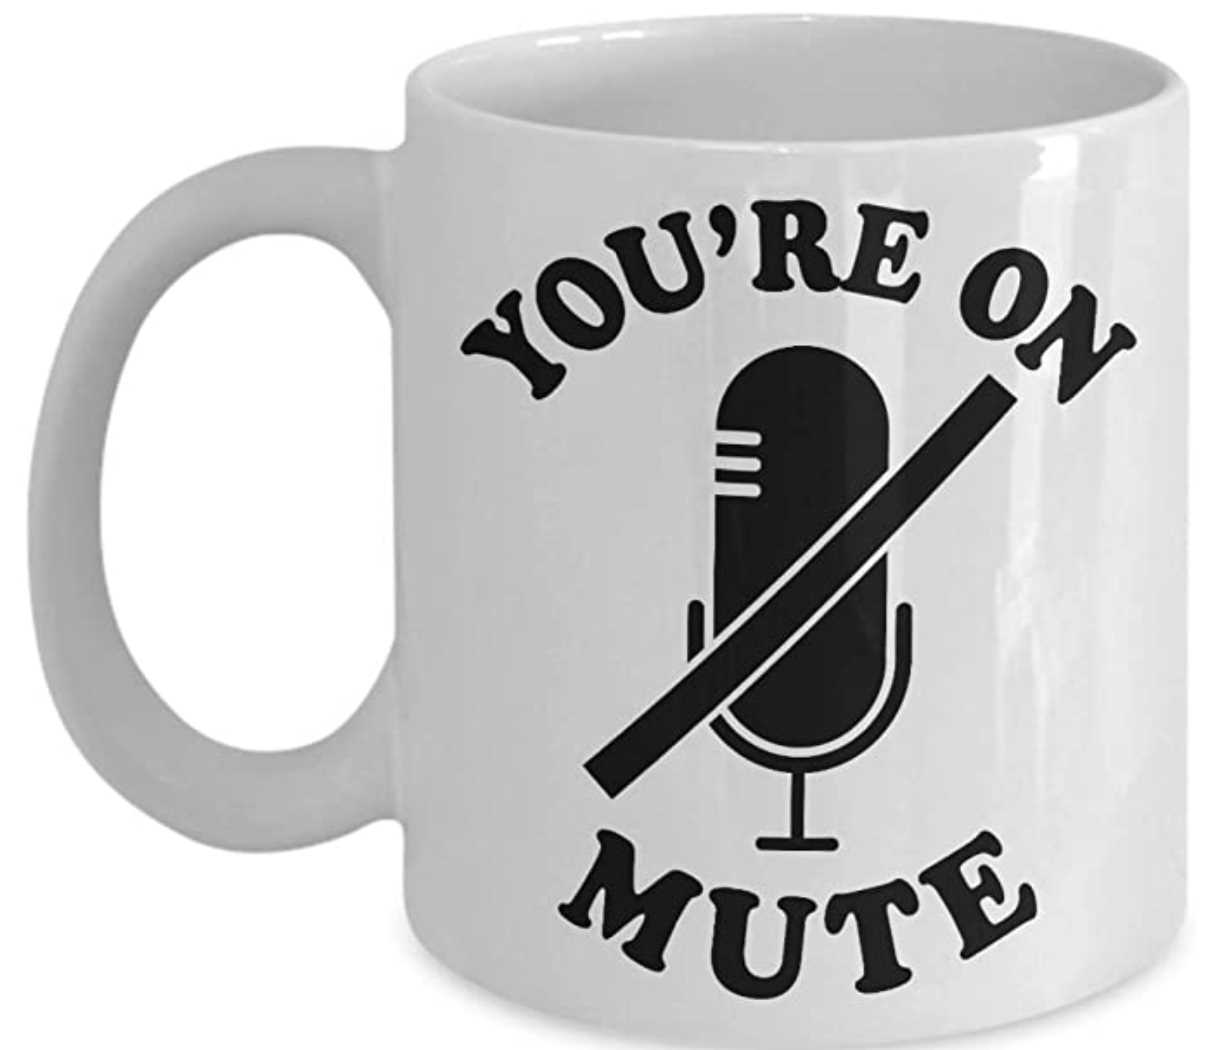
Figure 22: If you're tired of saying this phrase, you can use a mug and raise it when needed. Source: Amazon
Know how to mute other noisy participants if you’re the meeting host. Remember to unmute the participant that was currently speaking if you decide to mute all.
Webcam on and off, multiple webcams
Know how to turn the webcam on and off, and how to change the active one if you have more than one connected at the same time. If you’re not sure how to turn it off, use a webcam cover.
Sharing content
Know the difference between sharing:
- Full screen: You can use it when presenting multiple applications, at the risk of oversharing sensitive information.
- Application: Keep in mind that sometimes when an application opens a pop-up window, that window could possibly be treated like a different app (not being shared)—so check if people are seeing it.
- Presentation: Some tools allow sharing a presentation directly from the tool, without the need to share the screen or a dedicated application.
I normally share a secondary desktop, with all the notifications disabled.
In Chapter 7, we’ll see how to handle most of the screen sharing problems.
Sharing audio or video
You’ll need to enable sharing audio, since it’s disabled by default in most programs.
When sharing a video, you should take into account bandwidth limitations and prepare for other options, like uploading the video in advance if the conferencing software allows it, or sharing a link to the video (although you lose control of what people are seeing).
If the video is essential for your meeting, you should consider sharing it in advance and asking people to look at it.
In Chapter 7 we’ll look also at audio problems.
Chat, public, and private
Know how to use the chat, especially the chat embedded in a meeting. Know the difference between public and private chat, and as a rule of thumb, avoid offensive content and comments about the person speaking.
Note: Consider using a different chat program if you need to send sarcastic comments to someone. Beware if the other people have the webcam turned on. I’ve sent many funny remarks to people that had the camera on, just to make them smile during a meeting.
Subtitles
Most modern tools allow you to add subtitles to meetings and to receive a transcript of the meeting, at least in English. Enable subtitles by default. Sometimes people don’t like talking about their accessibility issues, whether those issues are temporary or permanent.
Note: You can also add a fixed message in your meetings asking people to privately share with you their accessibility needs, if different from the subtitles. In case of privacy issues, you can create an anonymous form online using many different tools (check your company policies) and share the link in the meeting invitation.
Remote presentation tools and video editing software
If you plan to record presentations or videos, or if you need advanced features for your live meetings and sessions, you should probably use advanced video tools. Being able to add effects to your videos, add subtitles, or add text and other content (jingles and music) can dramatically change the quality of a video, but is completely out of scope for this book.
One of the most-used tools for live streaming and video recording is, known as OBS. You can find a good selection of other free (and paid) video editing tools in this article by Alexis Mera Damen.
Hide notifications and other presentation settings
Both MacOS and Windows allow you to hide notifications automatically when presenting. The feature is called Do Not Disturb on MacOS and Focus assist on Windows.
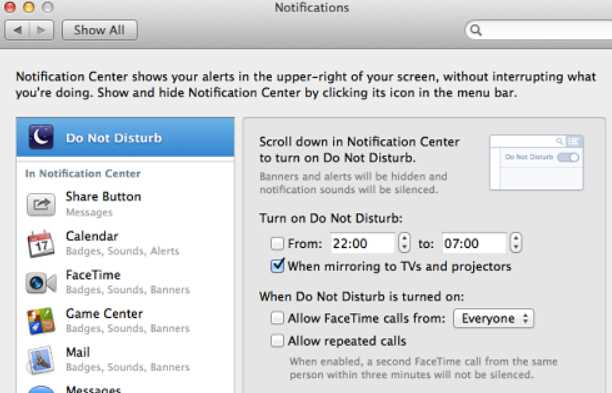
Figure 23: Configure Do Not Disturb on a Mac
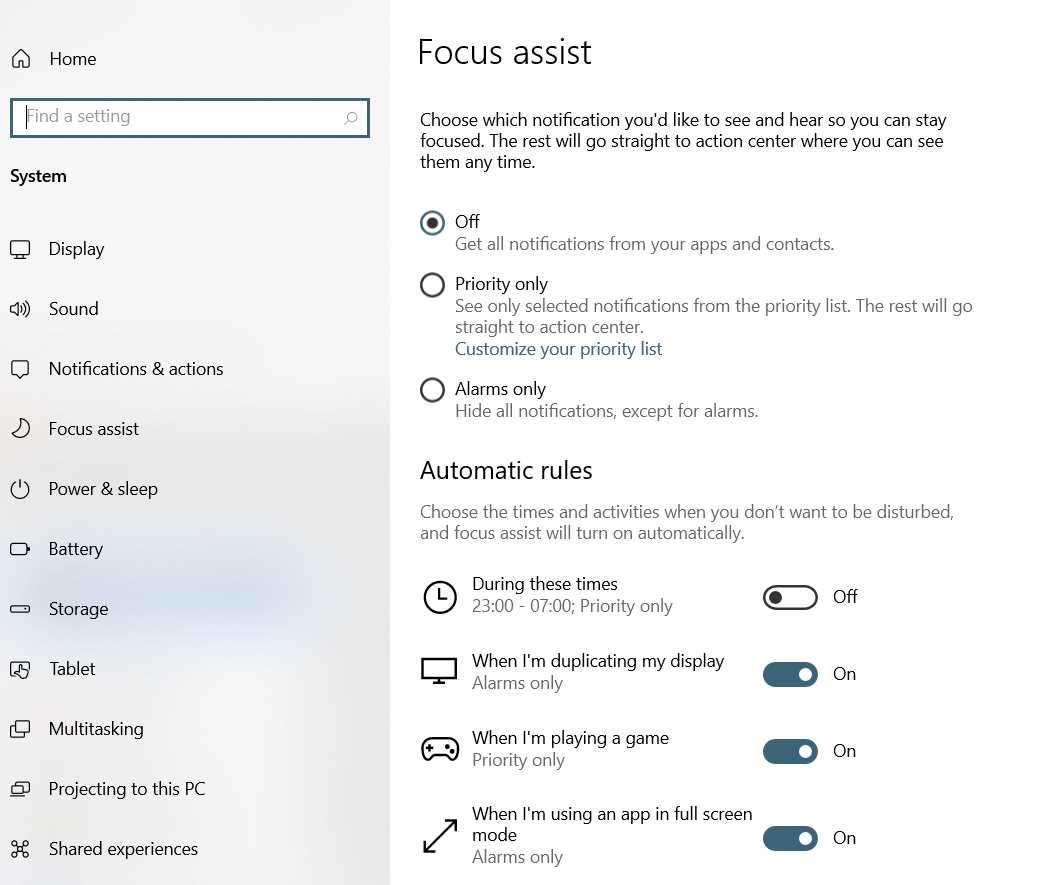
Figure 24: Configure Focus Assist on Windows
One little-known feature of Windows is the ability to configure presentation settings, so you can turn off the screen saver, use a specific background (perhaps with a company logo instead of your family’s picture), and set a specific volume.
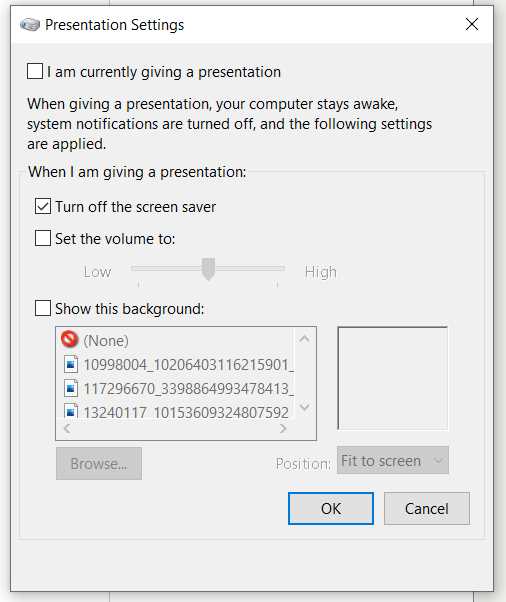
Figure 25: Presentation Settings in Windows
It would be great if, when presenting, the system could automatically hide all the desktop icons, but at the moment you can do it by right-clicking on the desktop and disabling Show desktop icons:
![]()
Figure 26: An easy way to hide all desktop icons when presenting on Windows
Note: You can find different ways to hide or customize desktop icons on MacOS in this article by Sue Wayne.
Document sharing and signing
There are many options to share documents with other people, such as DropBox, OneDrive, Box, and Google Drive. Some companies mandate the use of specifically approved tools; other companies don’t have specific policies. In every case, know the software that you’re using, especially for document protection, privacy, security, sharing, and so on.
If you need to sign documents frequently, there are many options that are legally valid and that don’t require you to print or scan a document. Check if your company already has a contract with such companies that you can use.
Other tools: whiteboards, polls, and ZoomIt
If you cannot use a physical whiteboard, you can use a software-based one. They’re more powerful than their counterparts in the real world, they have undo/redo functions, ink to text, virtual sticky notes, and many other features. Be sure to know how to use them, and how to share the results with other people. If you feel awkward writing with a mouse, you can use a (graphic) tablet with a pen.
Sometimes when interacting with multiple people in a meeting, a well-designed poll can be quicker to assess the sentiment of the participants. There are many sites and plug-ins that allow you to gather information, formally or using gamification techniques.
ZoomIt (on Windows, there are many other options for Mac) is my favorite software to zoom and quickly draw something on the screen; it’s useful during remote meetings.
Do you remember the old Apple saying: “There’s an app for that”? Well, you can probably find many other kinds of apps and sites that can be useful for a remote worker. If you have a need or a problem, try to search for it—someone has probably created a niche business that can help you.
- 1800+ high-performance UI components.
- Includes popular controls such as Grid, Chart, Scheduler, and more.
- 24x5 unlimited support by developers.