
SSIS Succinctly®

CHAPTER 5
Data Flow
Introduction
Data flow is where all data extraction, transformation, mapping, and loading happens. Before starting to develop your data flow logic, you need to tell the control flow what you are going to do with it. So your first job is to add a data flow task to the control flow.
As I have previously explained, one package can only have one control flow; however, it can have as many data flows as you want. However, in the SSIS Designer, there is only one Data Flow tab. This is because it is a dynamic tab; whenever you click on a data flow task, this tab will assume the objects developed in it. This way, if you add a data flow task to your control flow, you can double-click it or select the Data Flow tab to open the data flow designer.
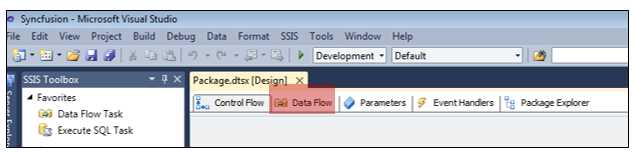
- Opening the data flow designer
Data flow objects can be of four different types: sources, transformations, destinations, and paths. An interesting fact about data flows is that when you retrieve data from a source, the transformations, destinations, and paths that come after the initial source object will be executed in memory, which makes it a powerful engine.
Now, let’s take a look at what these objects do. Sources are connections from which you will retrieve your data. Destinations are connections to the targets in which you want to insert or update data. In a perfect world, the schemas of source and destination would be the same but, as you know, they are not. Because of this, transformations are important because they allow you to transform the data to follow the destination schema. The transformations allow you to perform operations against your data sets such as column conversions, column creation, and many more that will be explained in the sections that follow.
Last but not least, we need to connect all these objects. For that we use paths, which are similar to precedence constraints but with fewer configuration options. However, they exist for the same purpose: to connect objects inside the data flow and define when to take flow (Failed, OnMatch, and NonMatch). The constraints of paths will be explained later.
When you connect two objects, the resulting behavior is a little bit different from the control flow. This is because, in this case, the connection doesn’t define the conditions for the next task to be executed. Rather, it defines where the data will flow next when the execution of a transformation fails, when it succeeds, or some other option. This means that, when you make a connection, the information is about when or where the columns available to work in this data flow become available in the next component of the data flow path. Like the control flows, these objects are designed using a drag-and-drop designer and then double-clicking them to open their configuration options. Now let’s take a look at all available objects.

- SSIS Toolbox with data flow objects
The first step when developing data flows is to define the source of your data. You can have as many sources as you need, and the SSIS data flow designer allows you to later join or merge that data (for instance, to insert it into a single destination). All of the objects available in the data flow toolbox are organized by their groups and explained in the sections that follow.
Favorites
The Favorites group contains two of the most important objects; they allow you to connect to external data sources or destinations. You can add new objects to this group by right-clicking an object and selecting Move to Favorites.
- Data flow transformations in the Favorites group
Shape | Name | Description |
|---|---|---|
| Destination Assistant | This object allows you to configure data sending operations to a variety of destination platforms. Its wizard helps you through the configuration of the target system. |
| Source Assistant | This object allows you to configure data retrieval operations from a variety of source platforms. Its wizard helps you through the configuration of the target system. |


Common
The Common tasks group includes objects commonly used in data flows. Once again, you can move objects to this group by right-clicking them and selecting Move to Common. The following table explains each of the objects that you can find in it.
- Common data flow transforms
Shape | Name | Description |
|---|---|---|
| Aggregate | This object allows you to aggregate data according to the following functions: Average, Sum, Count, Count Distinct, Max, and Min. |
| Conditional Split | This object allows you to route data to multiple outputs based on conditions that can be specified within it. You can use conditions to specify the outputs of this object. |
| Data Conversion | This object allows you to convert data between data types. You can use it to convert, for instance, an integer into a string. |
| Derived Column | This object allows you to create new columns based on transformations applied to input columns. For example, you can create a single column based on the concatenation of the values of the other three input columns. |
| Lookup | This object allows you to join additional columns to the data flow by looking up values in a table. This is commonly used, for example, to evaluate if a record always exists in a data warehouse table. |
| Merge | This object allows you to combine rows from multiple, sorted data flows into one sorted data flow. If sorting is not important, use the Union All transformation object. |
| Merge Join | This object allows you to combine two sorted data flows into one using FULL, LEFT, or INNER join. |
| Multicast | This object allows you to distribute every input row to every row in one or more outputs. |
| OLE DB Command | This object allows you to run SQL statements over each row in the data flow. This is different from the Execute SQL Task in the control flow because this affects each row; the task is applied to the database—commonly pre-DDL or DML operations. |
| Row Count | This object allows you to count the number of rows in a data flow. |
| Script Component | This object allows you to run custom script code. You can use it as a source, destination, or transformation object. You can use the C# and VB.NET programming languages. |
| Slowly Changing Dimensions (SCD) | This object allows you to update an SSIS data warehouse dimension table. This object is fully detailed in the Chapter 5. |
| Sort | This object allows you to sort data in ascending or descending order. It is commonly used to remove duplicated values as well because, when using this object, you can tell it to remove duplicates after sorting them. |
| Union All | This object allows you to combine multiple data flows without sorting. You can use it to combine data coming from multiple objects’ outputs. |


Other Transforms
The Other Transforms group includes objects less frequently used in data flows. Although they are not used as often, they can be equally as important to your ETL projects.
- Other Transforms
Shape | Name | Description |
|---|---|---|
| Audit | This object allows you to include data about the environment in which the package runs. Map system variables to new output columns. |
| Cache Transform | This object allows you to write data to a cache (a .caw file) with the Cache connection manager. |
| CDC Splitter | This object allows you to direct streams of net change records into different outputs based on the type of change (insert, delete, and update). |
| Character Map | This object allows you to apply string functions to character data. For example, convert uppercase to lowercase. |
| Copy Column | This object allows you to copy input columns to new columns in the transformation output. |
| Data Mining Query | This object allows you to query data mining objects from Analysis Services. |
| DQS Cleansing | This object allows you to use Data Quality Services (DQS) to correct data from a connected data source by applying approved rules that were created for the connected data source or a similar data source. |
| Export Columns | This object allows you to read data from a data flow and insert it into a file. |
| Fuzzy Grouping | This object allows you to identify potential duplicate rows, and helps standardize the data by selecting canonical replacements. |
| Fuzzy Lookup | This object allows you to perform data cleaning tasks such as standardizing data, correcting data, and providing missing values. Uses fuzzy matching to return one or more close matches from a reference table. |
| Import Column | This object allows you to read data from files and adds it to columns in a data flow. |
| Percentage Sampling | This object allows you to randomly sample a percentage of rows from an input data flow. |
| Pivot | This object allows you to compact an input data flow by pivoting it on a column value, making it less normalized. |
| Row Sampling | This object allows you to randomly sample a specific number of rows from an input data flow. |
| Term Extraction | This object allows you to extract frequently used, English-only terms from an input data flow. |
| Term Lookup | This object allows you to determine how frequently specific terms occur in a data flow. |
| Unpivot | Converts an unnormalized data set into a more normalized version. Values from multiple columns of a single record expand to multiple records in a single column. |


Other Sources
The Other Sources group includes other source objects used in data flows.
- Other Sources
Shape | Name | Description |
|---|---|---|
| ADO.NET Source | This object allows you to consume data from SQL Server, OLE DB, ODBC, or Oracle using .NET providers. |
| CDC Source | This object allows you to read changed data from SQL Server CDC shadow tables. This object is fully detailed in Chapter 5. |
| Excel Source | This object allows you to connect and extract data from worksheets or named ranges in Microsoft Excel workbooks. |
| Flat File Source | This object allows you to read and extract data from text files. You can define data widths or data delimiters to identify rows and columns. This objects is used for CSV files, for example. |
| ODBC Source | This object allows you to extract data from an Open Database Connectivity database. You can use it to extract data from tables or views. |
| OLE DB Source | This object allows you to extract data from an OLE DB relational database. You can use it to extract from tables or views. |
| Raw File Source | This object allows you to extract raw data from flat files previously written by the raw file destination. Reading local files uses this to optimize packages. |
| XML Source | This object allows you to extract data from XML files. |


Other Destinations
The Other Destinations group includes other used destination objects in data flows.
- Other Destinations
Shape | Name | Description |
|---|---|---|
| ADO.NET Destination | This object allows you to load data into an ADO.NET-compliant database that uses a database table or view. |
| Data Mining Model Training | This object allows you to train data mining models by passing the data that the destination receives through the data mining model’s algorithms. |
| Data Reader Destination | This object allows you to expose data in a data flow to other applications by using the ADO.NET Data Reader interface. |
| Dimension Processing | This object allows you to load and process a SQL Server Analysis Services dimension. |
| Excel Destination | This object allows you to load data into worksheets or named ranges in Microsoft Excel workbooks. |
| Flat File Destination | This object allows you to write to a text file. |
| ODBC Destination | This object allows you to load data into an Open Database Connectivity (ODBC)-compliant database. |
| OLE DB Destination | This object allows you to load data into an OLE DB-compliant relational database such as SQL Server. |
| Partition Processing | This object allows you to load and process a SQL Server Analysis Services partition. |
| Raw File Destination | This object allows you to write raw data that will not require parsing or translation. |
| Record Set Destination | This object allows you to create and populate an in-memory ADO record set that is available outside of the data flow. Scripts and other package elements can use the record set. |
| SQL Server Compact Destination | This object allows you to write data to a table in a SQL Server Compact database. |
| SQL Server Destination | This object allows you to connect to a local SQL Server database and bulk loads data into SQL Server tables and views. To optimize performance, it is recommend that you use the OLE DB destination instead. |


Data Viewers
Introduction
Data viewers are great debug components because they allow you to see the data that is flowing from one data flow component to another. As I wrote before, paths connect data flow components by connecting the output of one data flow component to the input of another data flow component. Data viewers operate in these paths, allowing you to intercept the “communication” and watch what input will be used in the next component or in another point of view (with the data set that the previous component originated). When you run the package, it will stop that data viewer and only continue its execution when you tell it to. By using data viewers, you can evaluate whether or not the result of a data flow component meets your requirements. If not, it allows you to correct it.
An important but logical prerequisite of using data viewers is that you must have at least one data flow in your package control flow and, inside the data flow, at least two components connected.
Using Data Viewers
To use a data viewer, right-click the path you want to evaluate and then select Enable Data Viewer as shown in the following figure.

- Enable Data Viewer
And that’s it. If you run a package with a data viewer in a data flow, the result will look like the following figure—a window showing the data being moved in that particular path.

Creating a Simple Data Flow
Introduction
To show you how these components work, we will create a simple data flow that gets a data set from a SQL Server database, transforms the data according to the schema in the destination SQL Server table, and then inserts it. It’s a simple data flow that will allow us to work with these objects for the first time. The components we will use are:
- Source
- Conversion
- Derived Column
- Destination
Creating the Data Flow
To create this example data flow, we start by dragging and dropping each object we need into the data flow designer and, after linking them, making all the configurations needed. So let’s start by defining the flow.

- Simple Data Flow
Now, the way you develop a data flow is always the same: add the objects you need to the data flow designer, connect them using tasks, and then configure their behavior. Because we have already done the first two steps, it’s now time to configure each of the objects in the data flow. The first object to configure is the source object. In this object, you need to define the connection manager for the source database (create a new one if none exists) and the table or view name.

- Source Configuration
After configuring the source object, click OK to close the editor and double-click the Conversion object. This will open its configuration screen where you can create expressions to transform the columns as needed. In this screen, select the columns from the source table or view you want to convert. In the conversion grid, select the destination data type and size.

- Conversion Configuration
Now we want to create a new column and add it to the existing data flow columns. This will be a load date value which indicates when this record was inserted. To do so, double-click the Derived Column Transformation. When the editor opens, you need to give this column a name. In the derive column option, select Add a new column and, in the expression, use the GETDATE() function to get the current date and time.

- Creating a new derived column
Last but not least, we need to configure the destination object. If you double-click the destination object, you will notice a big difference between it and the source object. You will see a new tab on the left called Mappings. In this tab, you are going to map the columns from the data flow which have been transformed or created to the columns in the destination table. However, the first step is configuring the connection manager.

- Destination object connection manager
As you can see in the previous figure, there is a warning at the bottom of the editor that tells you that you need to map the columns from the data flow to the destination table. So let’s click the Mappings tab.

- Mapping Columns
The goal in this editor screen is to be able to map between the available input columns and the available destination columns. Once you complete this task, you can run your package and the data will move from the source to the destination database.
Note: This is just an introductory example; it doesn’t have any error control or validations. It is meant for you to see how to start developing packages with data flows in its control flows.
- 1800+ high-performance UI components.
- Includes popular controls such as Grid, Chart, Scheduler, and more.
- 24x5 unlimited support by developers.