
Spark Succinctly®

CHAPTER 2
Installing Spark
Spark runs in the Java Virtual Machine. The prerequisite for running Spark is installing Java. We are going to go over the installation steps on the most popular operating systems, like Microsoft Windows and Linux. Since release 1.4, Spark also supports the R programming language and Python 3. The previous versions of Spark only supported Python 2.6. The R language is mentioned for completeness only; this book is not going to go deeper into R language examples beyond stating that Spark has built-in support for it.
Installing Spark Prerequisites on Linux
We are going to demonstrate how to install Apache Spark on Centos 6.X from scratch. As mentioned earlier, Spark actually runs on top of JVM, so we have to install Java first. Most of the desktop versions of Linux systems come with Java preinstalled, but we will cover Java installation just in case. Note that the installation in the examples was done with the user having root privileges. You might need to run all of the following commands in this section by prefixing them with sudo in order to acquire root privileges.
Installing Java
Skip this step if your system has an appropriate version of Java installed. The easiest way to check this is by running the command java –version in the shell. While Java version 8 has been available for quite some time now, many developers work on Java 7 version. You can install whichever Java version you prefer. The provided source codes will be in both Java 7 and Java 8 versions.
Code Listing 1: Installing Java on Linux
$ cd /opt/ $ tar xzf jdk-8u51-linux-x64.tar.gz $ cd jdk1.8.0_51/ $ alternatives --install /usr/bin/java java /opt/jdk1.8.0_51/jre/bin/java 2 $ alternatives --install /usr/bin/javaws javaws /opt/jdk1.8.0_51/jre/bin/javaws 2 $ alternatives --install /usr/bin/javac javac /opt/jdk1.8.0_51/bin/javac 2 $ alternatives --config java ----------------------------------------------- *+ 1 /opt/jdk1.8.0_51/jre/bin/java $ java –version Java(TM) SE Runtime Environment (build 1.8.0_51-b16) Java HotSpot(TM) 64-Bit Server VM (build 25.51-b03, mixed mode) [Add these to ~/.bash_profile or the exports will not be set on the next boot] $ export JAVA_HOME=/opt/jdk1.8.0_51 |
Installing Python
If you are running Linux, there is a fair chance that you already have Python installed. You can check this by running the following commands:
Code Listing 2: Checking Python Version on Linux
$ python -V Python 2.6.6 |
If you are not satisfied with an installed version of Python, you can install a newer one. It’s a good practice to update OS packages before starting the installation.
Code Listing 3: Updating Linux Packages by Using Yum
$ yum -y update |
Installing multiple versions from the Python source can quickly become cumbersome. I would recommend you use the pyenv tool. The prerequisite for installing pyenv is a popular source versioning system Git. After pyenv is installed, it will automatically build the downloaded Python from the source. To run the build processes successfully, you also need to install development tools and some other components required by Python. You can install the components by running the following commands:
Code Listing 4: Installing Git and Development tools by Using Yum
$ yum install git $ yum install bzip2-devel $ yum install openssl-devel |
Code Listing 5: Installing Pyenv
$ curl -L https://raw.githubusercontent.com/yyuu/pyenv-installer/master/bin/pyenv-installer | bash export PATH="$HOME/.pyenv/bin:$PATH" eval "$(pyenv init -)" eval "$(pyenv virtualenv-init -)" |
After installing pyenv, switching between Python versions is relatively easy even on the project level. All you need to do is install the Python version that you need and then create a .python-version file inside the project directory with the Python version that you need:
Code Listing 6: Installing Pyenv and Switching Python Version
$ pyenv install 3.4.3 # version 3.4.4 is installed but if you try to run the version command you get something like $ python -V Python 2.6.6 $ python -V Python 3.4.3 |
Installing Scala
Spark is pretty flexible when it comes to Java and Python, but versions of Scala must match. At the time of writing, the latest Spark version is 1.4.1 and is compatible with Scala 2.10.x. Be sure to check the latest Spark documentation when you start to install Scala on you system. In my case, it’s going to look like the following:
Code Listing 7: Installing Scala on CentOS
$ wget http://www.scala-lang.org/files/archive/scala-2.10.5.tgz $ tar xvf scala-2.10.5.tgz $ mv scala-2.10.5 /usr/lib # you can add following commands to ~/.bash_profile: |
To build applications with Scala, you will also need to use a tool called Simple Build Tool. To install it use the following commands:
Code Listing 8: Installing sbt on CentOS
$ curl https://bintray.com/sbt/rpm/rpm | sudo tee /etc/yum.repos.d/bintray-sbt-rpm.repo $ yum install sbt $ sbt about [info] This is sbt 0.13.8 |
Installing Spark Prerequisites on Windows
Windows 7 simply shows no signs of dying and is still by far the most popular Windows OS around. It doesn’t have mainstream support from Microsoft, but that hasn’t changed its market share significantly. The installation procedure will be described based on Windows 7.
Installing Java
For Windows, go to http://www.oracle.com/technetwork/java/javase/downloads/index.html and locate the JDK download. At the time of writing the latest version is 8u51. Agree to the terms and conditions on the page to download the Java installer and run the downloaded software. Just make sure that you select a JDK for Windows and be careful about 32(x86) and 64(x64) bit systems. Before proceeding with the installation, Windows will ask you if you really want to make changes to your computer:

Figure 9: Allow the downloaded installer to make changes to the system.

Figure 10: Initial Screen for Installing JDK on Windows
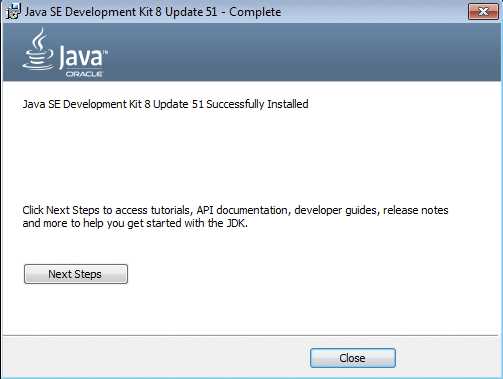
Figure 11: The End of a Successful JDK Install
After installing Java, it is important to set the JAVA_HOME environment variable. Use the following steps and check or set the JAVA_HOME variable:
- Right-click on My Computer.
- Select Properties from the list.
- Go to Advanced system settings. This will open System Properties on the Advanced tab.
- Click on Environment Variables.
- Add or update the JAVA_HOME variable as shown on the following figure. The default location is something like C:\Program Files\Java\jdk1.8.0_51; make sure that you check the location on file system before changing the variable. Note that the location varies depending on the installed Java version.

Figure 12: Java Home Environment Variable Setup
Installing Python
Many Python developers don’t want to move to the new Python 3 syntax, so Python has both Python 2 and 3 available for download. Go to https://www.python.org/downloads/windows/ and select the one you like the most. Note that there are x86 and x86-64 versions available, so please make sure whether you have a 32 or 64 bit system before downloading the installer.
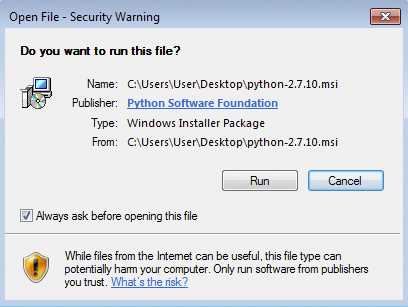
Figure 13: Click on run when Windows security popup comes up.

Figure 14: Install Python for all users.
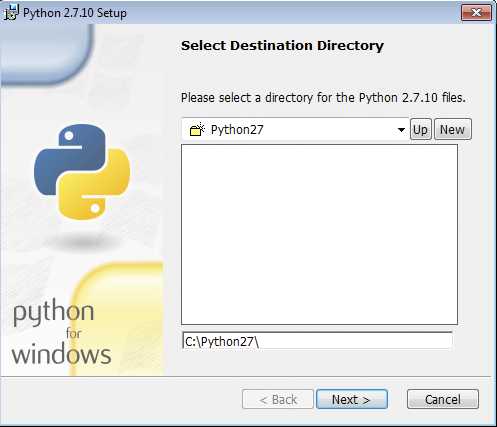
Figure 15: Select destination directory.

Figure 16: Click on Python in dropdown, choose Entire feature will be installed.

Figure 17: End of Python Installation

Figure 18: You may need to restart your system before using Python.
Installing Scala
At the time of writing, the latest Spark version is 1.4.1 and is compatible with Scala 2.10.x. Check the latest Spark documentation before you start to install Scala on your system. To install Scala on Windows, go to http://www.scala-lang.org/download/all.html and find the appropriate version to download. On my system with the latest Spark version, it’s http://www.scala-lang.org/download/2.10.5.html. Installation steps are described in the following figures; if there are any security questions or something similar, agree with them:

Figure 19: On the initial Scala install screen, click Next.

Figure 20: Check the license and accept the terms.

Figure 21: Install all features on local disk and click Next.

Figure 22: Start the installation process.

Figure 23: End of Scala Installation Process
At the end of the installation process, set environment variable SCALA_HOME to value “C:\Program Files\scala.” Use the process described in the previous section on Java.
If you want to develop applications for Spark in Scala, you will need to install the Simple Build Tool.
You can download the Simple Build Tool for Scala at http://www.scala-sbt.org/download.html. After you download it, run the installer:

Figure 24: Start of sbt Install Process

Figure 25: Accept the license terms.

Figure 26: Install all features to the hard drive in the Simple Build Tool dropdown menu.
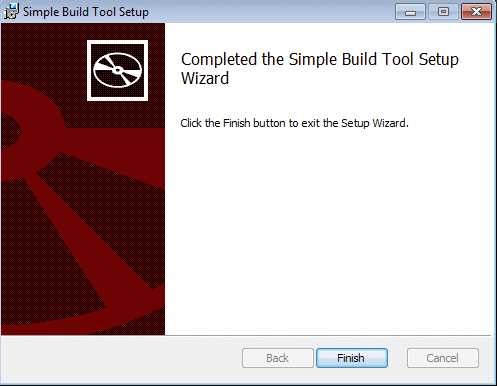
Figure 27: Last Screen During the Installation of Simple Build Tool
With this, all prerequisites for the rest of the book, including how to install Spark, are covered. The installation and configuration process is almost the same on both Windows and Linux from now on.
Spark Download and Configuration
You can download Spark at https://spark.apache.org/downloads.html. At the moment, the latest version is 1.4.1. Pick this one when choosing a Spark release on the download page. If you plan to run Spark on existing Hadoop infrastructure, choose your Hadoop version under the package type selection. If you don’t intend to use Hadoop, simply select “pre-built for Hadoop 2.6 and later.” Hadoop version in download type doesn’t really matter for this book. The next element on page will be a download link; some users may be surprised that there is no download button. Download the archive to a directory of your choosing. In my case, the download link is http://www.apache.org/dyn/closer.cgi/spark/spark-1.4.1/spark-1.4.1-bin-hadoop2.6.tgz, but this may vary depending on whether there is a newer version of Spark or Hadoop when you start the download. You might have noticed the archive is in “tar” format. Users of Linux computers will have no special trouble unpacking the downloaded file, but on Windows you will need to install a utility like 7-Zip or any other archiving software that has tar support. Note that the extraction process will have multiple steps because there are archives within archives. When extracting the output files, always output them to a folder with a simple name. I ended up with something like “C:\spark\spark\spark\spark-1.4.1-bin-hadoop2” on Windows, but then I simply copied the contents of the final folder to “C:\spark-1.4.1” to make later interactions with Spark easier. On Linux, I copied and extracted Spark to the folder “/root/spark-1.4.1-bin-hadoop2.6;” it really depends on your preferences.
Tip: Extract Spark’s tgz archive to a folder with a path that has no spaces in it.
If you are running Linux, open your shell and navigate to the folder where you extracted Spark. If you are running Windows, open the Command Prompt and do the same thing. First we’ll run the Spark Shell.
Code Listing 9: Running Spark Shell from Command Prompt on Windows
C:\spark-1.4.1>bin\spark-shell |
Code Listing 10: Running Spark Shell from Shell on Linux
[root@localhost spark-1.4.1-bin-hadoop2.6]# ./bin/spark-shell |
The result will be a running Spark Shell on both platforms. If everything worked, you should see a read-eval-print loop scala interface:
Code Listing 11: Result of previous commands should be a running scala interpreter interface.
scala> |
I personally don’t like the amount of information that is printed when running Spark Shell with defaults. It’s really low-level info that has very little use. Although you just started the Spark Shell, it might be a good idea to leave it and change the logging level so that it doesn’t confuse you. To leave the REPL simply type exit() and hit the Enter key.
Navigate to the conf subfolder and make a copy of the file log4j.properties.template. Rename it log4j.properties and open the file for editing. Change the line log4j.rootCategory from INFO to WARN as shown in following code listing:
Code Listing 12: More User Friendly Logging Setup
# Set everything to be logged to the console log4j.rootCategory=WARN, console log4j.appender.console=org.apache.log4j.ConsoleAppender log4j.appender.console.target=System.err log4j.appender.console.layout=org.apache.log4j.PatternLayout log4j.appender.console.layout.ConversionPattern=%d{yy/MM/dd HH:mm:ss} %p %c{1}: %m%n # Settings to quiet third-party logs that are too verbose log4j.logger.org.spark-project.jetty=WARN log4j.logger.org.spark-project.jetty.util.component.AbstractLifeCycle=ERROR log4j.logger.org.apache.spark.repl.SparkIMain$exprTyper=INFO log4j.logger.org.apache.spark.repl.SparkILoop$SparkILoopInterpreter=INFO |
After setting the log output level to Warning, change your current directory to one level up from the conf folder and start the Spark shell again. You should see a lot less output coming out from the shell before it gives you the scala REPL:

Figure 28: Spark Shell with Logging Level Set to Warn
This concludes the chapter. You now have a running Spark instance on your system. In the next chapter, we are going to go over how to start data processing tasks in Scala, Java, and Python.
- 1800+ high-performance UI components.
- Includes popular controls such as Grid, Chart, Scheduler, and more.
- 24x5 unlimited support by developers.