
Skype Bots Succinctly®

CHAPTER 5
Publishing
Quick intro
We’ve now explored the most interesting features of Skype Bots programming, such as LUIS, the QnA Maker Service, and Scorables—really cool APIs and development paradigms.
All we are missing is to publish our latest example to Skype and test it there—this is what we’ll do now. Ready, set, go!
Publishing to Skype
Registering and publishing a bot to Skype is very easy. First, log in to the Bot Framework Developer Portal with your Microsoft account, and click My bots.
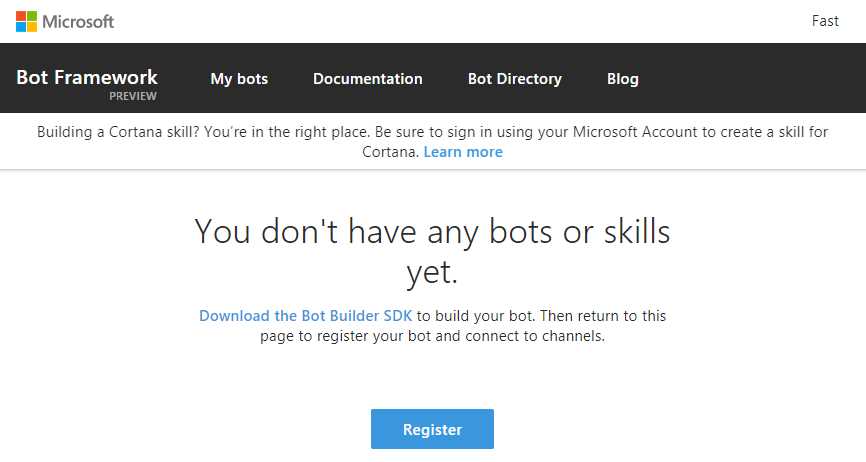
Figure 5-a: The Bot Framework Developer Portal
Once logged in, click Register in order to start the process of registering our bot with Skype. The process is pretty straightforward and intuitive (this is also explained in-depth in my other e-book—Microsoft Bot Framework Succinctly).
As we can see in Figure 5-b, we are required to enter several fields, but the most important one is the Messaging endpoint—which is the public URL where our bot will reside.
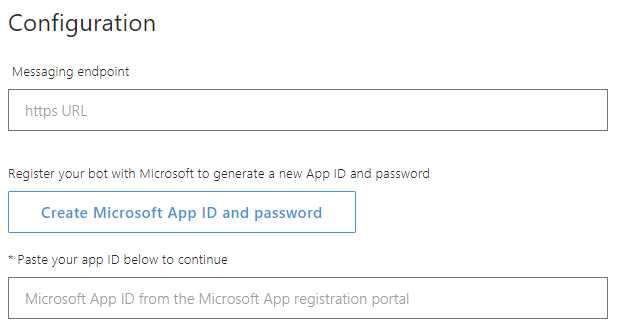
Figure 5-b: Fields Required for Publishing our Bot to Skype
In order to get a public URL for our bot, we need to open Solution Explorer in Visual Studio, right-click on the project name, and then click Publish. We’ll then be presented with a wizard that is very intuitive to follow. We’ll be asked for some information in order for the wizard to be able to create the Azure App Service that will host the bot.
We won’t go over the whole process here, you can see in Figure 5-c how the publishing wizard’s main screen looks after you have chosen the Publish option.
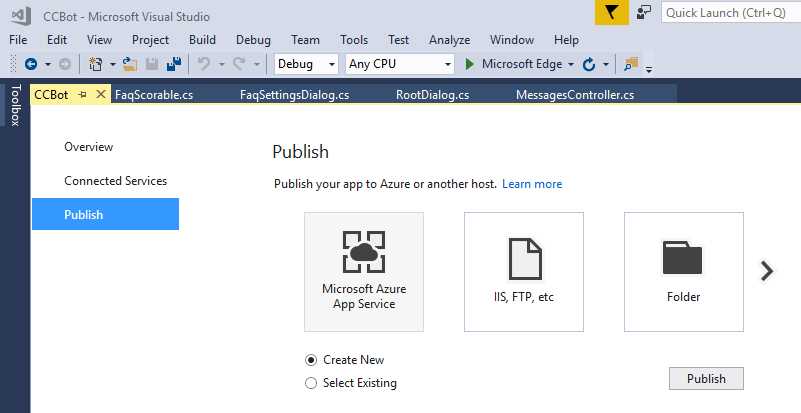
Figure 5-c: The Publishing Wizard in Visual Studio
In Figure 5-d, we can also see the publishing process taking place.
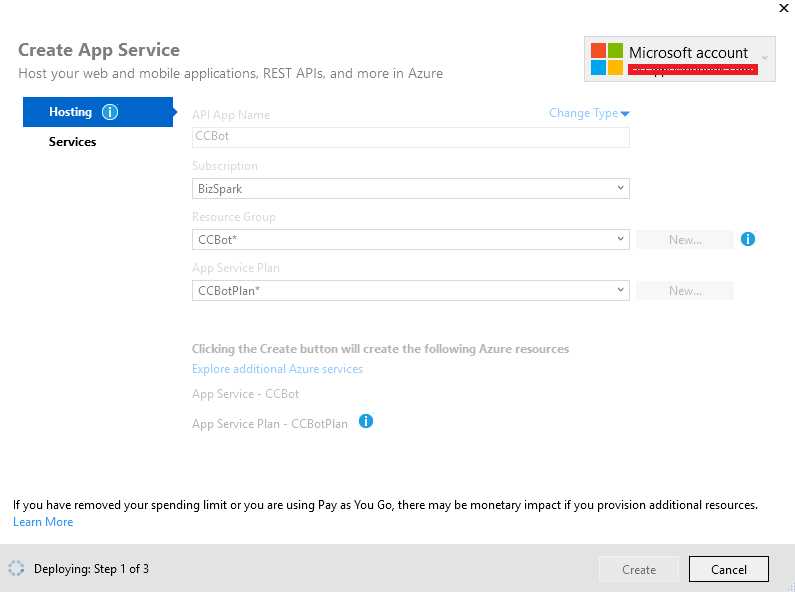
Figure 5-d: The Publishing Process
Once the publishing process is complete, we can get the bot’s public URL, as shown in Figure 5-e.

Figure 5-e: Published Succeed
It is very important that when specifying the messaging endpoint, we add /api/messages, and make sure that the https is used.
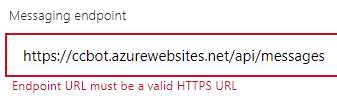
Figure 5-f: The Bot’s Messaging Endpoint
Once we’ve filled in all the data required on the Bot Framework Developer Portal, click Register on the bottom of the form to complete the process.
By default, the Bot Framework automatically deploys the bot to the Skype and Web Chat channels. To test the bot in Skype, all we need to do is to click on the Skype icon on the Bot Framework Developer Portal page, as shown in Figure 5-g.
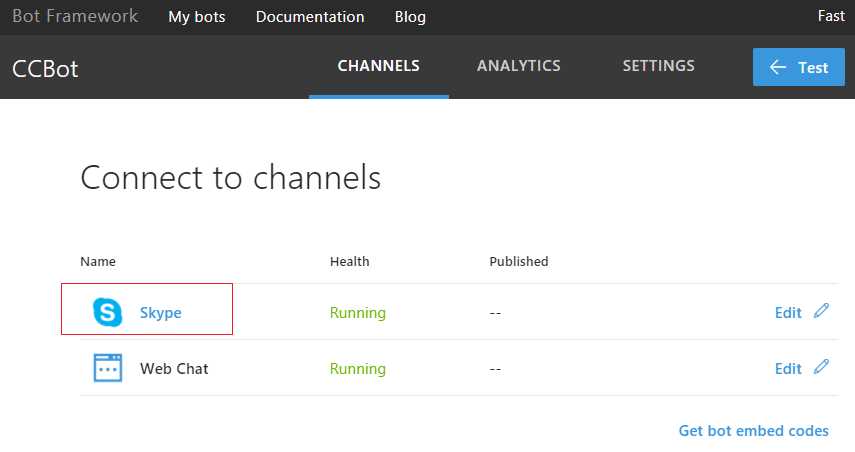
Figure 5-g: The Try on Skype Button on the Bot Developer Portal
Once you click on the Skype icon, you’ll be asked to add the bot to your contacts.
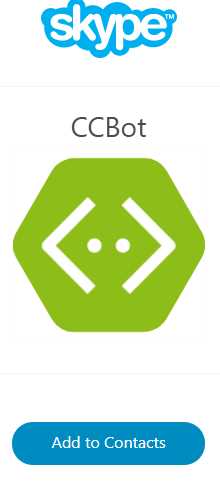
Figure 5-h: The “Add to Contacts” Option
Next, you’ll be presented a browser pop-up window asking you to Open Skype.
Finally, the bot will be added to your Skype contacts list. You’ll be asked to confirm within the Skype application that you would like the bot added to your contacts list. That’s it—let’s now do a quick test.
Testing on Skype
Now that we’ve added the bot to Skype, we can run a quick test to see if it works as expected. As we’ve already tested it extensively on the emulator and have not changed the code, things should work in the same way as on the emulator.
So, let’s simply enter some keywords and see what the bot responds to.
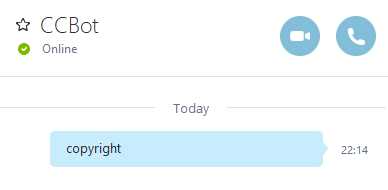
Figure 5-i: Testing Our Bot on Skype
Looks cool! But wait, it seems that the bot is not giving back any answers. The reason is that we forgot to add the bot’s App ID and Password from the Bot Framework Developer Portal to the Web.config file within our Visual Studio project.
Code Listing 5-a: The AppSettings Part of the Web.config File
<appSettings> <!-- update these with your BotId, Microsoft App Id and your Microsoft App Password --> <add key="BotId" value="" /> <add key="MicrosoftAppId" value="" /> <add key="MicrosoftAppPassword" value="" /> </appSettings> |
Let’s enter the values we have for BotId, MicrosoftAppId, and MicrosoftAppPassword.
The BotId is the bot handle, the MicrosoftAppId is the App ID, and the MicrosoftAppPassword is the auto-generated password.
We can get these values from the Developer Portal by clicking on Settings and then Manage Microsoft App ID and password.
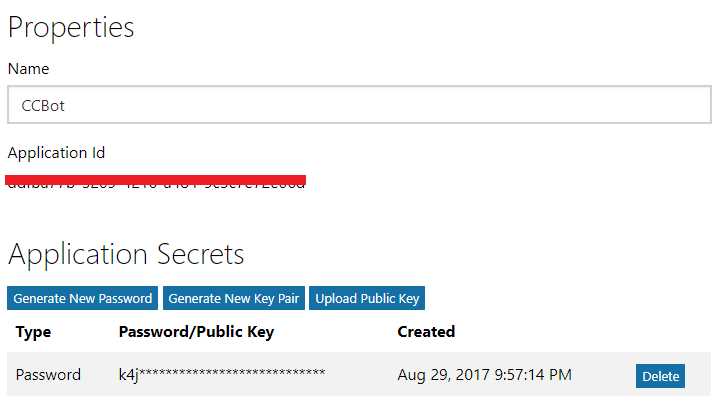
Figure 5-j: The Bot’s App ID and Password
Assuming that you used the same bot name on the developer portal as you did for the Visual Studio project and the Azure App service, the BotId will be the name of the Visual Studio project.
Once you’ve entered the values, save the changes in Visual Studio and publish the bot again. Then, go to Skype and test the bot again. Type in copyright.
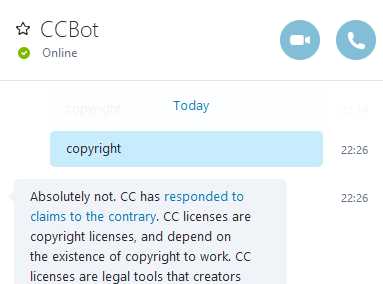
Figure 5-k: Testing Our Bot on Skype Again
Now we’re in business! Feel free to try it further, but bear in mind that the results will be the same as when we tested using the emulator.
We’ve come to the end of our journey—but before wrapping up, I’d like to close with some comments.
Closing comments
It’s been a very interesting journey of exploration—we’ve expanded upon the concepts learned in the Microsoft Bot Framework Succinctly book and looked at APIs and technologies that take bots to the next level.
Skype is Microsoft’s premier communication tool, and one of the most popular communication platforms in the world.
Bots are already starting to add value to businesses and improve the experience for both users and companies. As the ecosystem continues to evolve, there’s a lot of potential for new APIs to further enrich this platform.
There are still plenty of Skype APIs that we didn’t cover in this book, and I invite you to explore some of these newest APIs—still in preview mode—such as Payments and Add-Ins, which could make the conversational experience even more enjoyable for users.
This book has laid out a solid foundation for you to keep exploring all the amazing possibilities that this vast ecosystem has to offer.
I hope you have enjoyed this book, and that it has helped you delve further into Skype development—whether for fun or business purposes.
Thanks for reading and supporting the Succinctly series. Be awesome!
- 1800+ high-performance UI components.
- Includes popular controls such as Grid, Chart, Scheduler, and more.
- 24x5 unlimited support by developers.