
SharePoint 2013 App Model Succinctly®

CHAPTER 4
SharePoint-Hosted Apps
As mentioned in previous chapters, a SharePoint-hosted app is a type of app that is hosted on SharePoint completely within a particular subsite called an app web. Unable to execute server-side code anymore, we are forced with this type of app to create business logic with a fully graphical interface using client-side technologies such as HTML 5 and JavaScript. Actually, you can create such apps to invoke external services but we will talk about that later. Thanks to Office Developer Tools, we have at our disposal the templates that we need to create the project.
The Project
Let’s discuss how to create our first SharePoint-hosted app using Visual Studio 2013.
Open Visual Studio. Create a new project by selecting the template "Office/SharePoint", then select "Apps" and select "App for SharePoint 2013":

- SharePoint app templates
As with any project in Visual Studio, give it a name and a path.
At this point, Visual Studio asks us to enter information (which can be modified later) that includes the name of the app, the site we want to perform debugging on, and the type of app we want to create. In this case, choose SharePoint-hosted as shown in Figure 11:
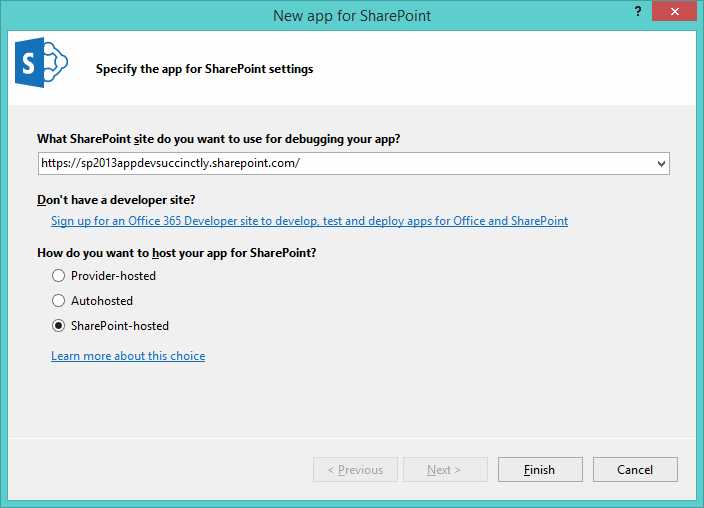
- Choice of hosting type
If you use Office 365, Visual Studio prompts you to log in so you can debug. You can then install the app (you can also skip this step and log in later).
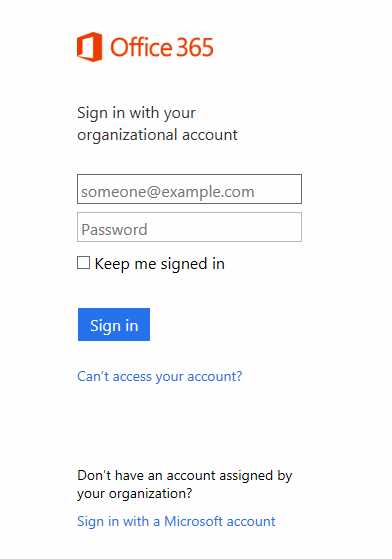
- Office 365 sign in
When you complete this step, we have a new project in Visual Studio for SharePoint. The structure of the newly created project is shown in Figure 13.

- Solution Explorer
As you can see, there are several project items that, in turn, consist of several files. The project items called Content, Images, Pages, and Scripts are SharePoint modules.
Note: Modules are what makes it possible to deploy files within a "virtual file" (or content database) to SharePoint, so then you can make those files available through specific URLs.
These modules contain all the files that must be installed within SharePoint and, more specifically, within the web app that will be created. In the module Pages, you can find the Default.aspx page that contains markup that implements this small app example. The Scripts module contains all the JavaScript files that need the app to work. In the Content and Images modules, there are CSS files and images using this app. By opening the file App.js, we can find this code:
'use strict'; var context = SP.ClientContext.get_current(); var user = context.get_web().get_currentUser(); // This code runs when the DOM is ready and creates a context object which is needed to use the SharePoint object model. $(document).ready(function () { getUserName(); }); // This function prepares, loads, and then executes a SharePoint query to get the current user’s information. function getUserName() { context.load(user); context.executeQueryAsync(onGetUserNameSuccess, onGetUserNameFail); } // This function is executed if the above call is successful. // It replaces the contents of the 'message' element with the username. function onGetUserNameSuccess() { $('#message').text('Hello ' + user.get_title()); } // This function is executed if the above call fails. function onGetUserNameFail(sender, args) { alert('Failed to get user name. Error:' + args.get_message()); } |
This code uses the CSOM in JavaScript to do something very simple that helps you retrieve the username of the user who is currently running this app.
Once you have successfully recovered your username, use jQuery to set the value within a paragraph of the Default.aspx page; otherwise, you receive an Alert that contains the error message.
We will analyze the CSOM in the next chapters, but remember that because we are in a SharePoint-hosted app, we can only use the JavaScript implementation.
A highly interesting thing to note here is that there are two things common to SharePoint solutions, features and packages: for example, we can go to add a list or a Custom Action or other artifact.
Why? Because all of the artifacts of SharePoint, such as Lists and Content Types, can also be published through the classic system (WSPs) but this time in a completely transparent way. In the next chapters we will learn how.
App Manifest
There is another file in the project: AppManifest.xml. This file, which we will find even in provider-hosted apps (as mentioned in previous chapters) is the Application Manifest:
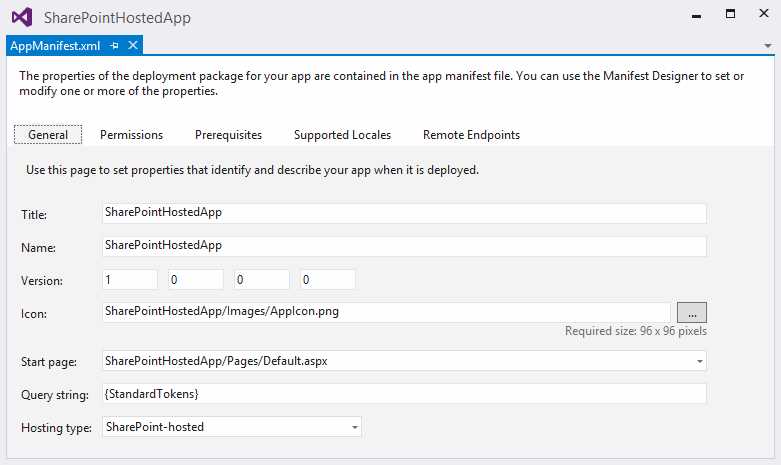
- General tab
What we see is the graphic designer of the App Manifest. We can open the file and display its XML contents:
<?xml version="1.0" encoding="utf-8" ?> <!--Created:cb85b80c-f585-40ff-8bfc-12ff4d0e34a9--> <App XMLns="http://schemas.microsoft.com/sharepoint/2012/App/manifest" Name="SharePointApp1" ProductID="{6d3a5861-3593-4af7-9673-df0d350d8ae9}" Version="1.0.0.0" SharePointMinVersion="16.0.0.0"> <Properties> <Title>SharePointApp1</Title> <StartPage>~appWebUrl/Pages/Default.aspx?{StandardTokens}</StartPage> </Properties> <AppPrincipal> <Internal /> </AppPrincipal> </App> |
As we can see from the graphic designer, there is a lot of information that we can add.
If we go to the Permissions tab, we will see the configuration of the app's security; this is where we can also indicate what permissions the app must have in order to work:

- Permissions tab
The Prerequisites tab allows you to configure all prerequisites (SharePoint Services, for example) that should be guaranteed to work in the app:

- Prerequisites tab
The Supported Locales tab serves to indicate the languages in which the app will be available. For each language, it will generate a resource file which can then be used in your pages.
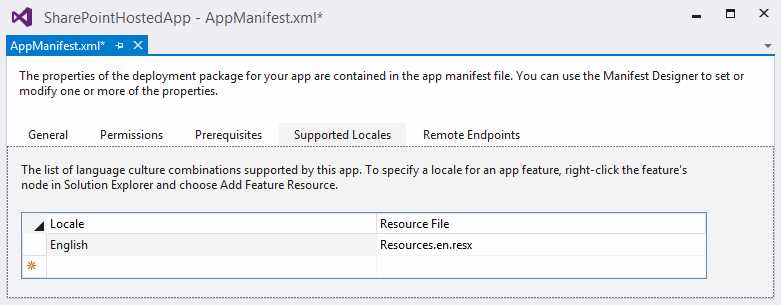
- Supported Locales tab
The Remote Endpoints tab indicates the external services to which the app will eventually connect in order to read or consume data. SharePoint checks cross-domain calls and blocks those that are not authorized if they do not exist within the App Manifest. We will see more details on this in the next few chapters.

- Remote endpoints
The result is as follows:
<?xml version="1.0" encoding="utf-8" ?> <!--Created:cb85b80c-f585-40ff-8bfc-12ff4d0e34a9--> <App XMLns="http://schemas.microsoft.com/sharepoint/2012/App/manifest" Name="SharePointHostedApp" ProductID="{6d3a5861-3593-4af7-9673-df0d350d8ae9}" Version="1.0.0.0" SharePointMinVersion="16.0.0.0"> <Properties> <Title>SharePointHostedApp</Title> <StartPage>~appWebUrl/Pages/Default.aspx?{StandardTokens} </StartPage> <SupportedLocales> <SupportedLocale CultureName="en" /> </SupportedLocales> </Properties> <AppPrincipal> <Internal /> </AppPrincipal> <AppPermissionRequests> <AppPermissionRequest Scope="http://sharepoint/content/sitecollection" Right="FullControl" /> </AppPermissionRequests> <AppPrerequisites> <AppPrerequisite Type="Capability" ID="132084D8-5DA6-4EAB-A636-3ADF44151846" /> </AppPrerequisites> <RemoteEndpoints> <RemoteEndpoint Url="http://www.test.com" /> </RemoteEndpoints> </App> |
In the XML syntax, the address of the start page is the first part, the value ~appWebUrl. This value will be replaced during installation with the value corresponding to the URL of the app web being created.
Summary
In this chapter, we learned how to create and structure the SharePoint-hosted app. As mentioned previously, this app must be developed using only client-side technology such as JavaScript. It is possible to insert into your project artifacts such as lists, Content Type, Modules, etc., declaratively. This will automatically be installed in the app web that will be created during installation.
- 1800+ high-performance UI components.
- Includes popular controls such as Grid, Chart, Scheduler, and more.
- 24x5 unlimited support by developers.