
Roslyn Succinctly®

CHAPTER 6
Deploying Analyzers to NuGet
One of the benefits of code analyzers is that they can be shared with other developers. For instance, you might have written an analyzer that detects code issues when implementing the MVVM pattern in WPF, and you want to make it public. Additionally, you might ship your own libraries and APIs including integrated Roslyn code analysis. This is an incredible opportunity: For example, if you build and sell user controls, you can include code analyzers that detect code issues and suggest fixes based on the programming patterns required by your APIs. This chapter explains how to package and deploy analyzers to the popular online library repository NuGet for the best integrated experience possible.
Note: The steps described in this chapter do not apply to code refactoring projects because these do not automate the generation of a NuGet package. Some tricks to publish a code refactoring to NuGet will be provided in this chapter, but the official, supported way to deploy a refactoring is only via the Visual Studio Gallery, which is the topic of the next chapter.
Quick Recap: About NuGet
NuGet (pronounced New Get) is an online package repository where developers can publish and find libraries. A NuGet package contains .dll libraries and metadata information about the package description and package dependencies. Visual Studio 2015 has integrated NuGet client tools that allow finding, downloading, and installing NuGet packages from within the IDE. These client tools automatically resolve and install any dependencies the package relies on, so that you do not have to worry about finding and downloading other libraries manually. You saw an example of how to use NuGet to install an analyzer package to a project in Chapter 2. In this chapter, you make a step forward: you will learn how to publish an analyzer package to NuGet, so that other developers will be able to install and use your analysis rules in their projects.
Preparing an Example
To demonstrate the process of deploying an analyzer to NuGet, I will use the DateTimeAnalyzer project created in Chapter 4. Obviously, you will not be able to publish the same analyzer because it already exists on the NuGet gallery, but the steps described here apply to any analyzers you build on your own.
Preparing for Publication
The Analyzer with Code Fix (NuGet + VSIX) project template automatically generates a NuGet package containing the compiled analyzer every time you build the project. This is possible because of specific MSBuild rules that automate the generation of the package. This resides in the Bin\Debug or Bin\Release subfolders of your project, according to the selected build configuration. Its name is made of the project name, of the version number, and of the .nupkg extension. For example, the name for latest stable version of the DateTimeAnalyzer package I’m using for this chapter is called DateTimeAnalyzer_VB.1.0.5710.29175.nupkg, where 1.0 is the major/minor pair and 5710.29175 is the build/revision pair.
Understanding NuGet Packages for Analyzers
Generally speaking, NuGet packages are zip archives with .nupkg extensions, and contain a number of elements, including files that must be installed onto the target machine. The structure for a NuGet package can be very complex, and explaining it in detail is out of the scope of this book, whose purpose is teaching you the basics of the .NET Compiler Platform, not the NuGet package conventions.
With specific regard to analyzers, a NuGet package contains (at least) the following elements:
- The package manifest, which contains metadata information and the list of files and dependencies that the package relies on. This is discussed in the next subsection.
- A folder called analyzers\dotnet that contains language-agnostic analyzers or language-specific folders, such as analyzers\dotnet\vb and analyzers\dotnet\cs.
- A folder called tools, which contains two PowerShell scripts called Install1.ps and Uninstall1.ps. When you install an analyzer package to a project with the NuGet Package Manager, Visual Studio 2015 executes the Install1.ps script to install the analyzer. To remove the package, Visual Studio executes the Uninstall.ps1 script when you decide you do not need it any longer and you want to remove it via the NuGet tooling.
Understanding these basic concepts is important because you will work with the structure of a package when editing its manifest in the next subsection. For a comprehensive list of elements that can be added to a NuGet package, and for a full package authoring guide, you can read the official NuGet documentation.
Editing the Package Manifest
Before a NuGet package can be published, you need to edit its manifest. The manifest contains metadata information, such as package id, title, description, and author, but also the list of files that the package is going to install to the target project and the list of dependencies that NuGet will automatically resolve. The package manifest is an XML file with .nuspec extension. For analyzers, Visual Studio 2015 automatically creates a manifest file called Diagnostic.nuspec that you can see in Solution Explorer and open inside a Visual Studio editor window. The XML elements in the .nuspec file are self-explanatory; however, you must pay particular attention to the following:
- id: this represents the unique identifier for the package in the NuGet online gallery.
- version: this allows specifying the package version number and is important for providing package updates. Notice that you can manually edit the major and minor version numbers, but Visual Studio 2015 automatically supplies and updates the build and revision version numbers of a package every time you rebuild the project, disregarding the content of version.
- licenseUrl: the web address of the license agreement for the package (optional).
- requireLicenseAcceptance: if true, users will need to accept the linked license agreement before downloading and installing the package. Notice that the default value is false. Remember that it cannot be true if you do not specify a valid license URL.
- tags: by specifying comma-separated tags, users will be able to find your analyzer in the NuGet gallery by typing one of the specified tags in either the search box of the Visual Studio’s Manage NuGet Packages window, or in the online web site.
Code Listing 18 shows how the Diagnostic.nuspec file has been edited for the current sample package.
Code Listing 18: Editing the NuGet package manifest
<?xml version="1.0"?> <package xmlns="http://schemas.microsoft.com/packaging/2011/08/nuspec.xsd"> <metadata> <id>DateTimeAnalyzer_VB</id> <version>1.0.0.0</version> <title>DateTime analyzer for Visual Basic</title> <authors>Alessandro Del Sole</authors> <owners>Alessandro Del Sole</owners> <licenseUrl>http://opensource.org/licenses/MIT</licenseUrl> <projectUrl>https://github.com/AlessandroDelSole/RoslynSuccinctly/> <!-- Commenting this line, not necessary <iconUrl>http://ICON_URL_HERE_OR_DELETE_THIS_LINE</iconUrl> --> <requireLicenseAcceptance>true</requireLicenseAcceptance> <description>This analyzers detects improper usages of the DateTime type in Windows Store and OData applications, where you should use DateTimeOffset instead</description> <releaseNotes>First stable release to the public.</releaseNotes> <copyright>Copyright 2015, Alessandro Del Sole</copyright> <tags>Roslyn, analyzers, datetime</tags> </metadata> <!-- The convention for analyzers is to put language agnostic dlls in analyzers\dotnet and language specific analyzers in either analyzers\dotnet\cs or analyzers\dotnet\vb --> <files> <file src="*.dll" target="analyzers\dotnet\vb" exclude="**\Microsoft.CodeAnalysis.*; **\System.Collections.Immutable.*; **\System.Reflection.Metadata.*; **\System.Composition.*" /> <file src="tools\*.ps1" target="tools\" /> </files> </package> |
You can use the releaseNotes element to describe what’s new with an updated package version. Notice how the files node contains the list of files that will be installed by the package. More specifically, the first file element will install the analyzer’s .dll library into a project folder called analyzers\dotnet\vb if the analyzer targets Visual Basic (VB), or into analyzers\dotnet\cs if the analyzer targets C#. If the analyzer is language-agnostic (that is, can be used against both languages), the analyzer’s .dll library is installed into a project folder called analyzer\dotnet. The exclude attribute tells NuGet that the specified dependencies will not be downloaded (the reason is that they are available by default in a project). The second file element tells NuGet to extract the Install.ps1 and Uninstall.ps1 scripts described in the previous section into a project subfolder called tools.
Assuming you have made all the required edits to the manifest of your analyzer, make sure the build configuration is set to Release, and then rebuild the project. Open the Bin\Release project subfolder and locate the highest updated version of your package. This will be used in the next section to complete the deployment process.
Publishing Analyzers to NuGet
In the previous section, you created a NuGet package for your analyzer. Such a package can be published to the NuGet gallery so that other developers will be able to consume it in their projects in the same way you did with the DateTimeAnalyzer in Chapter 2. However, the official NuGet repository is not a playground, and you might want to avoid publishing unstable packages. Fortunately, Visual Studio 2015 can consume local packages on your development machines. This allows local testing before graduating to the online repository. This is the next topic of this chapter.
Testing Packages Locally
Visual Studio 2015 allows picking NuGet packages not only from the official NuGet repository online, but also from local folders and online feeds that are compatible with the NuGet specifications. This gives you an option to test your packages on your development machine before publishing your work online. To demonstrate how this works, create a new local folder called C:\LocalPackages. Then, copy the DateTimeAnalyzer_CS.1.0.5710.29175.nupkg analyzer’s NuGet package into this folder (or DateTimeAnalyzer_VB.1.0.5710.29175.nupkg for Visual Basic).
Finally, open Visual Studio 2015. Remember that Visual Studio updates the package version number at every build, so you might have a slightly different version number. What you have to do at this point is configure the integrated NuGet client tools to recognize the local folder as a package source. To accomplish this, select Tools > Options, and in the Options dialog box, expand the NuGet Package Manager node. Finally, select the Package Sources element (see Figure 38).
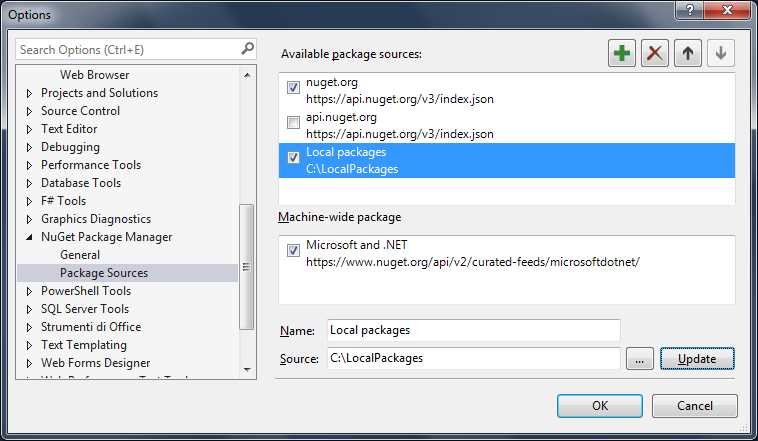
Figure 38: Configuring NuGet package sources
Click the button with the green + symbol to add a new package source. In the Name text box, enter a friendly name for the package source, which will be displayed in the NuGet Package Manager window. In the Source text box, enter the newly created folder name (see Figure 38). When ready, click OK.
To test the package locally, follow these steps:
- Create and save a new Windows Phone 8.1 project with the programming language that matches the analyzer’s target language.
- In Solution Explorer, right-click the project name and select Manage NuGet Packages.
- When the NuGet Package Manager appears, from the Package source combo box, select the Local packages feed (see Figure 39).
- Select the desired package, review the information, and then click Install.
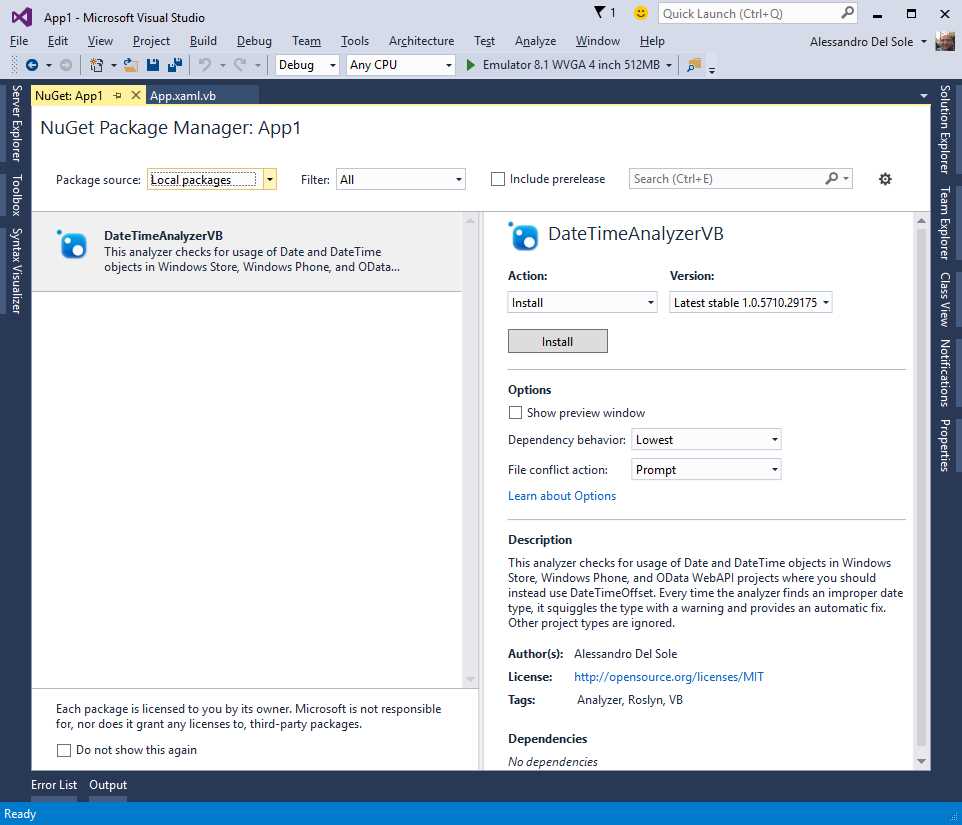
Figure 39: Selecting and installing the NuGet package from a local repository
After a few seconds, the package will be installed to the project and the analyzer will be immediately available. To demonstrate how it works, you can follow the steps described in the section called “Downloading, Installing, and Using Code Analyzers” in Chapter 2, and you can take Figures 17 and 18 as a reference. Assuming you have made your local tests to make sure the analyzer works as expected, it’s time to move online and share the analyzer with other developers.
Note: Developers expect to find only stable and professional packages on the official NuGet gallery. So before you graduate your package from local testing to NuGet, it’s a good idea to make an intermediate test by publishing the package to one of the online NuGet hosting services, such as MyGet. This allows you to create your personal and enterprise NuGet feeds outside of the official gallery.
Moving to the Online NuGet Repository
In order to share an analyzer package with the public, you have to sign into the NuGet portal. If you don’t have an account, you can register for free by supplying your credentials or using an existing Microsoft account.
Once you’ve signed in, click Upload Package. You will be asked to specify the NuGet package you want to upload, so click Browse, and then locate and select the highest version of the package. Figure 40 shows an example based on version 1.0.5710.29175 of the DateTimeAnalyzer_VB package.
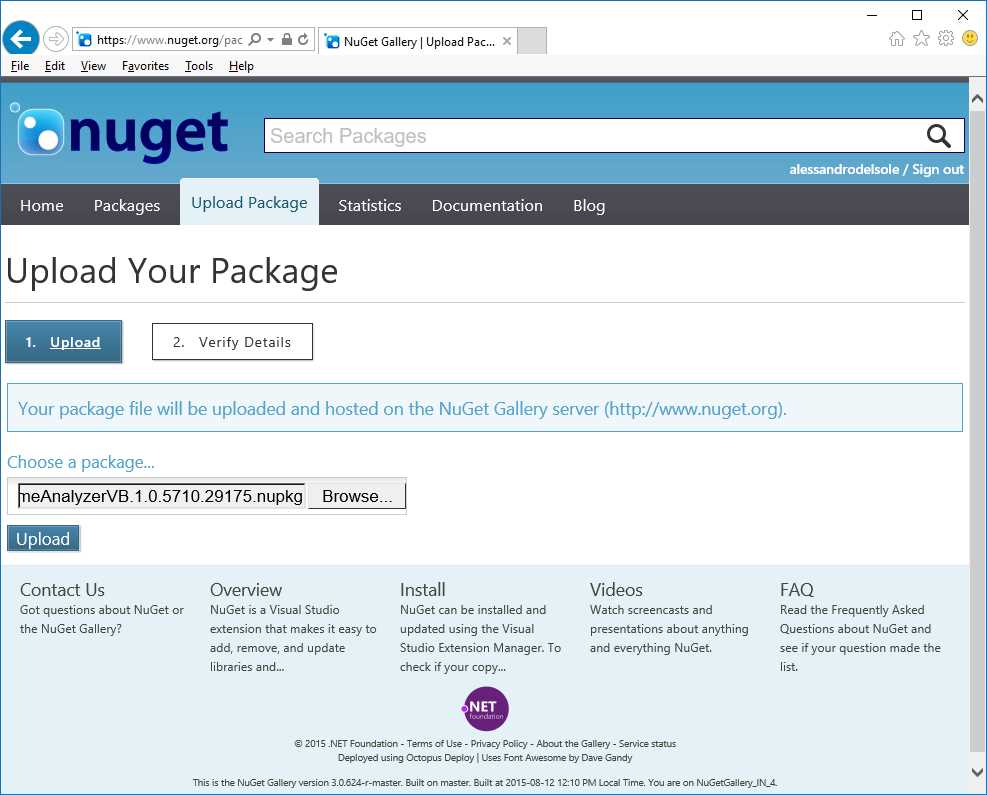
Figure 40: Uploading a NuGet package
Click Upload. When the upload has been completed, you will have an option to review the package details, as shown in Figure 41. Whether or not you need to make changes to the package details, submit the information to finalize the publication process. After 15 to 20 minutes, the package will be listed in the NuGet feed.
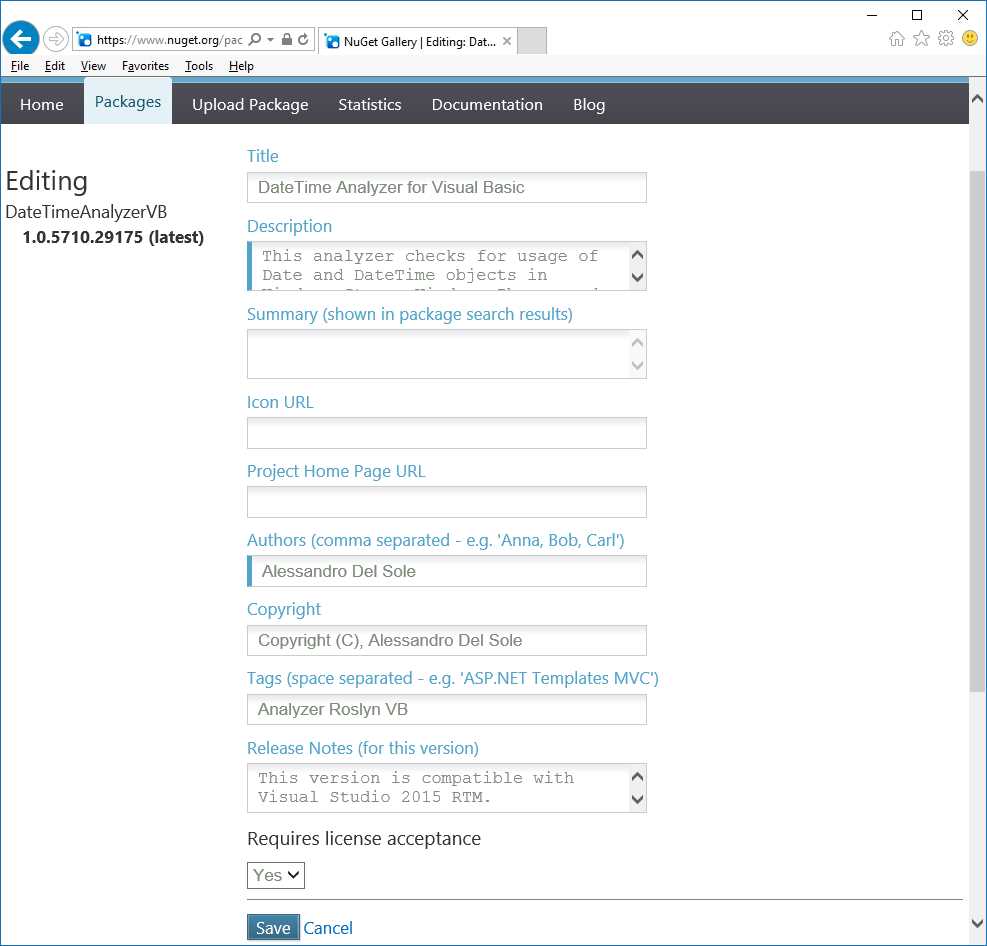
Figure 41: Viewing and editing package details
In Visual Studio 2015, you can then add the NuGet package from the official repository in one of the supported project types, for example, a Windows Phone 8.1 app. Figure 42 shows the NuGet Package Manager window with the published package highlighted.

Figure 42: The NuGet package is available from the online repository
You can then follow the steps described in Chapter 2 to download the package and use the analyzer it will install to your project. At this point, you have shared your analyzer with the world, and other developers will be able to leverage your analysis rules in their projects.
Tips and Tricks for Analyzers and Refactorings
This section includes a number of tips and tricks to make your experience with NuGet and Roslyn better.
Deploying Refactorings via NuGet Packages
As I told you at the beginning of this chapter, the Code Refactoring project template does not include MSBuild rules that automate the generation of a NuGet package, and the default way to share a refactoring is via the Visual Studio Gallery, which is detailed described in the next chapter. However, if you add a code refactoring to an analyzer project via the Refactoring item template, this is bundled into the NuGet package together with the analyzer, and will be properly installed alongside the diagnostics.
Integrating Roslyn Analysis with Your APIs
You can ship NuGet packages that contain your libraries and Roslyn analyzers and refactorings. This gives developers an improved coding experience when using your APIs. For instance, a diagnostic might report a warning every time a developer is writing improper code against your libraries, and a code fix might help supplying more appropriate code snippets. You have two alternatives to accomplish this:
- Including your .dll libraries into the NuGet package that Visual Studio generates for your analyzers.
- Publish two separate NuGet packages: one for your APIs, and one for code analysis, plus a third, empty package that only contains metadata and dependencies information required to gather them both at install time. This approach allows developers to choose if they only want your APIs or both libraries and integrated code analysis.
In both cases, you need to be familiar with package authoring. The best place to find information about this is the official NuGet documentation. Also, you can take a look at an article I wrote for MSDN Magazine, which discusses this topic in more detail.
Chapter Summary
Microsoft Visual Studio 2015 provides an easy way to share your code analyzers with other developers by automating the generation of a NuGet package that contains the analyzer binaries and metadata information required to provide package details to consumers. Before you deploy your analyzers to the official NuGet gallery, it is important to make local tests on your development machine to make sure your package works properly and offers a stable development experience.
Visual Studio 2015 has specific options that can be configured to pick packages from local folders, so that you can test any packages as you would from the online NuGet repository. Once you are satisfied with local tests, you can graduate your package to NuGet by signing in and uploading your package. Developers will be able to find your analyzers in a few minutes, and they will be able to take advantage of your Roslyn-powered work.
- 1800+ high-performance UI components.
- Includes popular controls such as Grid, Chart, Scheduler, and more.
- 24x5 unlimited support by developers.