
Rider Succinctly®

CHAPTER 2
Up and Running with Rider
When you run Rider for the first time, you will be met with a series of screens for setting up your environment. First of all, you will get a chance to import settings from a previous version of Rider. This will become relevant as you upgrade Rider—something that the Toolbox makes painfully easy to do.

Figure 3
Next up, you can pick whether you want Rider to use the light or dark UI theme. I cannot recommend the dark theme (known as Darcula) strongly enough, especially if you run a multi-monitor setup and do not want to burn your eyes out.

Figure 4
The next step is to define a color scheme. This is quite different from a theme: themes determine how the UI looks, whereas color schemes determine what colors are used to highlight your code.

Figure 5
The options here are:
- ReSharper Dark is very similar to what Visual Studio ships with, but you’ll notice that it uses quite a bit more color in places where Visual Studio does not. This setting is actually called Color Identifiers, and is very much a personal choice. Personally, I think it adds a bit too much color to an already crowded editor.
- Visual Studio Dark is a near-perfect replication of the dark Visual Studio layout (without ReSharper). The only differences are in places that Visual Studio doesn’t bother to highlight, such as tokens in regular expressions.
- Darcula is the color scheme that ships with IntelliJ IDEA and other JetBrains IDEA-based IDEs. It makes sense to use this theme if you have already been using it previously on other IDEs in the JB product line, and want to preserve visual consistency.
Next up, you get to select the keymap, that is, which keyboard keys perform operations such as Compile, Run, etc.

Figure 6
The options here are to either use the Visual Studio keymap (keep in mind it will never match completely with VS because VS itself is internally inconsistent between versions), the ReSharper keymap, or the new Rider keymap.
Next up, you get to select some of the default (JetBrains-created) plug-ins. These include plug-ins for version control, web development and a lot more. You can use the Disable hyperlinks to disable any of the plug-ins if you don’t need them: otherwise, they will be included in your installation.

Figure 7
It generally makes sense to disable things you don’t need—you can always install any of these plug-ins at a later time. For example, in terms of source control plug-ins, I suspect that 99 percent of users would simply leave Git (there’s special support for GitHub, too) and can safely disable everything else. One interesting thing to note: even though the F# language support is included as a plug-in and can be disabled, C++ language support cannot be removed in the same fashion.
Following the selection of the “default” (official) plug-ins, the next screen shows a set of featured plug-ins that are not as essential, but could be useful to some users.

Figure 8
This selection of plug-ins is downloaded from the Internet, and is likely to be changed by JetBrains. Just click the Install button to install it, but beware: some plug-ins (such as IdeaVim) can fundamentally change the operation of the IDE and leave you stuck in a state where you are unable to operate the IDE properly. That explains the warning shown in Figure 8.
That’s it for configurations. The following Getting Started screen give you some links to learn more about Rider. At this point, you can close the dialog box, and you’ll end up at the Start screen.
The Start screen
The Start screen looks different depending on whether you’re using it for the first time or not. If you’ve used Rider before, the left-hand side includes a list of recent projects that you can immediately click.

Figure 9: Rider Start Screen
On the right, you can see three ways by which a project can be opened. The options are:
- Make a new solution. Just like Visual Studio, Rider provides a number of project templates for you to get started with.
- Open an existing solution or project. Rider uses the Visual Studio project system, so members of the team can work in either Rider or Visual Studio and it won’t affect the development process in any drastic way. There are differences, of course, which we’ll discuss as we go along.
- Open a project from VCS (Version Control System). Rider supports all the popular VCS systems.
The Start screen also allows direct access to Rider’s various settings via the Configure dropdown item, just in case you want to access them without opening a solution first:
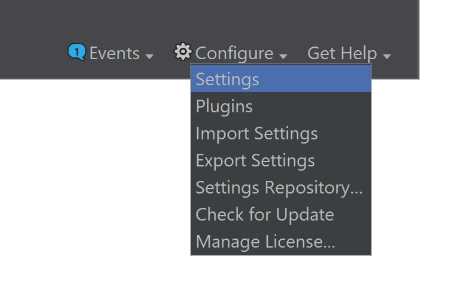
Figure 10: Rider Configure Dropdown Menu
From the Configure menu, you can see that the following options are available:
- Settings: Lets you customize a wealth (I mean it, there are lots) of settings related to the IDE
- Plug-ins: Lets you manage plug-ins which, again, not as simple a process as it seems – we’ll discuss it later
- Import/Export Settings: Allow you to bundle up the settings into a single JAR file and share them with someone.
- Settings Repository: Allows you to stick your settings into a source control service such as GitHub or BitBucket, and then use those settings, merging them with your own.
The two remaining options, “Check for Update” and “Manage License,” are self-explanatory.
Rider user interface
Being an Integrated Development Environment, Rider is essentially a text editor surrounded by a large number of different tool windows. Each tool window takes up a small section of the screen; some of them can be tabbed together. Here’s a view of Rider with lots of tool windows open:

Figure 11
As you can see, we have the Solution Explorer on the left, the Errors in Solution window on the right, and a Terminal on the bottom.
You can use the mouse to show and hide these windows, but there’s a better way: using the keyboard and something called the Switcher.
To bring up the switches, press Ctrl+Tab. A pop-up window similar to the following will show up in the center of the screen:

Figure 12
The Switcher is divided into two parts. The left side is a listing of some of the available tool windows. Each one has a shortcut key that you can press to toggle in order to show or hide this window. This shortcut key also combines with the Alt key—to toggle the visibility of the Solution Explorer, you can simply press Alt+1 without opening the Switcher in the first place. The right-hand side of the Switcher is a listing of some of the recent files that we’ve been working with. We can use the arrow keys to select one of them and press Enter to open that file. And yes, the mouse also works here.
Now let’s talk about the editing pane. Each file occupies a separate tab and, by default, only one file is visible at a time. You can left-click to open a tab or middle-click (assuming you have a middle mouse button) to close a tab. Tabs can also be reordered. You can also have more than one file shown in the central editing pane; to do this, you can split the editor vertically or horizontally by right-clicking the tab and choosing the appropriate options:

Figure 13
Rider also comes with several editing modes that control the way code is displayed on screen. They are:
- Distraction-free mode: Most UI elements except the title bar and menu bar are removed, editor adornments are also removed, code appears right in the middle of the screen.

Figure 14
- Presentation mode: Useful for giving presentations. Hides everything except code, line numbers, and the scrollbar. Tries to hide the menu, too, but it’s available if you move the cursor to the top of the screen.
- Fullscreen mode: Hides the title bar and auto-hides the menu bar; the rest of Rider appears as before.
Important tool windows
First and most important is the Solution Explorer, which is a tool window showing the structure of your entire solution:

Figure 15
While it’s tempting to use the Solution Explorer to navigate individual files, there are plenty of other navigation mechanisms (described later in this book) that let you do it more efficiently.
Another, Rider-specific window is called File Structure. It’s a window that shows an outline of the members of the file you’re currently working with:

Figure 16
The third tool window worth mentioning (because, although you can hide it, you really cannot avoid it) is the Output window. The Output window collects all the textual output from compilation and other processes that happen within Rider.
There are a couple of other windows that will be considered later on in this book.
Look and feel
The customization of the IDE is not limited to choosing the theme to use on the setup screen. There are plenty of additional customization options worth discussing.
First of all, you might want to customize in detail the fonts and colors that are used to render text—whether it is the text of the IDE’s UI, the code that is being edited, or text in other windows (such as the terminal window). This isn’t as simple as it seems, since IDEA uses a hierarchical set of definitions for fonts and colors used to render text.
The default set of fonts and colors is defined in the Color Scheme setting. This is the color scheme you chose when installing Rider, though if you open it in the Settings window, you will find quite a few more settings:

Figure 17
As you can see, the set of color schemes corresponds roughly to whether you chose a ReSharper or Visual Studio scheme and light or dark theme. Darcula is dark by definition, and is represented in all of JetBrains’ IDEA-based IDEs. As you may have guessed, it’s also possible to import and export color schemes, and you can find plenty of schemes available online.
A color scheme is a complicated concept. At the top level, it defines the fonts and colors used in general—a group of settings that are used in all text editors, regardless of programming language:

Figure 18
You’ll notice that for each element, there is a preview window, but curiously enough, there are only settings for the foreground/background color of the font, whether it’s bold or italic, whether an error stripe (see those lines in the preview pane’s right margin?) is shown and in what color. Additionally, you can specify different effects, such as the text being underlined with a wavy line.
Customizing fonts
All this is well and good, but what about the font family and size? Those settings are in the Font section, which is just above Color Scheme:

Figure 19
This definitely needs an explanation. By default, the scheme you choose also mandates a particular font. This is what the exclamation point icon at the top is telling us. You can, however, change the font to something of your liking. Here are the things you can specify:
- Font family: This determines the font that is used for code (not for other things, such as the Console window). Please note that some monospaced fonts (such as Lucida Console) are not identified as such by Rider, which may require you to uncheck the Show only monospaced fonts option to get them to appear in the dropdown list.
- Font size, measured in pixels: This may cause unpleasantness because pixels are DPI specific, so if you sync settings between computers with low- and high-DPI screens, it won’t be pretty!
- Line spacing controls the distance between two subsequent lines. You really want to keep this value between 1.0 and 1.2. Values less than 1.0 will cause lines to overlap, whereas large values will leave too much empty space between lines.
Note: Rider does not support fractional font sizes. Unlike Visual Studio, which keeps font sizes in points, Rider stores it in pixels. This means that if you are used to, say, a 10-point font in Visual Studio, you will never get exactly this font size in Rider. Sorry about that!
- Fallback font is the font to be used by the IDE when the currently selected font does not have a particular character. For example, some character sets do not have Cyrillic characters, so if you start typing Russian in your source code (completely legal, by the way), the fallback font will be used.
IDEA also supports ligatures. If you haven’t met ligatures before, they are essentially special rules encoded in the font that change the presentation of symbols written together to something more readable. Don’t worry, the underlying code still appears as before! Here is an example:
Code Listing 1: Ligature Example
// without ligatures |
Rider supports ligatures, and does so better than Visual Studio—at the time of writing, certain ligatures, such as <= and >=, are broken in Visual Studio as a direct consequence of being broken in the entire WPF subsystem! Rider handles these just fine though, so feel free to try out ligature-supporting fonts, such as the free FiraCode, before you decide to go for expensive commercial-grade ones (I recommend PragmataPro).
Language-specific settings
Following the set of general-purpose text settings, each color scheme also comes with programming-related settings section called Language Defaults. I think we can all agree that all programming languages have certain things in common (like variables), right? Well, this is where you can fine-tune how those things look:

Figure 20
In the screenshot shown in Figure 20, I am changing the settings for a keyword. Language-specific settings can, of course, override the way things look, but by default all my keywords will be light-blue colored.
Mainstream programming languages such as C#, VB.NET, and F# are covered perfectly by the previous set of features, so they aren’t afforded any additional sections under Color Scheme. Other languages do have specific settings though: for example, JavaScript has settings for both when it’s standalone and when it’s embedded in Razor views.
Needless to say, all these settings can be customized to your heart’s content. You can even devise your own color scheme and distribute it online.
Code style settings
Let’s talk about code styles. While C# isn’t strict about code styles, teams and individual developers typically have their own preferences as to how things are named. For example, do you use underscores in front of field names? Some people do, some people don’t. Some people use tabs, and some use spaces. Some hate var, and others have var virtually everywhere. Luckily for us, Rider is very configurable, and is bound to satisfy even the most sophisticated developer.
Code style settings are different according to language/technology, and vary widely. Let’s just take a look at some of the settings available for C#:
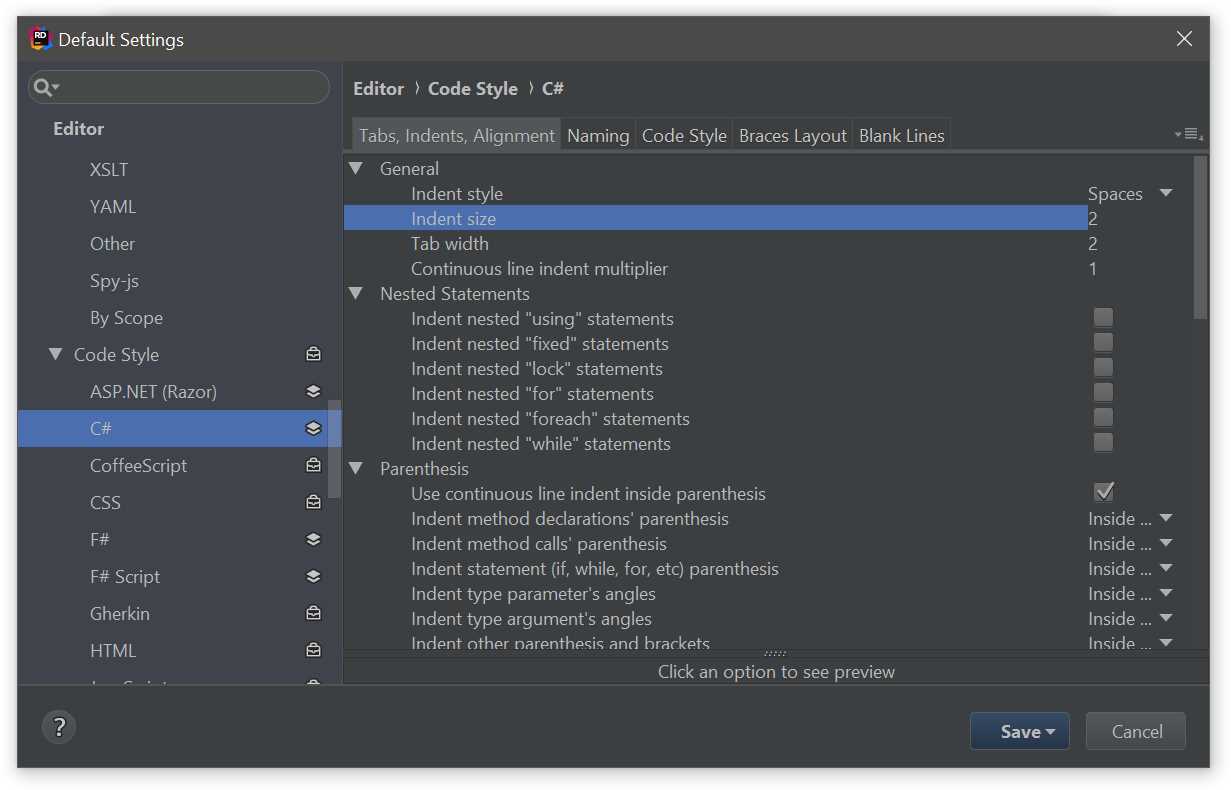
Figure 21
As you can see, there is a lot to discuss here. We have sections dedicated to:
- Tabs, indents, alignment: Controls the distribution of spaces within each of the opened files. The most important settings here are whether you want to use tabs or spaces and how big the indentation actually is. Correct application of these settings can prevent romantic breakups.[1]
- Naming: Controls how variables are named. Rider comes with a set of defaults that may not be to everyone’s liking, so you’ll definitely be spending time in this menu in order to fine-tune things to the way you want.
- Code style: Where you control the way Rider enforces the coding style in your C# source code. For example, suppose you want to set a policy on the use of the var keyword. You have lots of options here:

Figure 22
As you can see, you can choose the location where var declarations are inspected (for built-in types, simple types, and elsewhere); what Rider actually is going to suggest (to use var explicitly, to use only when “evident,” or to use the explicit type name); and, finally, what kind of highlighting is shown.
But we haven’t discussed highlighting yet, have we? Now is a good time to explain what this is. To better appreciate highlighting, here’s a screenshot of a simple Hello World program:

Figure 23
For such a simple program, the editor is quite crowded! Let’s discuss all the interesting parts:
- The class name Program has a green wavy underline beneath it. When code elements are underlined, this means Rider is trying to tell us something. In this particular case, it’s telling us that the class is never instantiated directly, and you can make it static if you want to. Wavy lines are used for warnings and errors—this distinction will be important later.
- The argument args is shown in gray instead of white like the rest of the code. This tells us that this code element is unused and can be safely removed.
- The type String has a dotted line beneath it, but it doesn’t cover the entire name of the type. These dotted highlights are used to indicate hints and suggestions.
Now take a look at the scroll bar on the right of the window. In addition to the scroll bar itself, there are also horizontal lines of various colors. These lines indicate possible issues in your code. Each line is clickable, and clicking it takes you to the line of code it corresponds to. There is a one-to-one correspondence between highlights and markers.
At the very top of the scroll bar, you can see an exclamation point icon. This is a summary of all the issues found in the file; it will only turn green if you fix every one of the issues that Rider finds (or explicitly suppress them, which is also possible).
So now, coming back to that var setting we discussed earlier, you can appreciate the different options that Rider offers for that particular code style setting:

Figure 24
There are five possible options that you can set:
- Do not show simply does not show the inspection. You don’t get any code underlined and you don’t get any markers in the scrollbar.
- Hint and suggestion help you fix these issues if you want to, but there is no direct imposition to get those fixed “here and now.”
- Warning and error are settings that put a bit more of a burden on the developer. These result in red wavy underlines and corresponding orange/red marker bars.
Hopefully it’s clear how these settings relate to the editing experience. The last part of the puzzle, quick fixes, is explained later in the book.
Keyboard shortcuts
While Rider’s development cannot be called 100 percent mouse-less, most of its functionality is available via various keyboard shortcuts. Rider comes with several bundles of keyboard shortcut settings (called keymaps) that emulate the behavior of other well-known development environments:
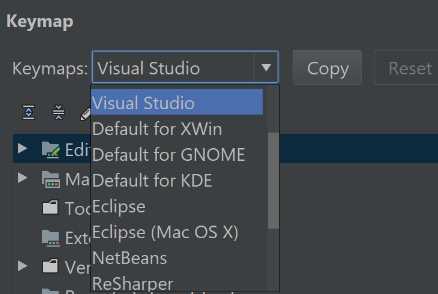
Figure 25: Keymap Selection Dropdown List
The two keymaps you are most likely to go for are ReSharper (if you have used ReSharper before) or Visual Studio (if you haven’t used ReSharper but have used Visual Studio).
Note: You cannot modify a predefined keymap.
In addition to using a predefined keymap, you can also customize each key individually. This is particularly relevant if, like me, you have fallen into the cult of mechanical keyboards and are missing, say, the F-key row (I’m typing this on an FC660C, just so you know).

Figure 26: Shortcut Customization
You’ll notice that each action can have one or more shortcuts (or none at all), and each shortcut can be not just a single keypress ,but also a (comma-separated) sequence of key presses.
But that’s not all! In addition to keyboard shortcuts, Rider’s actions can also be invoked using mouse shortcuts and abbreviations. What are they?
A mouse shortcut is a shortcut that gets invoked by clicking one or more of the mouse buttons or using the scroll wheel. This can also be combined with modifier keys (Ctrl, Alt, and Shift).
The last, even more peculiar option, is called an Abbreviation. This is best illustrated with an example: suppose you choose the Exit action and you give it an abbreviation of quit. Now, if you open up Go to Anything (see the Search & Navigation section for more info) and type in that word, your top match will be the Exit action.
The Registry
The Registry is a somewhat secret part of Rider. You can access it by pressing Alt+Enter anywhere in your code and typing in the word Registry—there are no keyboard shortcuts for it. Essentially, the Registry window looks like this:

Figure 27
These are deep, internal settings that affect the way Rider operates. For example, you can force Rider to use OS-native file opening dialogs instead of ones provided by the IDEA platform. While some of these settings have descriptions, those descriptions are not very intuitive unless you are a Rider developer.
- 1800+ high-performance UI components.
- Includes popular controls such as Grid, Chart, Scheduler, and more.
- 24x5 unlimited support by developers.