
ReSharper Succinctly®

CHAPTER 3
Navigation Tools
In this chapter we'll be taking a more in-depth look at the tools provided on the ReSharper Navigate menu.
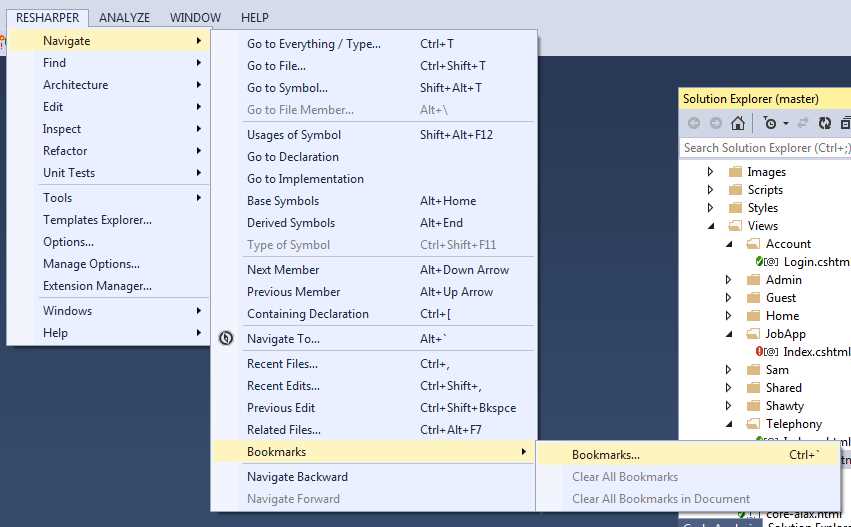
If you expand the main Navigate menu by going to RESHARPER > Navigate, you should see the following:
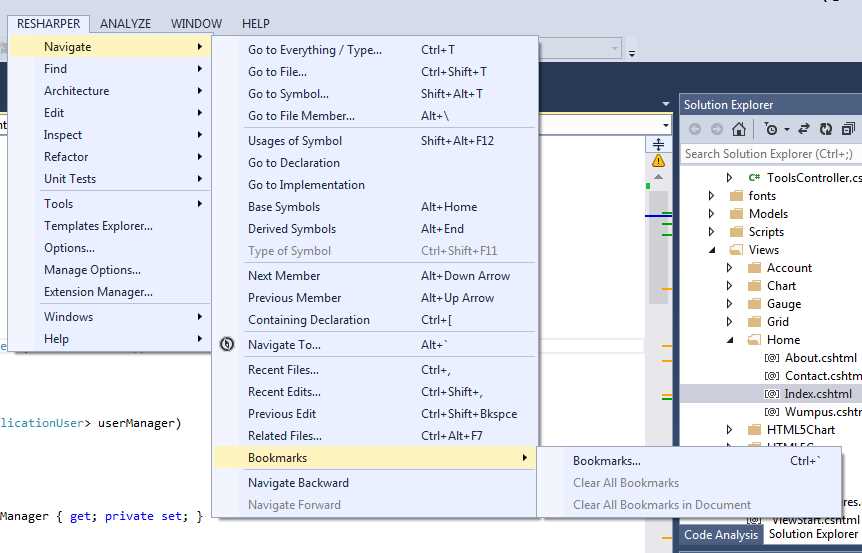
- R# Navigation tools menu
As its name suggests, the navigate menu and its options are there to help you get around your solution in the quickest possible way.
You've already seen some of the navigation features in the last chapter, when we used F12 to move between our views and controllers. F12 however, just like it does in standard Visual Studio, will still take you to the definition of a method, variable, or class.
Give it a try: place your cursor over a variable or method in your application and press F12; you'll see it behaves just the same. However, you should also try it with something for which you don't have the source code available. If you do this, you should find that rather than doing nothing as most versions of VS do, you should be dropped straight into the Object Browser on the object or interface that you are examining.
Note: I am aware that in some versions of Visual Studio you do get better navigation features. For example, if you try this on an MVC Attribute in Professional or higher VS2013, then you'll actually get a reconstructed source class, which VS builds for you on the fly. Many of these advanced features of VS are only available in the higher-end products, so for the purposes of this book, the fact that many versions don't do anything unless you have the source available stands true.
F12 is just the tip of the iceberg when it comes to R#. I've loaded a more complex solution into my copy of VS2013 for the rest of this chapter; if you really want to explore the navigation commands fully, I'd strongly advise you to do the same. The project I've loaded contains nine separate projects, eight class libraries, and an ASP.NET MVC front end. If you don't have a solution with quite a few moving parts, you might find that many of the menu options remain disabled. Even with the solution I have loaded, I still get dimmed options on some of the menus.
Go To Everything
The first four options on the navigate menu are all derivatives of “Go to…”, and as developers these are a set of go-to's you'll be pleased to see.
The first one, Go-to Everything/Type, is kind of the master go-to. Position it over a type, method, enum, or class, and then press Ctrl+T or navigate the menus from the VS main menu bar. You should see one of R#'s now famous pop-up menus appear:
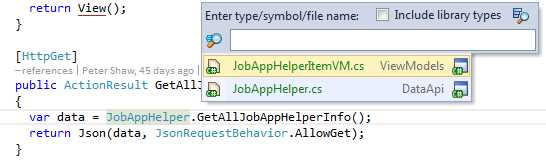
- Context-sensitive Go-to everything/type pop-up menu
In this example, I positioned my cursor onto the JobAppHelper call in my MVC action. I then pressed Ctrl+T and ReSharper immediately opened up a menu that shows me two things.
The first is a list of my two most recently used items, in my case my two JobApp helper files.
The second is the search box; anything I type in here will be filtered to a list of options containing the phrase I typed. If I type “JobApp” here, then all my classes, objects, and models containing JobApp in their name would be listed.
Using Ctrl+T essentially gives you another of R#'s specialized search tools. Just as we saw in the previous chapter when looking for code issues to correct, the Ctrl+T key press gives you the option to search for type and member names, all while maintaining a certain level of wildcard searching (just in case you're not quite sure how to spell what you're looking for). Because it's context-aware, it will also look at its surroundings, and suggest things you may be looking for based on your location in the code. If your target is in the suggestions list, a simple click on it will take you straight there.
The second option in the group, Go to File, and again the familiar R# menu pops up, this time allowing you to search for file names in your project:
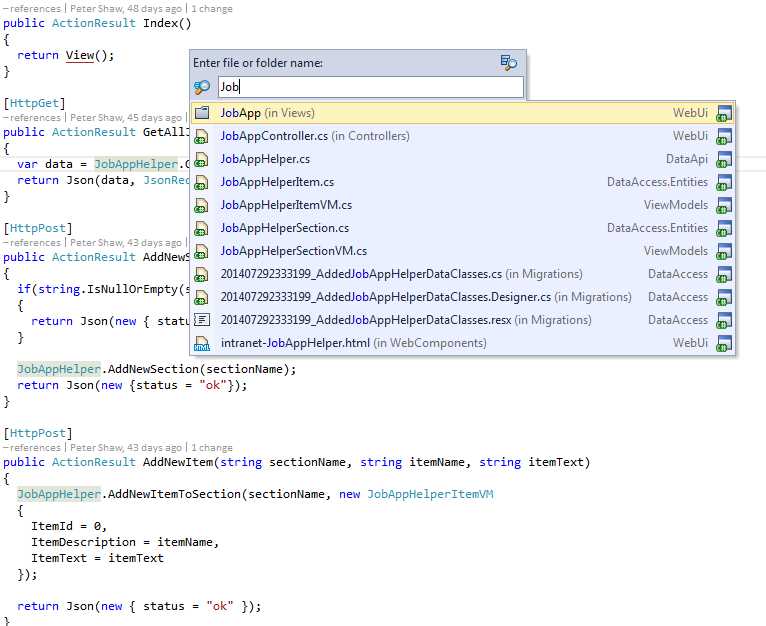
- R# pop-up menu for Go-to File
In Figure 35, you can see that I've started to type “job,” and R# has presented me with a list of possible file matches. If I select any of the matches, that file is then immediately opened within the VS editor. Just as with other areas in Visual Studio, you can also use abbreviated searching. This means, for example, you can enter “JAC” (or “jac” in lowercase), which form the initial letters of JobAppController, and anything matching will be displayed.
The third option, Go to Symbol, opens up yet another pop up on the press of Shift+Alt+T. This one allows you to search for symbol usages.
For example, if you have a variable (private or otherwise) in a file in your solution called MyJobCount, and you use the Go to Symbol navigation option, the location where this variable is defined will be displayed in the search results, allowing you to go directly to that location.
I've found this most handy when, for example, I remember writing a bit of similar code, but can't remember the full method or class name. With Go to Symbol, all you need to remember is something in the method or class definition and R# will do the rest.
The final go-to is the Go to file member command. This command simply allows you to navigate to methods and other definitions within the currently opened file.
If I open this on one of my controllers for example, I get the following:
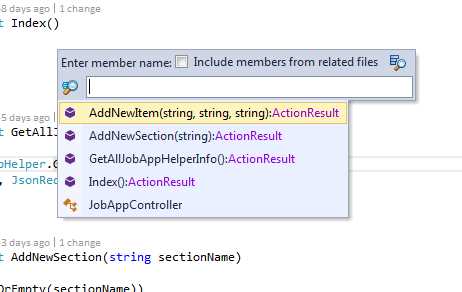
- Navigate to Go to File Member pop-up menu
In my case the controller is a very short one, but imagine if you were dealing with a controller from a large e-commerce site—you can easily and efficiently jump from action to action using Alt+\ and a quick wildcard.
The next group of commands on the menu are all related to our F12 scenario.
Usages of Symbol (Shift+Alt+F12) will list places where the symbol currently under the cursor have been used. The following example shows this command being executed on an Entity Framework DbSet declaration:
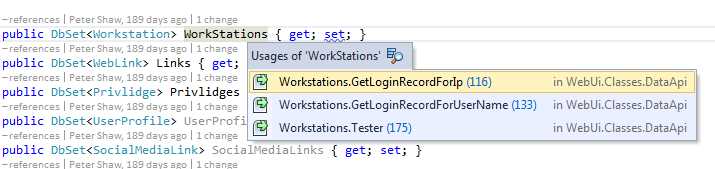
- Usages of Symbol pop-up menu
You can clearly see the usages of that data table with the exact line numbers and file name where they are used, and as with all the other menus, clicking on one will jump to that location.
Go to Declaration and Go to Implementation are both single-shot commands; if you position your cursor onto a type definition, the former will take you directly to the file and location where that type is defined. The Implementation derivative is similar, but that will take you directly to the implementation of a method within a type.
The Base Symbols command will list any symbols on a derived type that are in a base class.
For example, if I press Alt+Home on my Entity Framework data context class, I get the following:
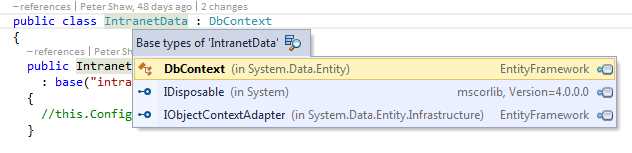
- Base Symbols pop-up menu
As you can see in Figure 38, this allows me to navigate the types and classes that my data context is built on. If I select DbContext and the source code is not available, one of two things will happen. The first time you attempt to access an object, you'll be asked if you would like ReSharper to attempt to either obtain the source code, or decompile it, or you'll be asked if you wish to use the object explorer as shown in Figure 39. If you've previously made this choice, then you'll automatically be given that choice the next time.
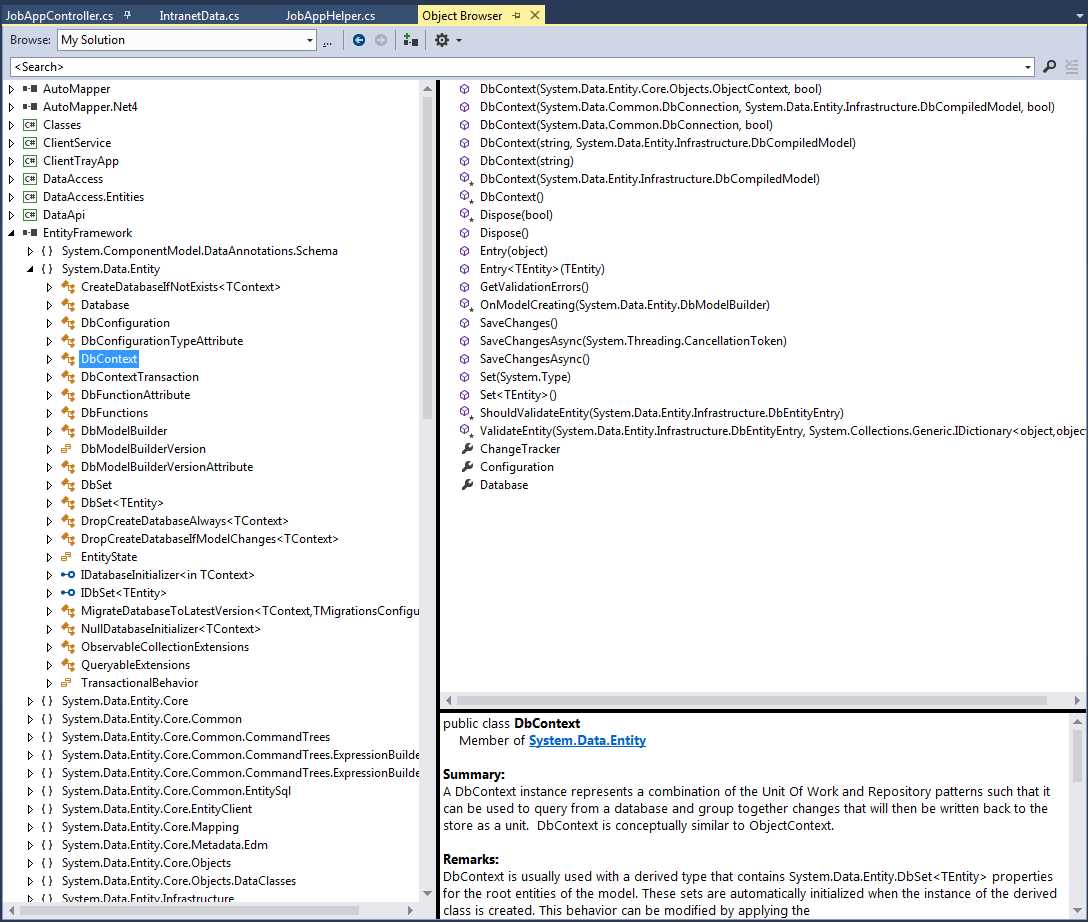
- Object browser opened by the menu selection in Figure 38
Whichever choice you get (which by default will be the source code decompiler), you can easily change the default options in the appropriate section of the ReSharper Options dialog box; since the decompiler is provided by default with all versions of ReSharper, you will always have the ability to decompile assemblies that you’re using. Object Explorer will often be the last on that list of options.
The opposite of Base Symbols is Derived Symbols; if you position the cursor on the DbContext in the previous example and press Alt+End, you'll be moved slightly to the left and positioned on the declaration for the data context.
If you had more than one data context in your solution, then pressing Alt+Enter over that symbol would have popped up a menu listing them both. Derived symbols will list any class or type that derives from the symbol or interface under your cursor and allow you to rapidly navigate to them.
The last one in the group, Type of symbol (Ctrl+Shift+F11), navigates to the type of the symbol underneath the cursor.
For example, in Figure 34, you saw that we could navigate and search for methods and classes in the type JobAppHelper. Furthermore, you should be able to see in the image that we assign the result of the call to a variable called data, which is defined using the C# var keyword.
If later on in the code you were working with the data variable, but were unsure as to which class it came from, positioning your cursor on the data part of the name and pressing Ctrl+Shift+F11 would take you immediately to the definition for the JobAppHelper class.
Beyond Go-To
Moving on to the rest of the Navigation menu:

- Remaining options on the navigation menu
Next Member and Previous Member will step you up and down in your source file, automatically positioning you on Variable, Property, and Method declarations. It's very much like using Alt+PageUp and Alt+PageDown to move from inspection to inspection, except you can immediately jump around the main blocks of your code without having to scroll.
Containing Declaration jumps you to the container of the current member you’re positioned on. For example, if you have a class called Customer, and within that class you have a method called FindAddress, positioning your cursor on FindAddress and pressing Ctrl+[ will position you on the class definition given that the class is the parent to the method, which is very convenient for navigating quickly to the top of the class.
Recent Files when invoked should produce a pop-up menu that looks similar to the following:
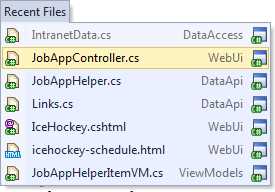
- Recent Files navigation menu
This pop-up menu allows you to go straight to any of the files you most recently worked with.
The Recent Edits option is very similar, but instead of a list of files, it shows you your most recent edits across all files in the current solution:
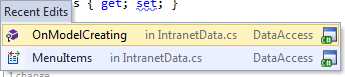
- Recent Edits navigation menu
Ctrl+Shift+Backspace will take you back to the position of your most recent edit, allowing you to quickly backtrack and undo changes if you need to.
The Related Files option is mostly useful when dealing with web and Razor views, but can also navigate between WinForms code and its associated designer file, or between XAML code and any bound view models. In most cases where a file linkage exists in Visual Studio, ReSharper can quickly navigate between instances using this command.
If we browse to a Razor view in our project, then press Ctrl+Alt+F7, we'll get the following pop-up menu:
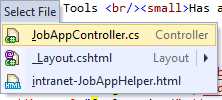
- Related Files pop-up menu
Because this is a Razor view, R# has correctly identified that the file has an accompanying controller, and that it also has a master layout page. I'm also using PolymerJS in this application, so R# is also telling me that there's an HTML page associated with it, and also offers it as a selection on the menu. Selecting any of them using the arrow keys and Enter, or by clicking with the mouse, will immediately place you in that file ready for editing.
If you position the selection bar on the entry for the layout and press the right arrow key, you'll also see any files that are related to the layout file, which by virtue of the relationship to layout are also dependencies of the current view. In my solution, it looks like this:
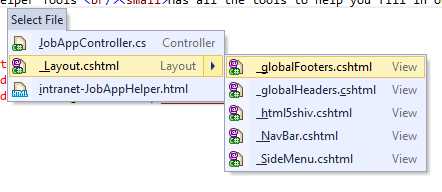
- Sub-menu showing dependencies of the Razor layout file
You can easily see that my layout file uses many other partials, all of which I can easily bring to the front of my editing experience in little more than a couple of key presses.
The last three, Bookmarks and Navigate Forward/Backward, allow you to create bookmarked points in your code, and jump back and forth easily.
Navigate Backward and Navigate Forward simply look at your history, then attempt to work out the best type of navigation for you. If, for example, you just performed an edit and executed Navigate Backward, R# will choose to navigate to your last edit. If you were recently moving forward through your file looking at members in your class, then moving forward will repeat the move to next member command.
Like many of R#'s tools, the backward and forward commands are quite generic and context sensitive; this can be a source of frustration at times, as it can occasionally pick the wrong type of navigation. Once you learn how to tame them, you'll find everything gets much easier.
Bookmarks
One of the most useful options under the navigation tools that R# offers has to be the bookmarks facility.
Just as you would bookmark pages on the internet, or pages in that massive .NET book that's on the desk beside you, ReSharper allows you to do the same with ease.
If you expand the Bookmarks submenu, you should have a pop-up menu like the one shown in Figure 45:
- R# Bookmarks menu
Initially (unless you've defined some bookmarks already without realizing it), only the main bookmarks option will be available. Clicking on this should open the bookmarks pop-up menu, and should look something like the following:
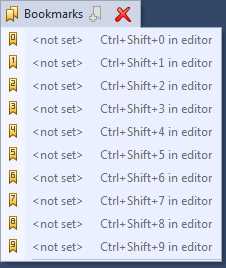
- R# Bookmarks pop-up menu
You can define up to nine bookmarks by moving your cursor to the position you wish to bookmark, then pressing Ctrl+Shift+<0 to 9>. This will then place a small bookmark symbol in the left-hand column next to your source code as shown in Figure 47:
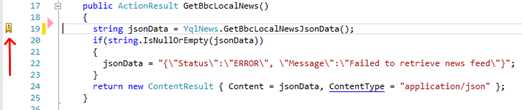
- Code snippet showing bookmark
If you then reopen the bookmark pop-up menu, you should see the bookmark you defined appear:
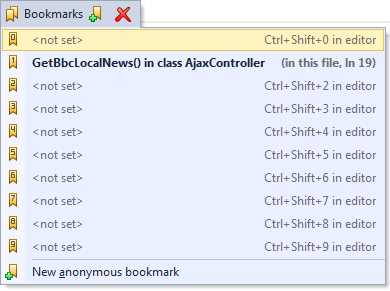
- Bookmarks pop-up menu showing the newly defined bookmark
One thing you need to be aware of—when you create a bookmark, if you have the R# tool icon in the left column at the same time, you won't be able to see your new bookmark as you define it. Once you move your cursor away from the line and thus hide the tool or menu icon, you'll be able to see the bookmark. This caused me a fair bit of frustration and I kept pressing Ctrl+Shift+Number (thus toggling the bookmark on and off), believing that it wasn't working.
Moving to a bookmarked line and pressing the Ctrl+Shift combination will remove the mark, and moving to a different line and pressing the combination of an existing bookmark will move the bookmark to that position.
Finally, if you want to navigate to the bookmarks you have created, simply press Ctrl+<0-9>, where the digit is the number of the bookmark you wish to navigate to, or press Ctrl+ and use the pop-up menu to select the bookmark you'd like to navigate to.
And there we have it—those are R#'s tools for getting around your project code.
As you can see, a lot of thought has gone into exactly how each option behaves, and while there is some overlap, you can see that using the keyboard shortcuts is much faster than having to navigate to menus all the time.
The key here is practice. The more you use these key combinations in your work flow, the more natural they'll become. Use them alongside the regular Visual Studio keys, and before long you'll wonder how you did without them.
Before we move on, one random and useful key shortcut that should always be committed to memory is Shift+Alt+L (Locate in Solution Explorer), which will highlight the file you’re currently editing in the Solution Explorer.
- 1800+ high-performance UI components.
- Includes popular controls such as Grid, Chart, Scheduler, and more.
- 24x5 unlimited support by developers.