
ReSharper Succinctly®

CHAPTER 1
Getting Started
What exactly is ReSharper?
ReSharper is a productivity extension designed to be installed under most versions of Visual Studio (Microsoft's flagship programming environment). Now in its 8th release, R# has been used by programmers for the best part of the last seven to nine years (over five years by your humble author), and shows no signs of stopping.
However, once you install it you'll find that it's much more than just a simple extension. It contains an absolutely staggering number of tools under the hood.
There are tools to reformat your code, tools to make sure you don't break your builds, and tools to help you find your way around complex large solutions. There are options to allow a senior or lead developer to enforce an enterprise-wide standard that all developers must adhere to, meaning better cohesion between team players on a development team.
Finally, it will (if configured to do so) improve your code for you as you go, as well as providing hundreds of keyboard shortcuts that mean you can keep your fingers where they need to be.
R# has become so popular that Visual Studio itself in its latest builds has actually got some of R#'s features built into it, and many of the other popular tools now also emulate the same key bindings for similar things.
However, there's no substitute for R# once you get to know your way around, and believe me, I've tried the others—even given them a real fair, long-term trial—but just could not gel with them the way I do with R#
R# doesn't stop there.
The developer group JetBrains has also thought long and hard about possible edge cases found while using this tool, and realized that this is a development tool used by developers. It may sound obvious, but many companies actually forget to think like this, and simply just make "Tools for Devs" without ever stopping to consider anything that might occur outside of the tool.
As a result, JetBrains has made R# extensible and even produced an SDK available for free to install via NuGet.
This SDK allows you to create your own plug-ins for R#, so if there is a scenario or a tool that you need that’s not already provided, it's child's play to add your own extensions. There is still a partial download available from the JetBrains website, but this no longer contains anything other than project templates and MSBuild targets, allowing you to get a jumpstart on building your own extensions. The meat of the SDK and its DLLs are all now only distributed via NuGet.
All told, R# could be the ultimate tool for any serious developer using Visual Studio—as you'll see as we go further into this book, the list of things that R# can do to help you seems endless.
Installing ReSharper
Before you can get started using R#, you first need to install it.
If you want to test it before buying, you can download a 30-day trial version from the JetBrains web site. Currently, it looks like this:
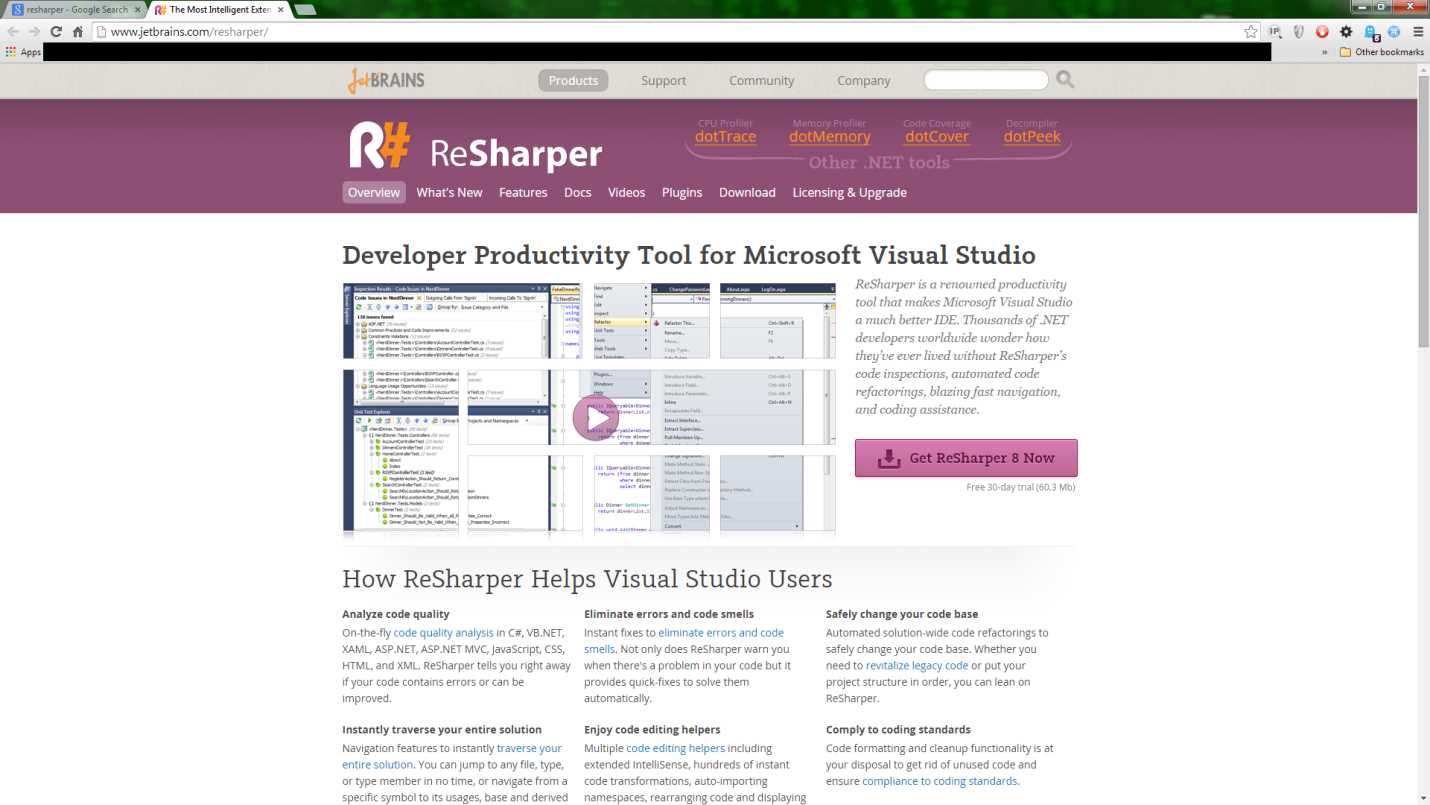
- JetBrains website
Click the pink button on the right to get the latest version (currently 8.2).
Go ahead and download the latest build, and make yourself a fresh cup of coffee while it arrives on your PC.
Running the installer
Before we actually launch the installer, make sure that you have no instances of Visual Studio running. R# works with Visual Studio 2005 upwards, so if you want the install to run smoothly, make sure you quit all versions that you'll want this to install in.
In reality, I've installed it before with Visual Studio running, but I had to quit and reload before anything took effect, so it's better to just terminate any running instances while you run the installer.
Note: By the time this book is released, v9 will likely be mainstream, so there will be a new installer. Details on this are in the last chapter of this book.
Once you click on the downloaded file, a dialog box will ask if you want to run the file. Click Yes, and after a minute or two you should be greeted with the following:
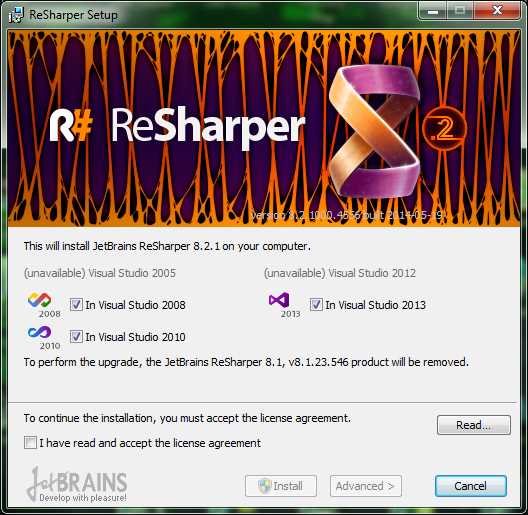
- First installer screen
As you can see, this copy has picked up all three versions of Visual Studio that I have installed. Make sure your read the license agreement, and click the check box to verify that you have read it. Next, click either Install or Advanced to continue.
Install will take you through the select sensible defaults route, and do most of the work for you. The advanced route will give you the following:

- Initial installer screen when an advanced install is chosen
In my case it's picked up the 8.1 version, which it says it wants to remove. We'll allow it to do so (I'll reinstall 8.1 later as I don't have a full license for 8.2); you'll most definitely want to do this if you’re performing an upgrade.
Make your selection and click Next, and you should then see the following:
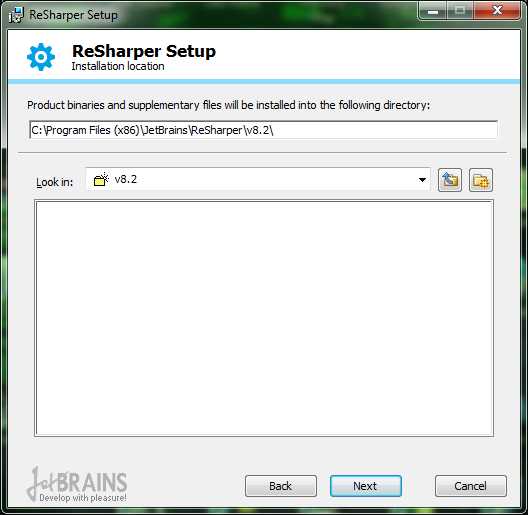
- Installer screen requesting save location
This is just the usual directory setup dialog box; the default is usually the best choice.
Click Next, then Install, and everything should continue in an automatic fashion. You'll see this dialog while it completes the installation:
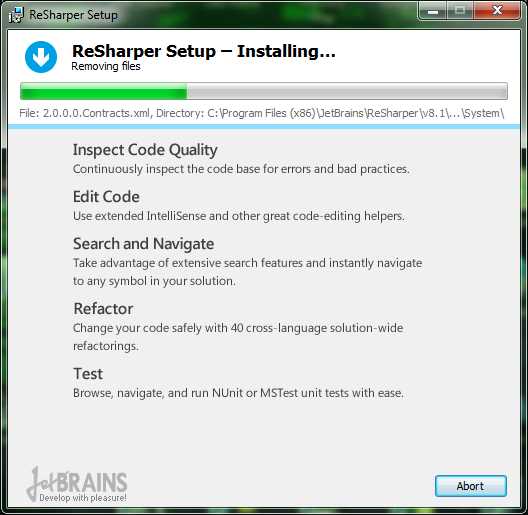
- Installer progress screen
Once the install is complete, you should see the following window:
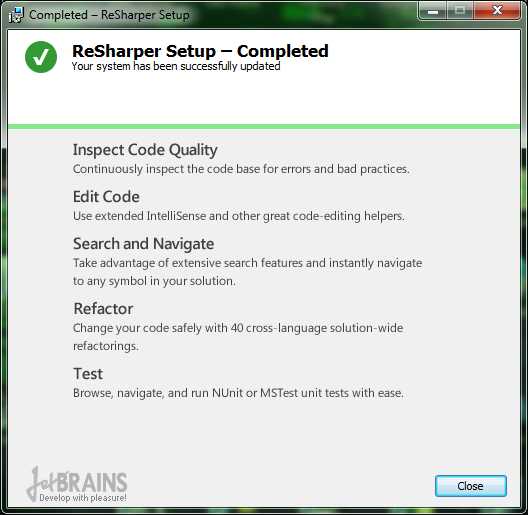
- Installer complete screen
Click Close, and at this point, we’re ready to fire up Visual Studio and start exploring.
R# first look
The first time you fire up Visual Studio after installing R#, things might take a little longer than normal to start up. Don't worry, R# can take a little bit of time to configure things on the first run. You may also be asked to choose a keyboard scheme; just select the set of keyboard shortcuts you'd like to use and everything will continue as normal.
You'll know R# is ready to run when you see the R# menu in your Visual Studio Menu bar:
![]()
- Visual Studio menu bar showing R# installed
Let's have a look at what's on the menu.
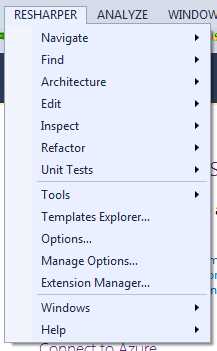
- Main R# Visual Studio menu
These are the main core tools available to the R# user. However, as you'll see if you start to hover over the options, most of them are not enabled.
One thing you will see when you first use ReSharper is the product registration dialog box:

- The ReSharper Registration dialog
Registration is a required step, and you won't be able to use the product without doing so. If you’re not ready to buy the product just yet, you can apply for a 30-day free trial from the JetBrains website.
The copy I'm using for this book is already registered, as you can see in the previous figure. Once you have a registration, trial or otherwise, you'll need to enter the details provided into this dialog box to continue.
Because R# is a programming tool, you need to have an active project loaded for majority of the menu items to be enabled.
If we go to RESHARPER > Help > About JetBrains ReSharper:
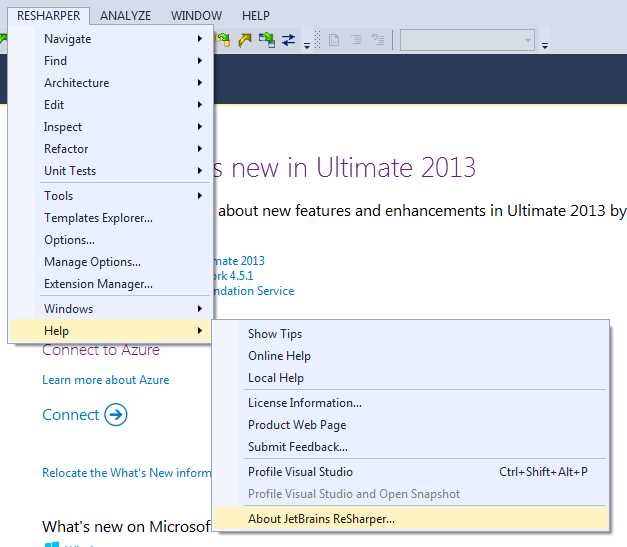
- R# Help menu to get the About window
We should at least be able to get the About information up:

- R# About window
R# options
Follow the menu path RESHARPER > Options, and you should see the following:
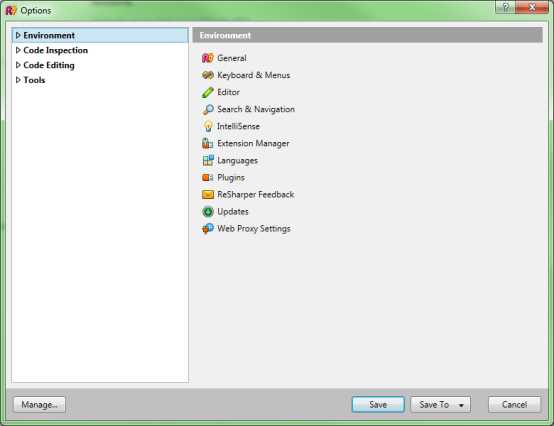
- R# initial options window
This might be somewhat larger with the options trees expanded. There are a LOT of options—in fact, if you have the smaller default dialog, I can guarantee that you are going to want to make the dialog box a lot larger. When I'm working with the available options, I can often have the box almost as large as my screen resolution!
If you click on the main tree nodes without expanding them, you should see that you get the underlying options list in the right-hand pane. In Figure 12, you can see I'm ready to go with the environment options. Click the small triangle to the left of the text and expand the Environment options tree. You should see the following:

- Options dialog showing environment options expanded
Click on General and the right panel will change. You'll most likely want to expand the box size at this point.
The General options, followed by the Keyboard and Editor options, are the ones you’ll most likely want to change in the first instance; the rest we'll cover as needed throughout the rest of this book.
Starting with the Environment options, you should have something like the following:

- R# General options
- Show tips on startup: This simply enables the R# tips dialog box when you first run VS. It's worth having this on for a while when you first start using the plug-in; you'll learn a lot of things that R# can do. The tips dialog box is also quite smart—it won’t show you things you already use!
- Loop selection: This might be a little bit of a mystery at first—it was to me. This option actually affects the pop-up lists (similar to VS's built-in IntelliSense pop-up lists). When you use a pop-up list and navigate to the end of it, having this option set will make your selection cursor jump back to the top; having it unselected will make the selection cursor stay where it is.
- Show managed memory: This will show the memory consumption not just of R#, but of all the other add-ons you may have installed and running, and that are used by Visual Studio itself. This will be shown in the lower-right side of the Visual Studio status bar.
- Application icons: These options allow you to choose the icon set you'd like R# on the whole to use. I generally just leave it on automatic, allowing R# to choose the most appropriate icons. If you’re used to another similar tool that uses a different icon set, you can force R# to use icons similar to that.
- Source code icons: These options are similar to the general application icons, but instead of being app-specific, they are used in the source code display of your projects. You'll see them appear in test screens and down the left margin of your code window when R# is showing you something.
- Cache options: While R# is working, it saves a lot of temporary data. Things such as internal code maps, and lists of options, warnings, and other things. You can choose where R# saves these caches. Usually you'll want to use system folders, but you decide you want to store them in the project folder, then you'll almost certainly want to make sure you configure things so the temp folders are not committed to your code repositories. The Clear Cache button allows you to expunge any temp data that's accumulated, should you need to.
- Use msbuild: Selecting this option makes R# use the Microsoft Build engine (and project files) to figure out any references that are linked to the project. The opposite (not selected) is to have R# interrogate the various .NET assemblies in your project and work out the references map that way.
Moving on to the Keyboard & Menus options, if you click on the entry in the tree to the left, you should see something like the following:
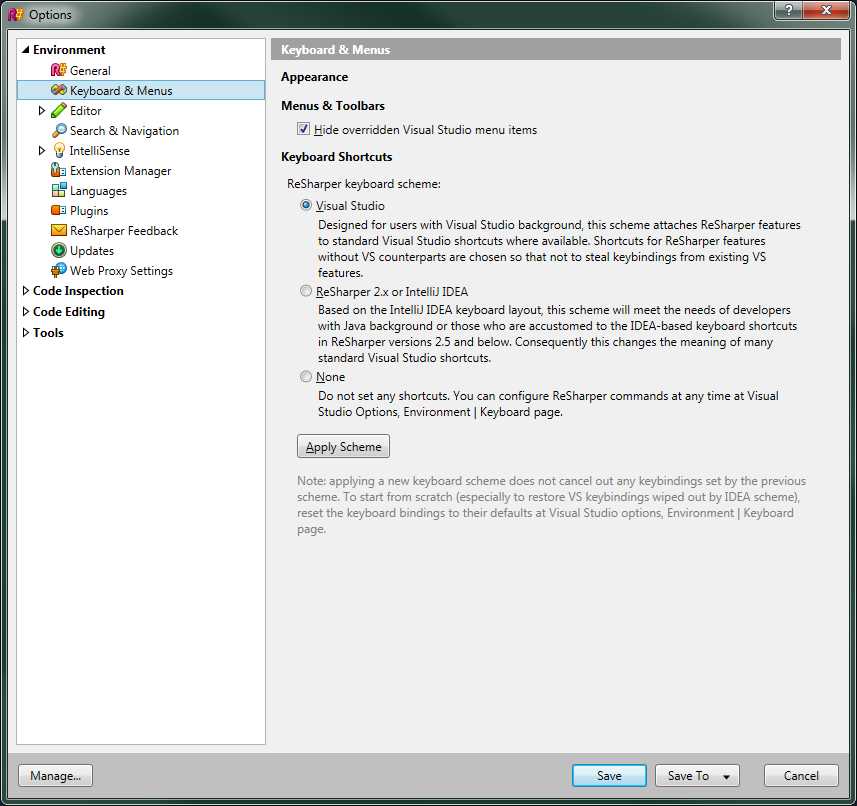
- R# Keyboard & Menus options
The keyboard and menu options are pretty straightforward. The first option hides items that are already present in Visual Studio, which have been overridden or superseded by functionality available in R#. You can uncheck this so that everything is visible all the time. Visual Studio can get a bit crowded if you do this though, so it's highly recommended to leave it selected.
The options available for keyboard shortcuts are the same decisions you may have made when you ran the plug-in for the first time. R# remaps a lot of the existing Visual Studio keyboard keys, so that they activate the enhanced functionality available in the plug-in.
There are by default three sets of predefined maps (as well as the ability to create your own custom bindings). The choices in this dialog box are the same ones that you may have already been asked the first time you fired up R#.
If you choose the Visual Studio option, then your key mappings will mirror those already found in Visual Studio. ReSharper 2.x or IntelliJ will set your keyboard shortcuts up to be the same as another JetBrains product, IntelliJ IDEA. The last option of None won't set any keyboard mappings, and you'll have to use the custom keyboard options elsewhere to set all your own bindings up from scratch.
I've found the most productive and useful way is to select the Visual Studio mappings, then customize only the few that I need that are different.
Finally, we'll take a quick look at the Editor options.
You'll note that the Editor options menu has two sub-menus; as with the previous option sets, you'll need to click the small triangle to expand those options to see the tree. Your options dialog box should look similar to Figure 16.

- Initial Editor options
If you click on the Editor appearance options, you'll get a number of initial settings that affect how R# shows up in the main VS code editing window. This dialog box should look something like this:
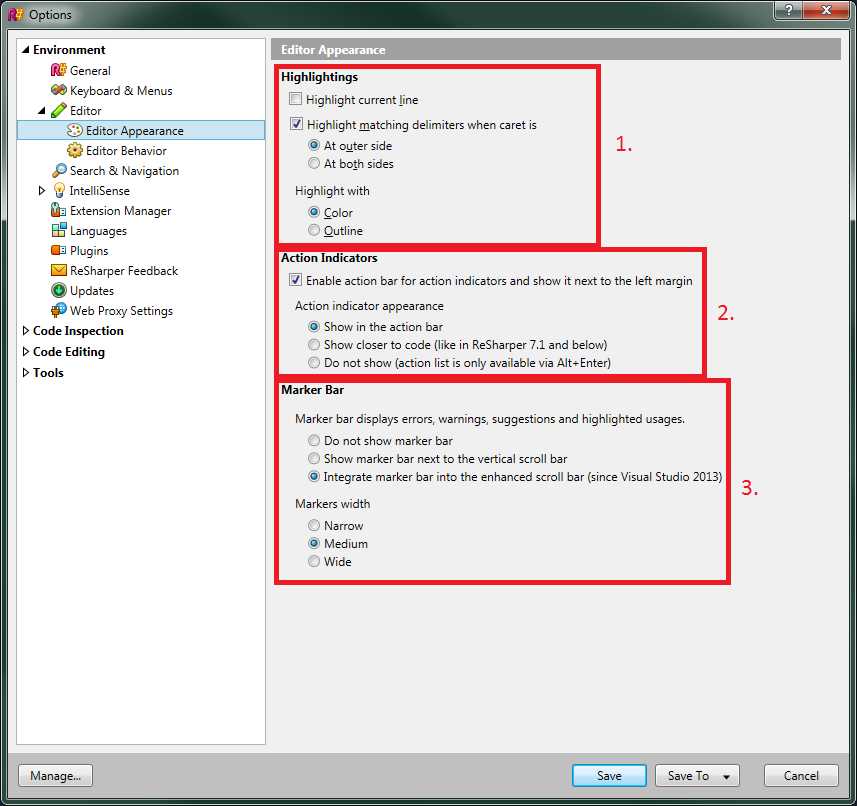
- R# Editor Appearance options
The first set of options (section 1 in Figure 17) deal with helping you see where you are in your code.
- Highlight current line simply highlights the line you’re currently working on, making it easy to see where you are when scrolling up and down at speed in your code.
- Highlight matching delimiters deals with things like parenthesis and quotation marks. If you move your cursor immediately to the left or right of one of these marks, then the closing mark will also be highlighted, enabling you to easily see where the closing section of the enclosed block is. The sub options At outer side and At both sides allow you to specify what's highlighted.
- Highlight with allows you to choose what to highlight with. Color makes the text in the highlighted block change to a defined color, whereas Outline is the more traditional form of a plain-colored border around the selection.
The second group deals with the R# action bar, which we'll meet soon. The action bar is R#'s way of showing you the points in your source code that it believes needs your attention. The action bar is positioned to the left of your Editor window (next to line numbers and breakpoints) and will display small icons, allowing you to click and select menus affecting the code at your current location.
- The Enable action bar option turns the bar on and off. Since most of what you'll use in R# is based on what you can see in this bar, it's usually recommended to leave this enabled.
- Action bar appearance allows you to choose how and where R# uses the bar to notify you of code issues. “Show in action bar” from v8 onwards, puts the light-bulb or hammer icon in the action bar to the left of the code, “Show closer to code” was the original legacy (pre-v8) behavior where the icon was shown over the code where the inspection is marked, potentially obscuring the code below. Finally, “Do not show” means don't show action bar icons at all for potential code issues.
The last of the three options are only recommended for those that have been using R# for a considerable amount of time and are used to knowing what R# will highlight and when, or for users who don't wish to be notified as they work, and instead choose to only use the “Code cleaning” tools from the menu prior to saving (or similar tools).
The third group of options deal with the bar on the right side of your Editor window known as the marker bar. Anyone who's seen a screen shot or video showing Visual Studio with a lot of colored lines in the right-hand margin has most likely already seen this in action. The marker bar is where R# places colored dashes that when hovered over will tell you what R# believes is a possible problem, error or, improvement at that location in your source code.
Clicking the dash mark will allow you to navigate to that place in the document, giving you instant access to options in the left column action bar, or via any pop-ups activated using Alt+Enter (more on this in the next section).
Similar to the action bar, you have three radio options that allow you to display the marker bar integrated with the Visual Studio 2013 marker bar, or as a separate bar alongside the existing one, or not at all. You'll almost always want to keep this enabled, as it's single-handedly the best way to get an overview of the current state of the source file you’re working with. I'll come back to the marker bar in the next chapter when we start looking at how R# integrates into the Visual Studio editor.
The last option in section 3 allows you to set the width of the bar to Narrow, Medium, or Wide.
The Editor Behavior options as seen in Figure 18 allow you to change the way R# formats and changes your source for you when typing.

- R# Editor Behavior options
Section 1 deals with basic editor behavior.
Use CamelHumps, when selected, means that certain keyboard actions (such as tab to expand templates) will be affected by the setting in differing ways. This also has a big effect on the way ReSharper’s selection and navigation tools work; shortcuts, such as Ctrl+Left/Right and extend selection (which you'll see more of later) will use this setting to determine where to split identifiers into individual words when selecting parts of the text.
For those who are new to this, CamelHumps is the term given to text that is typed with the very first letter in lower case, then the rest of the first letters of each word in the sentence capitalized, with no spaces between the words, for example:
thisIsAnExampleVariableName |
This is a common typing notation used in the Java and JavaScript worlds, and is often used for local variables in C# under Visual Studio. Some developers have their own typing and naming styles, so ReSharper gives you the option of turning this off if you wish to.
The remaining two in the first group, Auto-format on semicolon and Auto-format on closing brace, refer to how R# deals with your source code formatting when reaching the end of the line, statement, or current block.
Throughout the R# plug-in, there are various options to allow R# to format your code for you, in a style that ensures you'll always have a consistent look and feel to the way your code is formatted. If these rules were applied constantly as you typed your code, it would be very difficult for you to type correctly, especially if your code is changing around you.
The format on semicolons and braces means that R# will wait until one of these situations is encountered before it tries to apply any formatting rules that you may have set in your R# options. Waiting until a semicolon is reached generally means that you’ve reached the end of the line that you’re currently typing, whereas waiting for a brace often means waiting until you finish an enclosure, such as using the default property syntax when creating objects containing data.
We'll leave our exploration of the R# options alone for now—I could write an entire book just exploring the options as they stand. We'll cover other options as we need to in further chapters of this book. In the meantime, if you want to explore the rest on your own I do encourage you to do so.
I've been using R# for almost six years now, and even I still discover things I never knew it could do. It truly is a massive plug-in with a staggering number of tools and options hidden behind the scenes, many of which you may never even discover.
The main help page for all the R# options can be found here.
ReSharper in the editor
Finishing off our first look at R#, we'll see the changes it makes to your general code-editing windows.
As has already been mentioned, R# adds two bars to the editor, an action bar on the left, and a marker bar on the right. Those of you who are using Visual Studio 2013 will already have gotten used to the marker bar, as VS2013 now has one of its own. Those who are still using an older Visual Studio version won't yet have been introduced to the concept.
The default editor view in the current version of R# should look something like Figure 19:

- General code editor layout
As you can see in Figure 19, we have our action bar on the left, and the marker bar on the right.
In this particular bit of code, you can see we have a light bulb icon showing inside the action bar, because we have a possible warning situation where our cursor currently is. The warning is an “Unused imports” warning, and R# colors the unused imports in a different color than those that are used, so you can see immediately which are not used.
R# also goes one step further: not only does it effectively shade the code, but it provides the light bulb icon, which means you can press the main R# keyboard combination of Alt+Enter to remove the unused imports. You can also click on the light bulb and use the pop-up menu to select the action you wish to take.
You'll also notice that the marker bar has four yellow bars near the top of the document, one for each unused import line, with the Code Status icon showing as a yellow triangle.
The items mentioned here are the general changes you'll see in your code windows. Depending on your settings and the severity of warnings and other issues, you may also see different colored squiggles under various parts of your source code.
These squiggles work in exactly the same way as the native VS ones, except as with the marker bar, they take on different colors for different statuses. Like in Visual Studio, red generally indicates an error, green indicates an improvement, yellow indicates a warning, and blue indicates a recommended practice.
We'll cover the different colors in more detail later. For now, other things you may notice are various underlined items that were not previously underlined.
For example, Figure 19 shows an ASP.NET MVC controller from a quick-and-dirty hack I put together to help demonstrate things in this book. You'll notice that the view functions and view names are underlined.
What gets underlined depends very much on what type of file you’re viewing and what the project type is. In CSS files for example, you'll get underlines matching the color of a color tag underlined, and using the R# key board shortcuts on them will allow you to pick the color from a color chooser built right into your editor.
Again, as we progress through the book, we'll cover these and others in more detail. To wrap this chapter up however, there's one final thing we need to look at.
Keyboard shortcuts and ReSharper's master key
I've already mentioned it a few times, but now it's time to give it a little more of the limelight. If there is one key press combination that you will use every day that you use R#, it’s Alt+Enter. This one combination is R#'s master shortcut key, and whenever or wherever you are in your source file, if there is an action that can be performed, then Alt+Enter will make this happen.
You can also press Alt+Enter twice in rapid succession (known as a double-tap among some of us) to action and select the default action. Looking back at Figure 19 for example, if you were to position your cursor on a shaded unused import line, and press Alt+Enter twice rapidly, you'd fix and remove all four warnings in one go.
There is, however, a warning to be noted here.
Be very careful, especially when you first start using R#. There have been many times over the past six years where I've had to be ready with Ctrl+Z to undo some action, simply because I've been too quick to react to something R# has pointed out to me, and realized later that I should have been paying more attention.
However, the fact remains that 90 percent of all of R#'s immense functionality is accessed from the various keyboard menus and shortcuts. R# is designed to keep your hands where your developer’s brain needs them, and that’s on your keyboard.
Without its many keyboard-accessible tools and shortcuts, R# would be nowhere near as powerful as it is, and it certainly wouldn't help you make the productivity gains that are possible. The best bit of advice I can give you is to learn the shortcuts—learn them well, and learn them early. If you do, you'll be amazed what you start achieving in a very short space of time.
- 1800+ high-performance UI components.
- Includes popular controls such as Grid, Chart, Scheduler, and more.
- 24x5 unlimited support by developers.