
Real-World Xamarin.Forms Succinctly®

CHAPTER 3
Implementing Biometric Authentication
Biometric authentication is the option to log into an application using the fingerprint sensor or the facial recognition feature, also known as face ID, without the need to type a username and password every time. This option is very common and popular in modern applications that require authentication, and you will likely need to implement it yourself in your apps. There are several reasons for doing this. The first reason is simplifying the user experience by leveraging sensors on the device. The second reason, which is basically connected to the first, is that typing credentials every time on a small keyboard might be annoying, and the user might quickly become tired of using your app—even if it is the best app on the market. This assertion might seem strange, but it’s not. It actually comes from research on analytics and user experience. With the incredible number of apps available, you might build a killer app on a certain topic, but if it’s not easy, fast, and fun to use, people will move to another app on the same topic. Login features are the user’s first contact with an app, and starting the app must be as simple, fast, and smooth as possible. You will agree that using the fingerprint or face ID is much faster than typing a username and password every time. This chapter explains how to implement biometric authentication in Xamarin.Forms, adding some steps for local password storage, with some logic that you will be able to reuse with web services, custom APIs, or even Azure.
Setting up libraries for biometric authentication
Xamarin.Forms does not include a built-in API that allows for implementing biometric authentication in a cross-platform way, so in theory, you should write platform-specific code. However, within the large ecosystem of plugins for Xamarin.Forms, you can use the Biometric/Fingerprint plugin for Xamarin, an open-source project by Sven-Michael Stübe, which is free and easy to use. It offers a cross-platform approach to leveraging all the biometric authentication features on even the most recent devices.
With this in mind, create a new Xamarin.Forms project using the Blank App template. Open the NuGet Package Manager user interface, and then locate and install the Plugin.Fingerprint package to all the projects in the solution (see Figure 7).
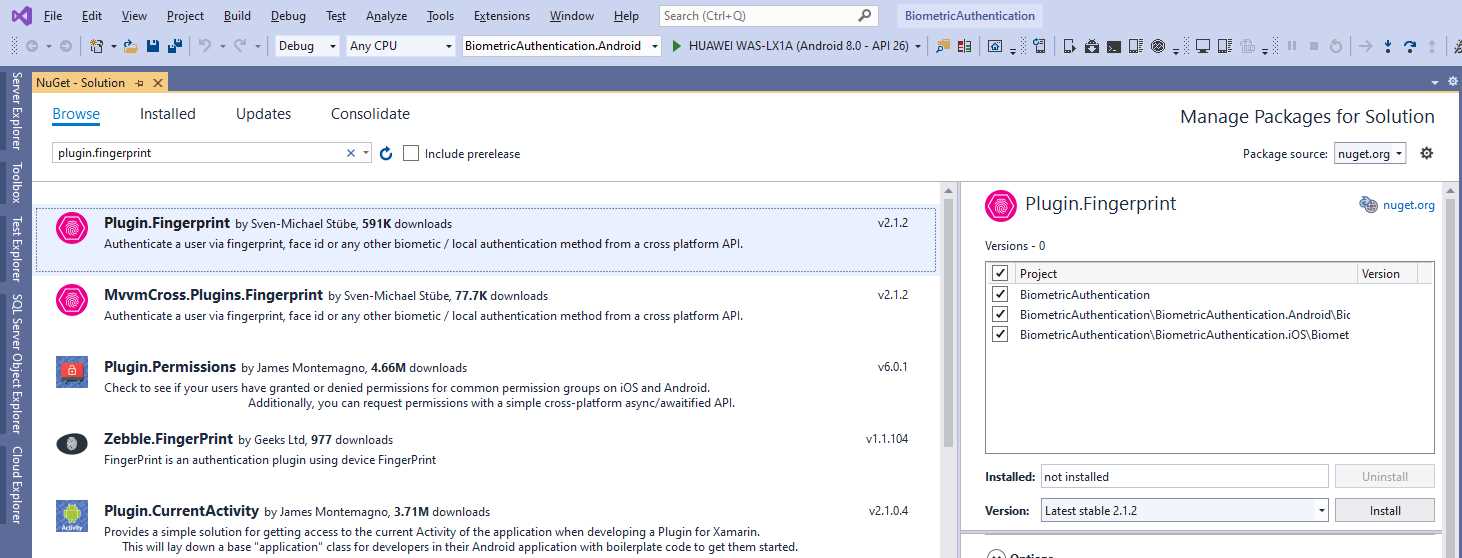
Figure 7: Adding the Plugin.Fingerprint library to the solution
Additional setup for Android
For Android, you will need to install the following additional NuGet packages to the project:
- Xamarin.AndroidX.Browser
- Xamarin.AndroidX.Legacy.Support.V4
- Xamarin.AndroidX.Lifecycle.LiveData
- Xamarin.Google.Android.Material
Each package will install its own dependencies. This is required by the Plugin.Fingerprint library, which relies on the most recent Android support libraries. Additionally, Android API supports biometric authentication since Level 23 (Android 6.0), which requires explicit user permission.
Open the Android project properties and select the Android Manifest tab. Make sure the Minimum Android Version is set to Android 6.0 (API Level 23, Marshmallow) or later, as shown in Figure 8. Obviously, later versions are OK, but earlier versions do not support biometric authentication.
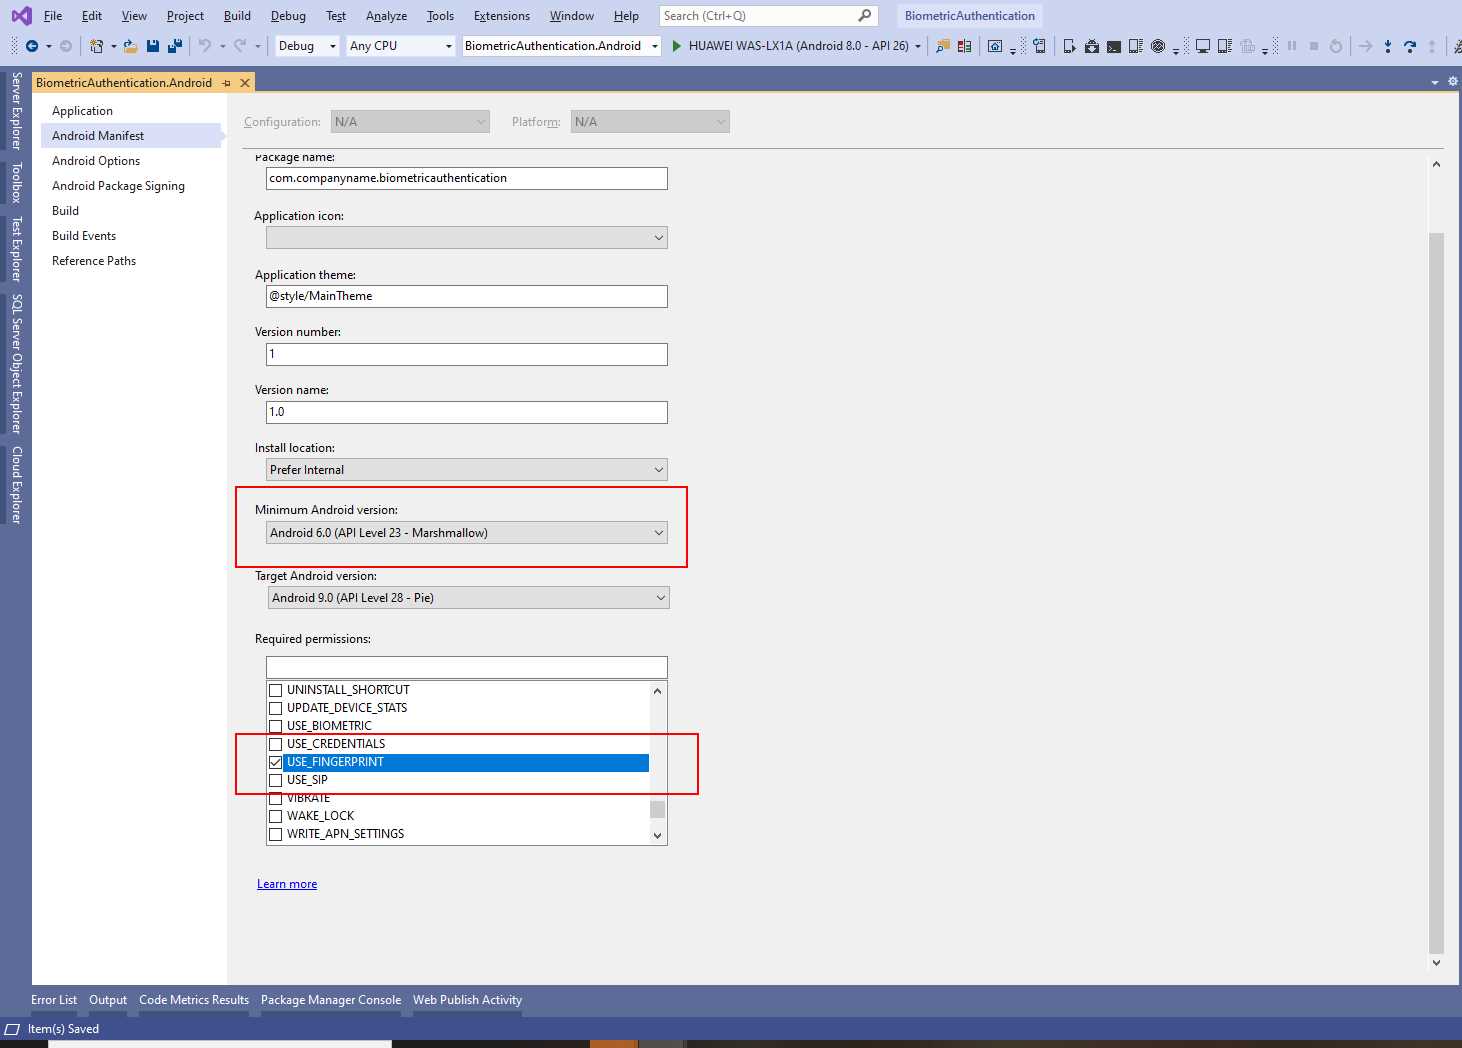
Figure 8: Setting Android API and permissions
In the Required permissions list, select the USE_FINGERPRINT permission (see Figure 8).
The logic of the sample project
The biometric authentication APIs in each system tell developers if a user is recognized by the device based on the fingerprint or face ID. Being recognized by the device does not mean being recognized, authenticated, and authorized by your application or your web services. In real-world development, the flow would be the following:
- The user registers, providing a username and a password. These credentials are usually validated against a web service and stored inside a database, on-premises, or in-cloud, and will be passed by the app every time it needs to access secured information.
- The credentials supplied at registration are also usually encrypted and stored locally on the device.
- After registration, when the user wants to manually log in, the app looks for a secured password on the device. If not found, the user is not registered. If found, the app makes a first match between the password typed at login with the secured, local one. If they match, the password is included in the calls to APIs, web services, or any remote service and undergoes a server-side validation before getting the information.
- With biometric authentication, the app looks for a secured password on the device. If not found, the user is not registered. If found, it means the user is registered, so the biometric authentication user interface is shown. If the device recognizes the user, the local, secure password is sent to any API calls, web services, or any remote service and undergoes a server-side validation before getting the information.
There is nearly an infinite number of scenarios and web services, APIs, and cloud services you might be using in your daily development, so the perfect server-side example does not exist, and would be outside the scope of this book. For this reason, the sample application will simulate the inclusion of the password to be sent to a service, but will still show the entire flow of registration, login, and biometric authentication with password management.
Creating a sample user interface
Based on the considerations of the previous paragraph, the user interface of the sample application consists of three pages:
- The auto-generated main page will serve as the welcome page and will offer two buttons: one for registration, and one for login.
- One page for registration, where the user will be able to supply and save a password. For the sake of simplicity, no username will be required.
- One page for the login part, with both the options to log in by typing the password manually and with biometric authentication.
Now, add two ContentPage items to the .NET Standard project: one called RegisterPage.xaml, and one called LoginPage.xaml.
Note: As you will see in the next code snippets and listing, the example is focusing on features, not on the beauty of the user interface. A professional designer will provide you with specific icons for biometric authentication features that you can use instead of a regular button.
For the MainPage.xaml file, the code is the following:
<?xml version="1.0" encoding="utf-8" ?>
<ContentPage xmlns="http://xamarin.com/schemas/2014/forms"
xmlns:x="http://schemas.microsoft.com/winfx/2009/xaml"
x:Class="BiometricAuthentication.MainPage" Padding="0,20,0,0">
<StackLayout>
<Button Text="Register" x:Name="RegisterButton"
Clicked="RegisterButton_Clicked"/>
<Button Text="Login" x:Name="LoginButton"
Clicked="LoginButton_Clicked"/>
</StackLayout>
</ContentPage>
The event handlers for the two buttons are extremely simple:
private async void RegisterButton_Clicked(object sender, EventArgs e)
{
await Navigation.PushAsync(new RegisterPage());
}
private async void LoginButton_Clicked(object sender, EventArgs e)
{
await Navigation.PushAsync(new LoginPage());
}
This assumes that you wrap the assignment of the MainPage property with a NavigationPage, inside the constructor of the App class, as follows:
MainPage = new NavigationPage(new MainPage());
In the RegisterPage.xaml file, replace the content of the StackLayout with the following:
<Label Text="Set your password:"/>
<Entry IsPassword="True" x:Name="PasswordEntry" />
<Button Text="Save password" x:Name="SavePasswordButton"
Clicked="SavePasswordButton_Clicked"/>
In the LoginPage.xaml file, replace the content of the StackLayout with the following:
<Label Text="Enter your password:" />
<Entry x:Name="PasswordEntry" IsPassword="True" />
<Button x:Name="PasswordLoginButton"
Text="Login with password"
Clicked="PasswordLoginButton_Clicked" />
<Button x:Name="BiometricLoginButton"
Text="Login with biometric authentication"
Clicked="BiometricLoginButton_Clicked"/>
There is really nothing complex in the XAML for both pages, and you are totally free to rearrange the layout inside the page. The C# event handlers for both pages are discussed in the next sections, as part of the implementation logic.
Enforcing requirements for biometric authentication
As I mentioned previously, biometric authentication is useful for understanding if the device recognizes the user, but does not guarantee that the user is also registered or authenticated on an application. So it’s a good idea to enforce the requirements for the user to be able to use biometric authentication. To accomplish this, when the user registers with an app, the credentials can be stored inside the device’s secure storage. As you learned in Chapter 2, the secure storage provides a high level of encryption and security, but nothing prevents you from encrypting the password with an algorithm and storing the resulting string in the secure storage. (This is not done in this chapter.)
Note: Because the logic relies on the secure storage, if you work with an iOS simulator, remember to set up the keychain entitlement, as you learned in Chapter 2.
You might argue that saving a password in the local secure storage is not a good idea. Most apps that both require authentication and offer biometric authentication options do this, and the reason is simple: if the user does not enter credentials manually, but they are required by API calls or web services, the app needs to take these from somewhere, even for the very first call.
Open the RegistrationPage.xaml.cs file and add the following event handler for the SavePasswordButton object:
private async void SavePasswordButton_Clicked(object sender, EventArgs e)
{
// Add more validation logic here...
if (!string.IsNullOrEmpty(PasswordEntry.Text))
{
await SecureStorage.SetAsync("P", PasswordEntry.Text);
await DisplayAlert("Success", "Password saved", "OK");
await Navigation.PopAsync();
}
}
You can perform your own validation logic on the entered password, such as length or minimum security requirements. It is saved inside the secure storage with a key that is not very readable, and this is intentional. We trust the secure storage, but more security is better. So, calling the key P instead of Password can be a good idea. When done, an alert is shown, and the code navigates back to the welcome page. This was the easiest part. Now let’s go into more complex logic.
Implementing biometric authentication
It is not possible to provide only biometric authentication options. Older devices might not have sensors, or the user might not have configured the hardware. If the sensor is broken, for example, or the user wears gloves (in the case of fingerprint), they must have an option to log in manually. So, the example will show how to work with both manual login and biometric login.
Open LoginPage.xaml.cs. There is some code common to both scenarios. For example, the following code detects if a password was securely stored previously, which means the user had registered:
private async Task<bool> IsPasswordSetAsync()
{
string result = await SecureStorage.GetAsync("P");
return result != null;
}
This will be invoked in the next paragraphs.
Authentication with password
In the case of a login scenario where the user types their credentials manually, you will need to validate the entered password and then send it to a web API or web service. In the LoginPage.xaml.cs file, add the following method:
private async Task<bool> IsLocalPasswordValidationPassing(string password)
{
string localPassword = await SecureStorage.GetAsync("P");
return localPassword == password;
}
Given the specified password, the method checks if it matches the password stored in the secure storage and returns the result of the comparison.
Note: A password, as well as regular data, should be validated on the front end, on the back end, and on the data store—something that is not possible to demonstrate here, but certainly to keep in mind.
This method is invoked by the event handler for the PasswordLoginButton object, whose code is the following:
private async void PasswordLoginButton_Clicked(object sender, EventArgs e)
{
bool isPasswordSet = await IsPasswordSetAsync();
if (!isPasswordSet)
{
await DisplayAlert("Error", "Password not set, register first",
"OK");
await Navigation.PopAsync();
return;
}
if (!string.IsNullOrEmpty(PasswordEntry.Text))
{
bool localValidation =
await IsLocalPasswordValidationPassing(PasswordEntry.Text);
if (localValidation)
{
await DisplayAlert("Success", "Authenticated!", "OK");
// Do login here...
}
}
}
If the password is not set, as per the IsPasswordSetAsync method explained in the previous section, it means the user is not registered, so the code returns to the calling page. Otherwise, if a formal validation of the password passes, IsLocalPasswordValidationPassing checks if the entered password matches the one stored in the secure storage. If they match, the password is accepted and sent to any real login service.
Authentication with fingerprint and face ID
About biometric authentication: the CrossFingerprint singleton class, through its Current property, provides methods and types that make it very easy to work with biometric hardware. The first thing to do is check if this is available on the device. Availability depends on several factors, such as hardware sensors available on the device, sensors enabled and configured, and API support. Checking availability is accomplished via a method called GetAvailabilityAsync, which returns an object of type FingerprintAvailability. The following method uses both to detect if biometric authentication is available:
private async Task<bool> CheckIfBiometricAuthIsAvailableAsync()
{
FingerprintAvailability isBiometricAuthAvailable =
await CrossFingerprint.Current.GetAvailabilityAsync();
return isBiometricAuthAvailable == FingerprintAvailability.Available;
}
Tip: The FingerprintAvailability enumeration also allows you to understand if face ID is available, not just fingerprint. Do not get confused by its name.
GetAvailabilityAsync checks if the operating system’s API supports biometric authentication, and then it checks if the user has given permissions, if the device has sensors, and finally, if the user has enabled and configured the sensor. Table 4 lists values from the FingerprintAvailability enumeration.
Table 4: FingerprintAvailability enumeration
Value | Description |
|---|---|
Available | Biometric authentication can be used. |
NoImplementation | The plugin has no implementation for the current platform. |
NoApi | The operating system’s API does not support biometric authentication. |
NoPermission | The app is not allowed to access biometric hardware. |
NoSensor | The device has no biometric hardware. |
NoFingerprint | Biometric authentication has not been set up. |
NoFallback | The fallback user interface has not been set up. |
Unknown | An error occurred and could not be mapped to any of the other values. |
Denied | The user has denied the usage of the biometric authentication. |
The next step is writing the code for the BiometricLoginButton object, which is the following:
private async void BiometricLoginButton_Clicked(object sender, EventArgs e)
{
bool isPasswordSet = await IsPasswordSetAsync();
if (!isPasswordSet)
{
await DisplayAlert("Error", "Password not set, register first",
"OK");
await Navigation.PopAsync();
return;
}
bool biometricAuthAvailability = await
CheckIfBiometricAuthIsAvailableAsync();
if (!biometricAuthAvailability)
{
await DisplayAlert("Error",
"Biometric authentication is not available.", "OK");
return;
}
await AuthenticateAsync();
}
Like for the manual login button, a first check is made to see if the user is registered; otherwise, the app goes back to the main page. If the user is registered, the code checks if biometric authentication is available by invoking the CheckIfBiometricAuthIsAvailableAsync method explained previously. If available, a new method called BiometricAuthenticationAsync is invoked. The following is the code for this method:
private async Task BiometricAuthenticationAsync()
{
var authRequest = new AuthenticationRequestConfiguration
("Biometric authentication", "Log in with fingerprint or face ID");
FingerprintAuthenticationResult result =
await CrossFingerprint.Current.AuthenticateAsync(authRequest);
if (result.Authenticated)
{
await DisplayAlert("Success", "Authenticated!", "OK");
// Do login here...
}
else
await DisplayAlert("Error", $"Reason: {result.ErrorMessage}", "OK");
}
The CrossFingerprint.AuthenticateAsync method is invoked to prompt the user with the system user interface for biometric authentication. Depending on the hardware installed on your device, the API will know which sensor to invoke. This method takes an object of type AuthenticationRequestConfiguration, whose constructor needs you to specify the title and text to be displayed in the user interface, where supported. This object allows for further authentication configuration, but most of the time you will not need to do this.
AuthenticateAsync returns the result of the biometric authentication with an object of type FingerprintAuthenticationResullt. The Authenticated property, of type bool, is true if the user was recognized. If not, you can get a description of the error through the ErrorMessage property, of type string, and the reason behind the error via a property called Status, of type FingerprintAuthenticationResultStatus. Values might be Failed, Canceled, TooManyAttempts, or Denied. Status is set with Succeeded when Authenticated is true.
Detecting the available hardware
If you need to understand what kind of hardware is supported on the device, you can invoke the GetAuthenticationTypeAsync method as follows:
AuthenticationType authTypes =
await CrossFingerprint.Current.GetAuthenticationTypeAsync();
It returns an object of type AuthenticationType, an enumeration whose values can be None, Fingerprint, and Face.
Running the sample app
After a bit of work, you can run the sample app and see how it looks. First, you will need to set and save a password in the registration page, or an error message will be displayed. Next, if you try to log in with biometric authentication, you will see the operating user interface for this feature. Figure 9 shows a fingerprint example based on an Android device.
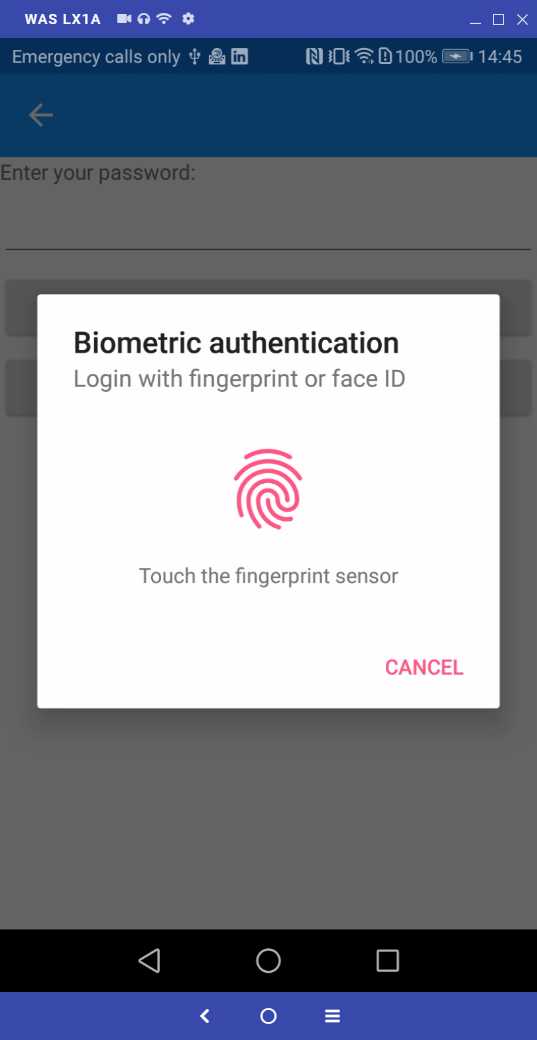
Figure 9: Biometric authentication on Android
Remember that the biometric authentication user interface can vary depending on your operating system version and system theme, especially on Android.
Chapter summary
Biometric authentication improves the user experience by leveraging the device hardware and avoiding the need to manually type user credentials every time. With the Plugin.Fingerprint library, it’s easy to implement biometric authentication using the CrossFingerprint class and its methods, such as GetAvailabilityAsync and AuthenticateAsync. The complexity of the logic depends on your specific scenario, but now you know how to cover a topic that Xamarin.Forms does not natively.
The secure storage, widely used in this chapter, is not the only secure place where you can store passwords and data in general. In the next chapter, you will learn how to work with secured SQLite local databases.
- 155+ high-performance Xamarin controls, including DataGrid, Charts, and ListView.
- Elegant XAML layouts for common scenarios.
- Layouts optimized for mobile and desktop.