
Real-World Xamarin.Forms Succinctly®

CHAPTER 1
Cross-Platform Device Capabilities
Mobile apps in the real world need to make sure the user always has control over what’s happening, especially with unexpected situations, and they need to respond accordingly. For example, if the network connection drops off, not only must the app intercept the loss of connection, but it also needs to communicate to the user that a problem happened and provide one or more actions. This should be done with a nice user interface, avoiding unnecessary modal dialogs that might be OK for desktop apps, but not on mobile apps where the user should never feel they are blocked.
This chapter will describe how to solve common problems that mobile apps might encounter, in a cross-platform approach. You will not find how to work with sensors, which are usually specific to certain application scenarios; you will find ways of handling scenarios that almost every app will need to face.
Chapter prerequisites
Except for taking pictures and recording videos, all the techniques and scenarios described in this chapter simply require the Xamarin.Essentials library, which Visual Studio automatically adds to a new solution at creation time. Xamarin.Essentials is an open-source library available as a NuGet package. It provides a cross-platform API to access features that are common to all the supported systems, to help you avoid the need to write native, platform-specific code.
In order to follow the examples provided in this chapter, create a new Xamarin.Forms solution by using the Blank template, as shown in Figure 1.
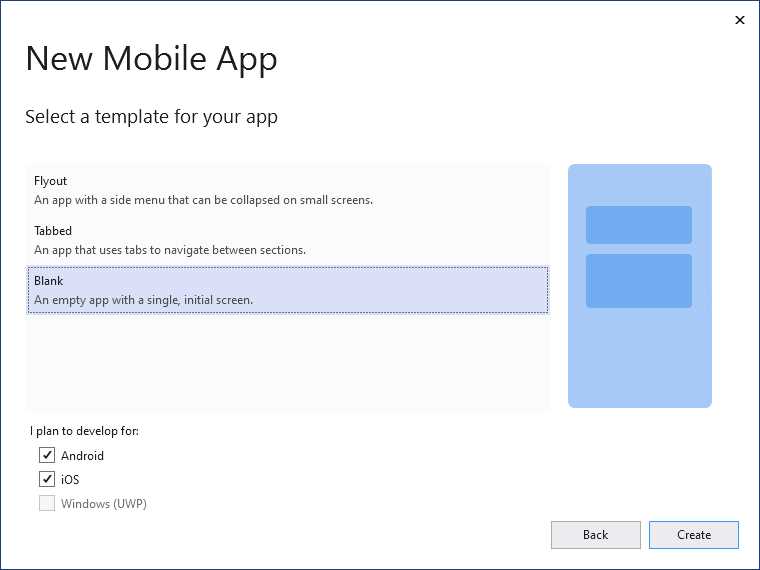
Figure 1: Creating a new Xamarin.Forms blank solution
When the solution is ready, make sure you update the Xamarin.Forms and Xamarin.Essentials packages to the latest version. To do so, right-click the solution name in Solution Explorer, select Manage NuGet Packages for Solution, and then open the Updates tab. Click the Select all packages tab (see Figure 2), and then the Update button. In Figure 2, you will see that an update is available only for Xamarin.Forms, which is fine.
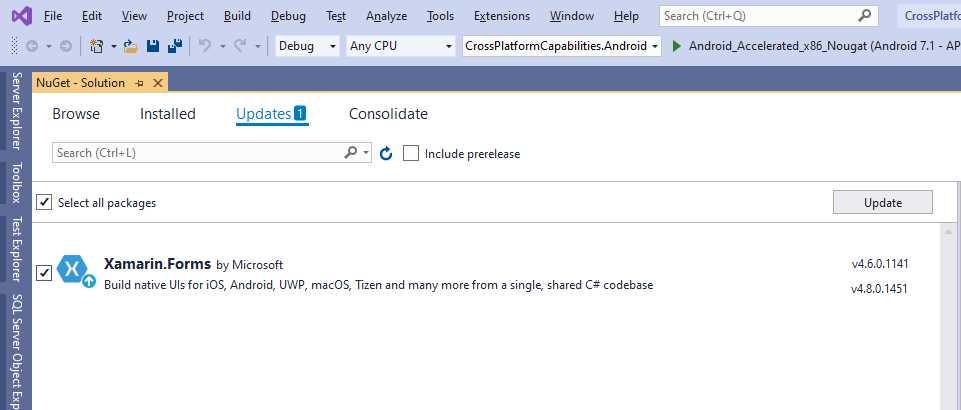
Figure 2: Updating libraries in the Xamarin.Forms solution
You are now ready to write some code (and you can always follow the example by opening the companion source code).
Tip: The steps I just described are the same ones to follow when you start a new chapter and you want to create a new, fresh solution.
Managing the network connections with Snackbar views
Most mobile apps need an internet connection to work properly and you, as the developer, are responsible for responding to changes of the connection status. For example, you need to inform users that the connection dropped and, depending on the scenario, you might also need to offer different actions. You probably already know that handling changes in the status of the network connection is accomplished via the Xamarin.Essentials.Connectivity class, but in this chapter I will show how to implement a Snackbar view to inform the user. This view does not exist in Xamarin.Forms, but it has become very popular in many applications because it does not block the user interaction while providing information. For a better understanding, consider Figure 3, where you see the final result of the work.

Figure 3: Displaying a Snackbar when the connection drops
As you can see, the user interface displays a nice view that informs the user that the connection dropped, while the other views have been programmatically disabled. Such a view will disappear once the connection is established again, and the other views will be re-enabled. Let’s now go through each step required to build this component.
Building a Snackbar view
A Snackbar can basically be thought of as a box that appears as an overlay to provide information to the user. This can include errors, confirmations, warning messages, and so on. The benefit of using a Snackbar is that it does not block the user interaction with the app, and you have complete control of it. For instance, you could animate a Snackbar to make it appear, keep the information visible for a few seconds, and then make it disappear. A typical situation for this is when the user saves some changes and the app provides a confirmation. In the case of the lost network connection, it could be a good idea to keep the Snackbar visible until the connection returns. Obviously, depending on the design requirements, you will change the behavior accordingly.
The implementation of the Snackbar can be done in a separate ContentView object. Code Listing 1 shows the full code for the Snackbar you see in Figure 3, and the new control is called NoNetworkSnackBarView.
Code Listing 1
<?xml version="1.0" encoding="UTF-8"?> <ContentView xmlns="http://xamarin.com/schemas/2014/forms" xmlns:x="http://schemas.microsoft.com/winfx/2009/xaml" x:Class="CrossPlatformCapabilities.NoNetworkSnackBarView"> <ContentView.Content> <Grid> <Frame BackgroundColor="PaleVioletRed" BorderColor="Red" CornerRadius="10" VerticalOptions="End" HasShadow="False" Padding="16"> <StackLayout Orientation="Horizontal" Spacing="16" Margin="0" Padding="0"> <Image Source="ExclamationMark.png" HorizontalOptions="Start" HeightRequest="20" WidthRequest="20" VerticalOptions="CenterAndExpand" /> <StackLayout Margin="40,0,0,0" VerticalOptions="CenterAndExpand" HorizontalOptions="StartAndExpand" Orientation="Vertical" Spacing="5"> <Label TextColor="White" FontSize="Medium" Text="Internet connection unavailable..." HorizontalTextAlignment="Center"/> <ActivityIndicator IsRunning="True" Color="White" VerticalOptions="Center" HeightRequest="35" WidthRequest="35"/> </StackLayout> </StackLayout> </Frame> </Grid>
</ContentView.Content> </ContentView> |
Tip: You can even go a step further and build a completely reusable Snackbar by binding the Label properties, such as Text and TextColor, and the Frame color properties to objects in a view model. This is actually how I have my Snackbar views, which also need to be localized. For the sake of simplicity, and because we just need a specific message, in this chapter you see a Snackbar that is tailored for loss of connectivity.
The code is very simple, as it combines StackLayout panels to organize an icon, a text message, and a running ActivityIndicator inside a Frame. There is nothing complex in Code Listing 1—this implementation is for the UI only and does not perform any action, which means no C# code is required.
Handling the status of the network connection
The Connectivity class exposes an event called ConnectivityChanged, which is raised every time the status of the network connection changes. Because you might have multiple pages in your app that require a connection, the best place to handle the event is in the App class. First of all, add the following line right after the invocation to the InitializeComponent method, inside the constructor:
Connectivity.ConnectivityChanged += Connectivity_ConnectivityChanged;
The event handler might look like the following:
private void Connectivity_ConnectivityChanged(object sender,
ConnectivityChangedEventArgs e)
{
MessagingCenter.Send(this, "ConnectionEvent",
e.NetworkAccess == NetworkAccess.Internet);
}
Because the event is handled in the App class, and this does not have direct access to the user interface of any page, the best way to inform all the subscribers that the network status changed is sending a broadcast message via the MessagingCenter class and its Send method. The message includes a bool parameter, which is true if an internet connection is available, otherwise false, whether the device is completely disconnected from any network or connected to a local network or to a network with limited access.
You can further manage the event using the values from the NetworkAccess enumeration if you need more granularity of control. There is actually an additional thing to do: the network check will not happen immediately at startup, so you need to handle the OnStart method as follows:
protected override void OnStart()
{
MessagingCenter.Send(this, "ConnectionEvent",
Connectivity.NetworkAccess == NetworkAccess.Internet);
}
The same check is done at startup, just once, and the same message is sent to the subscribers. The next step is notifying the app’s user interface of the network status change and showing the Snackbar.
Notifying the user interface and showing the Snackbar
All the pages that will want to display the Snackbar when the connection drops off will need to subscribe the ConnectionEvent message via the MessagingCenter.Subscribe method. In the current example there is only one page, so Code Listing 2 shows the code for the MainPage.xaml.cs file.
Code Listing 2
public partial class MainPage : ContentPage { public MainPage() { InitializeComponent(); MessagingCenter.Subscribe<App, bool>(this, "ConnectionEvent", ManageConnection); } private void ManageConnection(App arg1, bool arg2) { LayoutRoot.IsEnabled = arg2; ConnectionStatusBar.IsVisible = !arg2; } } |
This code is also simple. The page subscribes for the message sent by the App class and expects a bool value, which in this case is true if the connection is available and of type Internet, and otherwise false. When the message is raised, the ManageConnection method is invoked. LayoutRoot is a Grid that I added to the layout that Visual Studio autogenerated when creating the solution, and ConnectionStatusBar is the instance name for the NoNetworkSnackBarView control. Code Listing 3 shows the full XAML markup for the MainPage.xaml file.
Code Listing 3
<?xml version="1.0" encoding="utf-8" ?> <ContentPage xmlns:local="clr-namespace:CrossPlatformCapabilities" xmlns="http://xamarin.com/schemas/2014/forms" xmlns:x="http://schemas.microsoft.com/winfx/2009/xaml" x:Class="CrossPlatformCapabilities.MainPage"> <Grid x:Name="LayoutRoot"> <StackLayout> <Frame BackgroundColor="#2196F3" Padding="24" CornerRadius="0"> <Label Text="Welcome to Xamarin.Forms!" HorizontalTextAlignment="Center" TextColor="White" FontSize="36"/> </Frame> <Label Text="Start developing now" FontSize="Title" Padding="30,10,30,10"/> <!-- Text cut for spacing reasons, look in Visual Studio --> <Label Text="Make changes to your XAML file and save..." FontSize="16" Padding="30,0,30,0"/> <Label FontSize="16" Padding="30,24,30,0"> <Label.FormattedText> <FormattedString> <FormattedString.Spans> <Span Text="Learn more at "/> <Span Text="https://aka.ms/xamarin-quickstart" FontAttributes="Bold"/> </FormattedString.Spans> </FormattedString> </Label.FormattedText> </Label> </StackLayout> <local:NoNetworkSnackBarView x:Name="ConnectionStatusBar"/> </Grid> </ContentPage> |
If you now run the app and disable the internet connection on your device, you will see the Snackbar appear like in Figure 3. When you re-enable the connection, the Snackbar will disappear. Handling changes in the network connection is probably the most common task with mobile app development, but in this chapter, you have seen a step further, which is related to a nice user interface, rather than focusing on the information only.
Checking the battery level
Checking the battery level of the device can be an important task, depending on the type of app you develop. Both iOS and Android inform the user with an alert when the battery level goes down to 20 percent, so if your app only displays data and does not require the user to save information, that might be enough. Generally speaking, it is not a good idea to bore users with additional alerts on the same information already provided by the system. As an alternative, you could consider the implementation of a more discreet Snackbar that disappears after a few seconds if you need to make sure the user saves some information manually. This is a good idea if your app manages sensitive data and it is better to leave to the user the final responsibility of data handling, including data persistence.
Another possible scenario is the need of temporarily persisting some information in a silent way. To accomplish this, I will demonstrate how to use the EnergySaverStatusChanged event from the Xamarin.Essentials.Battery class. This event is raised when the device enters energy saver mode, which normally happens when the battery level goes down to 20%, but because it can also be manually enabled by the user, I will also show how to combine this with a check on the actual battery level. Before going into this, let’s look at what the Battery class has to offer. This class exposes the following properties:
- ChargeLevel, of type double, which returns the current battery charge level between 0 and 1 (where 0 means completely discharged and 1 means 100 percent charged).
- BatteryState, of type BatteryState, which describes the state of the battery and returns the information described in Table 1.
- PowerSource, of type BatteryPowerSource, which describes how the device is being powered and returns the values described in Table 2.
Table 1: BatteryState enumeration values
Value | Description |
|---|---|
Charging | The battery is currently charging. |
Discharging | The battery is discharging. This is the expected value when the device is disconnected from a power source. |
NotCharging | The battery is not being charged. |
NotPresent | A battery is not available in the device (for example, on a desktop computer). |
Unknown | The state could not be detected. |
Full | The battery is fully charged. |
Table 2: BatteryPowerSource enumeration values
Value | Description |
|---|---|
Battery | The device is powered by the battery. |
AC | The device is powered by an AC unit. |
Usb | The device is powered through a USB cable. |
Wireless | The device is powered via wireless charging. |
Unknown | The power source could not be detected. |
When one of the aforementioned properties changes, the BatteryInfoChanged event is raised and you will be able to read its status.
Note: On Android, you will need to select the BATTERY_STATS permission in the manifest before accessing information on the battery. UWP and iOS do not require additional steps.
The next example will focus on the EnergySaverStatusChanged event, for which you specify a handler as follows in the constructor of the App class:
Battery.EnergySaverStatusChanged += Battery_EnergySaverStatusChanged;
The event handler will check if the phone entered into the energy saving status, but because this can be also manually enabled by the user, it will also check if the battery level is equal to or lower than 20 percent. This is accomplished with the following code:
private void Battery_EnergySaverStatusChanged(object sender,
EnergySaverStatusChangedEventArgs e)
{
MessagingCenter.Send(this, "BatteryEvent",
e.EnergySaverStatus == EnergySaverStatus.On
&& Battery.ChargeLevel <= 0.2);
}
In this case, any tasks related to persisting user settings or storing local information will actually happen only if there is a real need. A message is sent to subscribers, which can then react to the status change.
Reacting to the energy saving status in the user interface
The first thing that a page must do is subscribe to the message sent by the App class when the phone enters the energy saving status. In the current example, the following line must be added to the constructor of the MainPage.xaml.cs file:
MessagingCenter.Subscribe<App, bool>(this,
"BatteryEvent", ManageBatteryLevelChanged);
The ManageBatteryLevelChanged method will be responsible for performing the actual actions. This is its code:
private void ManageBatteryLevelChanged(App arg1, bool arg2)
{
FileHelper.WriteData("test data");
}
FileHelper is a program-defined class that must be implemented, and that exposes methods for reading and writing text files locally. Code Listing 4 shows the full code for the class.
Note: For Android, you will need to enable the READ_EXTERNAL_STORAGE and WRITE_EXTERNAL_STORAGE permissions in the app manifest.
Code Listing 4
using System; using System.IO; using System.Threading.Tasks; using Xamarin.Essentials; namespace CrossPlatformCapabilities { public static class FileHelper { public static string ReadData() { try { string fileName = Path.Combine(Environment.GetFolderPath( Environment.SpecialFolder.LocalApplicationData), "appdata.txt"); string text = File.ReadAllText(fileName); return text; } catch (Exception) { return null; } } public static bool WriteData(string data) { try { string fileName = Path.Combine(Environment.GetFolderPath( Environment.SpecialFolder.LocalApplicationData), "appdata.txt"); File.WriteAllText(fileName, data); return true; } catch (Exception) { return false; } } } } |
The code for the ReadData and WriteData methods is very simple: it opens a stream for reading and writing a file, and then it reads/writes the file content as text. The WriteData method was invoked by the ManageBatteryLevelChanged method in the user interface’s code-behind file, which silently saves some user information when the battery level is very low. Such information can then be read back by invoking the ReadData method, which returns a string. In the current example, everything happens silently, but you can also consider implementing a Snackbar that gently informs the user about the battery level getting low, and about the automatic information backup. Using a text file for local persistence is obviously the simplest example possible, but you can go further by persisting user and app settings to the local storage or into a SQLite database. App settings and SQLite databases will be discussed in Chapters 2 and 4. Keep the FileHelper class in mind, because this will be extended in the next section with methods to work with the file system.
Working with files
Working with files is a very common requirement in mobile apps. Due to the natural system restrictions, what you will commonly be able to do is work with image files, video files, and document files, and with Xamarin.Essentials you will be able to do this cross-platform. This section discusses two topics: accessing data in the local app folders and picking up files.
Accessing files in the local app folders
In terms of cross-platform development, you will be able to access two file locations: the cache directory, where temporary files are stored, and the app data folder, where app data files are usually stored. Notice that the cache directory is not usually visible to the user, and the data it contains can be removed at any time, due to its temporary nature. For a better understanding of how reading files from these locations works, consider the following method that you can add to the FileHelper class, so that you can build a reusable class for file access:
public async static Task<string> ReadDataAsync()
{
try
{
var mainDir = FileSystem.AppDataDirectory;
string localData;
using (var stream = await FileSystem.OpenAppPackageFileAsync("appdata.txt"))
{
using (var reader = new StreamReader(stream))
{
localData = await reader.ReadToEndAsync();
}
}
return localData;
}
catch (Exception)
{
return null;
}
}
The FileSystem class exposes two properties, AppDataDirectory and CacheDirectory, which are both self-explanatory. It also exposes a method called OpenAppPackageFileAsync, which allows for reading the content of a file. With regard to this, there are important considerations to keep in mind:
- Only text files are supported.
- As the name implies, OpenAppPackageFileAsync allows for opening a file that is part of the app resources. Further, you can only open text files that were previously added to the platform-specific projects.
- Continuing from the previous point, for Android you will need to place the text file under the Assets folder and set its Build Action property with AndroidAsset. On iOS, the text file must be placed under the Resources folder and its Build Action set with BundleResource. On UWP, the file must be placed in the project folder, and its Build Action set with Resource.
Accessing files in the local app folders is useful, but it is even more useful learning how to select an existing file from the user’s device.
Picking up files from the device
If your app needs to allow users to select files from the device, Xamarin.Essentials has the cross-platform solution for you.
Note: You will need Xamarin.Essentials 1.6 for this API. At the time of writing, this has not been yet released as a stable build, but you can install the 1.6.0-pre2 version from NuGet.
Let’s start by supposing your app allows users to select and display an image file. You will need a button to select an image, a label to display the selected file name, and an Image view to display the image. Code Listing 5 shows the XAML for this.
Code Listing 5
<?xml version="1.0" encoding="utf-8" ?> <ContentPage xmlns="http://xamarin.com/schemas/2014/forms" xmlns:x="http://schemas.microsoft.com/winfx/2009/xaml" x:Class="CrossPlatformCapabilities.FilePickerPage"> <ContentPage.Content> <Grid> <Grid.RowDefinitions> <RowDefinition Height="Auto" /> <RowDefinition Height="Auto" /> <RowDefinition /> </Grid.RowDefinitions> <Button x:Name="PickButton" Clicked="PickButton_Clicked" HorizontalOptions="Center" Text="Pick an image"/> <Label x:Name="ImageNameLabel" HorizontalTextAlignment="Center" HorizontalOptions="Center" Grid.Row="1"/> <Image x:Name="PickedImage" Grid.Row="2"/> </Grid> </ContentPage.Content> </ContentPage> |
Nothing complex at all. Because you want to display the image and its file name, you might want to implement a class that stores this information from the selected file:
public class FileSelection
{
public string FileName { get; set; }
public ImageSource Image { get; set; }
}
Now it is time to write a method for file selection. The Xamarin.Essentials.FilePicker class exposes a method called PickAsync, which opens the system user interface for file selection, and returns an object of type FileResult. An instance of FileResult will contain the file name, the full path, and a stream object that contains the selected file. Code Listing 6 demonstrates how to invoke PickAsync and how to store the result in the FileSelection class we created previously.
Code Listing 6
private async Task<FileSelection> PickAndShowAsync(PickOptions options) { try { FileResult result = await FilePicker.PickAsync(options); FileSelection fileResult = new FileSelection(); if (result != null) { fileResult.FileName = $"File Name: {result.FileName}"; if (result.FileName.EndsWith("jpg", StringComparison.OrdinalIgnoreCase) || result.FileName.EndsWith("png", StringComparison.OrdinalIgnoreCase)) { var stream = await result.OpenReadAsync(); fileResult.Image = ImageSource.FromStream(() => stream); } } return fileResult; } catch (Exception ex) { return null; // The user canceled or something went wrong } } |
The method also takes a parameter of type PickOptions, but this is discussed in the next paragraph. Key points to focus on now:
- PickAsync returns the selected file as a FileResult object.
- Built-in support is for .png and .jpg image files, so other types are filtered out (see the if block).
- The file name and the actual image are assigned to an object of type FileSelection and returned as the result of the method. The image in particular is returned as a stream.
The final piece is the Clicked event handler for the button, which will look like the following:
private async void PickButton_Clicked(object sender, EventArgs e)
{
var result = await PickAndShowAsync(
new PickOptions { PickerTitle="Pick a file",});
this.ImageNameLabel.Text = result.FileName;
this.PickedImage.Source = result.Image;
}
The key point here is obviously the invocation of the PickAndShowAsync method. Notice how an instance of the PickOptions allows for customizing the user interface for file selection. You can actually specify a different text for the picker and, as you will see in the next paragraph, this is also the place where you add support for different file types. If you run the code and select an image, you will see a result similar to Figure 4.
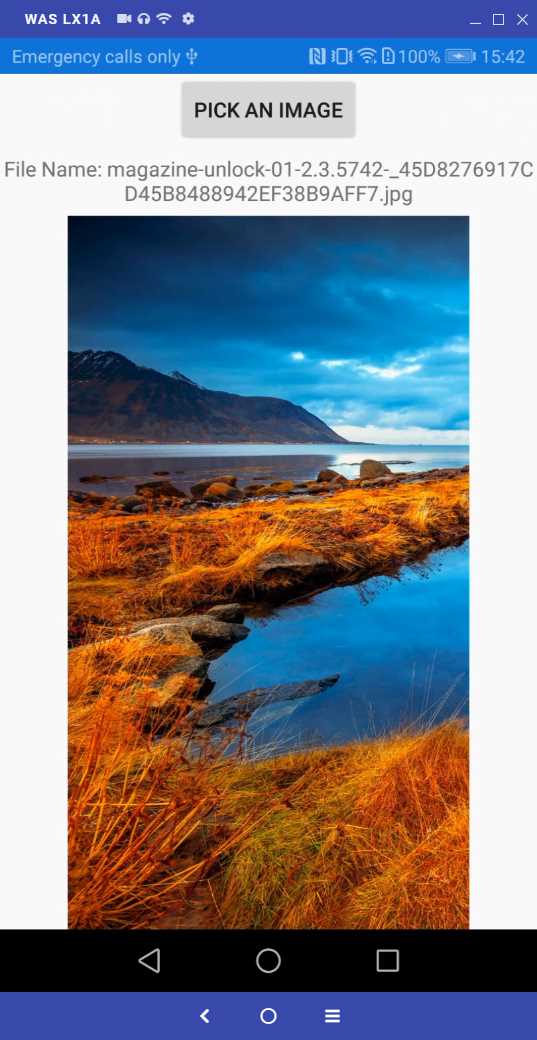
Figure 4: Displaying an image selected from the device
You can support different file types, as described in the next section.
Supporting custom file types
You can add support for file types different from images. This requires some platform-related specifications, but fortunately the picker API makes this simple. Suppose you want the picker to show .doc files. You would change the invocation to our method PickAndShowAsync as follows:
var fileType = new FilePickerFileType(new Dictionary<DevicePlatform,
IEnumerable<string>>
{
{ DevicePlatform.iOS, new[] { "public.my.doc.extension" } },
{ DevicePlatform.Android, new[] { "application/doc" } },
{ DevicePlatform.UWP, new[] { ".doc", ".doc" } },
});
var result = await PickAndShowAsync(new PickOptions {
PickerTitle="Pick a file", FileTypes = fileType });
The PickOptions object is passed to the PickAsync method of the FilePicker class. Notice how, for each operating system, you need to supply a different syntax to identify the file type. The easiest are for Android, where you pass the MIME type, and for UWP where you simply pass the file extension. For iOS, I suggest you replace the file extension inside the string you see in the previous example. If you want to try yourself based on this example, you will need to remove the filter on .png and .jpg files.
Note: Of course, it is not enough to allow users to open different types of files. You also need to implement viewers or launch the appropriate app. The “Sharing files and documents” section later in the book will help you with the second option.
Development trick: Running code in the main thread
In order to keep the user interface active and capable of accepting the user input even when an app is busy doing something else, most operating systems (iOS, Android, and UWP are no exception) run the user interface on a dedicated thread—known as the main thread, user interface thread, or UI thread.
Note: For consistency with the API naming, I will refer to this thread as the main thread.
All the code that interacts with elements of the user interface should run within this thread; otherwise, exceptions would be raised because of invalid cross-thread calls. However, this does not mean that an app only runs on a single thread. For example, classes like Battery or Connectivity that you saw at the beginning of this chapter raise events on a separate thread to avoid a work overload on the main thread. If part of the code that runs on a separate thread needs to interact with elements of the user interface, that piece of code needs to run on the main thread instead.
For instance, an event handler might contain some logic and code that changes properties of UI elements. The logic part can stay on a separate thread, but the piece of code that works against UI elements needs to run on the main thread. Xamarin.Essentials simplifies running code in the main thread via the MainThread class. If you want to run code on the main thread, all you do is write something like this:
MainThread.BeginInvokeOnMainThread(() =>
{
// Run your code on the main thread here..
});
The body for the BeginInvokeOnMainThread method is an Action that you can represent with a lambda expression, like in the previous snippet, or by explicitly declaring a method name as follows:
MainThread.BeginInvokeOnMainThread(DoSomething);
…
void DoSomething()
{
// Run your code on the main thread
}
The fact is that you might not know if a piece of code needs to run on the main thread or not. Luckily enough, the MainThread class exposes the IsMainThread static property, which returns true if the current piece of code is already running on the main thread. You use it as follows:
if (MainThread.IsMainThread)
DoSomething();
else
MainThread.BeginInvokeOnMainThread(DoSomething);
The MainThread class is extremely useful. It will help you avoid errors and save time detecting which thread your code is running on.
Opening the browser and sending emails
Sometimes you need to open a browser on the device for navigating to a webpage, or your app might need to allow users to send emails. Xamarin.Essentials provides APIs for both scenarios, which are discussed in this section. For the next example, add a new ContentPage to the project with the XAML shown in Code Listing 7, which declares two simple buttons:
Code Listing 7
<?xml version="1.0" encoding="utf-8" ?> <ContentPage xmlns="http://xamarin.com/schemas/2014/forms" xmlns:x="http://schemas.microsoft.com/winfx/2009/xaml" Padding="0,20,0,0" x:Class="CrossPlatformCapabilities.BrowserEmailSample"> <ContentPage.Content> <StackLayout VerticalOptions="Center"> <Button Text="Open webpage" x:Name="BrowserButton" Clicked="BrowserButton_Clicked"/> <Button Text="Open email client" x:Name="EmailButton" Clicked="EmailButton_Clicked" Margin="0,15,0,0"/> </StackLayout> </ContentPage.Content> </ContentPage> |
The event handlers of each button will be implemented to work with the two scenarios taken into consideration.
Opening the browser
Xamarin.Essentials provides the Browser class, which makes it really simple to open an external browser pointing to the specified URI via the OpenAsync method. While you can display web content, including websites, inside the WebView control in Xamarin.Forms, there might be several reasons for displaying a website with an external browser. The first reason is certainly the fact that web browsers are more optimized to display websites than the WebView. I will explain other reasons with a practical example coming from my daily work. The main project I work on is an app for dialysis patients, and we had the requirement to provide links to official sources about COVID-19 from the World Health Organization (WHO) website. We made the decision to display such webpages inside an external browser for the following reasons:
- If we implemented our browsing system inside the app, the user would have the perception that contents from the WHO were offered by us, which is not true.
- In the unlucky (and unlikely) event the website was hacked, the user would have the perception that it was our fault, which is not true.
- Because of the sensitivity of the information, the user had to understand clearly who was the source of the information, and that would not be possible (or at least very difficult) with in-app browsing.
- Security is key for us, so we thought that delegating this responsibility to the browser was the best approach.
The simplest way to open a website inside a browser is by invoking the OpenAsync method as follows:
private async void BrowserButton_Clicked(object sender, EventArgs e)
{
await Browser.OpenAsync("https://www.microsoft.com");
}
If multiple browsers are installed on your device, the system will show a user interface where you can select the browser for opening the website. With this simple line of code, a browser will be opened and will run externally. You can also open a web browser instance inside the app, changing the previous line of code as follows:
await Browser.OpenAsync("https://www.microsoft.com",
BrowserLaunchMode.SystemPreferred);
The BrowserLaunchMode enumeration has two values: External, which is basically the default and works exactly like the first example, and SystemPreferred, which makes the browser run inside the app. Figure 5 shows an example based on iOS where on the left the browser is running externally. You can see a shortcut to go back to the app at the top-left corner, and on the right, the browser is running inside the app.

Figure 5: Opening the browser outside and inside the app
As you can see, when the browser runs externally you will have the browser controls available. When it runs inside the app, you will have fewer controls available, but the user does not need to switch between apps.
Sending emails
Similar to browsing external websites is sending emails. Creating a dedicated user interface would take time, and you would need to care about a lot of information. Xamarin.Essentials provides the Email class, which exposes the ComposeAsync method which allows for opening one of the installed email clients on your device. In its simplest form, the method works like this:
await Email.ComposeAsync();
This will open an email client on the device, and the user will need to supply all the email information manually. Another method overload allows for specifying a minimum set of information as follows:
await Email.ComposeAsync("Support request",
"We have problems with the internet connection",
The first argument is the email subject, the second argument is the email body, and the third argument is an array of string containing the list of recipients. However, there is a third method overload that is much more powerful and gives you complete control of the email. This overload takes an argument of type EmailMessage and works as shown in the following example (which is also the event handler for the button in the sample app):
private async void EmailButton_Clicked(object sender, EventArgs e)
{
EmailMessage message = new EmailMessage();
message.Subject = "Support request";
message.To = new List<string> { "[email protected]" };
message.Cc = new List<string> { "[email protected]" };
message.BodyFormat = EmailBodyFormat.PlainText;
message.Body = "We have problems with the internet connection";
await Email.ComposeAsync(message);
}
As you can see, the EmailMessage class exposes self-explanatory properties and allows you to specify if the body should be plain text (EmailBodyFormat.PlainText) or HTML (EmailBodyFormat.HTML). You can define multiple recipients in the To, Cc, and Bcc properties via List<string> objects. The EmailMessage class also exposes the Attachments properties, which allows you to programmatically attach files to the email message.
The following code demonstrates how to add an attachment:
string attachmentPath =
Path.Combine(Environment.GetFolderPath(
Environment.SpecialFolder.MyPictures),
"myimage.png");
EmailAttachment attachment = new EmailAttachment(attachmentPath);
message.Attachments = new List<EmailAttachment>();
message.Attachments.Add(attachment);
Before running the example, you need to add the following XML markup to the Android manifest if you plan for the app to run on Android 11 devices:
<queries>
<intent>
<action android:name="android.intent.action.SENDTO" />
<data android:scheme="mailto" />
</intent>
</queries>
Tip: For iOS, the Email class is only supported on physical devices. In the simulator, it will throw a FeatureNotSupportedException.
If you run the example, you will first see the operating system asking which email client you want to use (if there is more than one on the system), and then you will see a new email message with all the required information supplied and ready to be sent. Figure 6 shows an example from my device, where on the left there is the client selection, and on the right the email message.

Figure 6: Email client selection and an email message ready to be sent
With a few lines of code, you can make your users able to send emails without the need of implementing a custom user interface and logic.
Chapter summary
Mobile apps in the real world often need to implement features that need to work cross-platform. In this chapter, you have seen how to build a Snackbar to inform users about the loss of network connection, and you have seen how to check for the battery level to make sure the app can persist important information. You have seen how to work with local files, and how you can open the browser and send emails using system resources that avoid the need of custom user interfaces and additional effort for developers. All these capabilities are provided by the Xamarin.Essentials library, and in the next chapter, you will learn other cross-platform capabilities from this library related to the app settings and secure storage.
- 155+ high-performance Xamarin controls, including DataGrid, Charts, and ListView.
- Elegant XAML layouts for common scenarios.
- Layouts optimized for mobile and desktop.