
Prism 4 Succinctly®

CHAPTER 3
The Prism 4 Startup Process
Building a Hello World Solution:
We're going to start our exploration of Microsoft WPF and Prism 4 by building the simplest solution possible. Our objective will be to create a solution that shows the following shell form.
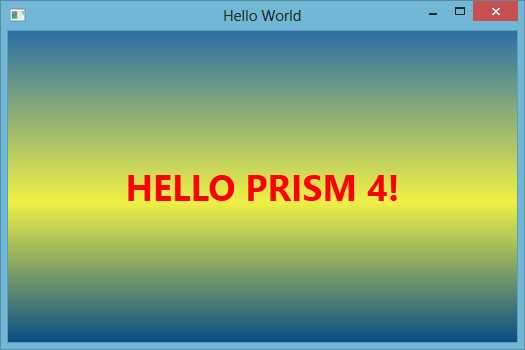
- The Hello World Shell Form
Create the Hello World Solution:
The first step is to create a solution that will contain our projects. Run Visual Studio and select FILE - New - Project from the Visual Studio main menu and create a Blank Solution. The Blank Solution is located in the Other Project Types folder of the New project dialog under Visual Studio Solutions. Name the Solution HELLO_WORLD. Place it in the folder of your choice.
Next we'll create a WPF project for the solution. Select FILE - New - Project from the Visual Studio main menu and create a C# WPF Application. Name it HELLO_WORLD.MAIN.
We now have a WPF solution that is ready to run. If you would like, click the Start button in Visual Studio and you will see a blank form displayed.
If we take a look at the files that were generated by Visual Studio we'll see that there is a MainWindow.xaml file and an App.xaml file. Expand the App.xaml file and you'll see an App.xaml.cs file. There is also a references folder. These are the files and folders that we will be concerned with in this solution.
Referencing the Prism 4 Library:
It's necessary to reference the Microsoft Prism 4 library before we can take advantage of the framework. Right click on the References folder in the Main project and select Add Reference. Browse to the folder where the Prism 4 DLLs are located on your computer. Add the following highlighted DLLs.
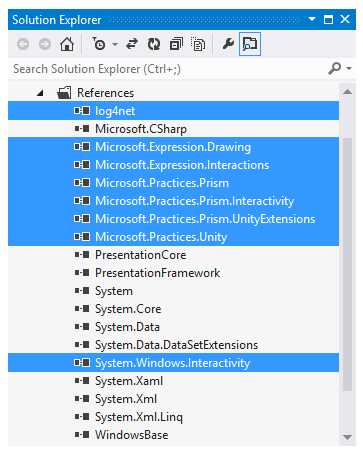
- The Microsoft Prism 4 Library
We now have the necessary libraries to work with Prism 4.
The Microsoft Prism 4 Startup Process:
As we saw earlier, starting a WPF solution is pretty easy. Simply add the project and run it. With Prism 4 the startup process is different. Lets first take a look at the Markup that is used to start the WPF solution.
Listing 1: The App.xaml File Markup.
<Application x:Class="HELLO_WORLD.MAIN.App"
xmlns="http://schemas.microsoft.com/winfx/2006/xaml/presentation" xmlns:x="http://schemas.microsoft.com/winfx/2006/xaml"
StartupUri="MainWindow.xaml">
<Application.Resources>
</Application.Resources>
</Application> |
In listing 1, the markup uses the StartupUri property to set the startup form to the MainWindow.xaml file. While this is a fast and easy manner in which to start the solution, it severely limits the amount of control that we have over the startup process. To address this issue, we'll first remove the StartupUri property from the App.xaml file. This is the markup that should be removed: StartupUri="MainWindow.xaml". Remove the markup now.
Tip: There is a closing bracket (>) at the end of the StartupUri property. Make sure to only remove the property and not the closing bracket.
The Prism 4 Bootstrapper Class:
Our next step in creating our Hello World project is to create a bootstrapper class. This class is used to start Prism 4 solutions. As you will see later this class gives us almost unlimited control over the startup process. We'll talk in detail about the bootstrapper class in chapter 5, but for now, let's add and create the class for this project.
Add The Prism 4 Bootstrapper Class to the Main Project:
Right click on the Main project and select Add - Class from the context menu. In the Add New Item dialog, enter Bootstrapper into the Name textbox. Click the Add button to add the class.
Add The Prism 4 Bootstrapper Code:
Add the following code to the Bootstrapper class:
Listing 2: The Bootstrapper Class.
using System; using System.Windows; using Microsoft.Practices.Prism; using Microsoft.Practices.Unity; using Microsoft.Practices.Prism.UnityExtensions; namespace HELLO_WORLD.MAIN { public class Bootstrapper : UnityBootstrapper { protected override DependencyObject CreateShell() { //Create and show the Prism 4 shell form: MainWindow Shell = Container.Resolve<MainWindow>(); Shell.Show(); return Shell; } } } |
Let's go over the code in Listing 2. First notice that the class inherits the UnityBootstrapper class. This is our Dependency Injection Container (DIC). If you're not familiar with DICs, don't worry I'll go over what they are and how they work in chapter 5.
Next is the CreateShell method. This method is used to replace the StartupUri markup the we removed in the App.xaml file earlier. This method returns a DependencyObject, returning this type of object allows us to return any object that derives from the DependencyObject type. In this case we return the MainWindow as our shell form. Notice that we use the DIC to create our shell form instead of using new to instantiate the object. We'll go into why we do things this way in later chapters. But for now, just remember that with Unity, resolving entities is equivalent to instantiating objects with the new keyword.
Use The Prism 4 Bootstrapper Code:
You may have noticed that we don't actually create and use the bootstrapper so far. This is our next step, now that we have a bootstrapper class, let's instantiate and call the CreateShell method.
Listing 3: The App.xaml.cs Code.
using System; using System.Windows; namespace HELLO_WORLD.MAIN { /// <summary> /// Interaction logic for App.xaml /// </summary> public partial class App : Application { protected override void OnStartup(StartupEventArgs e) { base.OnStartup(e); Bootstrapper Bootstrapper = new Bootstrapper(); Bootstrapper.Run(); } } } |
The code in Listing 3 is used to instantiate the bootstrapper class. The Bootstrapper.Run method is then called. This method calls the other methods in the class including the CreateShell method which is used to show the shell form.
Running the solution at this time will show our shell form. The shell form at this time, is just a blank form. Lets add a message to the form.
Add A Label to the Shell Form:
Now that we have a working solution, lets finish up by adding a message to our shell form. Add the following markup to the shell form.
Listing 4: The Shell Form Markup.
<Window x:Class="HELLO_WORLD.MAIN.MainWindow"
xmlns="http://schemas.microsoft.com/winfx/2006/xaml/presentation" xmlns:x="http://schemas.microsoft.com/winfx/2006/xaml"
Title="Hello World" Height="350" Width="525" WindowStartupLocation="CenterScreen">
<Window.Background> <LinearGradientBrush EndPoint="0.5,1" StartPoint="0.5,0"> <GradientStop Color="#FF2D6FA6" Offset="0"/> <GradientStop Color="#FF084D87" Offset="1"/> <GradientStop Color="#FFF0F045" Offset="0.549"/> </LinearGradientBrush> </Window.Background> <Grid>
<Label Name="MainLabel" Content="HELLO PRISM 4!" HorizontalAlignment="Center" VerticalAlignment="Center" FontSize="36" FontWeight="Bold" Foreground="Red"> </Label>
</Grid>
</Window> |
The Listing 4 XAML markup is a good example of what is necessary to create a basic layout with WPF. As we progress you'll find that XAML is one of the most powerful and extensive markup languages that you are likely to encounter. Let's take a closer look at the Markup.
The base control is a System.Windows.Window control, this is the container control for all of the other controls that will be used in the window.
The x:Class tag combines the window's namespace and class name, it describes the associated class for the window control.
The two XML namespace tags associate the window with DLL files that the window will use when working with objects.
The next lines of markup expose properties of the window, for instance, the window title is set to "Hello World" and the WindowStartupLocation is set to "CenterScreen".
Next the window Background is set to a LinearGradientBrush. That's the three colors that you see on the background of the form.
The Grid control is a powerful layout control that can be used to position controls on the shell form.
Contained inside of the Grid control is a label with its content set to "HELLO PRISM 4".
Figure 6 shows an example of the finished solution.
One interesting thing to note, is that we have only used one Prism 4 construct in this example. The only Prism 4 library that we have used so far is the Unity Dependency Injection Container (DIC) in our bootstrapper class! The Unity DIC is included with Prism 4, but it is really a standalone DIC, it could just as easily be used independently.
Don't despair! In the following chapters we'll integrate Prism 4 into this chapter's basic framework as we look at a more detailed Prism 4 solution.
Note: Another interesting point is that the Unity DIC is also Included in the Microsoft Enterprise Libraty as a one of it's application blocks.
In this chapter we took a look at what it takes to build a Microsoft Prism 4 barebones solution. It takes a bit more work to start a Prism 4 solution, but in the following chapters we'll see how this extra work pays off when building well architected WPF solutions.
- 1800+ high-performance UI components.
- Includes popular controls such as Grid, Chart, Scheduler, and more.
- 24x5 unlimited support by developers.