
OWIN Succinctly®

CHAPTER 3
Using Katana with Other Web Frameworks
Introduction
In the previous chapter, you learned how to write applications with Katana using all the hosting options available: IIS/ASP.NET, self-host, and OwinHost.exe. In particular, you learned that writing the startup configuration is a very easy process that only involves creating a class with a Configuration method that contains all the setup instructions.
Leveraging the knowledge you just acquired, in this chapter you will learn how to use the following web frameworks you are probably already familiar with, but on top of Katana:
- ASP.NET Web API
- NancyFx
- SignalR
Unfortunately, existing web frameworks have to be adapted to work with OWIN middleware components; for those that depend on System.Web, the porting is not easy. One of those is ASP.NET MVC, which is not compatible with OWIN, but ASP.NET MVC version 6 will be.
Since you know already how to include the OWIN and Katana NuGet packages and how to create a startup class, I will skip over those steps and focus mainly on the usage of the web frameworks.
Using Any Web Framework with Katana
Before going into the specifics of individual frameworks, this is the general recipe for using almost any web framework with OWIN and Katana:
- First you create the Visual Studio project based on which host you want to use:
- Web Application project if you want to host it with IIS/ASP.NET.
- Console Application (or your custom host) if you want to use the self-hosting option.
- Class Library or Web Application if you want to use the OwinHost.exe host.
- Get the NuGet package for the hosting option you decide to use:
- Microsoft.Owin.Host.SystemWeb if you are using the IIS/ASP.NET host.
- Microsoft.Owin.Host.HttpListener if you are using self-host or OwinHost.exe.
- Get the NuGet packages for the framework you want to work with, usually by downloading the compatibility package for your framework, which should have the references already.
- Add the OwinStartup class via Visual Studio, which adds the startup class and the code OWIN packages in case they have not been added automatically during the previous steps.
- Configure OWIN to use your web framework, and write the application based on your web framework as you would normally do.
ASP.NET Web API
Probably the most common scenario for using an OWIN-based application is the creation of a RESTful service using ASP.NET Web API.
Creating an ASP.NET Web API application with OWIN is not much different from doing it with the normal ASP.NET stack. Microsoft has slightly adapted the Web API framework to interface with the OWIN pipeline, but nothing else has changed: the only difference is that now you have to manually register Web API as OWIN middleware inside the pipeline.
Create the project
The hosting project can be any of the ones seen in the previous chapter, but for keeping it simple we will make an ASP.NET Web Application, using the Empty template, and selecting the Web API option under Add folders and core references for.
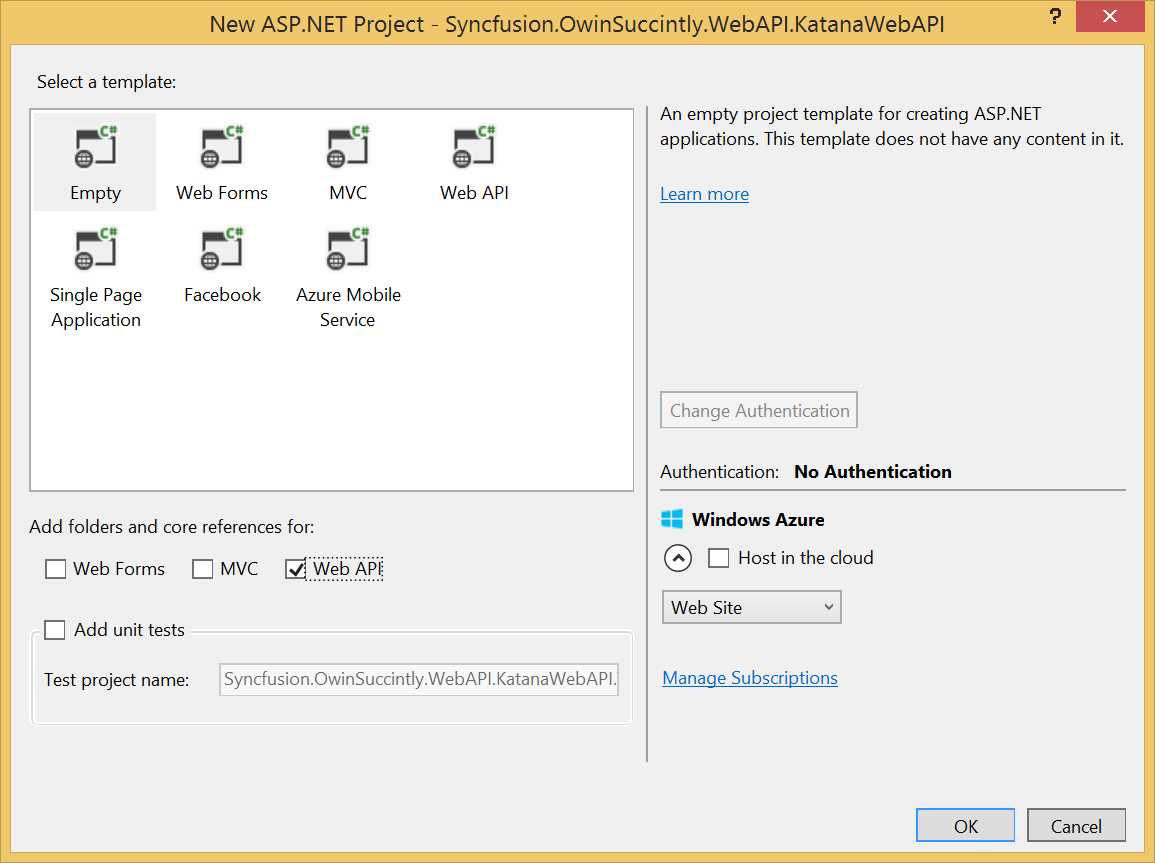
New ASP.NET Project
Note: You can also create the project using the Web API template, but that will also include references to ASP.NET MVC (which relies on System.Web) that are used to provide the API help page. In general you don't need it, especially under OWIN. It will not work as ASP.NET MVC is not yet compatible with OWIN.
Once you have created the project, you have to include the usual OWIN NuGet packages and the compatibility package that makes ASP.NET Web API understand the OWIN AppFunc and environment dictionary. Luckily, the compatibility package, Microsoft.AspNet.WebApi.Owin, comes with all the dependencies needed, except for the one about the OWIN server you want to use.
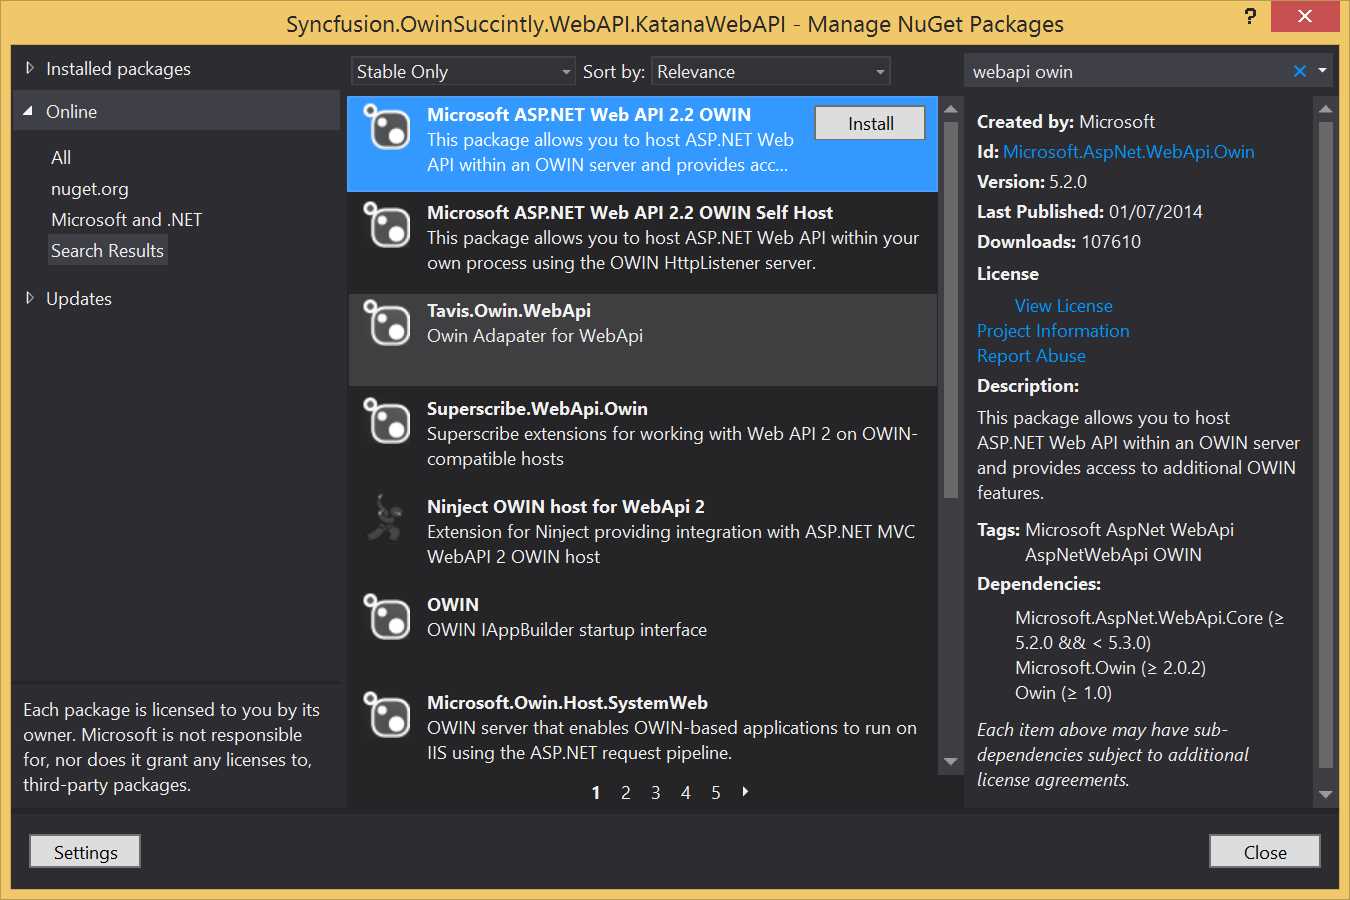
NuGet Package Manager with Microsoft.AspNet.WebApi.Owin selected
The previous figure shows which NuGet package to download. You could also download it via the package manager console:
PM> Install-Package Microsoft.AspNet.WebApi.Owin |
Now you have to add the NuGet package for the server you want to use. In this case, since we are running on IIS, you would also need to get the Microsoft.Owin.Host.SystemWeb package.
Add Startup class and configure Web API
Now add the Startup class as usual, and add to it the configuration for Web API.
public class Startup { public void Configuration(IAppBuilder app) { HttpConfiguration config = new HttpConfiguration(); config.Routes.MapHttpRoute( "default", "api/{controller}", new { controller = "Chapter" } );
config.Formatters.XmlFormatter.UseXmlSerializer = true; config.Formatters.Remove(config.Formatters.JsonFormatter);
app.UseWebApi(config); } } |
You should notice the code is not different from the configuration code that you would normally write in the WebApiConfig class of a standard Web API project.
Tip: If you want to test your Web API with a browser that doesn’t have a JSON visualizer, you can remove the JsonFormatter and set the XmlSerializer by default to always return the XML representation of the results, like in the previous code listing.
In addition there is the last line of code app.UseWebApi(config); that is used to add the Web API framework in the OWIN pipeline, supplying its configuration.
Since we are bootstrapping the application with OWIN, we don't need the default configuration classes from the Web API folders and references, so you can safely delete the Global.asax and the App_Start\WebApiConfig.cs files that have been created by the Visual Studio template.
The actual Web API code
Now that the application startup has been configured, you can write the Web API application like you are used to. The configuration in the previous code listing refers to a controller named Chapter as the default controller to redirect to, so let's write it.
public class ChapterController : ApiController { // GET api/<controller> public IEnumerable<string> Get() { return new string[] { "Owin", "Katana", "Web Frameworks", "Azure", "Custom Middleware", "Authentication", "Appendixes"}; } } |
The previous code listing is a very simple controller that returns a list of strings with the names of the chapters of this e-book. From this you can see that if you know how to write normal Web API applications, you also know how to write Web API applications under OWIN.
To test the application, just launch it by pressing F5 and then browse to http://localhost:<port>/api.
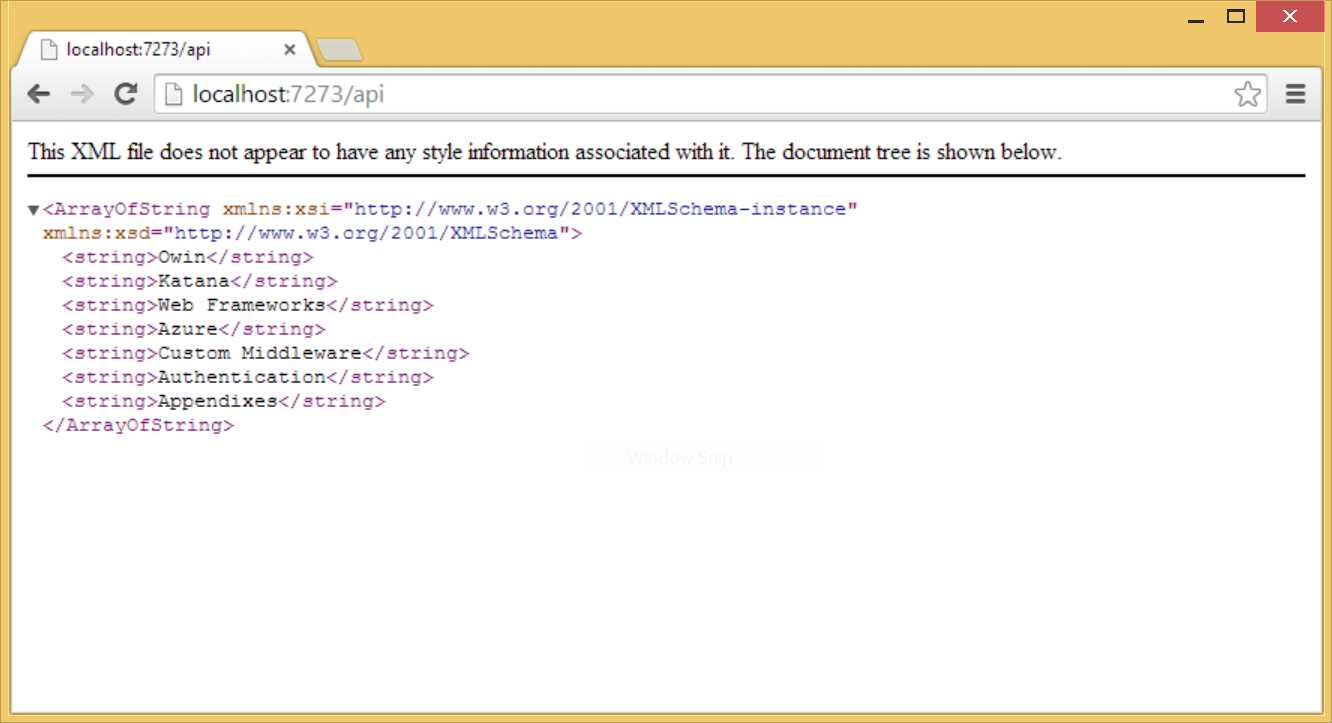
Web API response
ASP.NET MVC
The second scenario that could be hosted on top of OWIN is the creation of MVC-based web applications.
The framework of choice for this kind of application is ASP.NET MVC. Unfortunately, as already mentioned, it heavily relies on System.Web and thus cannot run on top of OWIN as middleware. This will happen with ASP.NET vNext, but for the moment, if you want to build an MVC-based application, you have only two choices:
- Still use ASP.NET MVC, which can be used without any problem in combination with OWIN (as you will see in Chapter 5), but you will lose the ability to run the OWIN application outside of IIS via either custom host or OwinHost.exe.
- Use another web framework, like NancyFx (which is very easy to use as you will see in the next section), FubuMVC, or Simple.Web.
NancyFx
NancyFx is, quoting from the official website nancyfx.org, a “lightweight, low-ceremony framework for building HTTP-based services on .NET and Mono. The goal of the framework is to stay out of the way as much as possible and provide a super-duper-happy-path to all interactions.”
Brief Introduction to Nancy
Nancy is inspired by Sinatra (www.sinatrarb.com), a very popular web framework in Ruby. It is not an MVC framework, but rather a domain-specific language (DSL) for creating web applications, with no default dependencies on any hosting environment or data persistence framework.
Applications are built in modules, which define how the application behaves by specifying the routes and the actions that have to be performed when a route is matched.
public class ChaptersModule : NancyModule { public ChaptersModule() { Get["/"] = _ => { //do something for homepage };
Get["/Chapters"] = _ => { //return chapters };
Get["/Chapters/{id}"] = params => { //return chapter with given id, retrieved via param.id }; } } |
The previous code listing demonstrates how to quickly set up an application with Nancy. Each action defined in the constructor of the module is a function that receives a dynamic dictionary, with the URL segments as input, and returns either the response directly or a ViewModel.
Using Nancy with Katana
The process of using Nancy is not different from the usual, so I'll just quickly go through the steps that are specific to Nancy.
After having created the project (the type you prefer) and adding the NuGet package for the hosting option you have chosen, get the compatibility package which, in the case of NancyFx, is called Nancy.Owin.
PM> Install-Package Nancy.Owin |
This package also comes with the Nancy package, so there’s no need to manually add it.
Once this has been done, you have to configure OWIN to use Nancy to handle the requests. This is done by adding one simple line of code to the Startup class.
public class Startup { public void Configuration(IAppBuilder app) { app.UseNancy(); } } |
Finally, create a Nancy module to handle the requests for your web application.
public class HomeModule : NancyModule { public HomeModule() { Get["/"] = _ => "Hello World!";
Get["/{name}"] = parameters => "Hello " + parameters.name+"!"; } } |
The code listing implements the same functionality of the last code listing of Chapter 2. It says "Hello World!" when requested without a URL segment, and says "Hello [name]!" when called with a URL segment.
Additional OWIN-Nancy Interaction Details
Before moving to the next framework, there are still a few more details to cover about using Nancy with OWIN:
- How to read the environment dictionary.
- How to configure Nancy as a pass-through component.
Read the OWIN Environment Dictionary
To access the OWIN environment dictionary from within an action, you can call the method this.Context.GetOwinEnvironment(), and then you can read the dictionary by specifying the key, for example, (string)env["owin.RequestPath"].
Configure Nancy as a Pass-Through Component
Typically, applications are developed using more than one framework, and for that to be possible, all middleware components must pass the execution back to the pipeline when they are done with it, so you don't want Nancy to process all the requests. But the way we configured the OWIN pipeline using app.UseNancy() doesn't allow it because it registers Nancy as the final step in the pipeline. To allow Nancy to pass all requests it cannot handle to the next component in the pipeline, you need to configure Nancy slightly differently, using the PerformPassThrough option.
public class Startup { public void Configuration(IAppBuilder app) { app .UseNancy(options => options.PerformPassThrough = context => context.Response.StatusCode == HttpStatusCode.NotFound) .PageNotFoundMiddleware(); } |
The previous code listing instructs Nancy to pass the execution to the next middleware component in case its execution results in a 404 Not found.
SignalR
As the last framework demonstrated in this chapter, SignalR is the solution provided by Microsoft for real-time communication on the web, which uses web sockets and a few other fallback protocols in case the browser or server doesn’t support them.
Since the second version of the framework, the only way to build an application using SignalR is by using OWIN, which means that if you are using SignalR, you are already using it in combination with OWIN. Actually, the only thing you have to do besides create the required SignalR Hubs or Connections is configure the OWIN pipeline with the following code.
public void Configuration(IAppBuilder app) { app.MapSignalR(); } |
Using SignalR with Self-Host
A bit more challenging would be configuring SignalR to run inside a custom host. Since static files are not served with custom hosts, you have two options: the first is to create another static website with the HTML and JavaScript needed to invoke the SignalR Hub (hosted on IIS), but you would need to configure the SignalR endpoint with CORS (cross-origin resource sharing) in order to accept connections from a different domain. The second option is to configure the self-host to serve static files without having to build a different website.
Using a Separate Website
Build the Host
We start by creating a console application as we did in the previous chapter. Get the Microsoft.AspNet.SignalR.SelfHost NuGet package. It contains references to all the packages needed for self-hosting OWIN applications, and also contains the server-side packages of SignalR.
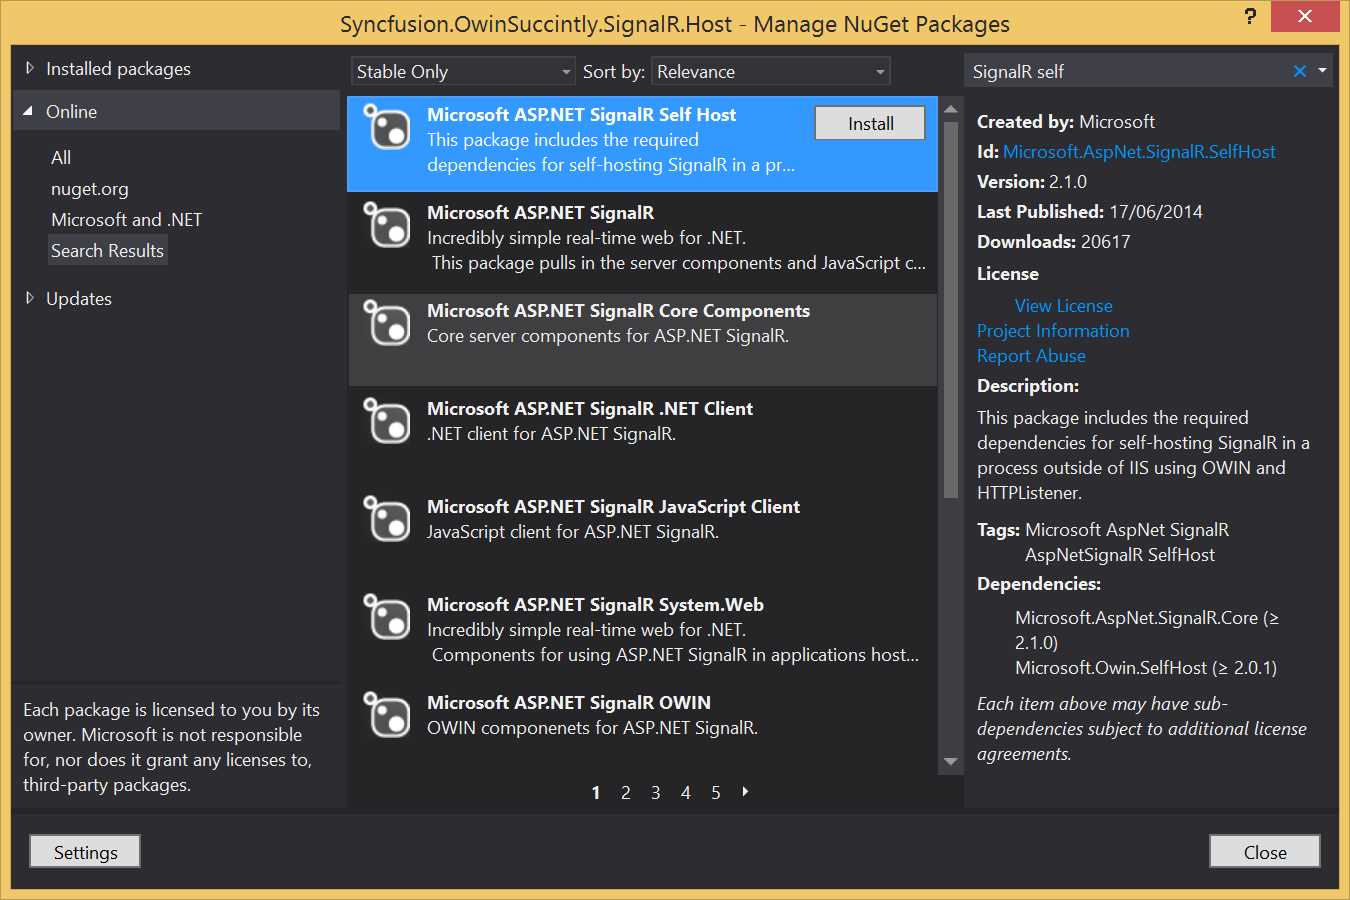
SignalR Self-Host package
Or you can also it install via the Package Manager.
PM> Install-Package Microsoft.AspNet.SignalR.SelfHost |
You also need to reference the Cors library for OWIN to enable cross-origin access.
PM> Install-Package Microsoft.Owin.Cors.SignalR.SelfHost |
With all the packages in the right place, we still need to add three classes:
- The code to launch the host, in Program.cs.
- The code to configure the OWIN application, in Startup.cs.
- The code of the actual SignalR application, in the form of a SignalR Hub, in a file called ChatHub.cs.
The code to launch the host is not different from what we have written already in the previous chapter.
static void Main(string[] args) { string uri = "http://localhost:9999/"; using (WebApp.Start<Startup>(uri)) { Console.WriteLine("Started Listening on http://localhost:9999/"); Console.ReadKey(); Console.WriteLine("Finished"); } } |
Also, the Startup class will not be very different from what we’ve seen previously.
public class Startup { public void Configuration(IAppBuilder app) { app.UseCors(CorsOptions.AllowAll); app.MapSignalR(); } } |
The only specificity here is the line used to configure CORS inserted in the pipeline as additional OWIN middleware.
Finally, we write the SignalR-specific code. The "Hello World" example for web sockets applications is a chat app, so the following example code creates a simple ChatHub.
public class ChatHub : Hub { public void Send(string message) { Clients.All.addMessage(message); } } |
If you are not familiar with SignalR Hubs, the code in the previous listing instructs the application to broadcast to all the connected clients the message that it receives when one client calls the Send method.
To test that everything works—well, at least the server part—launch the application and open your browser to the URL http://localhost:9000/signalr/negotiate to verify that SignalR is running and responding.
To verify that the proxy for the ChatHub has been created, browse to http://localhost:9999/signalr/hubs. This file is automatically generated by SignalR, and contains all the proxies needed so that client-side development is easier.
... proxies['chatHub'] = this.createHubProxy('chatHub'); proxies['chatHub'].client = { }; proxies['chatHub'].server = { send: function (message) { return proxies['chatHub'].invoke.apply(proxies['chatHub'], $.merge(["Send"], $.makeArray(arguments))); } }; ... |
The previous lines are an extract from the auto-generated JavaScript file signalr/hubs.
Build the Site
Now, to consume the SignalR application, we need an HTML page with a bit of JavaScript code. The easiest way to do it is by creating a Web Application project and downloading the NuGet package with the client-side libraries for SignalR.
The following command will download jQuery and the SignalR JavaScript library.
PM> Install-Package Microsoft.AspNet.SignalR.JS |
Now create a default.html page and write the following code.
<!DOCTYPE html> <html> <head> <title>SignalR Simple Chat</title> </head> <body> <div class="container"> <input type="text" id="message" /> <input type="button" id="sendmessage" value="Send" /> <ul id="discussion"></ul> </div> <script src="Scripts/jquery-1.6.4.min.js"></script> <script src="Scripts/jquery.signalR-2.1.0.min.js"></script> <script src="http://localhost:9999/signalr/hubs"></script> <script type="text/javascript"> $(function () { $.connection.hub.URL = "http://localhost:9999/signalr"; var chat = $.connection.chatHub; chat.client.addMessage = function (message) { var encodedMsg = $('<div />').text(message).html(); $('#discussion').append('<li>'+ encodedMsg + '</li>'); }; $.connection.hub.start().done(function () { $('#sendmessage').click(function () { chat.server.send($('#message').val()); $('#message').val('').focus(); }); }); }); </script> </body> </html> |
I won't go into much detail since this is not a book about SignalR, but I'd like to comment on a few lines just to give you the context in case you are not familiar with it.
The page references three JavaScript libraries: jQuery, the SignalR library, and the auto-generated proxies.
<script src="Scripts/jquery-1.6.4.min.js"></script> <script src="Scripts/jquery.signalR-2.1.0.min.js"></script> <script src="http://localhost:9999/signalr/hubs"></script> |
As the first thing in the JavaScript code, you configure the URL of the Hub and get a reference of the proxy class.
$.connection.hub.URL = "http://localhost:9999/signalr"; var chat = $.connection.chatHub; |
After the connection is established, you can configure the button to call the send message of the proxy.
$.connection.hub.start().done(function () { $('#sendmessage').click(function () { chat.server.send($('#message').val()); }); |
You also need a function that the SignalR Hub can call to update the page when messages are broadcasted.
chat.client.addMessage = function (message) { var encodedMsg = $('<div />').text(message).html(); $('#discussion').append('<li>'+ encodedMsg + '</li>'); }; |
Notice that Send and addMessage are the same method names used in the ChatHub previously defined. This is how the communication between client and server happens.
Now start both projects and open default.html in two separate windows of your browser and see that messages typed in one window are also displayed in the other.
Serving Static Files from Self-Host
This option is a bit trickier to set up, but is also probably the most common scenario for self-hosted solutions: you want all the resources for your self-hosted site served from your custom host.
Start by creating a self-host for SignalR and configure it as you did before, just don't add the Cors NuGet package (the requests will come from the same domain).
Now we have to configure the application to serve static files; there is a NuGet package for this called Microsoft.Owin.StaticFiles.
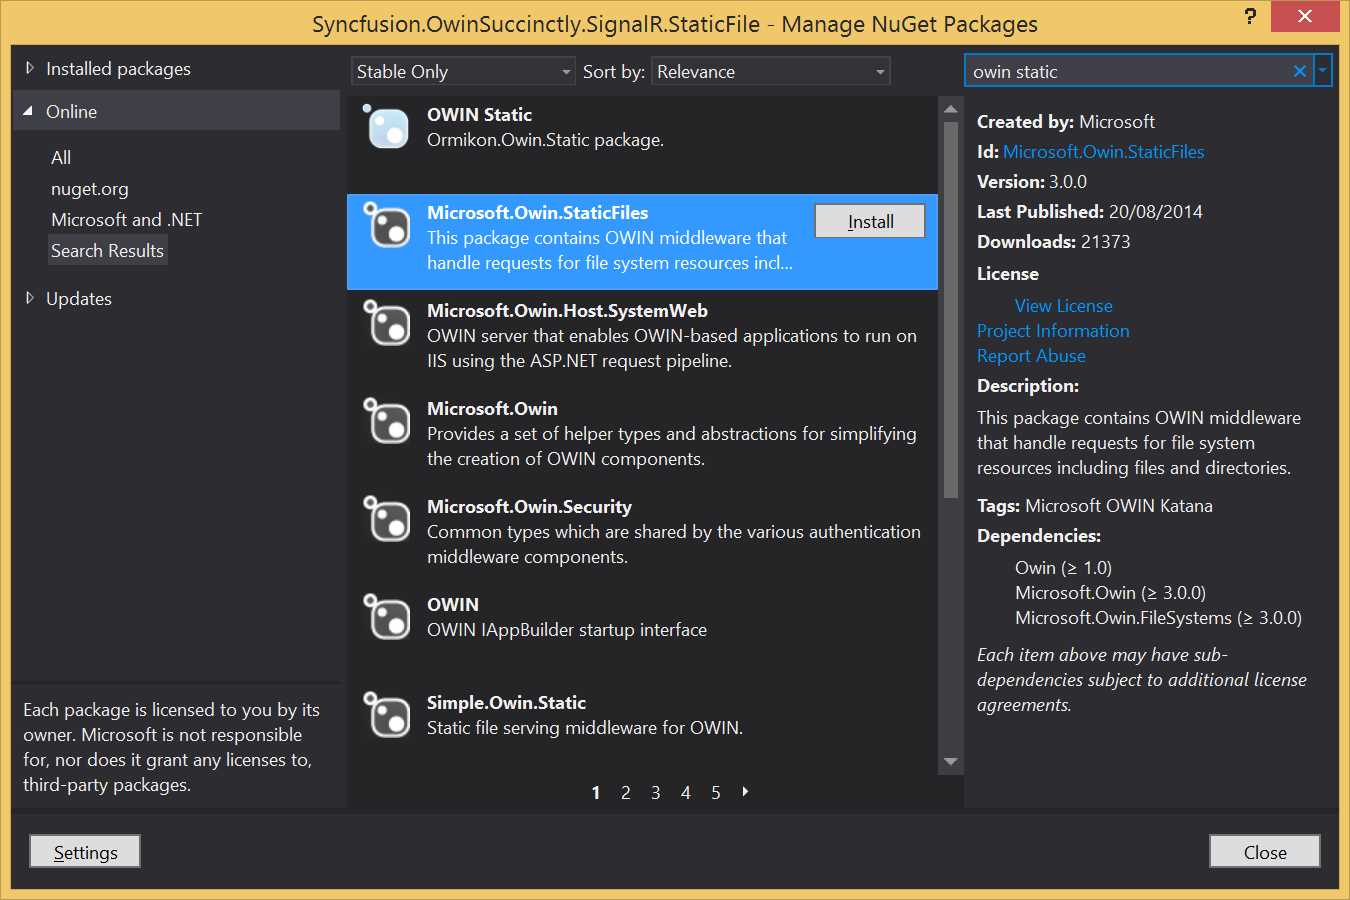
OWIN StaticFiles package
With this package, you can configure your application to serve static files too. All you need is to add a line in the Configuration method to enable it.
public class Startup { public void Configuration(IAppBuilder app) { app.UseStaticFiles("/files"); app.MapSignalR(); } } |
With this UseStaticFiles method, you add a static file OWIN middleware that serves all the files located under the /files folder. To configure static file serving, you can also use the UseFileServer method, which allows you to specify default files and folder browsing.
The last step is to create a folder called files and copy all the files from the static website created previously (the default.html and all the JavaScript files in the Scripts folder) into it. The final project structure should look like the following figure.
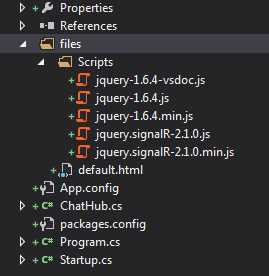
Project folder structure
This is a console application, so static files are not copied by default to the output folder. Remember to specify the Build Action as Content and Copy to Output Directory as Copy always.
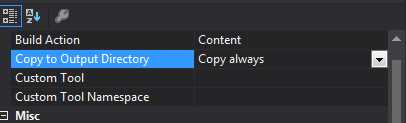
Build action
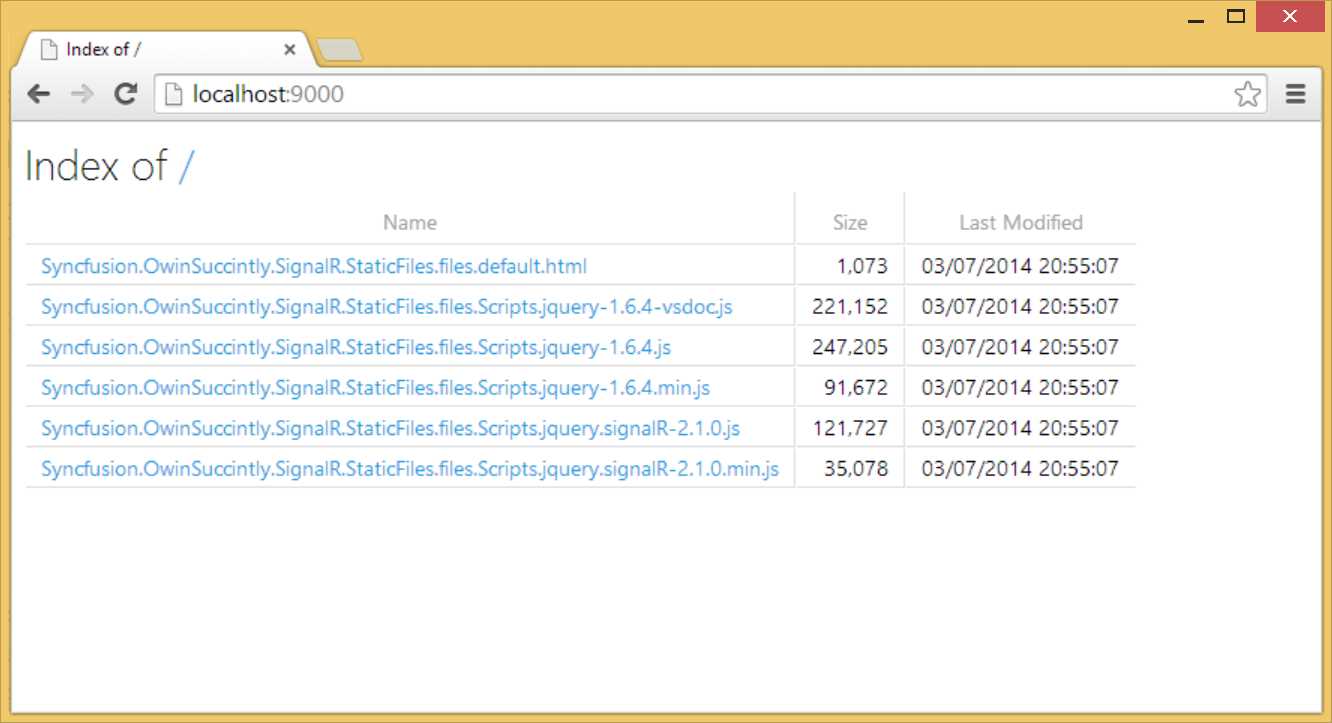
Now launch the project and open the http://localhost:[port]/files/default URL and you will see the same chat application as before, but all served from the same host.
Storing Files in Embedded Resources
If you want your hosting application to be even tidier, you can also configure the static file middleware to serve files from resource files. This is done by specifying which IFileSystem implementation to use. Two are available in the StaticFiles middleware: the one used by default, PhysicalFileSystem, and EmbeddedResourceFileSystem.
To avoid always repeating the initial part of the resource identifier when creating the instance of EmbeddedResourceFileSystem, you can specify the root of your files’ structure.
app.UseStaticFiles(new StaticFileOptions() { FileSystem = new EmbeddedResourceFileSystem("Syncfusion.OwinSuccinctly.SignalR.StaticFiles.files") }); |
Change the Build Action to Embedded Resource and change the path to physical scripts to use . as the path separator instead of /.
<script src="Scripts.jquery-1.6.4.min.js"></script> <script src="Scripts.jquery.signalR-2.1.0.min.js"></script> <script src="/signalr/hubs"></script> |
Now open the URL http://localhost:9000/default.html and use the same chat application.
If you are stuck and always get 404 errors when trying to get to files, you can enable directory browsing on the whole site and call the root of the site to get the full name of the files after they have been converted into embedded resources.
app.UseDirectoryBrowser(new DirectoryBrowserOptions() { FileSystem = new EmbeddedResourceFileSystem(@""), }); |
Directory browsing
Combining More Frameworks
In this chapter, you’ve seen how to use all the frameworks on their own, but one of the nicer features of OWIN is that you can combine many frameworks in a single application and use standard OWIN middleware components along the pipeline for cross-cutting concerns, like logging, caching, or authentication. You could use many frameworks without OWIN, but you would have to implement those horizontal functionalities for each of the frameworks you were integrating.
public void Configuration(IAppBuilder app) { HttpConfiguration config = new HttpConfiguration(); config.Routes.MapHttpRoute( "default", "api/{controller}" );
app.Use(async (context, next) => { Trace.WriteLine("-> " +context.Request.Path); await next(); });
app.UseNancy(options => options.PerformPassThrough = context => context.Response.StatusCode == HttpStatusCode.NotFound);
app.UseWebApi(config); } |
The previous code listing shows Nancy and Web API used together, and both use common logging code written as inline OWIN middleware. In this case it was important to configure Nancy as a pass-through component, otherwise it would have thrown a 404 HTTP error for all the URLs it couldn’t handle (like in the case of Web API routes).
Conclusions
In this chapter, you have learned how to use your favorite web frameworks with Katana and theoretically every other host or server that implements the OWIN specs.
You have seen how to use Web API, Nancy, and SignalR. You have also discovered that the current ASP.NET MVC cannot be used with OWIN servers, but it will be possible with the next version of ASP.NET MVC (version 6). You have also learned how to serve static files from OWIN self-hosted applications.
In the next chapter, you will learn how to add custom components to the OWIN pipeline, including building your own middleware.
- 1800+ high-performance UI components.
- Includes popular controls such as Grid, Chart, Scheduler, and more.
- 24x5 unlimited support by developers.