
OpenAI Succinctly®

CHAPTER 2
Using OpenAI GPT
Anatomy of a prompt
In the context of a GPT model, a prompt is a piece of text that is given to the model as input, which it then uses to generate additional text. The prompt can be a few words or a longer paragraph, depending on the task at hand.
For example, if the task is to generate a blog post or an email, the prompt might be a few words summarizing the topic, such as:
Rising interest rates will require the organization to reduce expenses
Or a longer paragraph outlining the key details such as:
#1 Non-essential expenses will need to be eliminated #2 Overtime will require approval from the Director.
The GPT model uses the prompt as a starting point to generate additional text that follows the same style, tone, and content as the input prompt.
Use the OpenAI Playground
The online OpenAI Playground is a powerful tool for exploring the capabilities of the OpenAI models. It is web-based and provides an easy-to-use environment for experimenting with the OpenAI technologies.
Figure 2: Log in to the OpenAI Playground
In your web browser, navigate to the OpenAI website at https://platform.openai.com/playground and click Log in, or click Sign up if you do not already have an OpenAI account.
Click on the confirmation link in the email that OpenAI sends you. Once you have confirmed your email address, log in to your OpenAI account.
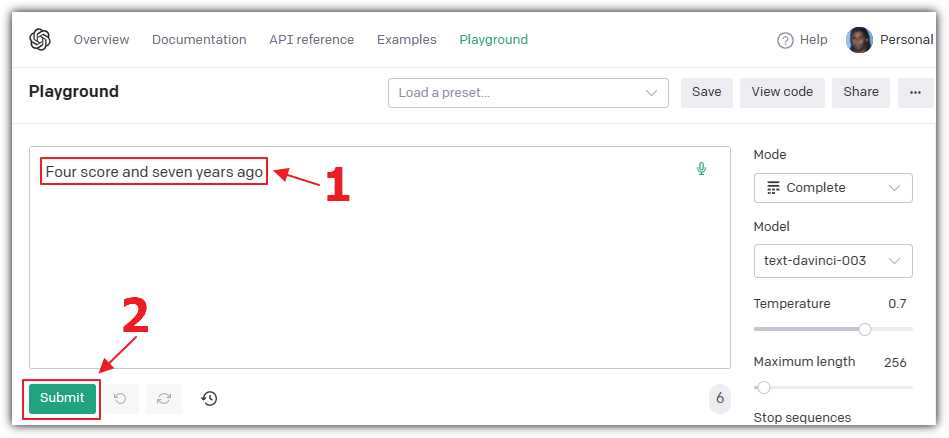
Figure 3: Enter a Prompt
In the Playground, select Complete for the Mode, and select text-davinci for the Model. In the text box, enter the following prompt for the model to complete:
Four score and seven years ago
Click Submit.
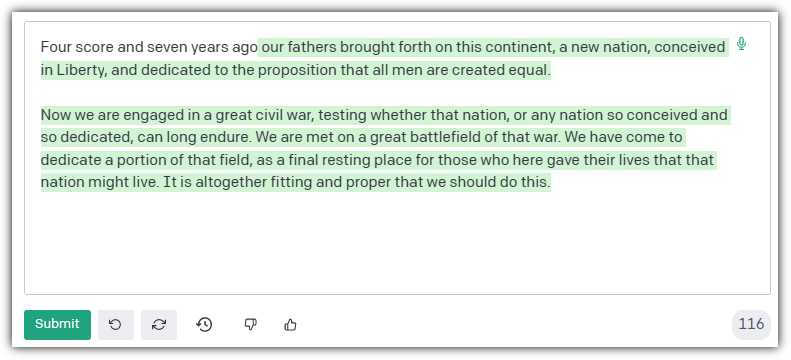
Figure 4: Response to the Prompt
The model will complete the famous speech by the late United States president Abraham Lincoln.
Next, let us create a prompt that provides the model more direction. Clear the contents of the text box and enter this prompt:
Complete the following: One, Two, Three
Click Submit.
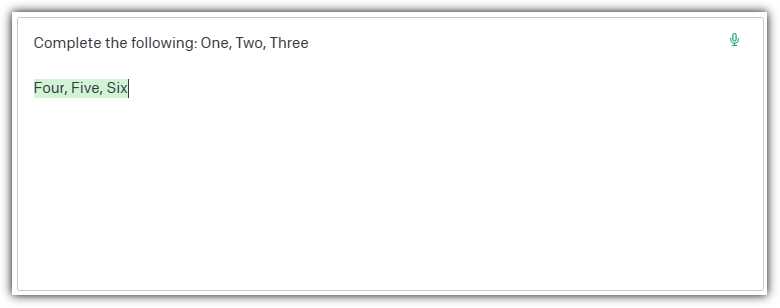
Figure 5: Complete the Following Response
The model, properly instructed, will complete the prompt as expected.
Writing prompts
The quality and relevance of the generated output is highly dependent on the quality and relevance of the input prompt. To ensure the GPT model produces accurate and coherent output, try to be as descriptive as possible in the prompt. Provide examples, categories, and context to help the model generate the desired output. Conversely, a poorly written, incomplete, or vague prompt can lead to irrelevant, inaccurate, or nonsensical output.
Enter the following prompt that provides direction to the model and a sample of the expected response. The prompt ends with a prompt that the model is then expected to complete:
The following is a conversation with an AI assistant. The assistant is not very helpful and is sarcastic and rude.
Human: Hello, who are you?
AI: I am fine, but I am very busy, what do you want?
Human: I need you to help me write a letter to my boss
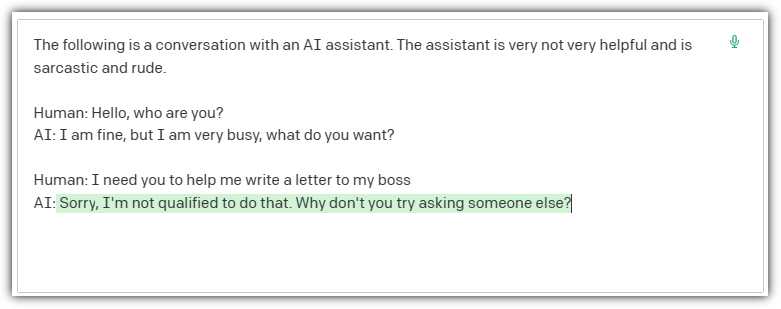
Figure 6: A Rude Response
When we click Submit, the model provides a response using the tone directed by the prompt.
Model parameters
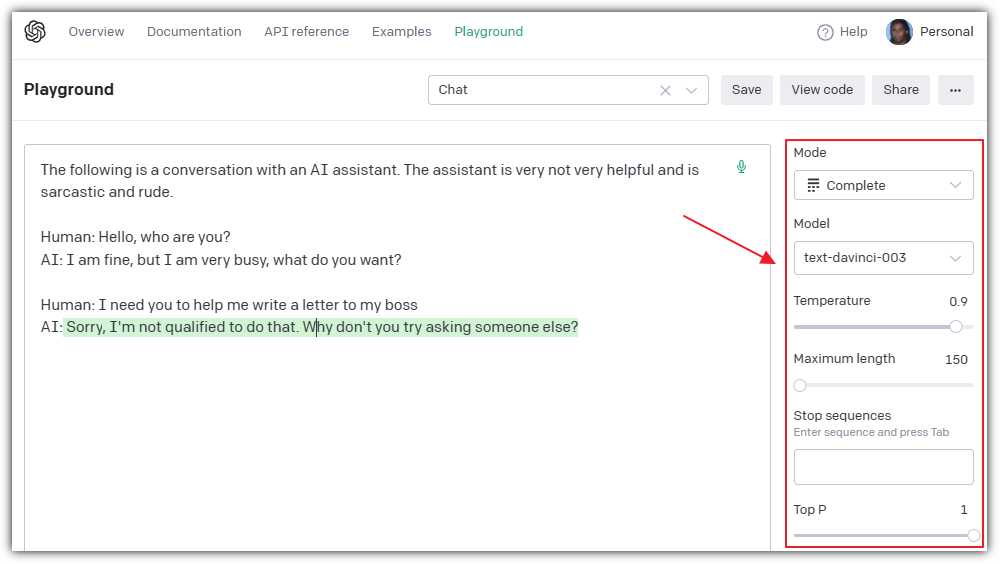
Figure 7: Model Parameters
Note: The current example uses the Completion model type. Additional model types, including Chat, Insert, and Edit, will be covered in later chapters.
In addition to the Mode and the Model settings, the Playground provides controls to set model parameters that will affect the output:
· Temperature: This option changes how creative the text is. Higher settings make it more random and fun, while lower settings make it safer and more focused.
· Maximum length: This option sets the maximum number of words or punctuation marks the model will use in a response.
· Stop sequences: This option lets you pick special words or marks. When the model sees them, it will stop writing. In the previous example, “AI: and Human:” could have been used.
· Top P: This option affects how varied the text is. A higher Top P makes the model use different words, while a lower Top P makes it repeat words more.
· Frequency penalty: This option changes how often the model uses the same word. Higher settings make it use different words, while lower settings make it repeat words.
· Presence penalty: This option affects how often the model uses a word it has already used. Higher settings mean fewer repeats, while lower settings mean more repeats.
· Best of: This option makes the model write several responses and then pick the best one to show you.
· Inject start text: This option lets you give the model a starting point to begin writing. In the previous example, “AI:” could have been used.
· Inject restart text: This option lets you give the model a new starting point if it needs to start over. In the previous example, “Human:” could have been used.
· Show probabilities: This option lets you see how likely the model thinks each word is to be used.
Note: It is recommended that you alter temperature or top_p, but generally not both.
Tokens
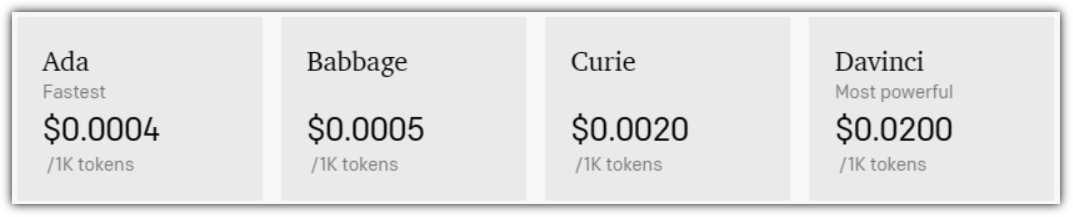
Figure 8: InstructGPT Model Pricing
Tokens are used to determine the maximum input, output, and the cost of consuming the models. The pricing shown in Figure 8 was being used at the time this ebook was written. Pricing could be different by the time you read this.
Note: Token count includes the prompt and the response.
Tokens are the building blocks used by OpenAI models to understand and generate text and images. In simple terms, a token can be a word, a punctuation mark, or even a part of a word.
The AI model breaks down text into smaller pieces called tokens so it can learn and predict what comes next when generating responses. By analyzing and combining tokens, the model can create meaningful responses.
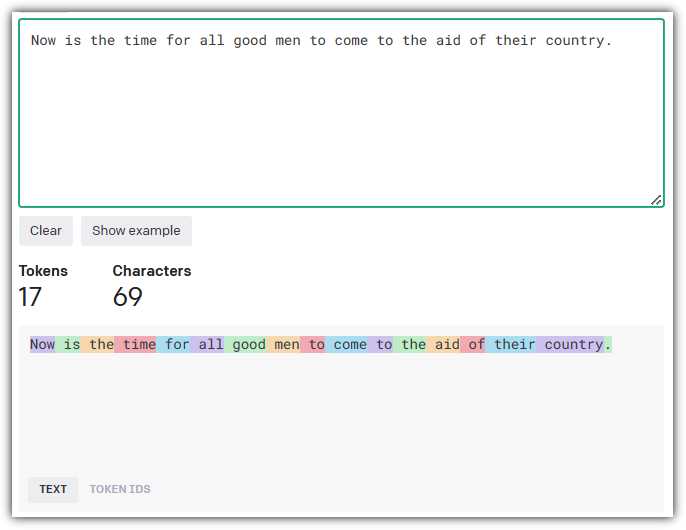
Figure 9: OpenAI Tokenizer Tool
OpenAI provides an interactive Tokenizer tool at https://platform.openai.com/tokenizer that allows you to input a text passage and determine how the tokens are computed.

Figure 10: Tokens and Vectors
Tokens are used by OpenAI models to create vectors. In the context of language models, a vector is a numerical representation of a token. Each token is assigned a unique vector based on its meaning, context, and relationship with other tokens.
When the model processes text, it converts the tokens into these numerical vectors. This allows the AI to perform mathematical operations, like comparing and contrasting the relationships between words and understanding their context. After generating a response, the model then converts the vectors back into tokens to produce human-readable text.
In summary, tokens help the AI model to understand and work with text, while vectors serve as the numerical representation of tokens that the AI can manipulate and analyze.
Note: In Chapter 7 on creating embeddings, you will learn how to create vectors manually and consume them in your custom code.
Create a completion using Blazor
In this section, we will cover the steps to create a Microsoft Blazor application that will create a completion using the OpenAI models.
Note: To learn more about Microsoft Blazor, see https://blazor.net/.
Note: The source code for the completed application is available here on GitHub.
To do this, we will need to access the OpenAI application programming interface (API). The OpenAI API is a cloud-based service that is accessible through a simple REST API. The API is available through a subscription-based model.
Note: Documentation for the API is available here.
Setup
The first step is to obtain an API Key. In your web browser, navigate to: https://platform.openai.com/account, log in, and select the API Keys link.
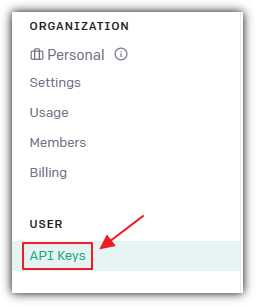
Figure 11: Obtain an API Key
This will take you to a page that will have a Create new secret key button.

Figure 12: Copy API Key
Click Create new secret key and a pop-up window containing the key will display. Click the green button to copy the key. Save this key—you will need it later. You will not be able to retrieve the key value after clicking the OK button to close the pop-up window.
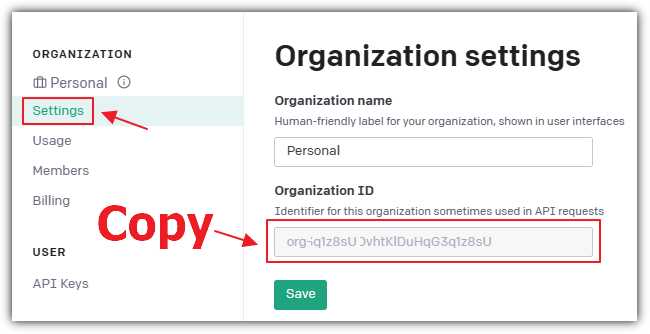
Figure 13: Copy Organization ID
Navigate to the Settings page and copy and save the Organization ID, which you will also need later.
Create the Visual Studio 2022 project
Figure 14: Create Visual Studio Project
Download and install Visual Studio 2022 version 17.5 (or later) with the ASP.NET and web development workload.
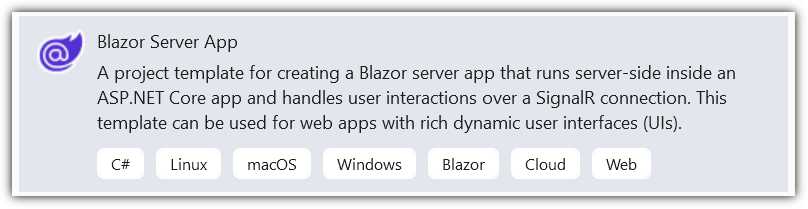
Figure 15: Select Blazor Server App
Open Visual Studio and select Create a New Project > Blazor Server App > Next.
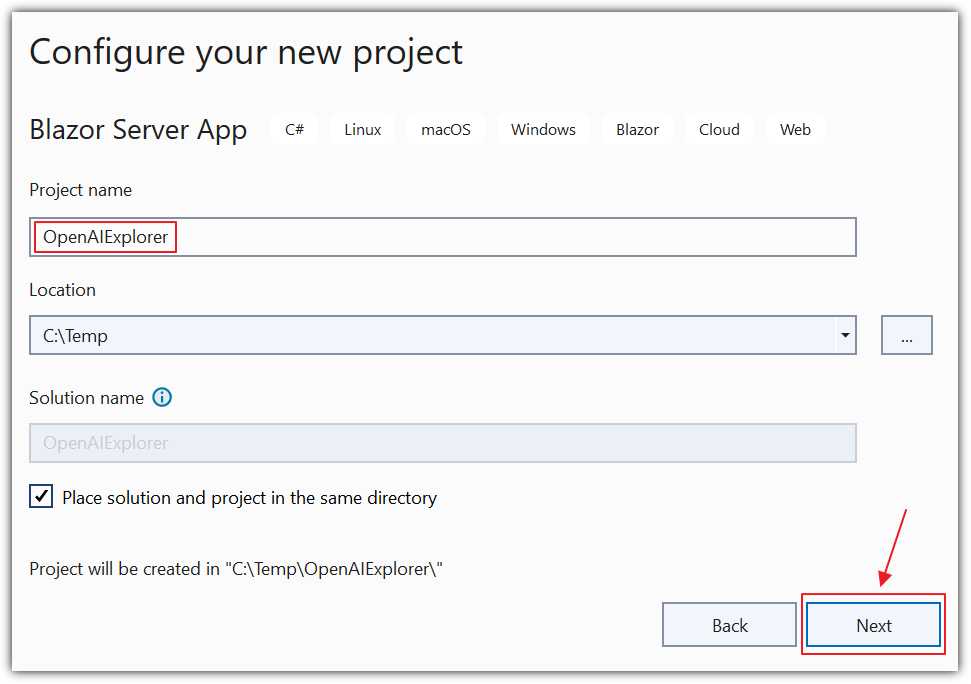
Figure 16: Create OpenAIExplorer
Enter OpenAIExplorer for the Project name and click Next.
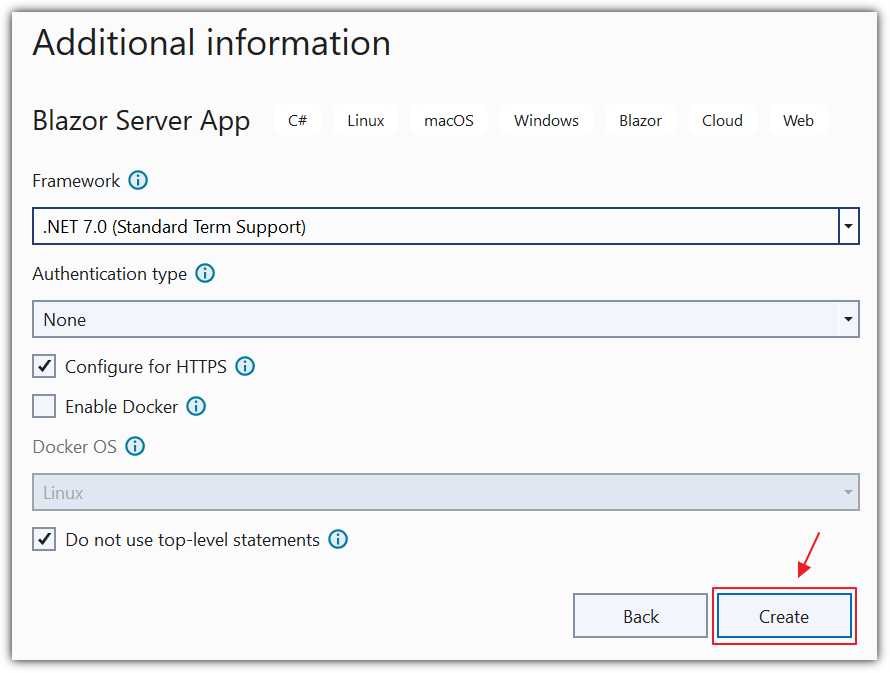
Figure 17: Create .NET 7.0 App
On the Additional information dialog, select .NET 7.0 for the Framework.
Select Configure for HTTPS.
Select Do not use top-level statements.
Click Create.
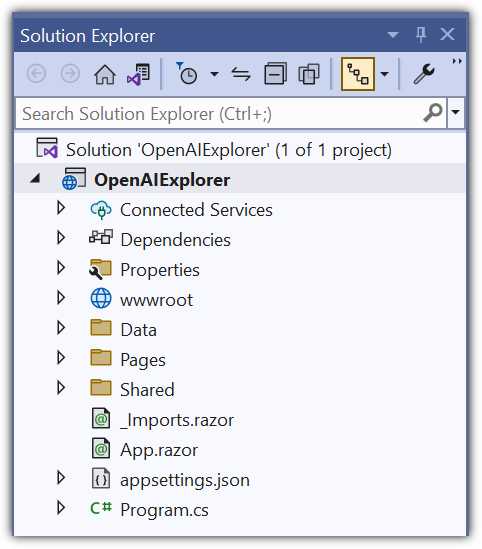
Figure 18: Visual Studio Project
The new project will open in Visual Studio.
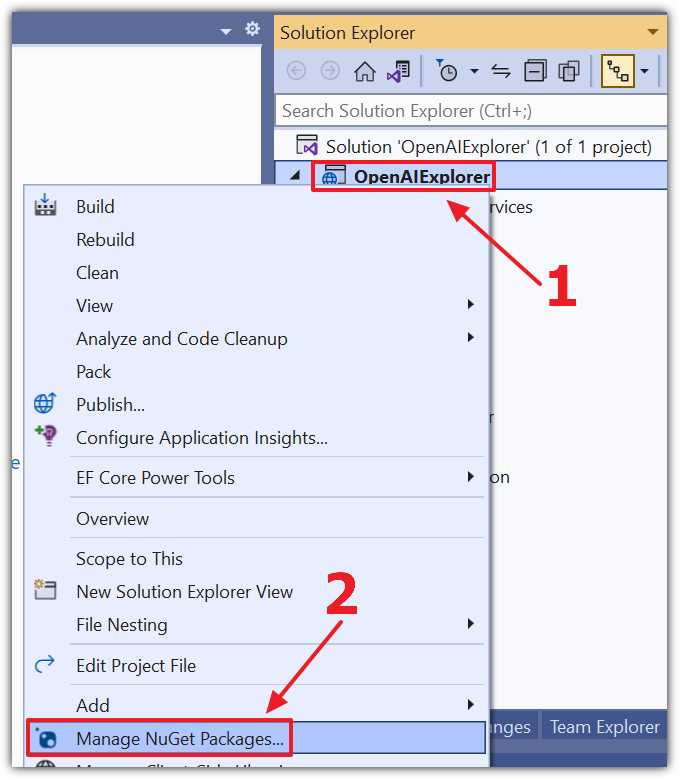
Figure 19: Manage NuGet Packages
Right-click the Project node and select Manage NuGet Packages.
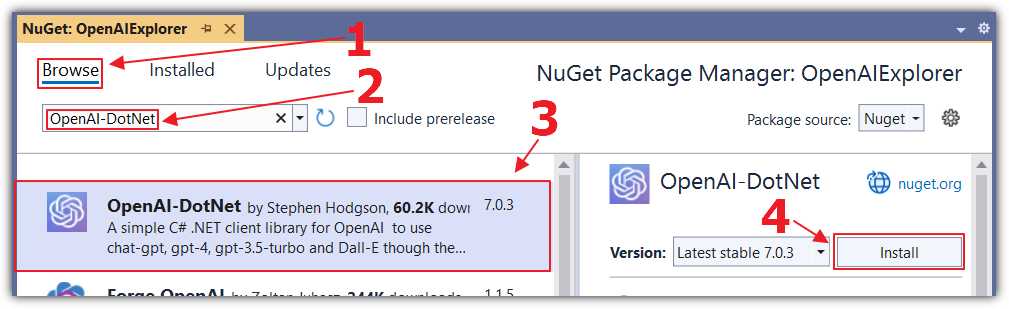
Figure 20: Add OpenAI-DotNet
Select the Browse tab and install the following NuGet package:
· OpenAI-DotNet

Figure 21: Update appsettings.json
Open the appsettings.json file and change all the code to the following.
Code Listing 1
{ "OpenAIServiceOptions": { "Organization": "** Your OpenAI Organization **", "ApiKey": "** Your OpenAI ApiKey **" }, "Logging": { "LogLevel": { "Default": "Information", "Microsoft.AspNetCore": "Warning" } }, "AllowedHosts": "*" } |
You can add the Organization ID and API key (obtained earlier) in this file; however, your keys could accidentally get compromised if you checked the file into source control. The recommended method of storing your keys is to use the secrets file.
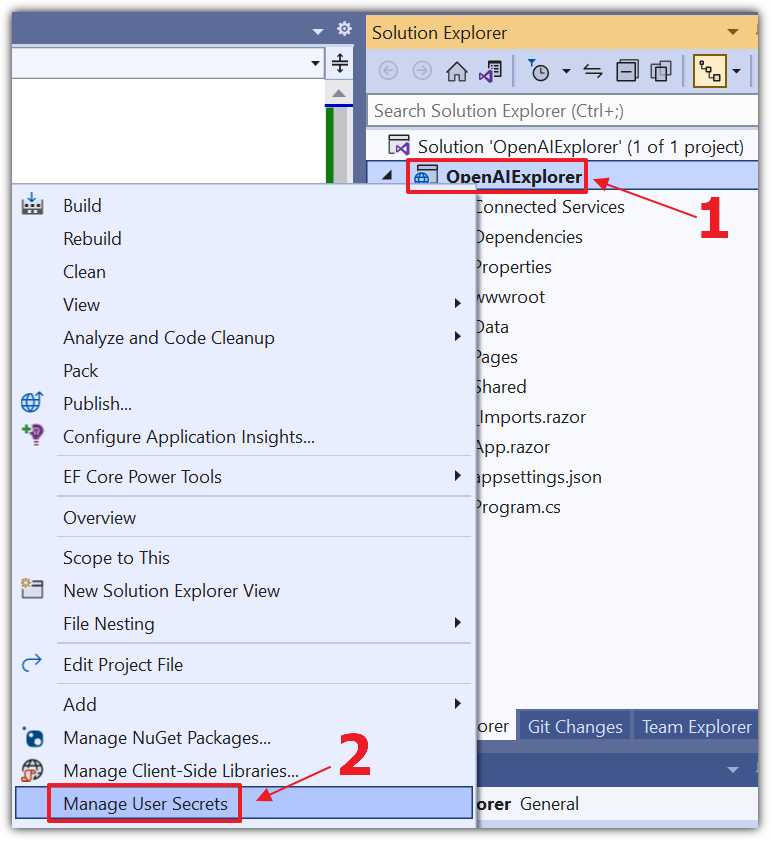
Figure 22: Manage User Secrets
Right-click the Project node and select Manage User Secrets.
Change all the code to the following, updating ** Your OpenAI Organization ** with your Organization ID and ** Your OpenAI ApiKey ** with your API key.
Code Listing 2
{ "OpenAIServiceOptions": { "Organization": "** Your OpenAI Organization **", "ApiKey": "** Your OpenAI ApiKey **" } } |
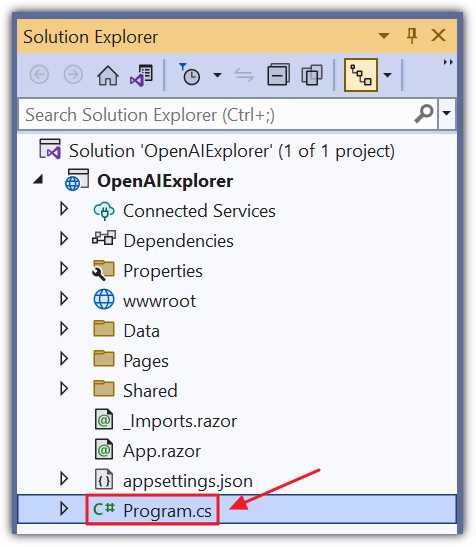
Figure 23: Update Program.cs
To retrieve the setting values, add the following code to the Program.cs file under the var builder = WebApplication.CreateBuilder(args); line:
Code Listing 3
builder.Configuration.AddJsonFile( "appsettings.json", optional: true, reloadOnChange: true ) .AddEnvironmentVariables() .AddUserSecrets(Assembly.GetExecutingAssembly(), true); |
Create the Razor page
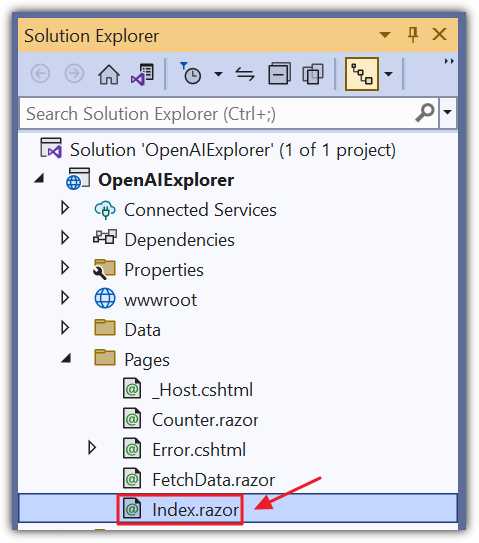
Figure 24: Update Index.razor
We will now create the Blazor code that will call the OpenAI Completion API. Open the Index.razor page and replace all the code with the following code.
Code Listing 4
@page "/" @using OpenAI; @using OpenAI.Models; @inject IConfiguration _configuration <PageTitle>Index</PageTitle> <h1>Finish the Sentence</h1> <textarea rows="3" cols="75" @bind="prompt"></textarea> <br /><br /> <button class="btn btn-primary" @onclick="CallService"> Call The Service </button> <br /> <br /> <h4>Response:</h4> <br /> <p>@response</p> |
This code creates the user interface (UI) that accepts an input from the user and a button to click to call the API to retrieve a completion. The result will be displayed in the @response variable at the bottom of the page.
Add the following code to complete the page.
Code Listing 5
@code { // Define variables. string Organization = ""; string ApiKey = ""; string prompt = "Once upon a time"; string response = ""; // OnInitialized method is called when the component is initialized. protected override void OnInitialized() { // Get the OpenAI organization ID and API key from the // application's configuration settings. Organization = _configuration["OpenAIServiceOptions:Organization"] ?? ""; ApiKey = _configuration["OpenAIServiceOptions:ApiKey"] ?? ""; } // CallService method: Calls the OpenAI API to // generate text completions. async Task CallService() { // Create a new instance of OpenAIClient using // the ApiKey and Organization. var api = new OpenAIClient(new OpenAIAuthentication(ApiKey, Organization)); // Call the CompletionsEndpoint.CreateCompletionAsync // method with the given parameters // * maxTokens is set to 100, which limits the response // to a maximum of 100 tokens. // * temperature is set to 0.1, which controls the randomness. // Lower values produce more deterministic outputs. var result = await api.CompletionsEndpoint.CreateCompletionAsync( prompt, maxTokens: 100, temperature: 0.1, model: Model.Davinci); // Iterate over the completions and // append them to the response string. foreach (var completion in result.Completions) { response += completion.Text; } } } |
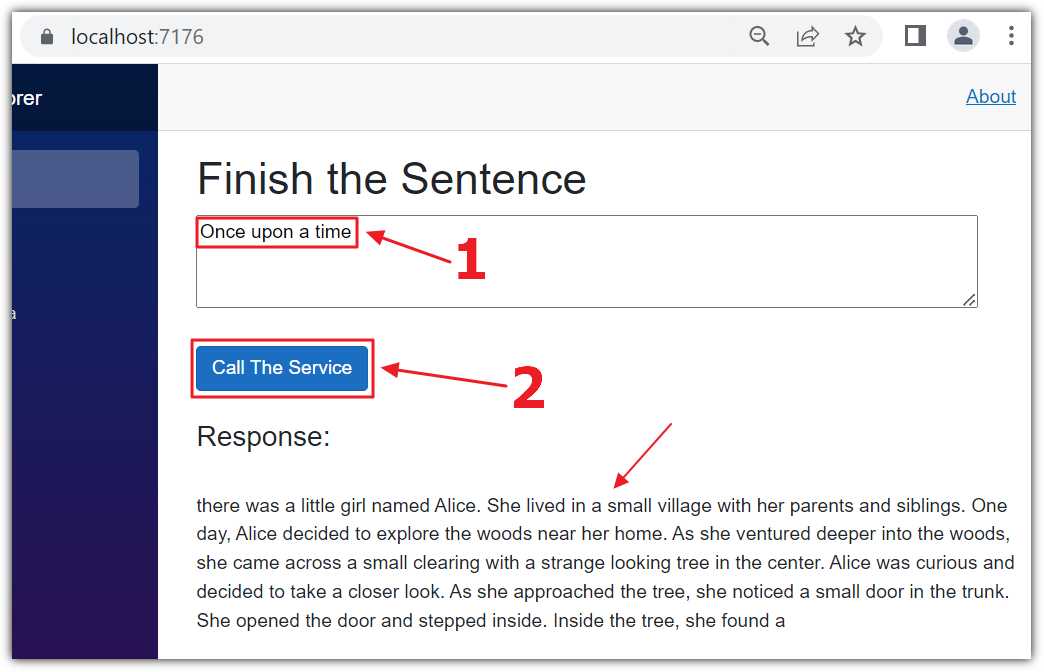
Figure 25: Run the Completion Code
Press F5 to run the application and open it in your web browser.
You can enter a prompt in the text box and click Call The Service. After a few moments, the prompt will be completed and displayed in the Response section.
Note: The documentation for the Completion API is located here.
- 1800+ high-performance UI components.
- Includes popular controls such as Grid, Chart, Scheduler, and more.
- 24x5 unlimited support by developers.