
NuGet In-House Succinctly®

CHAPTER 5
Using Packages Published in a Local NuGet Server
Defining and creating a project for using published packages
Defining the project
Now it is time to use the published package from our private NuGet server. For the purposes of this book, we are going to create a Windows Forms application called MyAnalogClock. The application name explains its purpose: displaying an analog clock on the screen.
Creating the project
Click File > New > Project in Visual Studio’s menu bar, and then click the Visual C# templates category. Next, click the Windows Forms App (.NET Framework) template and type MyAnalogClock in the Name text box. Finally, click OK to create the project.

Figure 62: Creating the MyAnalogClock project
After creating the project, our Visual Studio interface looks like the following image.
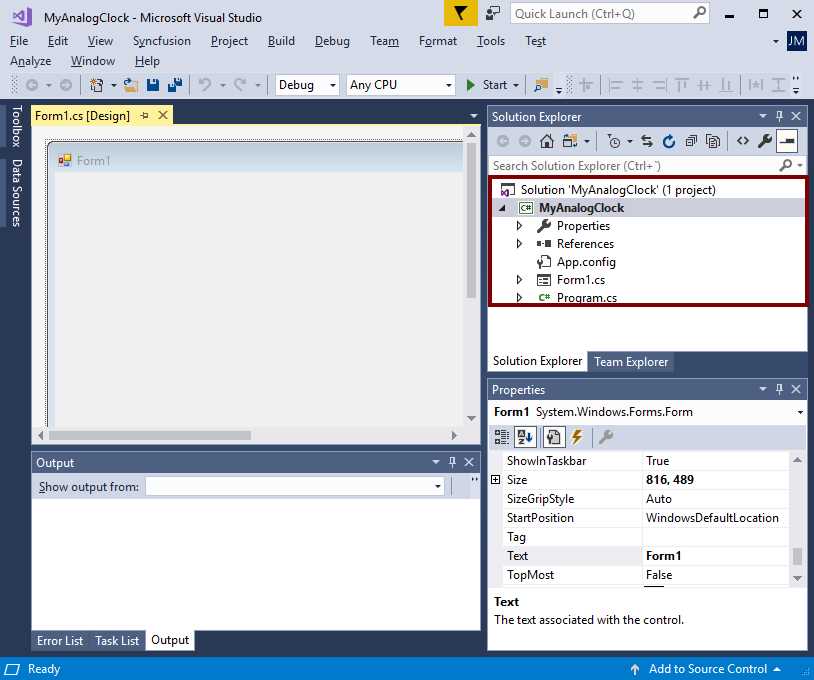
Figure 63: Solution Explorer for the MyAnalogClock project
For the purposes of this book, we are going to rename the Form1.cs and Program.cs files to MyAnalogClockForm.cs and MyAnalogClock.cs, respectively.
Specifying package sources in Visual Studio
The first step to using our NuGet package is telling Visual Studio where the sources for downloading and installing packages are. To accomplish that, click Tools > NuGet Package Manager > Package Manager Settings in the Visual Studio menu bar.
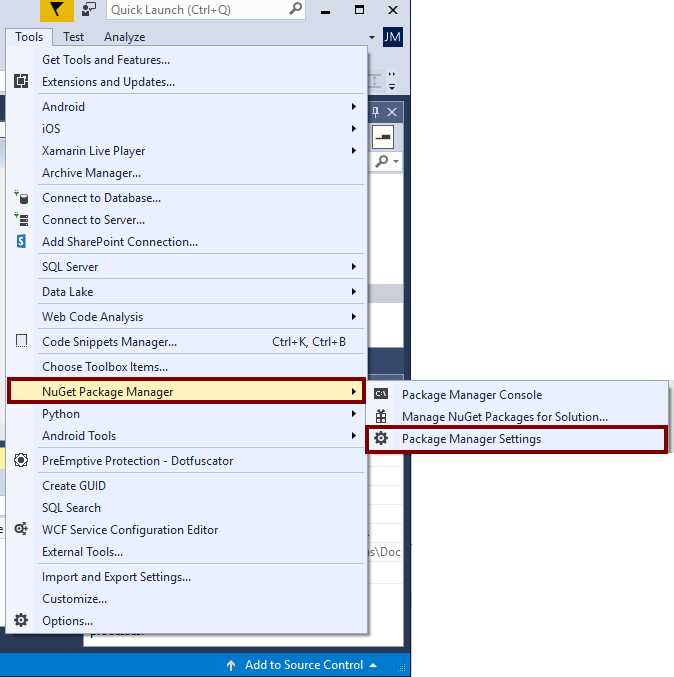
Figure 64: NuGet Package Manager Settings
When the Options dialog box appears on the screen, we should click the Package Sources section located at the left of the dialog box. Now, we can see the package sources section for the NuGet Package Manager, as displayed in the following figure.

Figure 65: NuGet package sources
The following table summarizes the usage of each one of the numbered elements that appear in Figure 65.
Table 6: NuGet Package Sources interface elements
Element | Purpose |
|---|---|
1 | The list box displays all available package sources for Visual Studio. |
2 | The command buttons allow us to add, delete, and reorder the package sources. Reordering package sources tells Visual Studio the order in which sources should be queried when we search for a package. |
3 | The package source settings include a descriptive name for the source and the URL for the source’s location. |
4 | The OK and Cancel buttons allow us to accept or reject the changes we’ve made. |
Click the plus-sign icon to add our local NuGet server as a package source, as explained in Table 6. The second source automatically appears in the list box. Now, we’ll set the following values for the source’s settings:
- Name: Local NuGet server
- Source: http://localhost/mynugetserver/nuget
Click the Update button located to the right of the source’s settings and click the up-arrow button located at the top-right corner. The dialog box should look like the following figure.
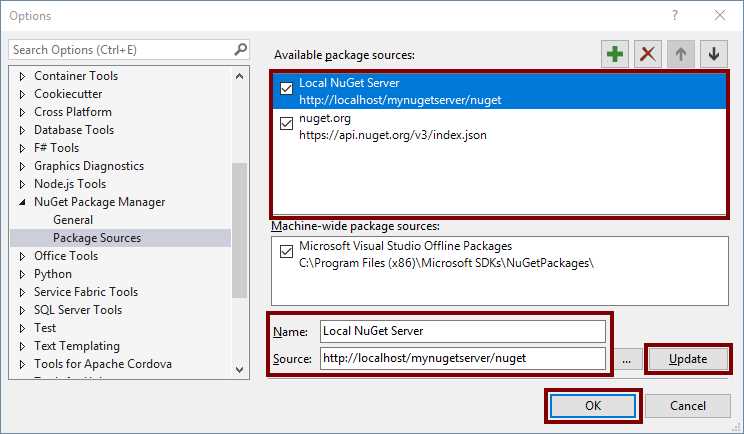
Figure 66: The Options dialog box after setting the local package source
Finally, click OK to accept changes and make our local NuGet server available for Visual Studio.
Managing packages from the NuGet local server
Since our project depends on the package published in our local NuGet server, we need to add this package before starting to write any lines of code. We are going to use the NuGet Package Manager for installing our package. First, we should right-click the MyAnalogClock node in the Solution Explorer, and then click Manage NuGet Packages in the context menu.

Figure 67: Managing NuGet packages for our project
Now, the NuGet Package Manager appears in a tab inside our project. We can see its interface in the following image.

Figure 68: NuGet Package Manager inside our project
The following list describes the purpose of each highlighted item in Figure 68:
- Management categories (1): We have three categories available: Browse, which allows us to explore the current package source; Installed, which displays the installed packages in our project; and Updates, which shows us if there are updates for any of the installed packages in our project.
- Current package source (2): Displays the current source for installing packages. We can select a different source by clicking the drop-down button in the combo box.
- List of available packages (3): Displays the available packages for the current package source, and the search expression entered in the search bar at the top of the list.
- Selected package info (4): Displays information about the selected package from the list. In addition, it allows us to install the package.
We can also see in Figure 68 that the current package source is nuget.org. For the purposes of our project, we need to choose our local NuGet server as a source. Click the Package source drop-down and then select Local NuGet Server. Next, click the myextensionmethods package in the list. The interface should look like the following image.

Figure 69: Selecting the myextensionmethods package from our local NuGet server
Click Install to install the package. After that, the following dialog box is displayed.
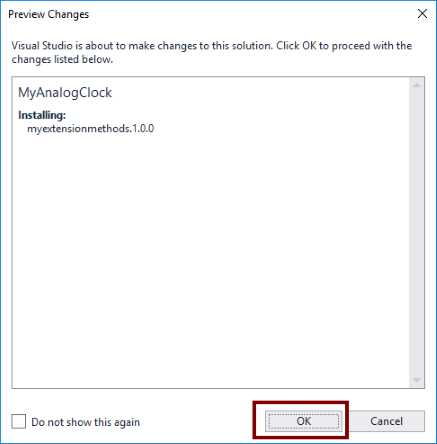
Figure 70: Preview Changes dialog box
Click OK to finish the installation, and then close the NuGet Package Manager tab to continue our work.
Putting it all together: building our project
Because Visual Studio added a reference to our package, we are ready to start building our project. The first step is writing the code for the analog clock.
The code for our project
The following example displays the code for making our analog clock function properly. The comments added explain the code’s functionality.
Code Listing 13: MyAnalogClock's code
using myextensionmethods; using System; using System.Collections.Generic; using System.Drawing; using System.Drawing.Drawing2D; using System.Drawing.Text; using System.Windows.Forms; namespace MyAnalogClock { /// <summary> /// Displays an analog clock on the screen /// </summary> public partial class MyAnalogClockForm : Form { /// <summary> /// Instance of the context menu which allows us /// to exit the application. /// </summary> private ContextMenuStrip _contextMenu; /// <summary> /// Dictionary with the form's context menu items. /// The key is assigned to the Tag property of the ToolStripMenuItem /// </summary> private readonly Dictionary<string, string> _contextMenuItems = new Dictionary<string, string> { {"EXIT","Exit"} }; /// <summary> /// Instance of the timer in charge of updating the clock. /// </summary> private Timer _clockTimer; /// <summary> /// Creates the instance of the form. /// </summary> public MyAnalogClockForm() { InitializeComponent(); //Subscribes the Paint event of the form Paint += MyAnalogClockForm_Paint; //Subscribes the Load event of the form Load += MyAnalogClockForm_Load; //Subscribes the MouseDown event of the form //in order to allow dragging it MouseDown += MyAnalogClockForm_MouseDown; } /// <summary> /// Handles the Load event of the form. /// </summary> /// <param name="sender">Instance of the form that raises the event.</param> /// <param name="e">Instance of <see cref="EventArgs"/> which holds the data for managing the event.</param> private void MyAnalogClockForm_Load(object sender, EventArgs e) { //Removes title bar and border //from the form. Text = string.Empty; FormBorderStyle = FormBorderStyle.None; ControlBox = false; //Creates the instance of the context menu _contextMenu = new ContextMenuStrip(); //Builds the context menu using the items dictionary. //Subscribes the Click event for every item to the MenuItem_Click method. _contextMenu.BuildContextMenu(_contextMenuItems, MenuItem_Click); // Attach the context menu to the form. ContextMenuStrip = _contextMenu; // Set the size to a square of 300x300. SetSize(300, 300); //Use double buffering to avoid flickering. DoubleBuffered = true; //The form will not be shown in the task bar. ShowInTaskbar = false; // Set focus to the form. You should do this // in order to make Alt+F4 close the clock properly. Focus(); //Creates an instance of a timer //and adjusts the time for firing the //Tick event (1000 milliseconds == 1 second) _clockTimer = new Timer { Interval = 1000 }; //Subscribes the Tick event for the timer instance _clockTimer.Tick += _clockTimer_Tick; _clockTimer.Enabled = true; } /// <summary> /// Handles the MouseDown event of the form in order to /// allow dragging from anywhere on the clock's surface. /// </summary> /// <param name="sender">Instance of the form that raises the event.</param> /// <param name="e">Instance of <see cref="EventArgs"/> which holds the data for managing the event.</param> private void MyAnalogClockForm_MouseDown(object sender, MouseEventArgs e) { //If we hold the mouse left button, we can drag the clock. if (e.Button == MouseButtons.Left) { // Release the mouse capture started by the mouse down. Capture = false; //Create the windows message var wMessage = this.CreateWmNclButtonDown(); //Sends the message to the form's instance DefWndProc(ref wMessage); } } // Redraws the clock to show the current hand position. private void _clockTimer_Tick(object sender, EventArgs e) => Refresh(); /// <summary> /// Handled the Paint event of the form and draws the clock. /// </summary> /// <param name="sender"></param> /// <param name="e"></param> private void MyAnalogClockForm_Paint(object sender, PaintEventArgs e) { //Clear the drawing surface of the form //and fills it with the form's BackColor e.Graphics.Clear(BackColor); //Sets the quality for graphics rendering e.Graphics.SmoothingMode = SmoothingMode.AntiAlias; //Sets the quality for text rendering e.Graphics.TextRenderingHint = TextRenderingHint.AntiAliasGridFit; //Translates the graphics coordinates to //center the drawing. e.Graphics.TranslateTransform(ClientSize.Width / 2, ClientSize.Height / 2); // Draws the clock face including tick marks. e.Graphics.DrawClockFace(ClientSize, Color.Blue, 4); // Draws the center of the clock. e.Graphics.FillEllipse(Brushes.Blue, -5, -5, 10, 10); // Draws the clock hands. e.Graphics.DrawClockHands(ClientSize, Color.Red, Color.OrangeRed); } /// <summary> /// Handles the click event for every item in the context menu. /// Since there is only one item (Exit), executes the Close method /// to close the form and exit the application. /// </summary> /// <param name="sender">Instance of the menu item which raises the event.</param> /// <param name="e">Instance of <see cref="EventArgs"/> which holds the data for managing the event.</param> private void MenuItem_Click(object sender, EventArgs e) => Close(); /// <summary> /// Set the form's size. /// </summary> /// <param name="clientWidth">Form's width in pixels.</param> /// <param name="clientHeight">Form's height in pixels.</param> private void SetSize(int clientWidth, int clientHeight) { //Set the form's size. ClientSize = new Size(clientWidth, clientHeight); // Set the form's region to a circle. GraphicsPath path = new GraphicsPath(); path.AddEllipse(ClientRectangle); Region = new Region(path); // Redraw the form. Refresh(); } } } |
Building and testing our project
To build and test our project, click Start in the Visual Studio toolbar.

Figure 71: Building and testing our project with the Start button
If everything is OK, we will see our analog clock on the screen.

Figure 72: The analog clock
Publishing an update for our NuGet package
One benefit of NuGet is the ability to easily update our reusable code. We can improve our assemblies, publish our package’s upgrades, and let NuGet deal with communicating upgrades to the consumer of that package. In this case, we are going to create a new version of the myextensionmethods package and publish this upgrade into our local NuGet server. First, let us see this part of the consumer’s code for understanding the reason of the upgrade.
Code Listing 14: Code for drawing the clock
// Draws the clock face including tick marks. e.Graphics.DrawClockFace(ClientSize, Color.Blue, 4); // Draws the center of the clock. e.Graphics.FillEllipse(Brushes.Blue, -5, -5, 10, 10); // Draws the clock hands. e.Graphics.DrawClockHands(ClientSize, Color.Red, Color.OrangeRed); |
We can see in Code Listing 14 that a separate line of code draws the center of the clock, instead of doing it using the DrawClockFace method. This works, but a better way to perform this task might be to draw the center in the DrawClockFace method. This will isolate the entire clock’s face drawing from the rest of the code.
The following example displays the modified code for the DrawClockFace method.
Code Listing 15: Upgraded code for DrawClockFace method
/// <summary> /// Draws an analog clock face in a client area (usually a form's client area). /// </summary> /// <param name="graphicsInstance">Graphics object associated to the client area.</param> /// <param name="clientSize">Width and Height of the client area.</param> /// <param name="penColor">Color used to draw the analog clock face.</param> /// <param name="penWidth">Width of the pen used to draw the analog clock face.</param> public static void DrawClockFace(this Graphics graphicsInstance, Size clientSize, Color penColor, int penWidth) { using (var clockPen = new Pen(penColor, penWidth)) { //Draws the clock face's outline graphicsInstance.DrawCircle(clientSize, penColor, penWidth); //Draws the tick marks around the clock's face outline //Defines a round cap for beginning and ending of every line clockPen.StartCap = LineCap.Round; clockPen.EndCap = LineCap.Round; //Defines the scale factors used to draw //the tick marks around the clock's face //Scale factors for the mark's outer point (x,y) var outXFactor = 0.45f * clientSize.Width; var outYFactor = 0.45f * clientSize.Height; //Scale factors for the mark's inner point (x,y) var innXFactor = 0.425f * clientSize.Width; var innYFactor = 0.425f * clientSize.Height; //Scale factors for the hour mark's inner point (x,y) var hourXFactor = 0.4f * clientSize.Width; var hourYFactor = 0.4f * clientSize.Height; //Loop for iterating the hour's minutes for (int minute = 1; minute <= 60; minute++) { //Calculates the angle for every minute var minuteAngle = Math.PI * minute / 30.0; var cosineAngle = (float)Math.Cos(minuteAngle); var sineAngle = (float)Math.Sin(minuteAngle); //Calculates inner and outer points //for the current tick mark var innerPoint = (minute % 5 == 0) ? new PointF(hourXFactor * cosineAngle,hourYFactor * sineAngle) : new PointF(innXFactor * cosineAngle, innYFactor * sineAngle); var outerPoint = new PointF(outXFactor * cosineAngle,outYFactor * sineAngle); graphicsInstance.DrawLine((minute % 5 == 0) ? clockPen : Pens.Black,innerPoint,outerPoint); } // Draws the center of the clock. // Now, we need to upgrade our package to version 1.1.0.0 using (var centerBrush = new SolidBrush(penColor)) graphicsInstance.FillEllipse(centerBrush, -5, -5, 10, 10); } } |
After building our project, we should go to the packagesource folder in the myextensionmethods project, and then create the new version of our package using the NuGet Command Line Interface, as displayed in the following example.
Code Listing 16: Creating the package upgrade for myextensionmethods
nuget pack myextensionmethods.nuspec -OutputDirectory ..\packagedeploy -Properties Configuration=Debug;Version=1.1.0.0;Description="Extension Methods for NuGet In-House Succinctly";Author="NuGet In-House Succinctly" |
Finally, after we create the package, we should go to the packagedeploy folder in the myextensionmethods project, and then publish the upgrade of our package using the NuGet Command Line Interface, as shown in the following example.
Code Listing 17: Publishing the upgrade of myextensionmethods
nuget push myextensionmethods.1.1.0.nupkg MyNuGetServer -Source http://localhost/mynugetserver/nuget |
Applying the package update to the consumer project
To use the new version of myextensionmethds, we need to use the NuGet Package Manager as we did when we added the package for the first time. However, unlike that time, the NuGet Package Manager interface should look like the following figure.

Figure 73: NuGet Package Manager displaying the update warning
We can see the number displayed to the right of the Updates section. This number tells us how many of the packages installed have upgrades. In this case, there is only one package with an available upgrade. Click Updates and click the Select all packages check box. Finally, click Update to install the new version of the package. After that, the Preview Changes dialog box will appear, as it did in the installation process. Click OK to finish the update.
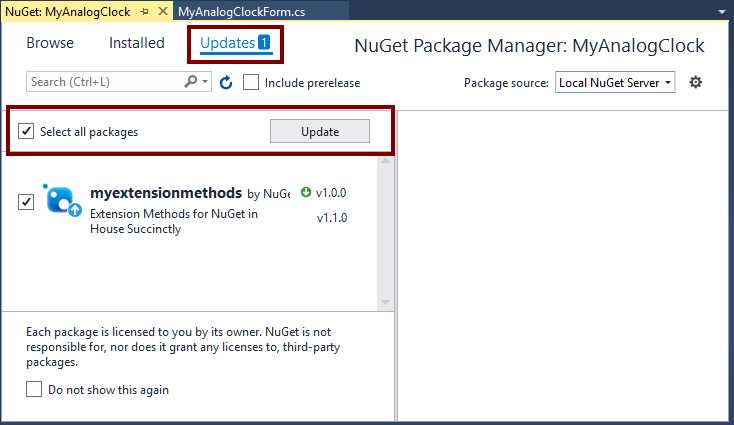
Figure 74: Installing the available updates
Once NuGet Package Manager finishes the update, we should change the code for the MyAnalogClockForm_Paint event handler to reflect the modifications made to myextensionmethods. The following example displays these changes.
Code Listing 18: Code modified to reflect the upgrade
/// <summary> /// Handles the Paint event of the form, and draws the clock. /// </summary> /// <param name="sender"></param> /// <param name="e"></param> private void MyAnalogClockForm_Paint(object sender, PaintEventArgs e) { //Clears the drawing surface of the form //and fills it with the form's BackColor e.Graphics.Clear(BackColor); //Sets the quality for graphics rendering e.Graphics.SmoothingMode = SmoothingMode.AntiAlias; //Sets the quality for text rendering e.Graphics.TextRenderingHint = TextRenderingHint.AntiAliasGridFit; //Translates the graphics coordinates to //center the drawing. e.Graphics.TranslateTransform(ClientSize.Width / 2, ClientSize.Height / 2); // Draws the clock face including tick marks. e.Graphics.DrawClockFace(ClientSize, Color.Blue, 4); // Draws the center of the clock. // This code was implemented in myextensionmethods // Draws the clock hands. e.Graphics.DrawClockHands(ClientSize, Color.Red, Color.OrangeRed); } |
Now, click Start in the Visual Studio toolbar to build and test our project.
Chapter summary
This chapter explained how to use packages published in our local NuGet server. For the purposes of this chapter, we created a Windows Forms application called MyAnalogClock to display an analog clock on the screen. Then we told Visual Studio the location of the sources for downloading and installing packages. To accomplish that, we clicked Tools > NuGet Package Manager > Package Manager Settings in the Visual Studio menu bar. This action displayed the Options dialog box. We clicked the Package Sources section located at the left of the dialog box, and then the plus-sign icon to add a package source. After that, we entered Local NuGet Server for the name of the source, and http://localhost/mynugetserver/nuget for the URL’s package source. Then, we used the Manage NuGet Packages item from the project’s context menu to install the myextensionmethods package from our local NuGet server. After that, we wrote the code for MyAnalogClock project and built it. Finally, we made an upgrade for the myextensionmethods package and applied it to the MyAnalogClock project using the NuGet Package Manager.
- 1800+ high-performance UI components.
- Includes popular controls such as Grid, Chart, Scheduler, and more.
- 24x5 unlimited support by developers.