
NuGet In-House Succinctly®

CHAPTER 2
The NuGet Server
What is a NuGet server?
A NuGet server is an application employed to host NuGet packages. The NuGet Gallery is one, for example, albeit a public one as mentioned in Chapter 1. The purpose of this chapter is to show you how to create a local NuGet server in order to keep your code private.
For the purposes of this book, we first need to set up IIS on our local computer before creating our own NuGet server.
Setting up IIS to host a NuGet server
The first thing we should do is go to the Control Panel and click the Programs and Features icon.
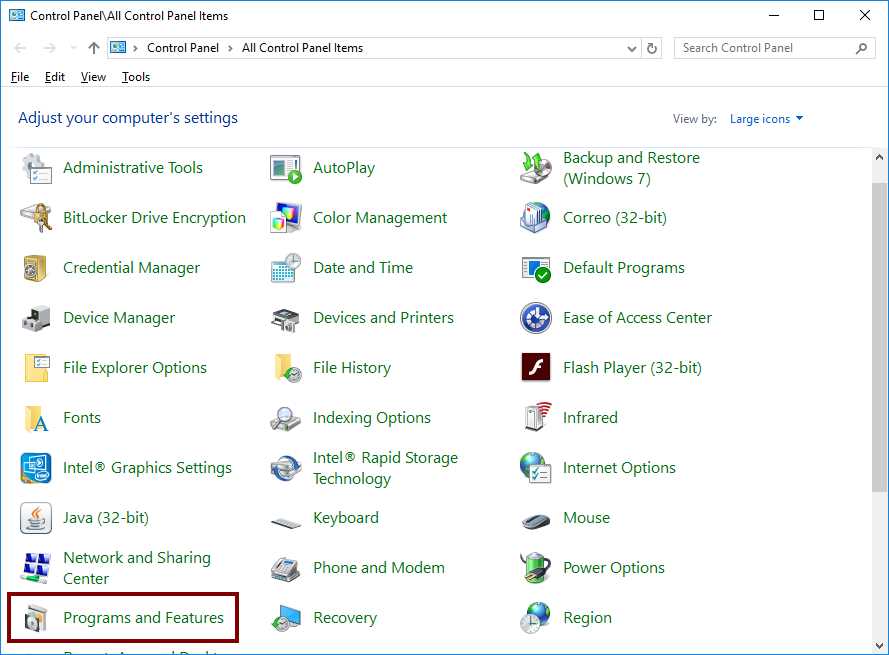
Figure 18: "Programs and Features" in Control Panel
Now, in the Programs and Features dialog, we should click the Turn Windows features on or off hyperlink located at the left side.
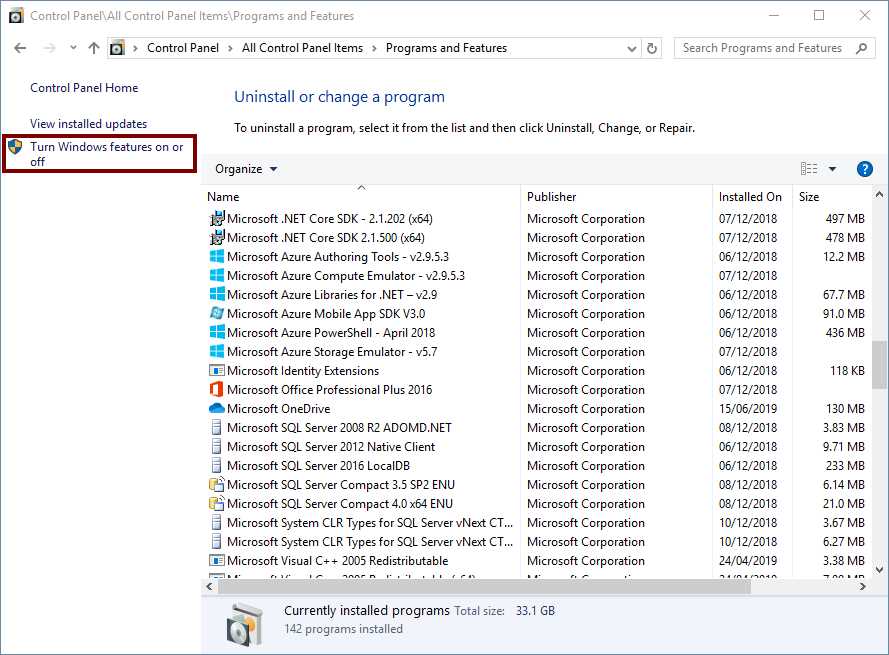
Figure 19: "Turn Windows features on or off" hyperlink
As soon as the Windows Features dialog box appears, we should locate the Internet Information Services node and select it. The filled check box displayed after clicking indicates that Windows will install the default components of IIS only.
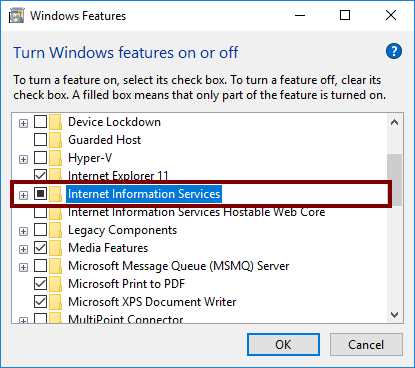
Figure 20: Selecting the "Internet Information Services" feature
For the purposes of hosting our NuGet server in IIS, we need to open the Internet Information Services node, and then the Application Development Features node, which is a child node of World Wide Web Services. Now, we are going to select all the features displayed as child nodes, except CGI, as shown in the following image.
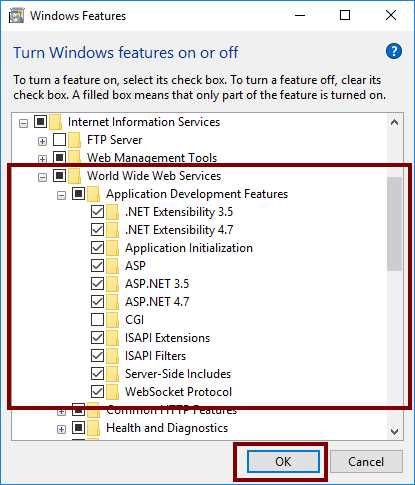
Figure 21: Selecting "Application Development Features" components
Now, click OK to start IIS installation. A progress dialog will appear, indicating how installation is proceeding. When the installation ends, the dialog box displayed in the following figure will appear.
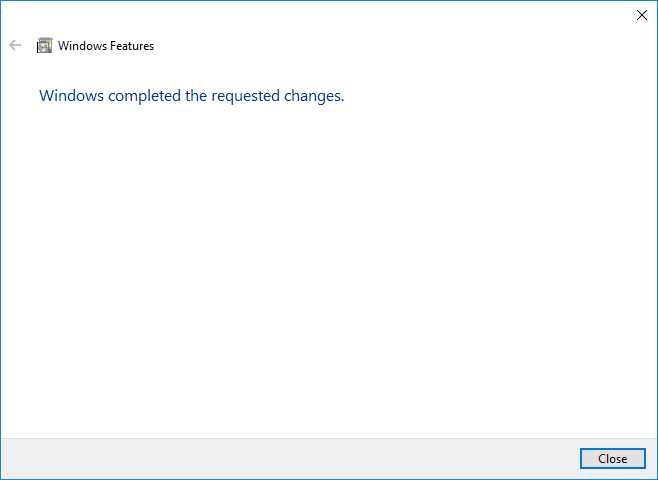
Figure 22: Dialog box indicating that installation ended
Click Close to finish the process. Next, we need to test the IIS installation. Open your web browser and type http://localhost into the address bar. If everything is OK, the home page for our local web server will appear, as shown in the following figure.
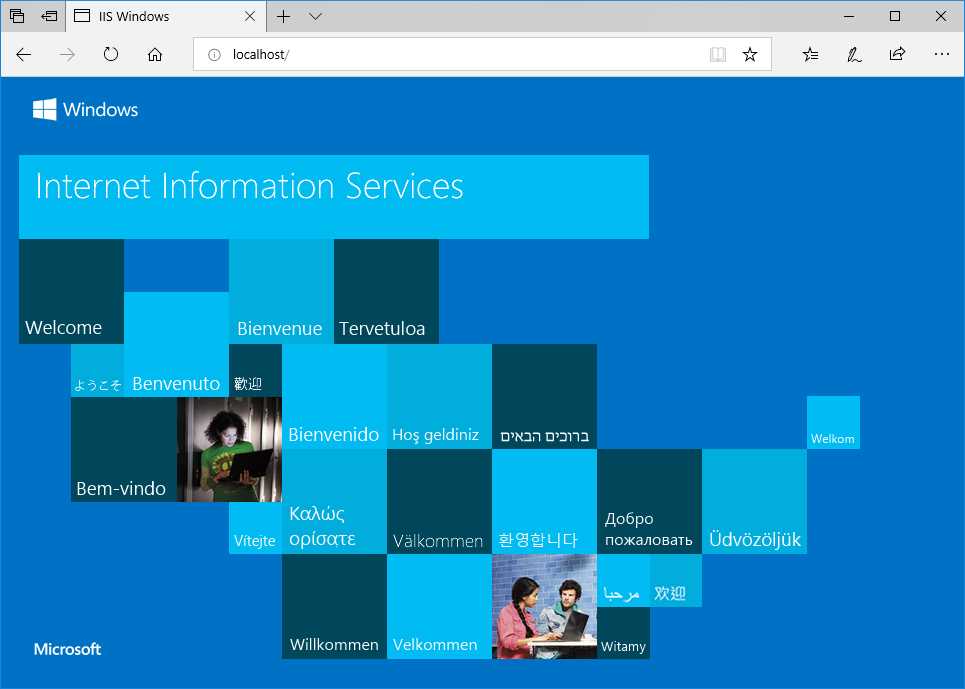
Figure 23: Local web server home page
Creating the NuGet server with Visual Studio
To make our own NuGet server, we will start by creating a new ASP.NET Web application project using Visual Studio. For the purposes of this book, we should save the project into the Documents\Visual Studio 2017\Projects folder. In addition, we will name this project MyNuGetServer.
Creating NuGet server project in Visual Studio
First, we will launch Visual Studio using the Run as administrator option. Then, we will click File > New > Project in the Visual Studio menu bar.
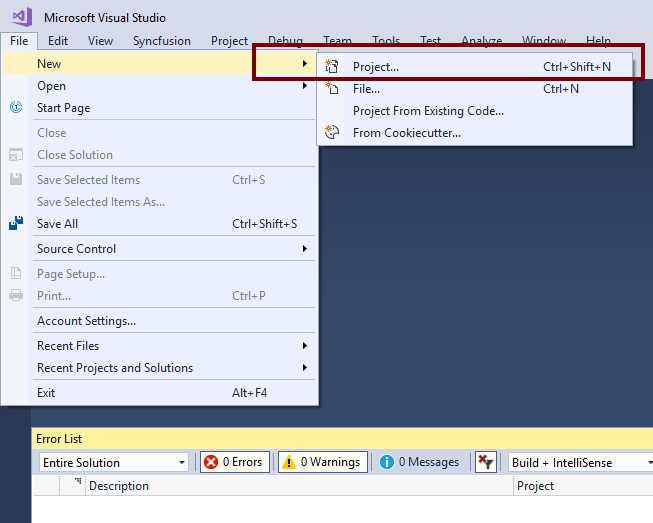
Figure 24: File > New > Project item in Visual Studio
Select ASP.NET Web Application from the Web section and type MyNuGetServer in the Name text box. We are using the classic ASP.NET Web application template rather than the newer ASP.NET Core Web application because we do not need a cross-platform system. Click OK to complete the process.
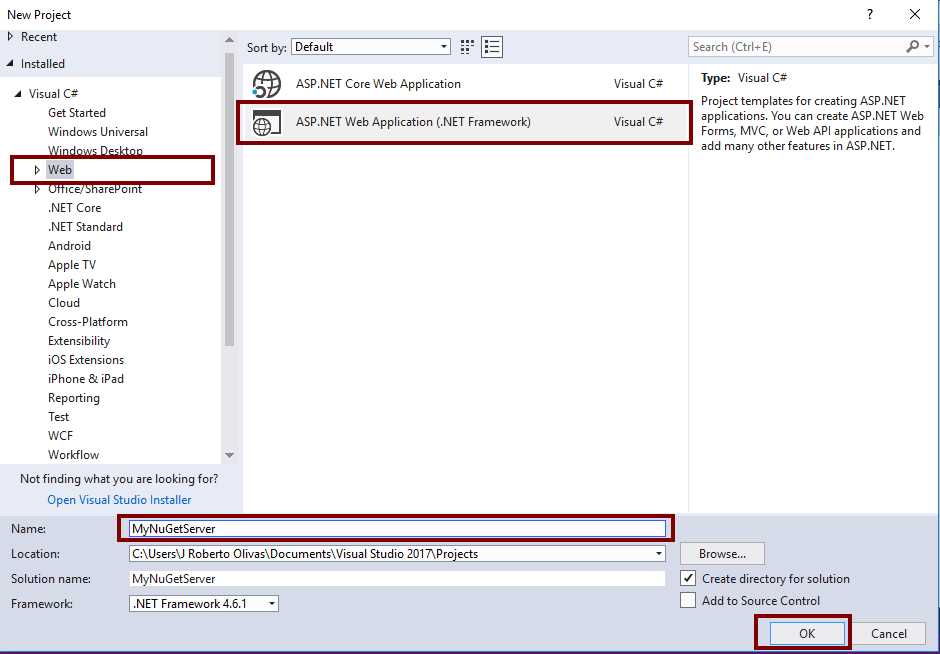
Figure 25: Creating the NuGet server project in Visual Studio
Now, Visual Studio asks for the kind of template we will use for the project. Click the Empty template and click OK. After that, Visual Studio will create the project.
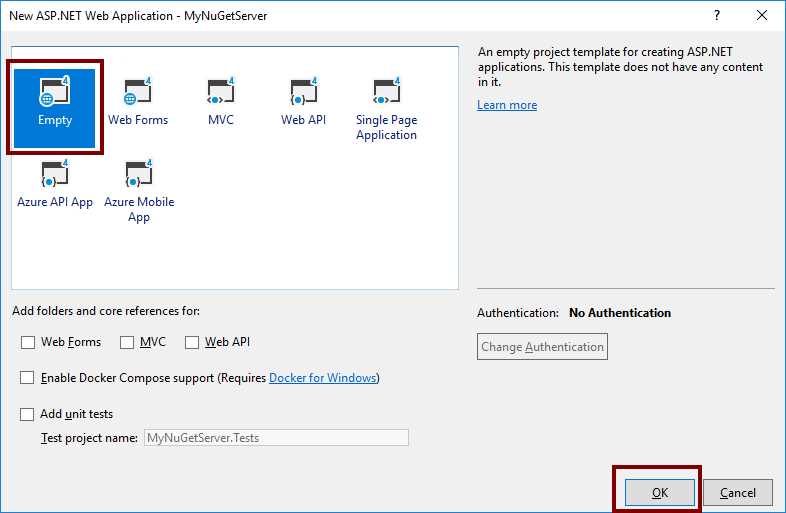
Figure 26: Choosing a Web Project Template
Now, the Solution Explorer in Visual Studio should look like the following figure.
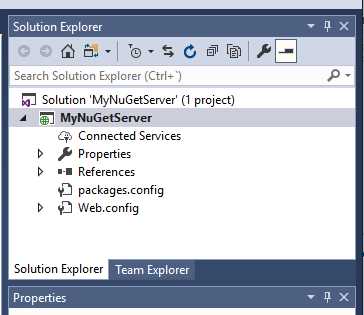
Figure 27: MyNuGetServer project in the Solution Explorer
Adding the NuGet.Server package to the project
Our NuGet server project will need a package named NuGet.Server in order to host its own NuGet packages on our local web server. This package is public, and we can download it from the NuGet Gallery by right-clicking the MyNuGetServer node in the Solution Explorer, and then clicking the Manage NuGet Packages item in the context menu.
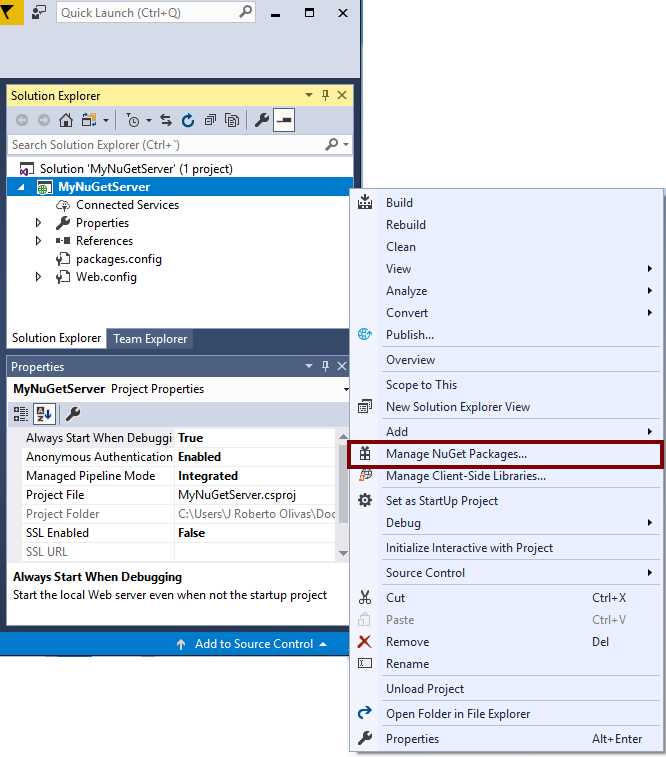
Figure 28: Managing NuGet packages in the NuGet server project
The NuGet Package Manager will appear, and we can search for the NuGet.Server package.
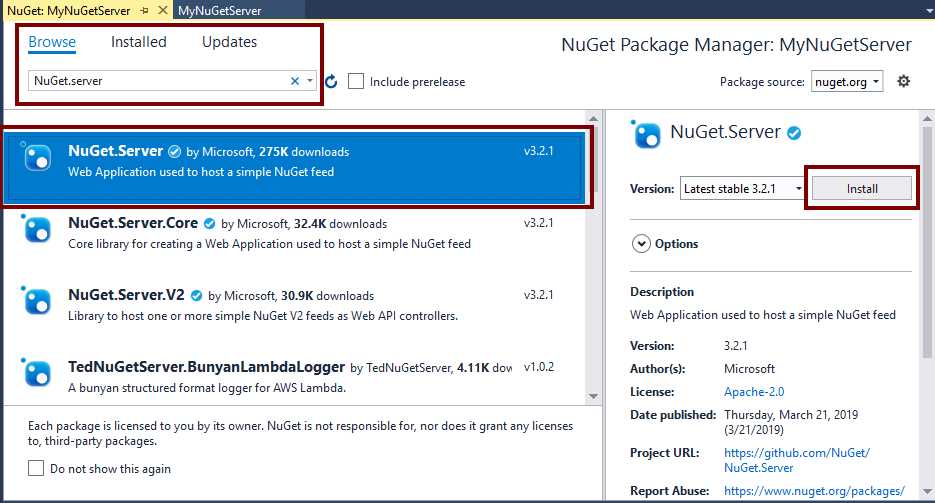
Figure 29: NuGet Package manager
As suggested by the previous figure, we should type NuGet.server in the search text box of the Browse section (underscored in blue). The Package Manager searches the NuGet Gallery and shows us the NuGet.Server package at the top. Click Install to begin package installation.
Now, the NuGet Package Manager displays a dialog box indicating the changes that it will make to the project after installing the package. We should click OK if we agree with these changes.
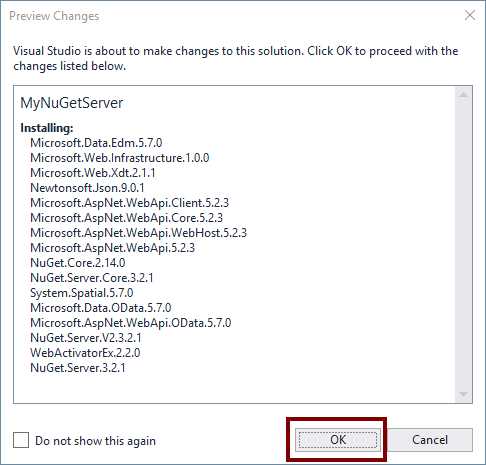
Figure 30: Preview Changes dialog box
In this case, some packages require the acceptance of a license for using them. Therefore, the License Acceptance dialog box appears.
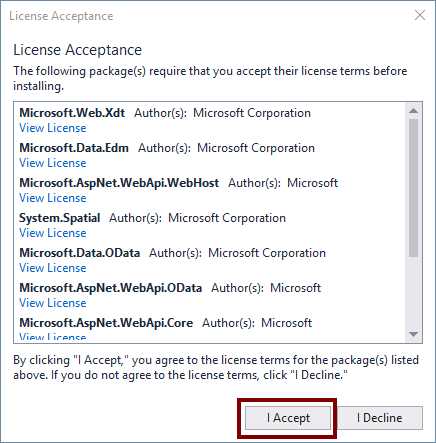
Figure 31: License Acceptance dialog box
We should click I Accept if we agree with the license terms for these packages. For the purposes of this book, we will assume that everything is OK. The Package Manager installs all the packages and adds the proper references to the project. Now, the Solution Explorer should look like the following image.
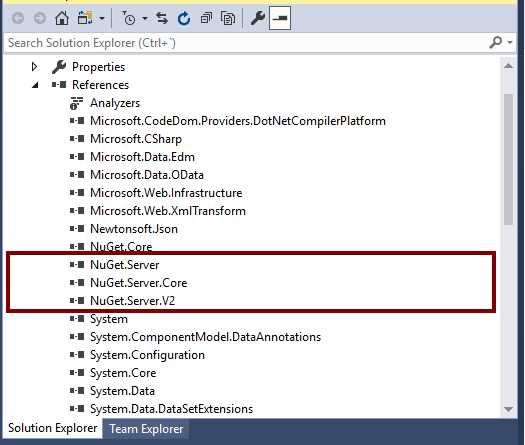
Figure 32: The Solution Explorer after installing the NuGet.Server package
Now we can see the references to NuGet.Server in our project.
Setting the API key for the project
If we want to upload our NuGet packages into our local NuGet server, we need to define an API key before building the project. We are going to define the API key for the NuGet server in the Web.config file, using MyNuGetServer as a key for the purposes of this book.

Figure 33: Specifying the API key in the Web.config file
Building and testing the project
Once we define the API key, we can test the project by clicking the Start Debugging button located on the Visual Studio toolbar.

Figure 34: Start Debugging for MyNuGetServer project
Visual Studio builds the project and launches the Microsoft Edge browser. The following image displays our NuGet server in action.
Note: If you get an error message that states something like "HTTP Error 500.19 - Internal Server Error The requested page cannot be accessed because the related configuration data for the page is invalid," carefully review the Web.config file and look for a duplicate entry, such as the <compilation> tag, and remove any duplicates.
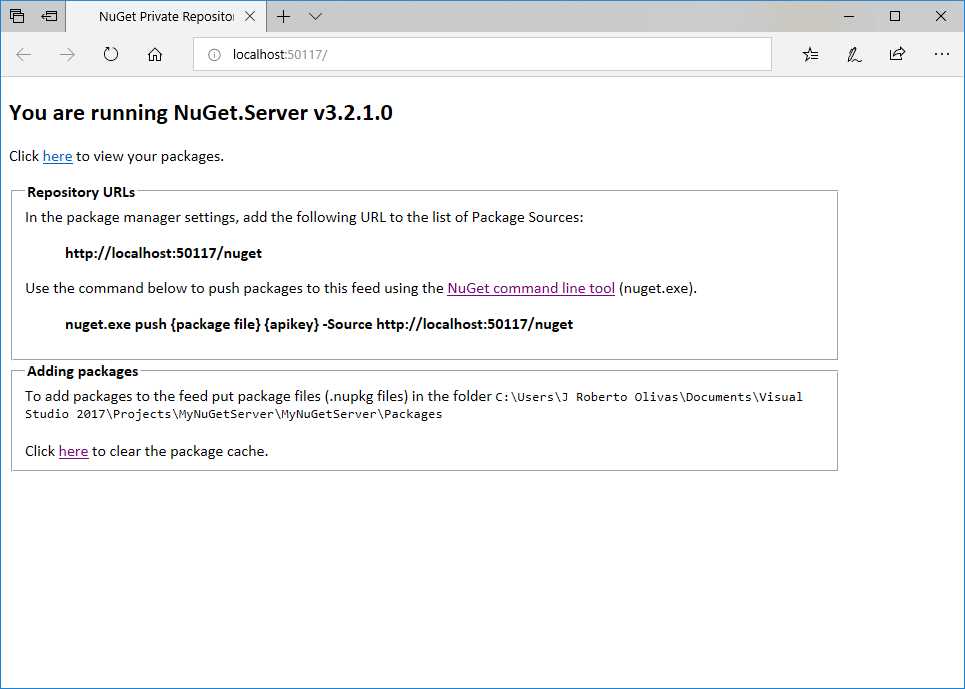
Figure 35: NuGet Server webpage in Microsoft Edge
Hosting the NuGet server in IIS
Copying our project compile code to IIS default website
Now, it is time to make our NuGet server available for use with Visual Studio. To accomplish this task, we need to go to the website root folder of our local computer. This is usually C:\Inetpub\wwwroot. Then, we are going to create a new folder named mynugetserver. In this folder, we will save the compiled code of our NuGet server project, created in the previous section.
Now, we need to go to the folder where our compiled code is, using Windows File Explorer. For the purposes of this book, this folder is Documents\Visual Studio 2017\Projects\MyNuGetServer\MyNuGetServer. Once the File Explorer window appears, we need to select the files and folders highlighted in the following figure.
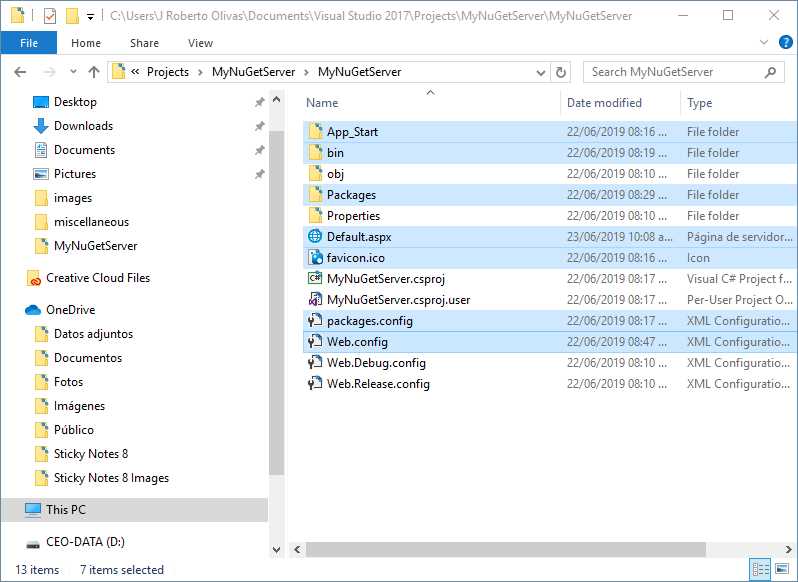
Figure 36: The list of files and folders to copy into the mynugetserver folder
Copy these files and folders to the mynugetserver folder created in C:\Inetpub\wwwroot. Since Windows considers the folder created for administrative purposes, a dialog box appears, asking for administrator permissions.
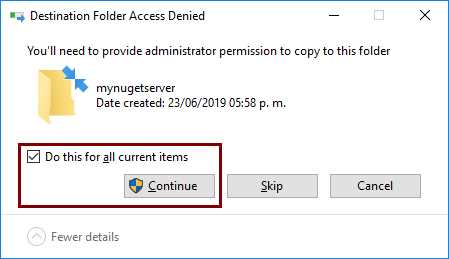
Figure 37: Dialog box asking for administrative permissions
Select the Do this for all current items check box to prevent the dialog box from appearing each time Windows attempts to copy a file or folder. Then, click Continue. The following image displays the mynugetserver folder with all copied files and folders.
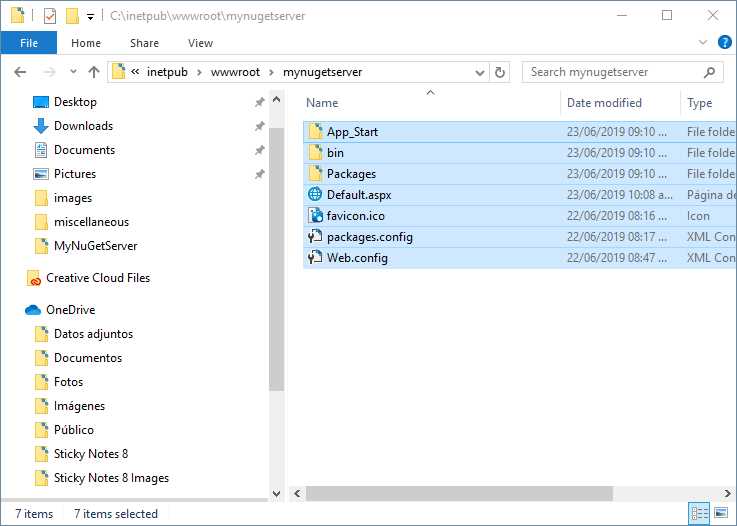
Figure 38: MyNuGetServer files and folders
Setting mynugetserver as an IIS application
The next step is to configure the mynugetserver folder as an application using the Internet Information Services Manager. We need to go to Control Panel and click the Administrative Tools icon. Then, we should click Internet Information Services (IIS) Manager, as shown in the following image.
![]()
Figure 39: Internet Information Services Manager icon in Administrative Tools
Now, in the Internet Information Services Manager dialog box, open the Sites node and right-click the Default Web Site child node. Then, click Add Application in the context menu.

Figure 40: Adding an application to IIS
The Add Application dialog box appears on the screen. For the purposes of this book, we should type mynugetserver in the Alias text box. Then, we should click the ellipsis (…) button located to the right of the Physical Path text box. Now, in the Browse For Folder dialog box, locate and point to the mynugetserver folder created in C:\Inetpub\wwwroot. Click OK to select this folder.
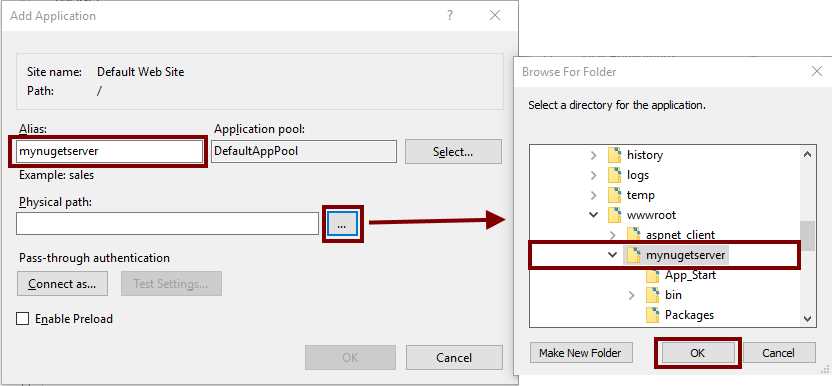
Figure 41: Setting application parameters
Now, the Add Application dialog box should look like the following image.
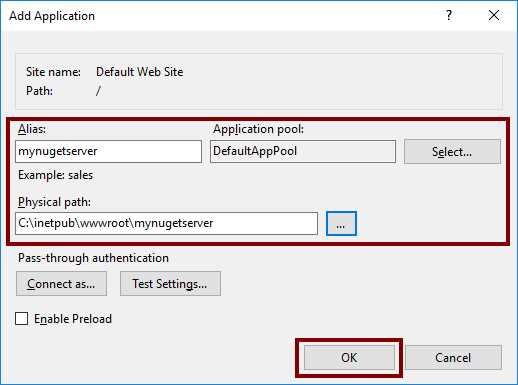
Figure 42: Application parameters
Click OK to finish the process.
Testing the NuGet server in IIS
We need to ensure that our NuGet server is working properly. To accomplish that, we will open Microsoft Edge and type http://localhost/mynugetserver in the address bar. If everything is right, the internet browser should look like the following figure.
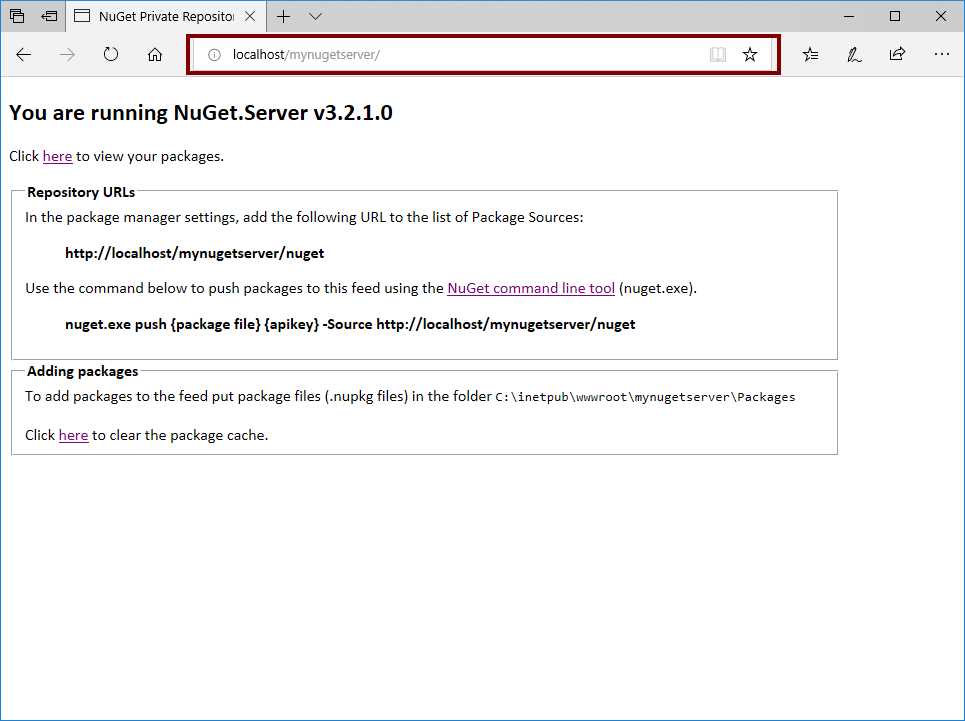
Figure 43: Our NuGet server running on IIS
Chapter summary
A NuGet server is an application employed to host NuGet packages. The NuGet Gallery is the most popular host for NuGet packages, but every package hosted there is public. The purpose of this chapter was to show you how to create a local NuGet server to keep your code private.
To host a local NuGet server on our computer, we needed to set up IIS first. To accomplish this, we went to Control Panel and clicked the Programs and Features icon. Then, when the Programs and Features dialog appeared on the screen, we clicked Turn Windows features on or off. After that, we selected the Internet Information Services node. Since this action told Windows to install the basic IIS features only, we opened this node and selected all components located in the Application Development Features node, except for CGI. We typed http://localhost in the address bar of our web browser to verify the installation, and the web browser displayed the IIS home page for our local computer.
We got our own NuGet server by creating an ASP.NET Web application project with Visual Studio. We named this project MyNuGetServer and saved it into the Documents\Visual Studio 2017\Projects folder. We employed the Empty template to create the project, and added a public package named NuGet.Server from the NuGet Gallery using the Manage NuGet Packages item from the context menu displayed by right-clicking the Solution Explorer.
After the NuGet Package Manager added NuGet.Server references to our project, we modified the Web.config file to set an API key necessary to upload our NuGet packages into our local NuGet server. For the purposes of this book, we used MyNuGetServer as an API key. Finally, we clicked Start Debugging to build our project and test it on the Microsoft Edge web browser.
To make our NuGet server available for Visual Studio, we created a folder named mynugetserver in C:\Inetpub\wwwroot, which is the website root folder of our local computer. Then, we copied the compiled code of the MyNuGetServer project, located in Documents\Visual Studio 2017\Projects\MyNuGetServer\MyNuGetServer, to the mynugetserver folder. After that, we configured mynugetserver folder as an IIS application using Internet Information Services Manager. Then, we tested the IIS application by typing http://localhost/mynugetserver in the address bar of the Microsoft Edge web browser.
- 1800+ high-performance UI components.
- Includes popular controls such as Grid, Chart, Scheduler, and more.
- 24x5 unlimited support by developers.