
NuGet In-House Succinctly®

CHAPTER 1
Introduction
What is NuGet?
NuGet is an open-source package manager developed by the Microsoft .NET Foundation for the Microsoft development platform. The first release of NuGet, called NuPack, appeared in October of 2010. Since then, it has evolved into a great ecosystem of services and tools. NuGet is free and licensed under the Apache License 2.0, and comes preinstalled with Visual Studio 2012 and later.
NuGet is primarily a tool for sharing .NET code in the form of packages. It defines a way to create, host, and consume these packages. It also provides the tools required for each one of the roles involved in code sharing: creators, hosts, and consumers.
Note: A NuGet package is a unit of code that can be shared at the developer‘s convenience.
The following figure displays how packages flow between creators, hosts, and consumers.
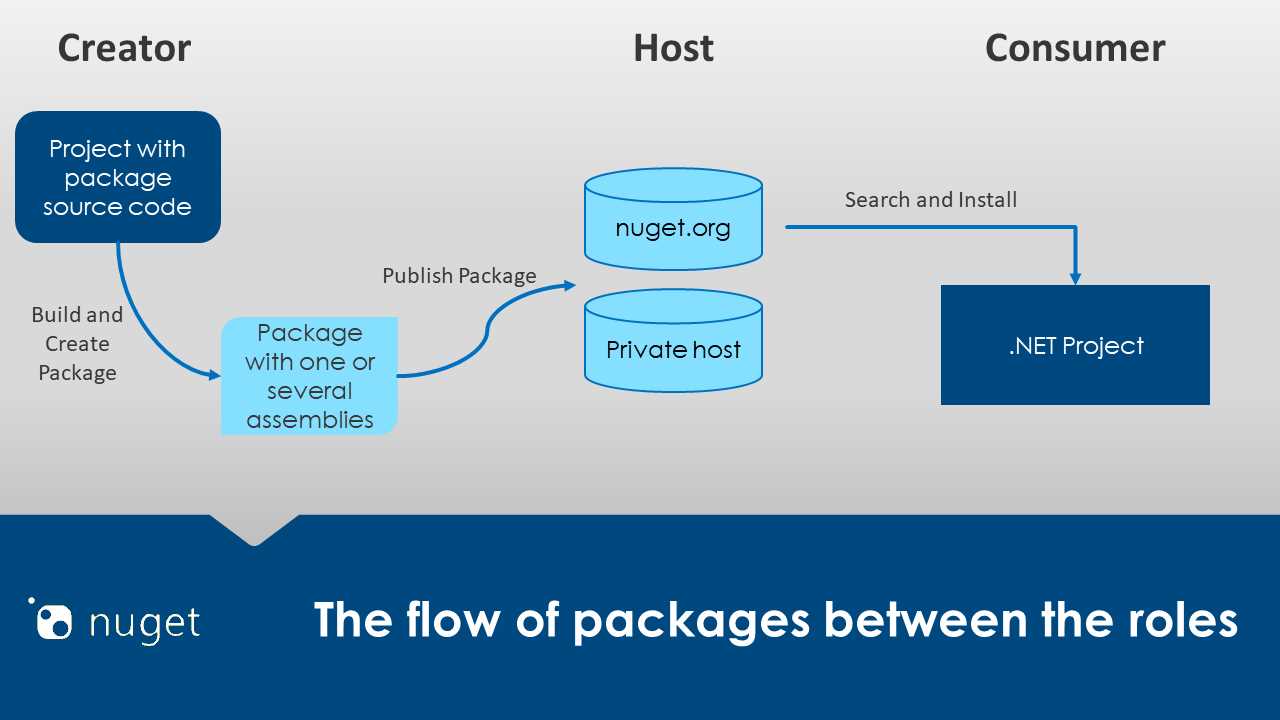
Figure 1: NuGet flow
The NuGet package
A NuGet package consists of .NET code compiled as one or several assemblies, delivered in a single compressed file with a .nupkg extension. Essentially, a .nupkg file is a .zip file with a different extension. Therefore, if we want to browse the content of a NuGet package, we can use any of the .zip file browser tools that exist on the market. One of the topics of this book is creating NuGet packages for sharing our code. This will be explained later.
The NuGet Gallery
The NuGet Gallery is the public repository for sharing NuGet packages. To access the NuGet Gallery, navigate to https://www.nuget.org. The following figure shows the NuGet Gallery home page.

Figure 2: NuGet Gallery home page
In Figure 2, we can see three metrics that are automatically calculated by the NuGet Gallery. The first one points to the number of downloads made by all .NET developers who browse the NuGet Gallery. The second tells us how many packages are hosted in the gallery, regardless of the number of versions for each one. The last metric points to the number of package versions hosted (a unique package can have multiple versions). If we want to update these metrics, we can click our browser’s Refresh button, usually located to the left of the address bar.
Signing in to the NuGet Gallery
We can browse the NuGet Gallery without an account. However, if we want to upload a package manually, we need to create an account and sign in to the gallery.
Creating an account for the NuGet Gallery
At the time I am writing this book, the NuGet Gallery has deprecated nuget.org accounts and supports only Microsoft accounts. Therefore, the first step is to create a Microsoft account if we do not already have one.
Creating a Microsoft account
We need an email address in order to create a Microsoft account. Once we make sure we have a valid email address, we should navigate to https://account.microsoft.com. The following figure displays the Microsoft account home page.
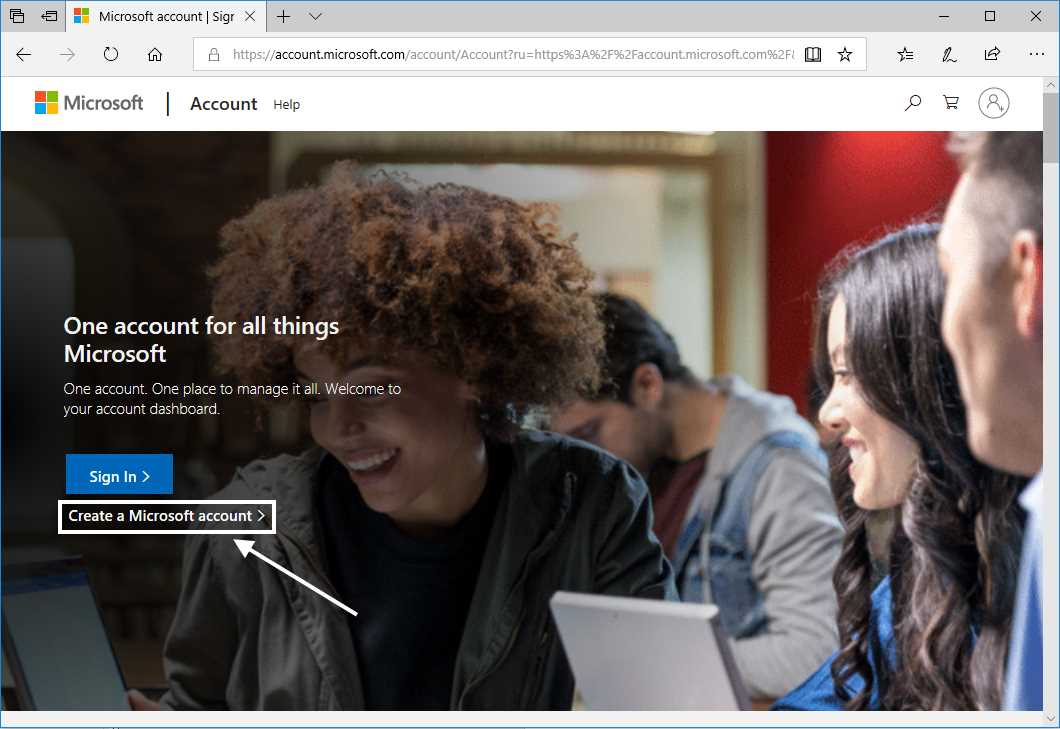
Figure 3: Microsoft account home page
Next, click Create a Microsoft account, displayed in Figure 3, outlined by a rectangle. The account creation form will appear, as shown in the following figure.
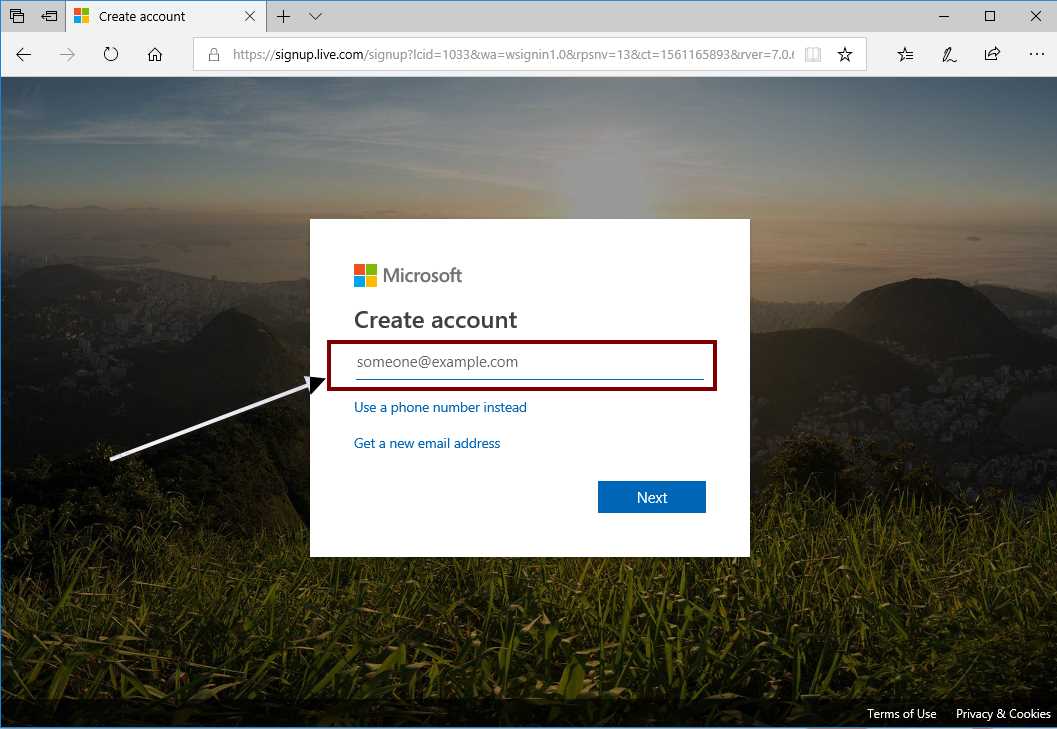
Figure 4: Microsoft account creation form
As suggested by the form displayed in the previous image, we need to type our email address. Then, click Next to continue. Now, the web browser displays a form asking for a password. We need to create a password for our new account, and then click Next. The following image displays the password form.
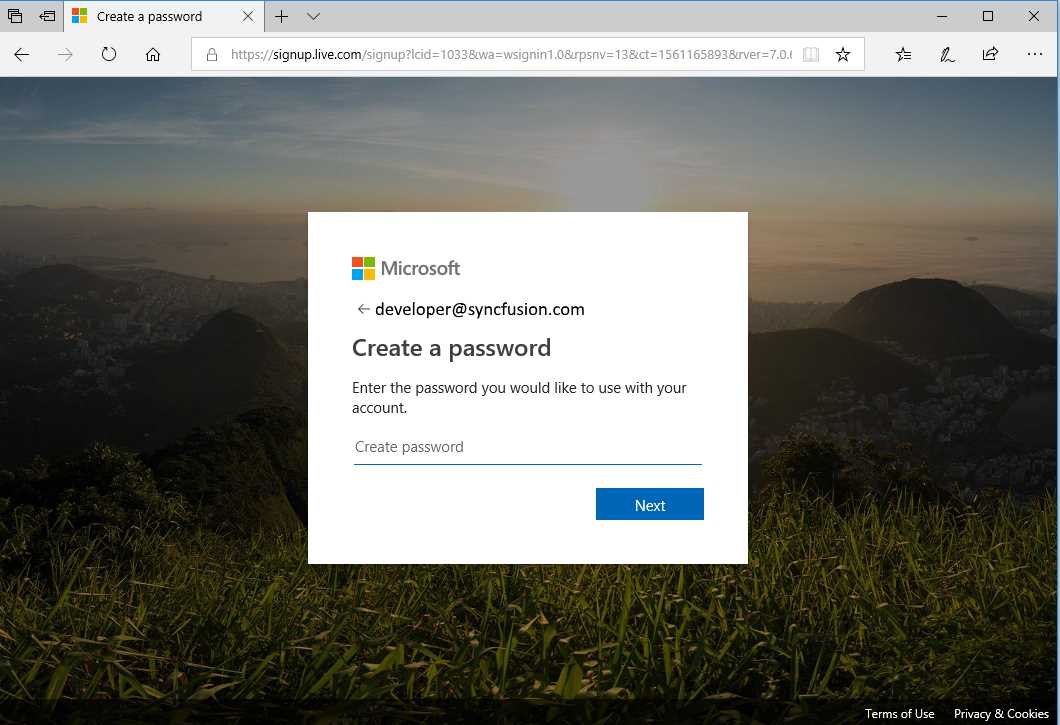
Figure 5: Create password form
The Microsoft account system asks for a verification code to ensure that we use an email address that belongs to us. We need to check our email inbox and locate the message with the subject line “Verify your email address” from the Microsoft account team. After that, we should find the security code and type it into the form displayed in the following image.
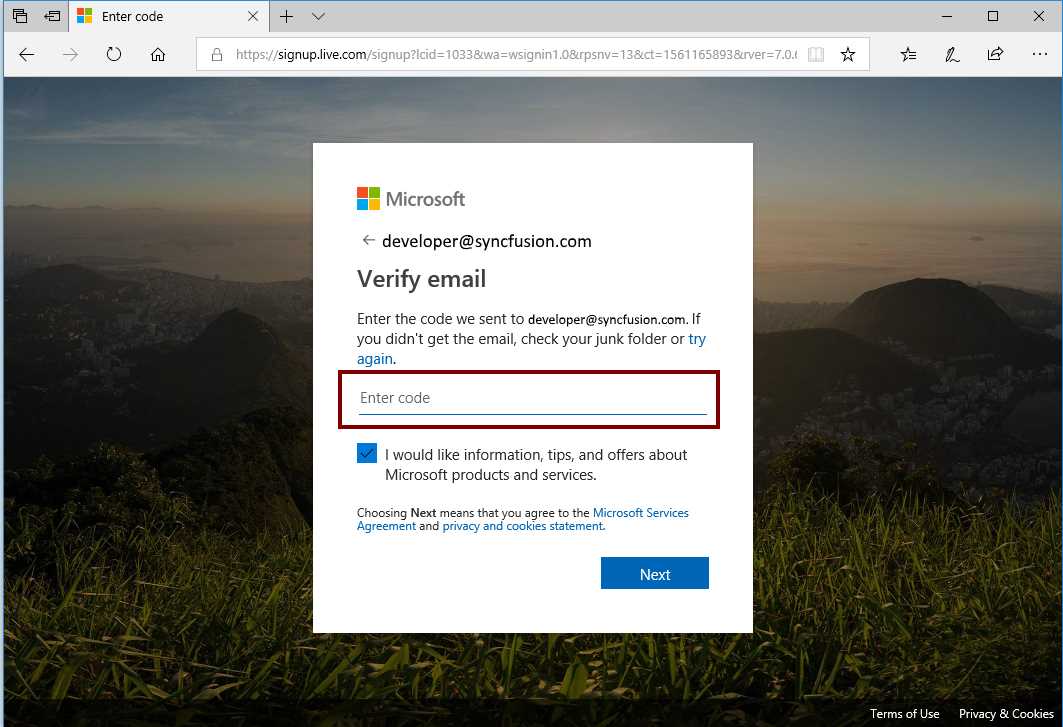
Figure 6: Verify email form
Click Next, and a form asking for a CAPTCHA will appear. This form helps to ensure an actual human being is creating the account. Type the characters displayed by the CAPTCHA, and click Next.
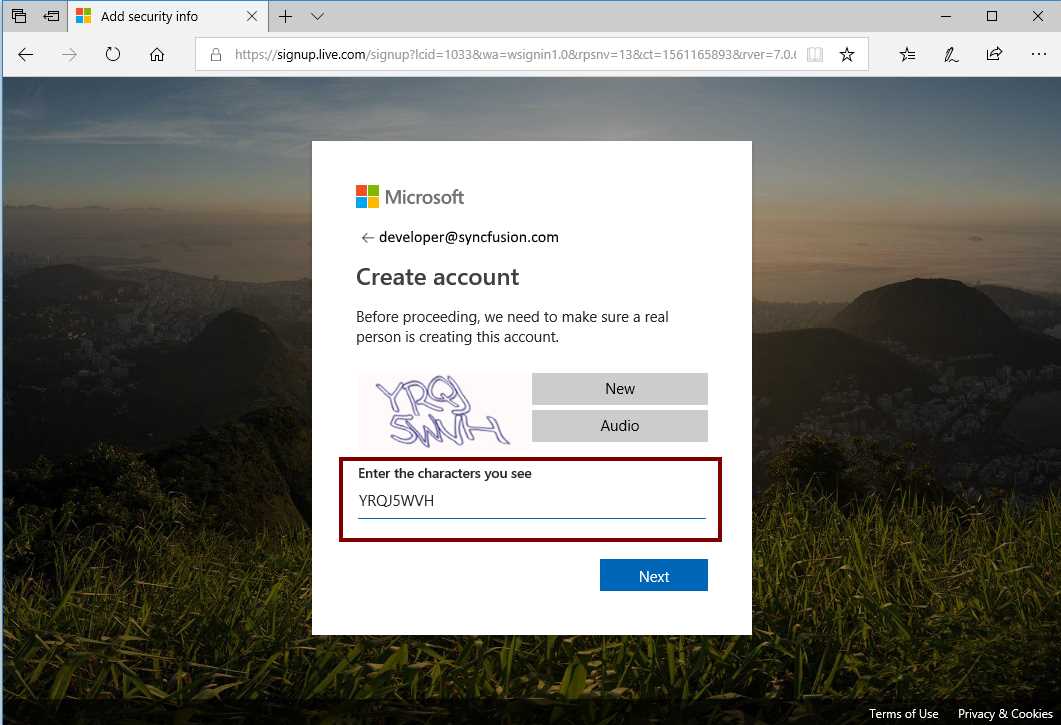
Figure 7: The CAPTCHA form
The system creates the account, and the Microsoft account manager home page appears in the web browser.

Figure 8: Microsoft account manager home page
Now we are ready to sign in to the NuGet Gallery.
Using the Microsoft account to access the NuGet Gallery
Once we are on the NuGet Gallery home page, we should click the Sign in hyperlink displayed in the following image.

Figure 9: Sign in
The browser will display a form asking for the Microsoft account to sign in to the gallery, as we can see in the following figure.
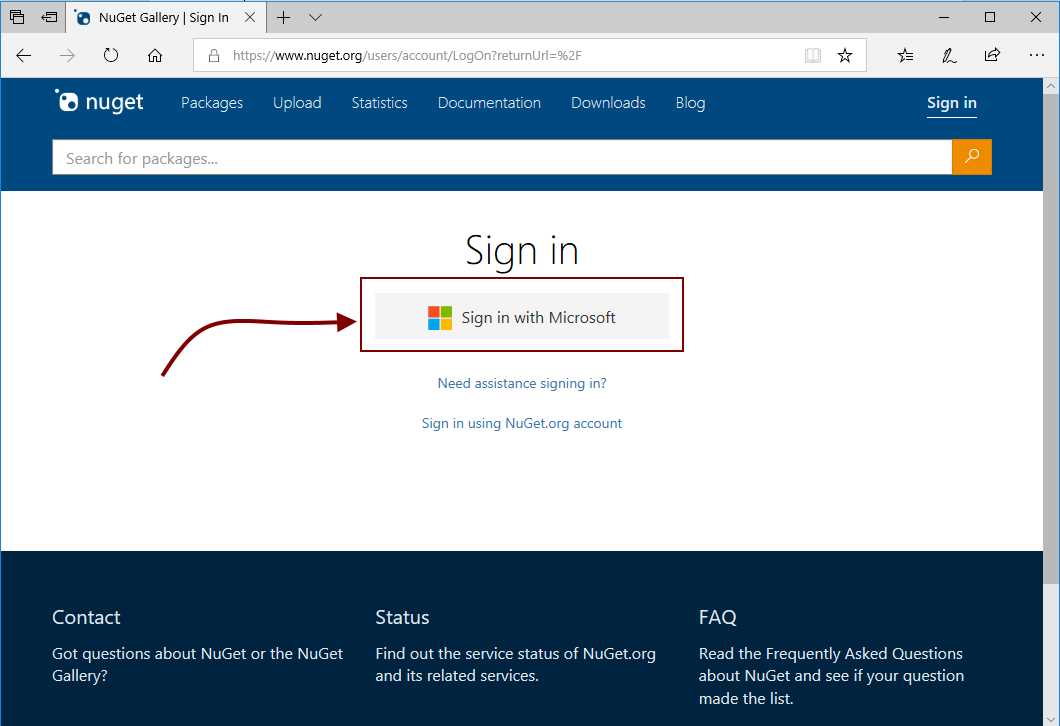
Figure 10: Signing in to NuGet Gallery, step 1
As suggested by the previous image, we should click Sign in with Microsoft to continue the sign-in process. Next, the web browser will show the form displayed in the following figure.
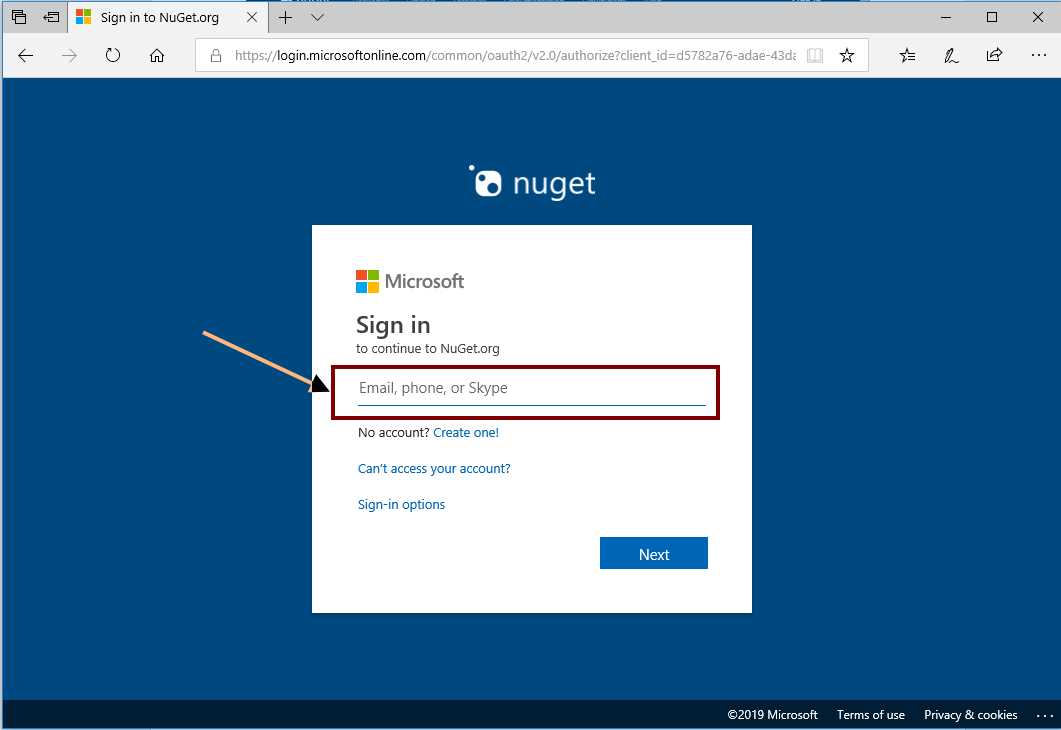
Figure 11: Signing in to NuGet Gallery, step 2
We should type the email address linked to our Microsoft account and click Next. A form appears in the web browser, asking for the password we assigned to our Microsoft account. Again, we should type the password and click Next. If everything is OK, the NuGet Gallery home page appears with our username located at the top-right corner.
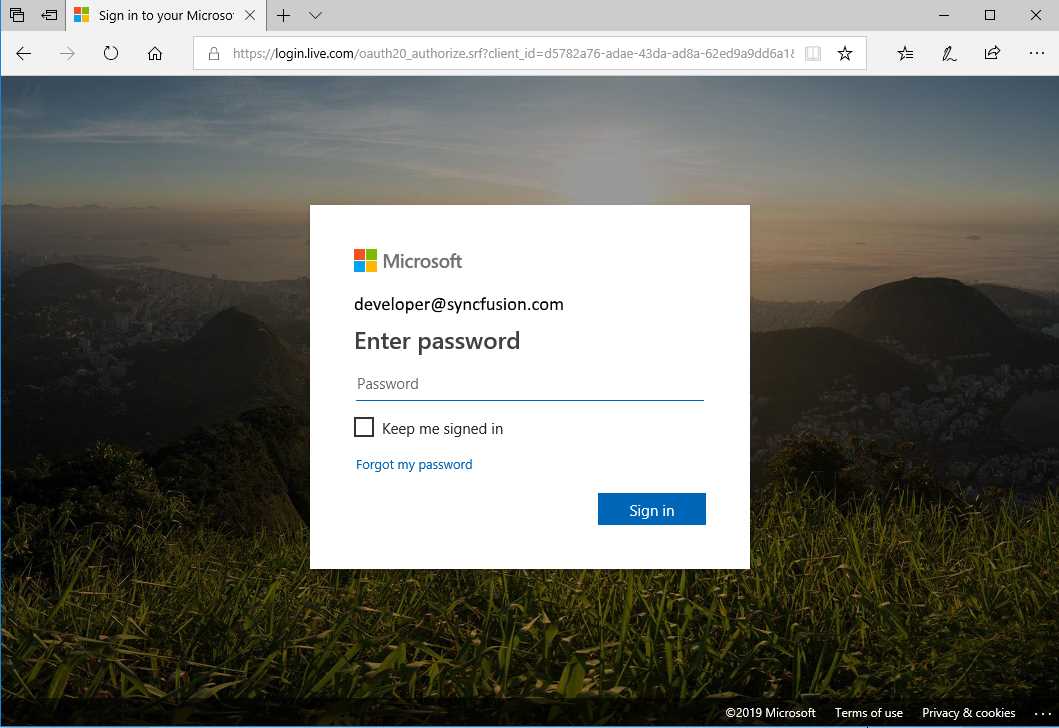
Figure 12: Signing in to NuGet Gallery, step 3
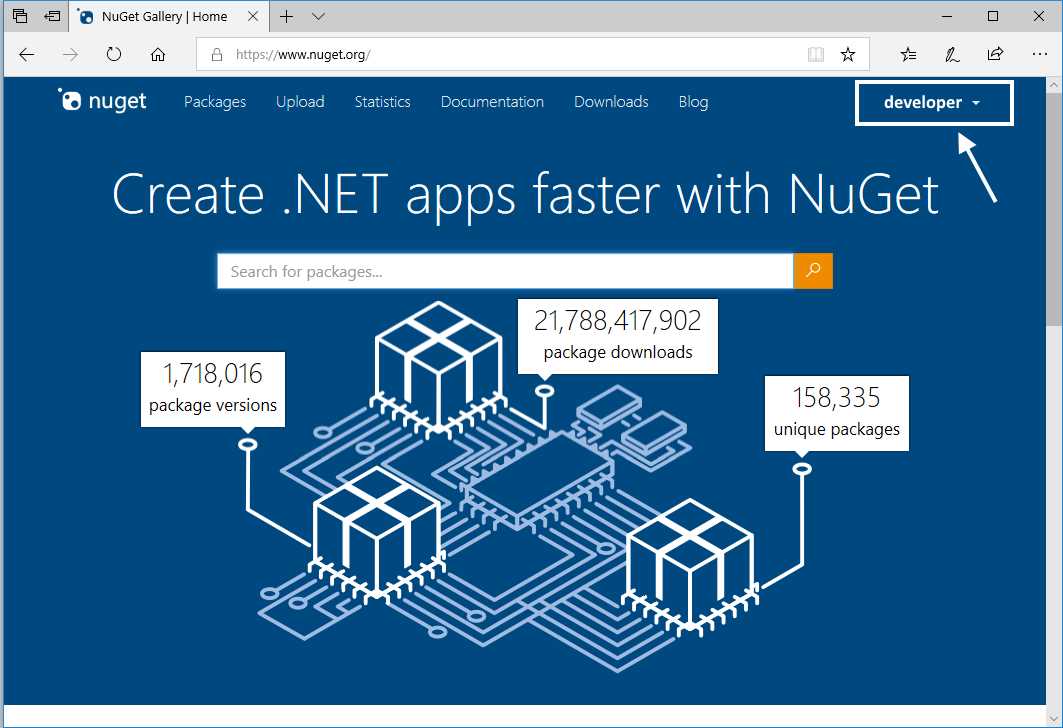
Figure 13: NuGet Gallery home page after signing in
Uploading a package to the NuGet Gallery
If we have a code package to share, we can upload this code to the NuGet Gallery by clicking the Upload hyperlink displayed in the following figure.

Figure 14: Upload hyperlink in NuGet Gallery home page
The Upload form will appear and prompt us for the file name of the package we want to upload.

Figure 15: Upload form in NuGet Gallery
Click Browse, and the Open dialog box will appear on the screen. For the purposes of this book, I placed a file named myfirstpackage.nupkg in the Downloads special folder. I should select this file and click Open.
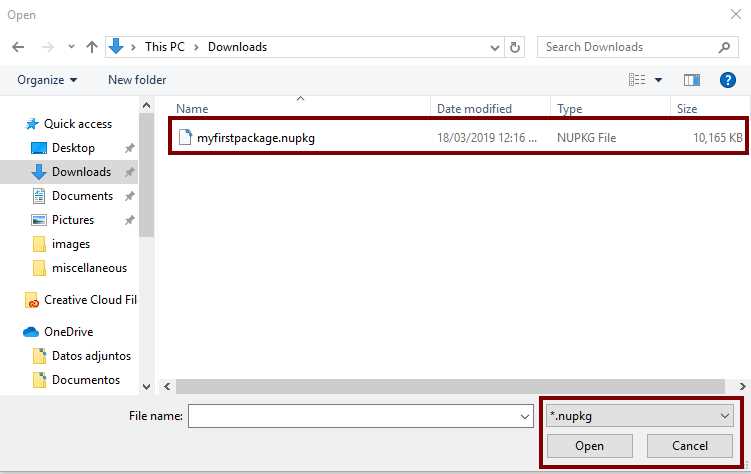
Figure 16: The Open dialog box when selecting a package to upload
The NuGet Gallery starts to process the file. The file I used for this example is a dummy package, so NuGet Gallery will not upload the package, and will display the message shown in the following figure.
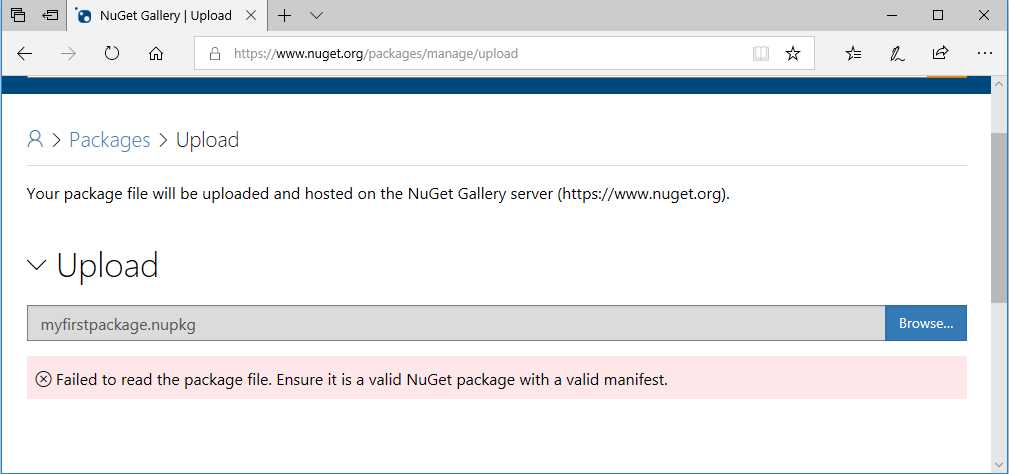
Figure 17: NuGet package upload failed
Note: The dummy NuGet package is not included in the examples available for downloading; you can try to upload a real package to the NuGet Gallery for practice purposes.
Chapter summary
NuGet is an open-source package manager developed by the Microsoft .NET Foundation, and designed for the Microsoft development platform. The first release of NuGet, called NuPack, appeared in 2010. NuGet is free and licensed under the Apache License 2.0, and comes preinstalled with Visual Studio 2012 and later.
NuGet is primarily a tool for sharing .NET code in the form of packages. The roles involved in code-sharing using NuGet are creators, hosts, and consumers.
A NuGet package consists of .NET code compiled as one or several assemblies, delivered in a single compressed file with a .nupkg extension, and the NuGet Gallery is the public repository for sharing NuGet packages. To access the NuGet Gallery all we need to do is navigate to https://www.nuget.org.
The NuGet Gallery displays three metrics: the number of downloads made by all .NET developers, the number of packages the gallery hosts, and the total number of package versions hosted.
We can browse the NuGet Gallery without an account. However, if we want to upload a package manually, we need to create an account to sign in to the gallery.
The NuGet Gallery has deprecated nuget.org accounts and supports only Microsoft accounts at this time. Therefore, we need to create a Microsoft account if we do not already have one. We also need a valid email address before creating the account. Once we create the account, we click the Sign in hyperlink in the NuGet Gallery home page to access the gallery.
If we have a code package to share, we can upload this code to the NuGet Gallery using the Upload hyperlink in the NuGet Gallery home page. Then, an upload form will appear asking for the file name of the package we want to upload. We should click Browse to bring up the Open dialog box, and then select the file to upload. For the purposes of this book, I placed a file named myfirstpackage.nupkg in the Downloads special folder, selected this file from the Open dialog, and clicked Open. Because the file is a dummy package, the NuGet Gallery will show an error message instead of uploading the package.
- 1800+ high-performance UI components.
- Includes popular controls such as Grid, Chart, Scheduler, and more.
- 24x5 unlimited support by developers.