
NuGet In-House Succinctly®

CHAPTER 3
Creating the Project for a Distributable Package
Defining the project
For the purposes of this book, we will create a .NET Framework class library that will contain a set of extension methods. We will name this project myextensionmethods and save it in the Documents\Visual Studio 2017\Projects folder. We will use this library in a Windows Forms application detailed in Chapter 5.
Creating the project
First, open Visual Studio and click File > New > Project in the menu bar. Now, select the Visual C# node in the template categories tree of the New Project dialog box, and select the Class Library (.NET Framework) template. After that, type myextensionmethods in the Name text box and click OK.
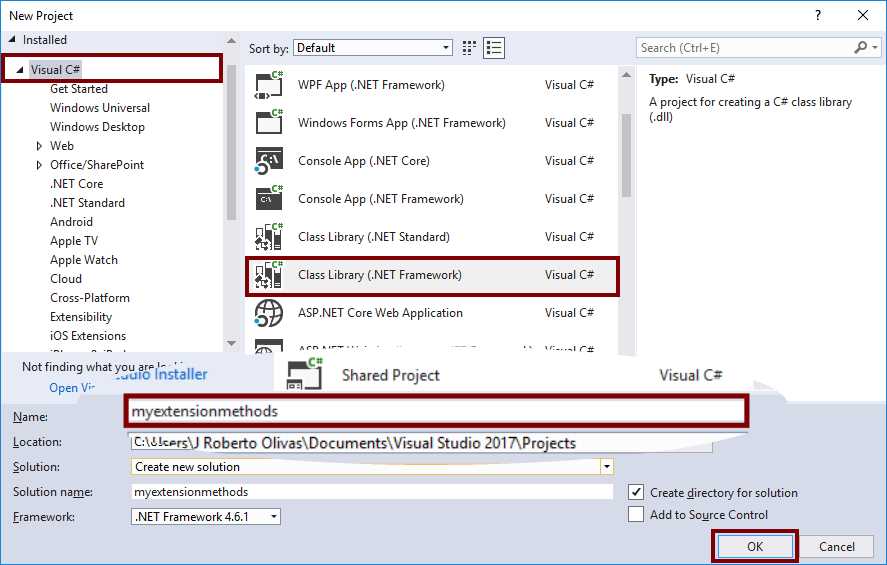
Figure 44: Creating the myextensionmethods project
Visual Studio will create the project, and the Solution Explorer should now look like the following figure.
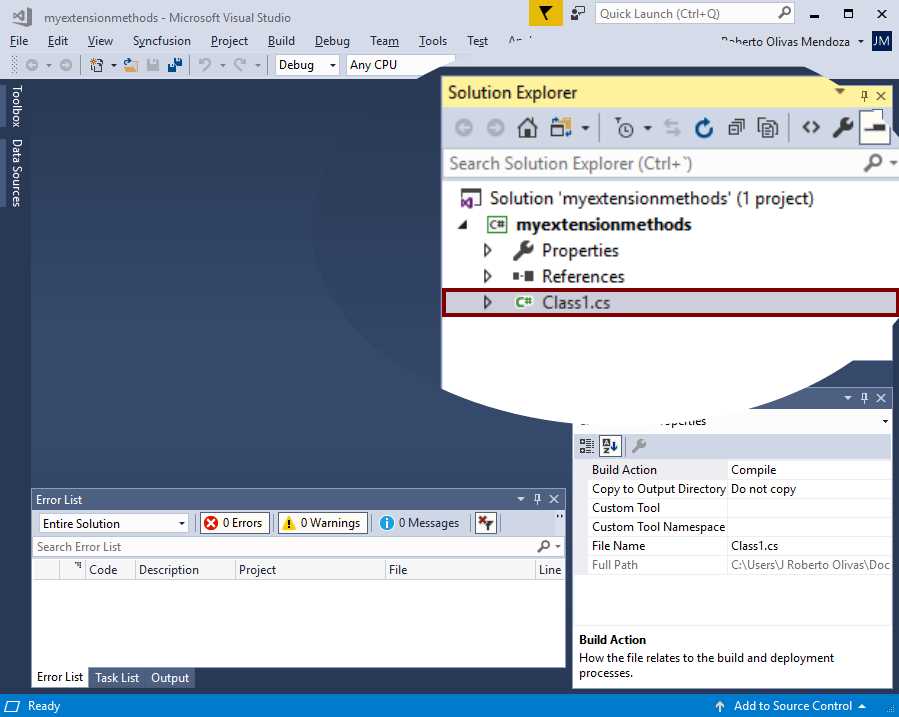
Figure 45: Visual Studio after creating the project
We can see in the previous image that Visual Studio automatically added a file named Class1.cs to the project. For the purposes of this book, we should rename this file to MyExtensionMethods.cs. To do this, right-click the name of the file and click Rename. When Visual Studio highlights the file name, type MyExtensionMethods and press Enter.
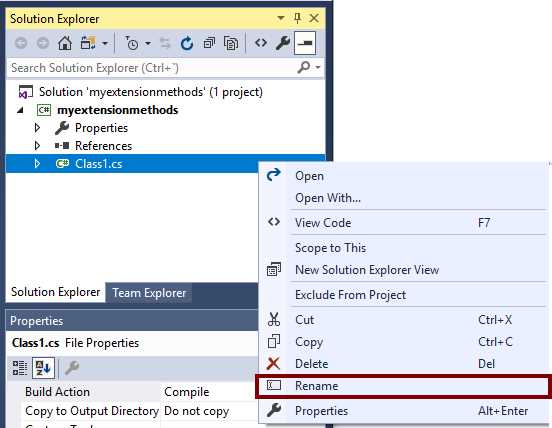
Figure 46: Renaming the Class1.cs file
Now, Visual Studio asks to rename the dependencies of Class1.cs using the dialog box displayed in the following image.

Figure 47: Visual Studio asking for renaming dependencies
Click Yes. Visual Studio renames the file and all its references in the project. The Solution Explorer will look like the following figure.
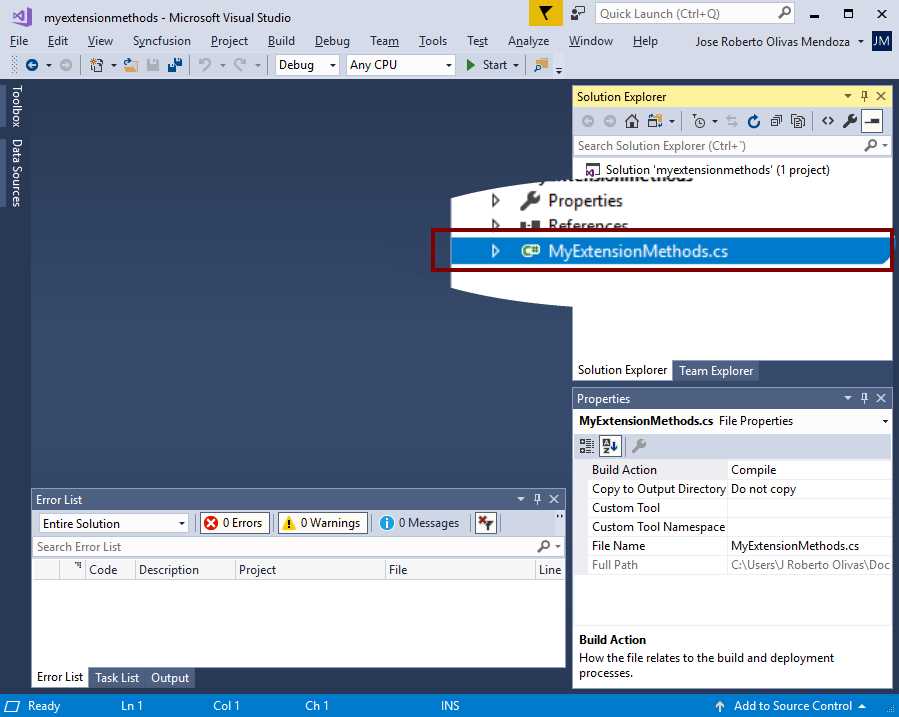
Figure 48: Our project after renaming the Class1.cs file
Writing code and building the assembly
Now, we will write the code for the extension methods to expose in the class library. At the end, the code should look like the following example.
Code Listing 1: MyExtensionMethods class code
using System; using System.Collections.Generic; using System.Drawing; using System.Drawing.Drawing2D; using System.Linq; using System.Windows.Forms; namespace myextensionmethods { public static class MyExtensionMethods { /// <summary> /// Message posted when the user clicks the left mouse button while /// the cursor is within the nonclient area of a window. The window /// that has the cursor receives the message. /// </summary> private const int WM_NCLBUTTONDOWN = 0x00A1; /// <summary> /// Indicates that the screen coordinates belong to the /// title bar. /// </summary> private const int HTCAPTION = 2; /// <summary> /// Creates a WM_NCLBUTTONDOWN message for the specified form. This /// method provides a mechanism to drag the form from anywhere, including the /// title bar, if there is one. /// </summary> /// <param name="targetForm">The form instance that will receive the message</param> /// <returns></returns> public static Message CreateWmNclButtonDown(this Form targetForm) => Message.Create(targetForm.Handle, WM_NCLBUTTONDOWN, new IntPtr(HTCAPTION), IntPtr.Zero); /// <summary> /// Draw the hands for an analog clock face in a client area (usually a form's client area). /// </summary> /// <param name="graphicsInstance">Graphics object associated with the client area.</param> /// <param name="clientSize">Width and height of the client area.</param> /// <param name="handsColor">Color used to draw the hour and minute hands.</param> /// <param name="secondHandColor">Color used to draw the second hand.</param> public static void DrawClockHands(this Graphics graphicsInstance, Size clientSize,Color handsColor, Color secondHandColor) { using (var handsPen = new Pen(handsColor, 4)) { // Get the hour and the minute including any fraction elapsed. DateTime currentDateTime = DateTime.Now; var currentHour = currentDateTime.Hour + currentDateTime.Minute / 60f + currentDateTime.Second / 3600f; var currentMinute = currentDateTime.Minute + currentDateTime.Second / 60f; // Gets the center point for the clock face. var clockFaceCenter = new PointF(0, 0); //Set the scale factor for drawing the hour hand. var hourHandXFactor = 0.2f * clientSize.Width; var hourHandYFactor = 0.2f * clientSize.Height; //Gets the angle for the current hour. var hourHandAngle = -Math.PI / 2 + 2 * Math.PI * currentHour / 12.0; //Gets the hour hand endpoint. var hourHandEndPoint = new PointF((float)(hourHandXFactor * Math.Cos(hourHandAngle)),(float)(hourHandYFactor * Math.Sin(hourHandAngle))); //Assigns the hands color to the drawing pen. handsPen.Color = handsColor; //Draws the hour hand. graphicsInstance.DrawLine(handsPen, hourHandEndPoint, clockFaceCenter); //Set the scale factor for the minute hand. float minuteHandXFactor = 0.3f * clientSize.Width; float minuteHandYFactor = 0.3f * clientSize.Height; //Gets the angle for the current minute. double minuteHandAngle = -Math.PI / 2 + 2 * Math.PI * currentMinute / 60.0; //Gets the endpoint for the minute hand. var minuteHandEndPoint = new PointF((float)(minuteHandXFactor * Math.Cos(minuteHandAngle)), (float)(minuteHandYFactor * Math.Sin(minuteHandAngle))); //Sets the pen width to 2 pixels for the minute hand. handsPen.Width = 2; //Draws the minute hand. graphicsInstance.DrawLine(handsPen, minuteHandEndPoint, clockFaceCenter); //Sets the scale factor for the second hand. var secondHandXFactor = 0.4f * clientSize.Width; var secondHadYFactor = 0.4f * clientSize.Height; //Gets the angle for the current second. var second_angle = -Math.PI / 2 + 2 * Math.PI * currentDateTime.Second / 60.0; //Gets the endpoint for the second hand var secondEndPoint = new PointF((float)(secondHandXFactor * Math.Cos(second_angle)),(float)(secondHadYFactor * Math.Sin(second_angle))); //Sets the color for the second hand handsPen.Color = secondHandColor; handsPen.Width = 1; //Draws the second hand. graphicsInstance.DrawLine(Pens.Red, secondEndPoint, clockFaceCenter); } } /// <summary> /// Draws an analog clock face in a client area (usually a form's client area). /// </summary> /// <param name="graphicsInstance">Graphics object associated with the client area.</param> /// <param name="clientSize">Width and height of the client area.</param> /// <param name="penColor">Color used to draw the analog clock face.</param> /// <param name="penWidth">Width of the pen used to draw the analog clock face.</param> public static void DrawClockFace(this Graphics graphicsInstance, Size clientSize, Color penColor, int penWidth) { using (var clockPen = new Pen(penColor, penWidth)) { //Draws the clock face’s outline. graphicsInstance.DrawCircle(clientSize, penColor, penWidth); //Draws the tick marks around the clock's face outline. //Defines a round cap for beginning and ending of every line. clockPen.StartCap = LineCap.Round; clockPen.EndCap = LineCap.Round; //Defines the scale factors used to draw //the tick marks around the clock's face. //Scale factors for the mark's outer point (x,y). var outXFactor = 0.45f * clientSize.Width; var outYFactor = 0.45f * clientSize.Height; //Scale factors for the mark's inner point (x,y). var innXFactor = 0.425f * clientSize.Width; var innYFactor = 0.425f * clientSize.Height; //Scale factors for the hour mark's inner point (x,y). var hourXFactor = 0.4f * clientSize.Width; var hourYFactor = 0.4f * clientSize.Height; //Loop for iterating the hour's minutes. for (int minute = 1; minute <= 60; minute++) { //Calculates the angle for every minute. var minuteAngle = Math.PI * minute / 30.0; var cosineAngle = (float)Math.Cos(minuteAngle); var sineAngle = (float)Math.Sin(minuteAngle); //Calculates inner and outer points //for the current tick mark. var innerPoint = (minute % 5 == 0) ? new PointF(hourXFactor * cosineAngle,hourYFactor * sineAngle) : new PointF(innXFactor * cosineAngle, innYFactor * sineAngle); var outerPoint = new PointF(outXFactor * cosineAngle,outYFactor * sineAngle); graphicsInstance.DrawLine((minute % 5 == 0) ? clockPen : Pens.Black,innerPoint,outerPoint); } } } /// <summary> /// Draws a circle within a client area (usually a form's client area). /// </summary> /// <param name="graphicsInstance">Graphics object associated with the client area.</param> /// <param name="clientSize">Width and height of the client area.</param> /// <param name="penColor">Color used to draw the circle.</param> /// <param name="penWidth">Width of the pen used to draw the circle.</param> public static void DrawCircle(this Graphics graphicsInstance,Size clientSize,Color penColor, int penWidth) { using (var circlePen = new Pen(penColor, penWidth)) { graphicsInstance.DrawEllipse(circlePen, -clientSize.Width / 2, -clientSize.Height / 2, clientSize.Width, clientSize.Height); } } /// <summary> /// Builds a context menu based on the elements of a Dictionary. /// </summary> /// <param name="contextMenu">Instance of the context menu to build.</param> /// <param name="menuItems">Dictionary with all menu items. The key is used in the Tag property to identify the item.</param> /// <param name="clickEventHandler">Handler for the Click event of every item.</param> public static void BuildContextMenu(this ContextMenuStrip contextMenu, Dictionary<string,string> menuItems, EventHandler clickEventHandler) { menuItems.ToList().ForEach(item => { var menuItem = new ToolStripMenuItem { Text = item.Value, Tag = item.Key }; menuItem.Click += clickEventHandler; contextMenu.Items.Add(menuItem); }); } } } |
Next, we need to add references to the System.Drawing and System.Windows.Forms assemblies. Click Build > Build Solution in the Visual Studio menu bar to create the assembly.
Setting up a development environment for building the NuGet package
In this section, we will review all tools we need to set up our development environment in order to build and publish a NuGet package.
The NuGet Command Line Interface
The NuGet Command Line Interface (CLI) nuget.exe is an application that provides the full power of NuGet functionality to install, create, publish, and manage packages without making changes to our project files.
Installing nuget.exe on our computer
We can install nuget.exe by performing the following steps.
Create a folder named nugettools in Documents\Visual Studio 2017. Visit this website and select the latest version of nuget.exe. At the time of writing this book, I am using version 5.0.2.
Next, we will instruct our browser to save the file in the folder created in the previous step. Add the Documents\Visual Studio 2017\nugettools folder to the PATH system environment variable to make nuget.exe available from anywhere.
Note: The nuget.exe file downloaded is the CLI application, not an installer.
The following figure shows the NuGet Command Line Interface application in the folder after it is downloaded.
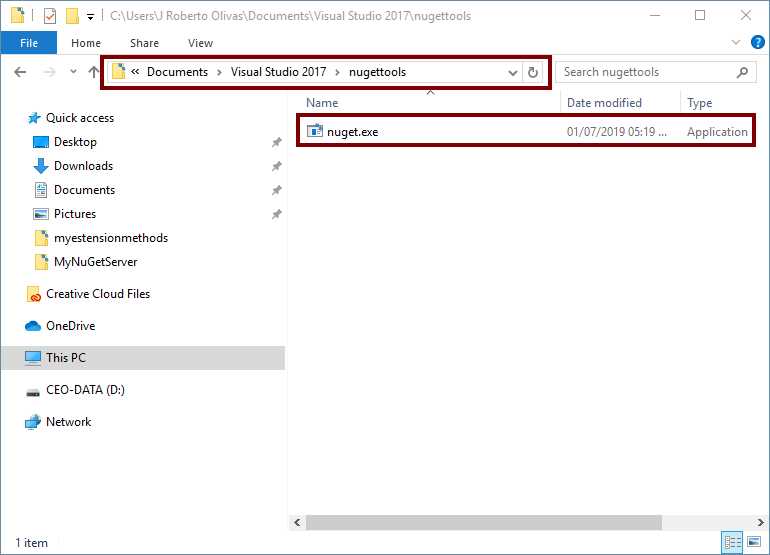
Figure 49: nuget.exe application after it is downloaded
Nuget.exe available commands
The following table summarizes the available nuget.exe commands.
Table 1: Nuget.exe commands summary
Command | Role | NuGet Version | Description |
|---|---|---|---|
pack | Creation | 2.7+ | Creates a NuGet package from a .nuspec or project file. |
push | Publishing | All | Publishes a package to a package source. |
config | All | All | Gets or sets NuGet configuration values. |
help or ? | All | All | Displays help information or help for a command. |
locals | Consumption | 3.3+ | Lists locations of the global-packages, http-cache, and temp folders and clears the contents of those folders. |
restore | Consumption | 2.7+ | Restores all packages referenced by the package management format in use. |
setapikey | Publishing, Consumption | All | Saves an API key for a given package source when that package source requires a key for access. |
spec | Creation | All | Generates a .nuspec file, using tokens if generating the file from a Visual Studio project. |
add | Publishing | 3.3+ | Adds a package to a non-HTTP package source using hierarchical layout. (For HTTP sources, use push.) |
delete | Publishing | All | Removes or un-lists a package from a package source. |
init | Creation | 3.3+ | Adds packages from a folder to a package source using hierarchical layout. |
install | Consumption | All | Installs a package into the current project, but does not modify projects or reference files. |
list | Consumption, perhaps Publishing | All | Displays packages from a given source. |
mirror | Publishing | Deprecated in 3.2+ | Mirrors a package and its dependencies from a source to a target repository. |
sources | Consumption, Publishing | All | Manages package sources in configuration files. |
update | Consumption | All | Updates a project's packages to the latest available versions. |
Note: A complete explanation of each of the commands displayed in Table 1 is outside the scope of this book.
The NuGet Package Manager
The NuGet Package Manager is a tool for simply installing, uninstalling, and updating NuGet packages in projects and solutions. Visual Studio 2017 includes this tool with two options: the Package Manager Console, and a graphical user interface. We can execute both options from the Tools > NuGet Package Manager submenu located in the Visual Studio menu bar. We will explain the use of the Package Manager Console later in this book.
Note: The NuGet Package Manager graphical user interface was explained in the “Adding the NuGet.Server package to the project” section of Chapter 2.
The NuGet Package Explorer
The NuGet Package Explorer is an application that allows for easily creating and exploring NuGet packages. We can load .nupkg files from disk or directly from a host, such as http://nuget.org.
Installing NuGet Package Explorer
We can install NuGet Package Explorer from the Microsoft Store. First, launch the Microsoft Store application in Windows 10, and then type NuGet Package Explorer in the Search text box and press Enter. Once the search results appear in the dialog box, click the NuGet Package icon displayed in the following figure.
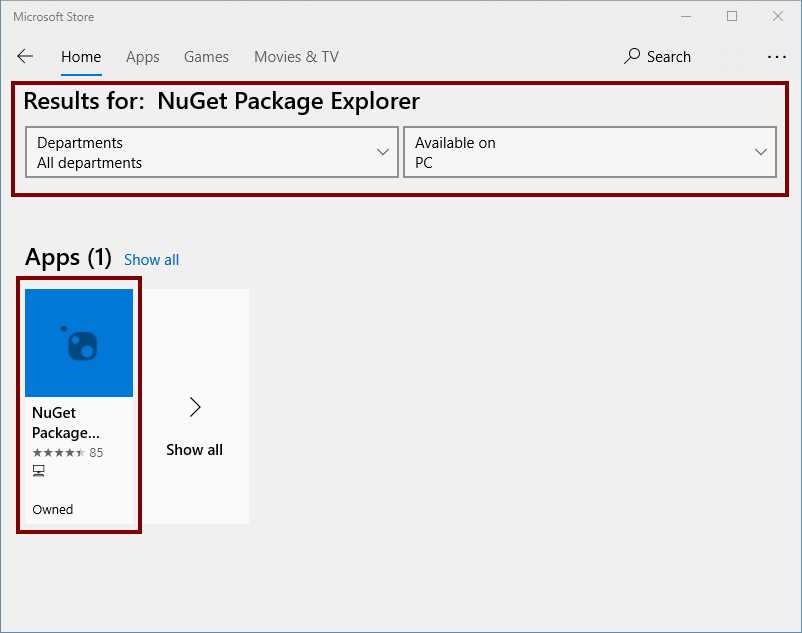
Figure 50: Displaying search results
The application info will appear on the screen. Click the Install button located at the top of the application info area. The Microsoft Store application will download the NuGet Package Explorer and install it to our local computer. The following image shows the application info in the Microsoft Store application.
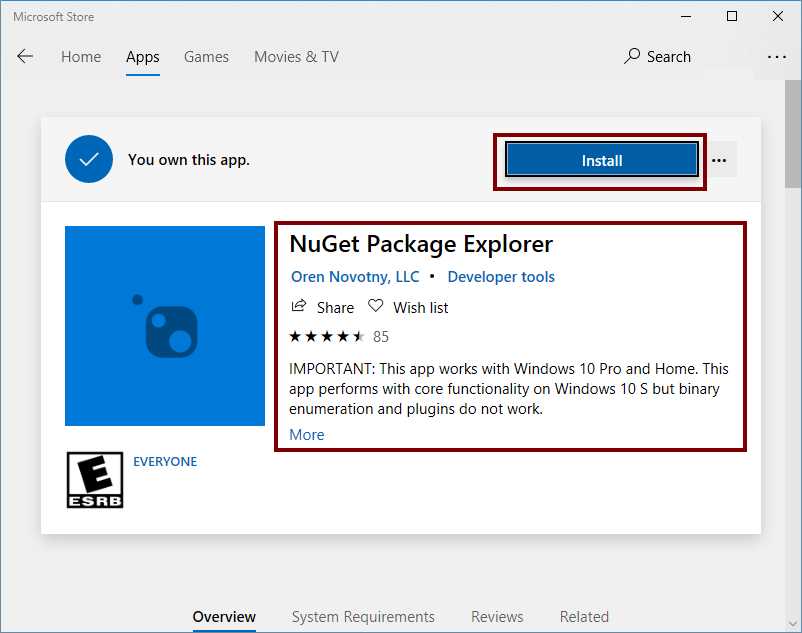
Figure 51: NuGet Package Explorer application info
When installation ends, the Microsoft Store application will replace the Install button with the Launch button, as displayed in the following figure.
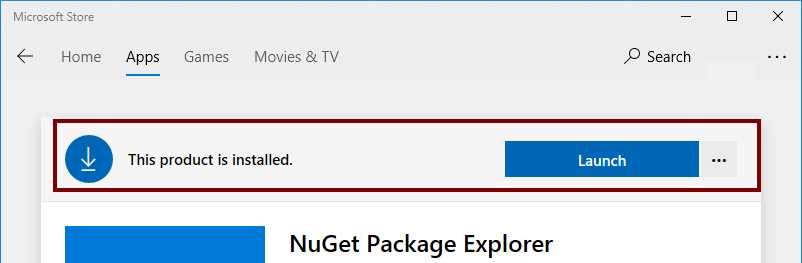
Figure 52: Microsoft Store application after installation process
Click Launch to make sure that the NuGet Package Explorer installation was successful. If everything is fine, we should see the dialog box displayed in the following image.
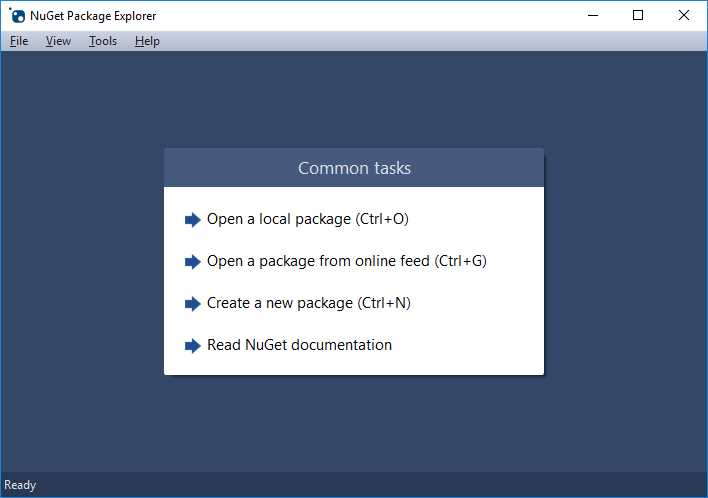
Figure 53: NuGet Package Explorer main window
Note: I will explain the use of the NuGet Package Explorer in the next chapter of this book.
Chapter summary
In this chapter, we defined a project to publish as a NuGet package. We created a .NET Framework class library with a set of extension methods named myextensionmethods, and we saved it in the Documents\Visual Studio 2017\Projects folder. We will use the compiled class library in a Windows Forms application, which will be explained in Chapter 5.
After creating and building the class library project, we reviewed all the necessary tools for creating, managing, and publishing NuGet packages, such as the NuGet Command Line Interface (CLI). The NuGet CLI is an application that provides the functionality to work with NuGet Packages without making changes to our project files. In addition, we reviewed the NuGet Package Manager, which is a tool included in Visual Studio 2017 that can install, uninstall, and update NuGet packages in projects and solutions. Finally, we reviewed the NuGet Package Explorer, which is an application for easily creating and exploring NuGet packages.
- 1800+ high-performance UI components.
- Includes popular controls such as Grid, Chart, Scheduler, and more.
- 24x5 unlimited support by developers.