
Node.js Succinctly®

CHAPTER 2
Basic Node.js Programming
This chapter will describe some basic Node.js programming. Node.js uses the JavaScript language to write code. If you have experienced programming in JavaScript, you will find it easier to write Node.js code.
Defining Variables
Node.js has a rule to define variables. Basically, we can declare a variable in Node.js to the following:
variable_type variable_name; |
variable_type is a JavaScript data type. It may be a numeric or string type. variable_name is your variable name. The following table illustrates an example of declaring a Node.js variable:
String firstName; String lastName; Number age; |
We can assign values to our variables:
firstName = "Alexander"; lastName = "King" age = 10; |
We also can assign values directly when declaring variables:
String firstName = "Alexander"; String lastName = "King"; Number age = 10; |
You can see that we must define data types such as String and Number before defining our variable. In Node.js or JavaScript, we can declare a variable without defining a specific data type. We can use var for the data type. If we assign a string value then our variable will become a string data type.
var city = "Berlin"; var id = 5; |
In general, we can declare a variable name with any name, but you must avoid usage of JavaScript keywords. Here is the list of keywords to avoid:
|
|
|
Comment
You may explain how to work on your code as a note or comment. In Node.js, we can write a note or a comment using // and /* */ syntax. The following is a sample code:
// bank account var account; /* parameters*/ var p1, p2, p3, p4; |
Arithmetic Operations
Node.js supports four basic arithmetic operations: addition, subtraction, multiplication, and division.
- Basic arithmetic operations in Node.js
Node.js Code | Note |
+ | Addition |
- | Subtraction |
* | Multiplication |
/ | Division |
The following is the code illustration for basic arithmetic using Node.js.
var a, b; a = 10; b = 5.4; // Addition var c = a + b; console.log(c); // Subtraction var c = a - b; console.log(c); // Multiplication var c = a * b; console.log(c); // Division var c = a / b; console.log(c); |
Save this code into a file, for instance basicarith.js. If you run this code, you will get the program output shown in Figure 11.

Figure 11: The program output for arithmetic operations
Mathematical Functions
Node.js provides a math library based on the JavaScript library. Here is the list of mathematical functions:
- Math.abs(a), the absolute value of a
- Math.acos(a), arc cosine of a
- Math.asin(a), arc sine of a
- Math.atan(a), arc tangent of a
- Math.atan2(a,b), arc tangent of a/b
- Math.ceil(a), integer closest to a and not less than a
- Math.cos(a), cosine of a
- Math.exp(a), exponent of a (Math.E to the power a)
- Math.floor(a), integer closest to a, not greater than a
- Math.log(a), log of a base e
- Math.max(a,b), the maximum of a and b
- Math.min(a,b), the minimum of a and b
- Math.pow(a,b), a to the power b
- Math.random(), pseudorandom number 0 to 1 (see examples)
- Math.round(a), integer closest to a (see rounding examples)
- Math.sin(a), sine of a
- Math.sqrt(a), square root of a
- Math.tan(a), tangent of a
To get an understanding of the math library usage, write this script:
var a, b; a = 2; b = 3.5; console.log(Math.sin(a)); console.log(Math.cos(b)); console.log(Math.max(a, b)); console.log(Math.sqrt(a * b)); |
Save this script into a file and run it in the console using Node.js.
You can see the output of our script in Figure 12.
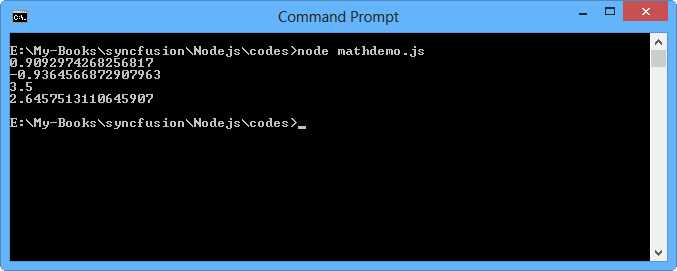
Figure 12: The program output for basic math operations
Comparison Operators
You may determine equality or difference among variables or values. For instance, you have two values 10 and 20. Thus, you want to compare these values. Node.js adopts C language for comparison operator syntax. The following is the list of comparison operators.
- Comparison operators in Node.js
Node.js Comparison | Note |
== | Equal to |
!= | Not equal |
> | Greater than |
< | Less than |
>= | Greater than or equal to |
<= | Less than or equal to |
Let’s write script for comparison usage for Node.js.
var a, b; a = 5; b = 8; console.log(a > b); console.log(a < b); console.log(a >= b); console.log(a <= b); console.log(a != b); console.log(a == b); |
You can see the program output in Figure 13.

Figure 13: The program output for comparison operator usage
Logical Operators
Node.js supports logical operation. These logical operators can be used to determine the logic between variables or value. You can see in Table 3 how Node.js implements logical operators.
- Logical operators in Node.js
Logical Operators | Note |
&& | And |
|| | Or |
! | Not |
Here is the script sample that illustrates logical operation:
var a, b; a = 5; b = 8; console.log(a > b && a != b); console.log(!(a >= b)); console.log(a == b || a > b); |
Run it using Node.js and you will see the program output shown in Figure 14.

Figure 14: The program output for logical operation in Node.js
Increment and Decrement
Imagine you have a value and you want this value to be incremented by 1. In general, you may implement the following script:
var a = 5; a = a + 1; |
We can do another solution with ++ syntax. We can rewrite our script to the following:
var a = 5; a++; |
We also can apply decrement in our value by using – syntax:
var b = 8; b++; |
Decision
A computer can execute instructions that are clear and precise. The computer will always do exactly what you say. That’s both good and bad news. The problem is that the computer follows instructions even if they are absurd; it has no judgment with which to question anything.
Our code can decide that computer will do or not. It's a decision. We can implement a decision in our program behavior like "if A is true, then do B". In Node.js, we have two options to implement decision program:
- if..then
- switch..case
if… then
The following is syntax for decision in Node.js:
if(condition){ do_something_a; }else { do_something_b; } |
If condition is true, then it will execute do_something_a.
Let’s write a script to implement a decision program in Node.js.
var a, b; a = 5; b = 8; if (a > b || a - b < a) { console.log('conditional-->a>b || a-b<a'); } else { console.log('..another'); } |
Run it using Node.js. Figure 15 is a sample output.

Figure 15: Sample output for decision program by using if..then
Change a and b values, then run it again.
For alternative if-conditional usage, we can use the following form:
var a = 8, b = 3; console.log(a > b ? false : true); console.log(a==b ? 'a==b' : 'a is not equal to b'); |
switch… case
We can use switch…case syntax to implement decision behavior in our program. The following is a syntax model for switch..case.
switch (option) { case option1: // do option1 job break; case option2: // do option2 job break; } |
option value can be a string or numeric data type.
For sample illustration, write this script:
var color = 'green'; switch (color) { case 'black': console.log('black'); break; case 'green': console.log('green'); break; case 'white': console.log('white'); break; } |
Run it and you will get an output response, shown in Figure 16.

Figure 16: Program output for switch case
You may change the option value in numeric data type. If you change it, you must change the options in case syntax.
Iterations
One of the most powerful concepts in any programming language is that of iterations. It’s one of the things that enable a program to do far more than perform a simple calculation and quit. In this section, you’ll see how a few lines of Node.js can set up an operation to be performed—potentially—thousands of times.
Node.js uses for and while for iteration operation. We will evaluate these syntaxes.
For
The for statement provides this mechanism, letting you specify the initializer, condition, and increment/decrement in one compact line. The following is node.js syntax of the iteration for.
for (initialize; condition; increment / decrement) { // do something } |
Let’s start to write this script.
for (var counter = 0; counter < 10; counter++) { console.log(counter); } |
We can see our initial value is 0. This will run until the condition value is not met. Each iteration will do value addition. Figure 17 is an example of the output from running program.

Figure 17: Program output for for-iteration operation
While
Node.js has the simple form of while syntax. The following is a form you can use.
while (condition) { // do something } |
while evaluates the condition and executes the statement if that condition is true. Then it repeats that operation until the condition evaluates as false.
Now let’s use node.js code to implement the while syntax described.
var num = 0; while (num < 10) { console.log(num); num++; } |
The program prints the output, shown in Figure 18.

Figure 18: Program output for while usage
- 1800+ high-performance UI components.
- Includes popular controls such as Grid, Chart, Scheduler, and more.
- 24x5 unlimited support by developers.