
.NET Core Succinctly®

CHAPTER 5
Building .NET Core apps with Visual Studio
Even if using the command line may sound intriguing to you, it’s not the best way to write code—especially when we need to write complex applications. This is partially due to the fact that we don’t have a proper IDE to code against, but also, and I dare you to differ, we are stripped of all the awesome features that Visual Studio provides such as: IntelliSense, the Debugger, the Immediate Windows, and so on.
Luckily for us, there is a way to solve this. If you have previously installed the new RC2 bits of the tools, then you may have noticed, during your daily fights inside the Visual Studio’s dungeons, that under the .NET Core node you have the new project templates.
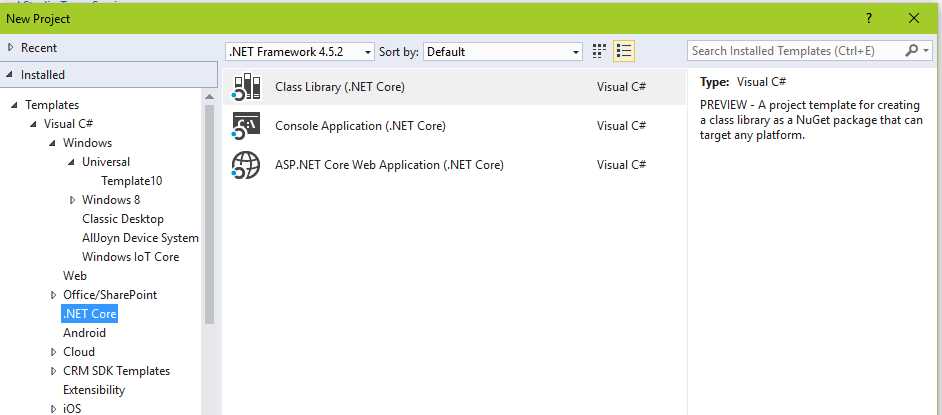
Figure 14: .NET Core Project Templates
They respectively allow you to create a console application that can run on the .NET Framework and .NET Core, and a Class library that can target any framework. Let’s create a new Console Application (.NET Core) and see where we can go from there.
The process of creating a new project does not change; we are using Visual Studio, after all. Once the project is created and Visual Studio has finished loading, here’s how our solution looks:
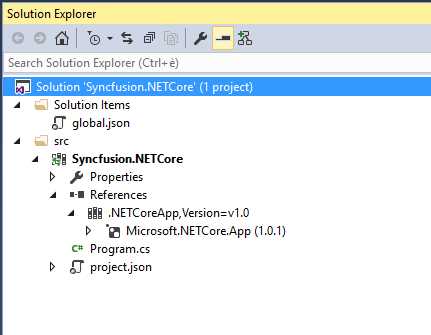
Figure 15: The structure of the Visual Studio solution
As we can see, the solution’s structure differs a little from what we are used to seeing. The first thing we notice is that we use the new special files global.json and project.json. The project.json file contains all the information that the CLI needs to run your project. The global.json file is used to configure all the projects within a directory. It includes just two default sections: the projects section and the SDK section. The projects property designates which folders contain source code for the solution. By default, the project structure places source files in a src folder.
The SDK.Version property specifies what version of the framework we are targeting.
{ "projects": [ "src" ], "sdk": { "version": "1.0.0-preview2-003131" } } |
If you wish to read more about the schema of the global json file, use the official schema store available here.
If we move onto project.json, we can see that its structure is a bit different. Here’s how my project.json looks:
{ "version": "1.0.0-*", "buildOptions": { "emitEntryPoint": true },
"dependencies": { "Microsoft.NETCore.App": { "type": "platform", "version": "1.0.1" } },
"frameworks": { "netcoreapp1.0": { "imports": "dnxcore50" } } } |
Mine is a pretty basic example, but even in this case there are a few things that need clarification. The first section is meant to configure some general metadata for our application. The compilationOption.emitEntryPoint specifies that this application will eventually have an entry point (a Main function), and that the execution should start from there.
You manage the dependencies of your application with the dependencies section of your project.json file. The dependencies are defined by name and version, where the runtime loaders determine what should be loaded. In our case we are depending only on the Microsoft.NETCore.App. Using the frameworks section, you can also add dependencies for a particular framework.
Adding a custom reference to our project
Now that we’ve made a general overview of a .NET Core Project (formerly a dnx project), let’s see how we can add a custom reference (Class Library) to our project. Of course, since we are still using Visual Studio, I assume that you know how to add a reference to your project. However, it’s the type of project that we need to include that deserves some attention. Go to File > New Project, and in the dialog box, choose the Class Library template under the .NET Core section.

Figure 16: The class library template to choose
Once the project loads, this should be the new structure of our solution.
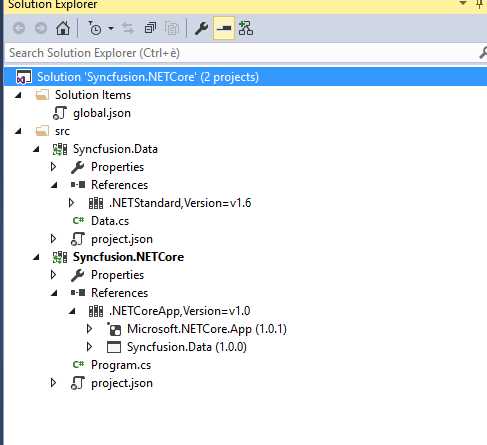
Figure 17: The solution explorer structure
I’ve already changed the reference inside the Portable Library project.json to match the one we use in our console app, and I added a project reference to our console application pointing to our new class library. The project.json file of our class library looks like the following.
{ "version": "1.0.0-*",
"dependencies": { "NETStandard.Library": "1.6.0" },
"frameworks": { "netstandard1.6": { "imports": "dnxcore50" } } } |
As you can see, it’s even simpler than the one used in the console application. Now you might be wondering if something has changed inside the project.json of our console app. The answer is yes. Here’s how the dependencies look like after we added this reference:
{ "dependencies": { "Microsoft.NETCore.App": { "type": "platform", "version": "1.0.1" }, "Syncfusion.Data": "1.0.0-*" } } |
A side note on semantic versioning
If you are following along with the samples, you may have noticed the unusual versioning schema that we’re using. This way of versioning components is called SemVer (short for Semantic Versioning). In general, SemVer works as follows:
Given a version number MAJOR.MINOR.PATCH, increment the:
- MAJOR version when you make incompatible API changes;
- MINOR version when you add functionality in a backwards-compatible manner, and
- PATCH version when you make backwards-compatible bug fixes.
Additional labels for pre-release and build metadata are available as extensions to the MAJOR.MINOR.PATCH format. You can learn more about semantic versioning here.
- 80+ high-performance ASP.NET Core controls, including DataGrid, Charts, and Scheduler.
- Lightweight and responsive.
- Modular and touch-friendly.
- Built-in themes.