
NancyFX Succinctly®

CHAPTER 7
View Engines
Nancy, just like many web toolkits, has a concept of using views to compose the output you see in your browser.
Defining a view
To some of you, the concept of a "view" may be a concept you've never encountered before; to others, you may only know it from using toolkits such as ASP.NET MVC (where the “V” in MVC stands for “View”).
Did you ever stop to consider however just what a view actually is?
According to the Oxford English Dictionary, it's defined as the ability to see something, or to be seen from a particular place, and this fits in well with its meaning when used in a web context such as Nancy, or indeed any frame work that produces views.
A view is something that’s seen in the browser, from the viewpoint of the end user. There is, however, a little more to it than that, because according to our definition, anything that can be viewed as output in a web browser could be classed as a view.
What stands our definition apart is the fact that our view is the result of a “composable” output. By this we mean that our output is not static (such as a pre-made HTML file, or even a PDF document); instead, it’s output that is produced using a mixture of static content and application-generated data.
By this definition, a traditional Windows web application page (web form) that uses a template page to create the final output could be considered a view, which many would disagree with.
For the purposes of understanding Nancy, a view is an output from the framework generated using a mixture of static and program-based data as inputs. For those coming from JavaScript, a view is the output from a templating library such as Handlebars or Mustache.
So why is it necessary to define a view rather than just mention that it's what Nancy produces? As you've seen so far, Nancy is exceptionally modular, and by now it should be no surprise that you can plug different view engines into the framework.
View engines
Put simply, a view engine is a library that produces your view based on the inputs given to it.
Going back to our definition of a view, stop for a moment and think about the main view generator in ASP.NET MVC, Razor.
Razor is the view engine that produces views for that framework; technically, Handlebars is a JavaScript view engine for creating views that use the Handlebars template format to produce output.
Because there are a number of different engines available, you can choose to use whichever suits you best. If Razor (from MVC) is your thing, you can easily use Razor in your Nancy-based project. Some of the others you can use are NHaml, DotLiquid, and Markdown.
You can reliably use all three of these and others; you just need to add them to your project using NuGet. Once they have been added, it's a simple task to start defining the template files that your chosen view engine requires.
The view engines available with Nancy are all conventions-based, and will match their usual file type extension to be mapped through themselves. This means defining your view consists of no more than creating simple text files and giving those files an appropriate extension.
The last thing to know is that Nancy will always look in a folder called Views that is relative to the executing code for any files you ask it to use as view templates.
However, this can be changed, and we will cover that in more depth later on when we look at the Nancy bootstrapper classes.
Creating your first view
If you haven't already, create yourself a simple Nancy application; you can make a copy of my code, use one of the templates mentioned previously, or do the entire process by hand. I've created an empty web application with no authentication, no MVC, and no Web Forms support, and with no initial creation of any files.
For our purposes, we will use the view engine that comes with Nancy out of the box, called SSVE, or "The Super Simple View Engine."
Once you have a skeleton application, add a simple class containing a Nancy route module to it, containing the following code:
Code Listing 14
using Nancy; namespace nancybook.modules { public class BaseRoutes : NancyModule { public BaseRoutes() { Get[@"/"] = _ => View["firstView/hellonancy"]; } } } |
This route will cause all requests to the / path in your application to request a view file called hellonancy.<ext> from a folder called firstview in the default views folder for your application.
Here I've put the file extension as <ext> to indicate that the file extension can vary.
In the case of SSVE, .sshtml, .html, and .htm are acceptable file extensions.
Putting together everything we've seen so far, create a folder called Views in your project, then inside that create a folder called FirstView. Inside that folder, create a regular HTML file called Hellonancy.html and put the following HTML code in it:
Code Listing 15
<!DOCTYPE html> <html> <head> <title>Hello Nancy FX</title> </head> <body> <h1>Hello Nancy FX</h1> </body> </html> |
If you look in your Solution Explorer, you should have something like the following:
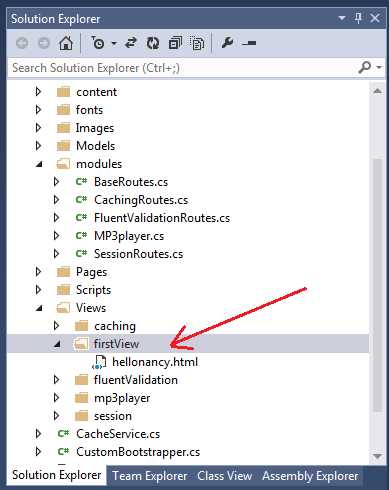
Figure 7: Solution Explorer showing the correct folders and file name for the view file
If you press F5 at this point and run your project, you should see an HTML page saying “Hello Nancy FX” in your default browser.
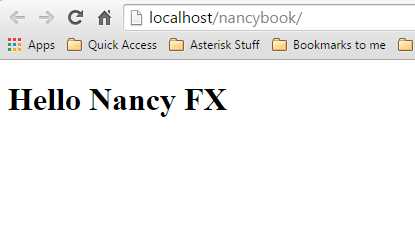
Figure 8: Our first view as seen in the browser
In case you're wondering what the localhost/nancybook URL is in Figure 8, that's just to do with the way I set up my development environment; for you, that will likely be different, maybe just showing localhost, localhost:12345, or something similar. As long as the page contents are the same, everything should be working ok.
A quick mention about static content
At this point, you might be wondering about including static files within your views, things such as images, JavaScript files, and other common web application files. Nancy makes this all very easy by creating a folder called Content, and placing your files in there, then using something along the lines of the following:
Response.AsFile("index.html", "text/html");
Everything that has no folder prefix will be looked for in a folder called Content, and then within any subfolders underneath that.
This convention can be changed in a custom bootstrapper file (which we'll see in a later chapter), and you can easily set up rules so that JavaScript files are in a scripts folder, styles are in a Styles folder, and so on.
For now, however, I am just going to assume that all static resources are within the Content folder. Feel free to organize this folder as you see fit; just remember to change the code samples as required.
Getting back to our discussion on views, you could, in theory, place your resources into separate view files, and just have your views return them. However, this would mean all your static resources would also go through the view engine being used, and that may add a very slight delay to the delivery of files that do not need to be processed.
Because you get the best of both worlds, however, it's not difficult to pass all JS, CSS, and other stuff through the view engine for combination, packing, size reduction, or any manner of other request-based processing. I'll leave you to experiment here.
Getting back to our view
As you've already seen, returning static content through your view engine is not difficult, but we shouldn't stop there. As I previously defined at the beginning of this chapter, using views is about much more than just returning a page; it's about combining known data with that page, and then having the page be presented as an amalgamation of the two inputs.
Let's add a new class to our project to act as a data model for our view. Use the Solution Explorer and add a new class called FirstModel.cs as follows:
Code Listing 16
using System; namespace nancybook { public class FirstModel { public string Name { get; set; } public DateTime TimeOfRequest { get; set; } } } |
Taking our previous example route, let's add a reference to the new object, and then return that as a data object for our page:
Code Listing 17
using System; using Nancy; namespace nancybook.modules { public class BaseRoutes : NancyModule { public BaseRoutes() { FirstModel demoModel = new FirstModel { Name = "Shawty", TimeOfRequest = DateTime.Now }; Get[@"/"] = _ => View["firstView/hellonancy", demoModel]; } } } |
When run, will do exactly the same thing as before, as we've not yet changed our view to act on the data, but you now have the data in demoModel passed to your view, and just as with other frameworks, you can now use whatever processing rules your chosen view engine uses to display that data.
Change the HTML code in your hellonancy.html to read as follows:
Code Listing 18
<!DOCTYPE html> <html> <head> <title>Hello Nancy FX</title> </head> <body> <h1>Hello @Model.Name</h1> <h2>The time is @Model.TimeOfRequest</h2> </body> </html> |
Make sure you rebuild your project, then re-run it, either by pressing F5 or refreshing your browser. You should see the following in your browser:
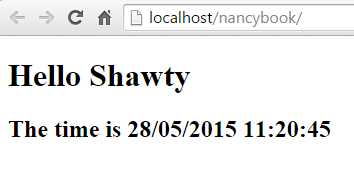
Figure 9: Our browser output showing a view containing our data
SSVE is a very simple engine, but perfectly fine for most use cases—because it is simple; the processing instructions available are not as varied as other engines.
However, this does not stop it from being useful.
For example, you can loop over a collection of items by using the @Each operator. When using @Each you refer to the currently iterated Model using @Current, and then close the loop using @EndEach, as the following view shows:
Code Listing 19
<!DOCTYPE html> <html> <head> <title>Hello Nancy FX</title> </head> <body> <!-- If we passed our data in as List<FirstModel> we could do the following --> @Each.Model <h1>Hello @Current.Name</h1> @EndEach </body> </html> |
As you might expect, this will display the list of names passed in, in your data object.
You can also perform very basic decision-making in your views by using the @If processing instruction. If comes in two versions: @If and @IfNot, which will branch if a condition matches or if it doesn't match, depending on which one you use. There is a “gotcha” here though: the If condition must be a Boolean (true or false), meaning you cannot perform checks such as if count < 10 or if name == 'joe'. If you plan your objects properly, however, this does not really present a problem.
There’s a third way of invoking If, using Has, which allows you to base your conditionals on a property collection existing in your data object. To demonstrate this, alter your FirstModel.cs class so it looks as follows:
Code Listing 20
using System; using System.Collections.Generic; namespace nancybook { public class FirstModel { public List<string> Names { get; set; } public DateTime TimeOfRequest { get; set; } public bool IsError { get; set; } public string ErrorMessage { get; set; } } } |
Now change your route module so it has the following code:
Code Listing 21
using System; using Nancy; namespace nancybook.modules { public class BaseRoutes : NancyModule { public BaseRoutes() { var demoModel = new FirstModel { Names = new List<string> { "Shawty", "Frank", "Alice", "Bob", "Julie", "Samantha"}, TimeOfRequest = DateTime.Now, IsError = false, ErrorMessage = "This is an Error message...." }; Get[@"/"] = _ => View["firstView/hellonancy", demoModel]; } } } |
Rebuild your project, then make the following changes to the HTML code for your view:
Code Listing 22
<!DOCTYPE html> <html> <head> <title>Hello Nancy FX</title> </head> <body> @If.Model.HasNames <h1>Names</h1> @Each.Model.Names <h2>@Current</h2> @EndEach @EndIf @If.IsError <h2 style="color: Red;">Oh Noes: @Model.ErrorMessage</h2> @EndIf @IfNot.IsError <h2 style="color: Green;">Phew, no errors...</h2> @EndIf </body> </html> |
When you run this, you should get a list of names, and a message in green stating "No Errors".
Now try changing the IsError property to true, and setting the Names property to null. When you rebuild and re-run your project, you should now find you get no list (but importantly no error) and a message in red containing the text you placed in the ErrorMessage property. If you set the names collection to an empty list rather than null, you should also find that everything works just the same.
While we’re on the subject of handling empty collections, what actually happens if you ask SSVE to display a property in the model that doesn't exist?
You might expect that an exception would be thrown, and you'd get a yellow screen of death (like in other frameworks), but you won't. Instead, you'll get something like this:
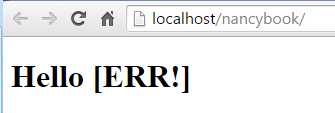
Figure 10: This is what Nancy does when you ask it to display something that doesn't exist
Where you would expect to see the contents of your model property, you'll instead see "[ERR!]". In my mind at least (others will disagree), this is a much better way, because it allows me to still see my layout while developing, without having to constantly make sure I at least have dummy variables in my objects, and it allows QA testing to see missing values immediately.
For a simple view engine, there are a few more things SSVE can do.
By placing an exclamation point (!) after the at symbol (@), you can automatically encode the output in HTML:
Code Listing 23
var demoModel = new FirstModel { //... ErrorMessage = "<strong>This is an Error message....</strong>" }; |
This will give the following output:
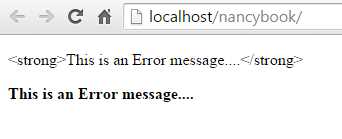
Figure 11: Output using SSVE @! syntax
When used with this HTML:
Code Listing 24
<p>@!Model.ErrorMessage</p> <p>@Model.ErrorMessage</p> |
SSVE can also do basic partials and master pages with sections by using the @Partial, @Master, and @Section processing instructions.
Add a new HTML file to your firstview folder called master.html, and then add the following HTML to it:
Code Listing 25
<!DOCTYPE html> <html> <head> <title>Hello Nancy FX</title> </head> <body> <h1>This header is in the master page</h1> <hr /> @Section['Body'] </body> </html> |
Create a second HTML file in the same folder; we'll call this partial.html and add the following to it:
Code Listing 26
<div style="width: 200px; height: 200px; border: 1px solid black;"> <h1>Oh Hai....</h1> <p>I'm your new partial content.</p> </div> |
Now change your hellonancy.html file so that it looks as follows:
Code Listing 27
@Master['firstview/master.html'] @Section['Body'] <h2>I'm some content that's defined in hellonancy.html</h2> <p>and I've brought along a friend to the party:</p> @Partial['firstview/Partial.html'] @EndSection |
If you now re-run or refresh your project in the browser, you should see the following:
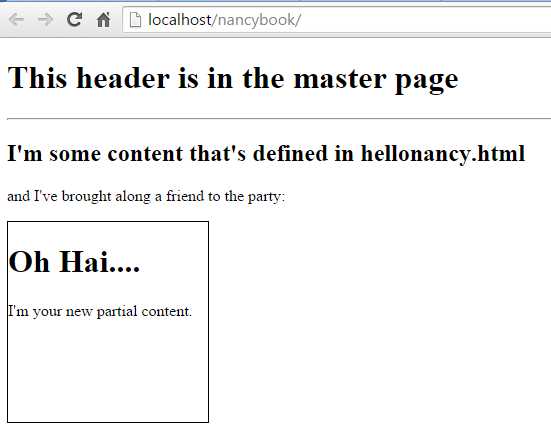
Figure 12: Output produced from the master page/partial example
The final two processing instructions in SSVE's toolbox are the anti-forgery token and the path expansion operator.
Simply put, adding the @AntiForgeryToken instruction will generate a hidden input at that location in your output. That is then verified when the page is posted back to a controller. Note, however, that CSRF protection is not enabled by default; you need to enable it in a custom bootstrapper (which you will learn in a later chapter) in order for it to be checked.
Tip: CSRF is a common form of attack used by hackers to gain access to a website. Most toolkits and frameworks (Nancy included) have some form of protection against this type of attack. If you’d like to find out more, do a web search for "Cross Site Request Forgery" or the "OWASP Top 10." The path operator expands any paths you have in your HTML code so that they correctly reference the correct path in your application.
For example, if you specify:
@Path['~/mypath/myfile.ext']
and your site is rooted at:
http://myserver/mysite/
The view will be rendered in the browser with:
http://myserver/mysite/mypath/myfile.ext
However, as of version 1.2 of SSVE, any path found that is preceded with a ~ is automatically expanded, so @Path is now only really needed in a handful of cases, and should be mostly considered deprecated.
Summary
In this chapter, you learned how to combine your data and HTML to produce data-driven output in your applications using the built-in view engine, SSVE. You learned that SSVE, while quite simplistic, includes more than enough under the hood for basic tasks related to producing views.
You learned about other view engines such as Razor and NHaml, as well as learning how to define and use the concept of a view when compared to static content.
In the next chapter, we'll look at bringing data back into your Nancy routes from your HTML pages using model binding and validation, giving you a full two-way, data-driven web application.
- 1800+ high-performance UI components.
- Includes popular controls such as Grid, Chart, Scheduler, and more.
- 24x5 unlimited support by developers.