
MSIX Succinctly®

CHAPTER 2
Packaging Your Applications with the MSIX Packaging Tool
In Chapter 1, we learned all the basic concepts of the MSIX format, what the advantages are, and which things to keep in mind. We are ready to start packaging our first Windows application. In this chapter, we’re going to explore this opportunity with a tool called MSIX Packaging Tool, which can convert an existing application even without owning the source code.
Packaging an installer: the MSIX Packaging Tool
Microsoft has released a new tool, with a special focus on IT pros who need to repackage their existing applications using the new format. The main feature of this tool is that it doesn’t require the source code of the application. You can start from an installer, from a self-executable application, or from an App-V package.
It’s called MSIX Packaging Tool, and it’s available on the Microsoft Store. The only requirement is to use, at minimum, Windows 10 version 1809. It’s also available on the Microsoft Store for Business, which will also give you the chance to download it for offline distribution.
How does the tool work? The key is the monitoring process, which is handled by a special driver that comes preinstalled with Windows 10. You must provide the tool with the installer of the application you want to repackage, which will be launched during the process. The tool will monitor all the changes performed by the installer to the operating system, like the deployment of files and the creation of registry keys. All these changes will be saved and then included inside the final MSIX package generated by the tool. The tool is smart enough to automatically handle all the special cases. For example, if the installer copies one or more files inside one of the system folders, the tool will automatically copy them in the proper subfolder of the VFS location.
Let’s see a step-by-step conversion, so that we can better understand how the tool works. Since the tool doesn’t require the source code of the application, we can use any installer that respects the requirements we have previously listed. For this sample conversion, we’re going to use a very popular open-source application: Notepad++, the text editor. You can download the installer from the official website.
Once you have started the MSIX Packaging Tool from the Start menu, you will have to choose between creating an application package or a modification package. We’re going to talk about modification packages in Chapter 3, so let’s focus on an application package for the moment, which is the option to package a regular Windows application.
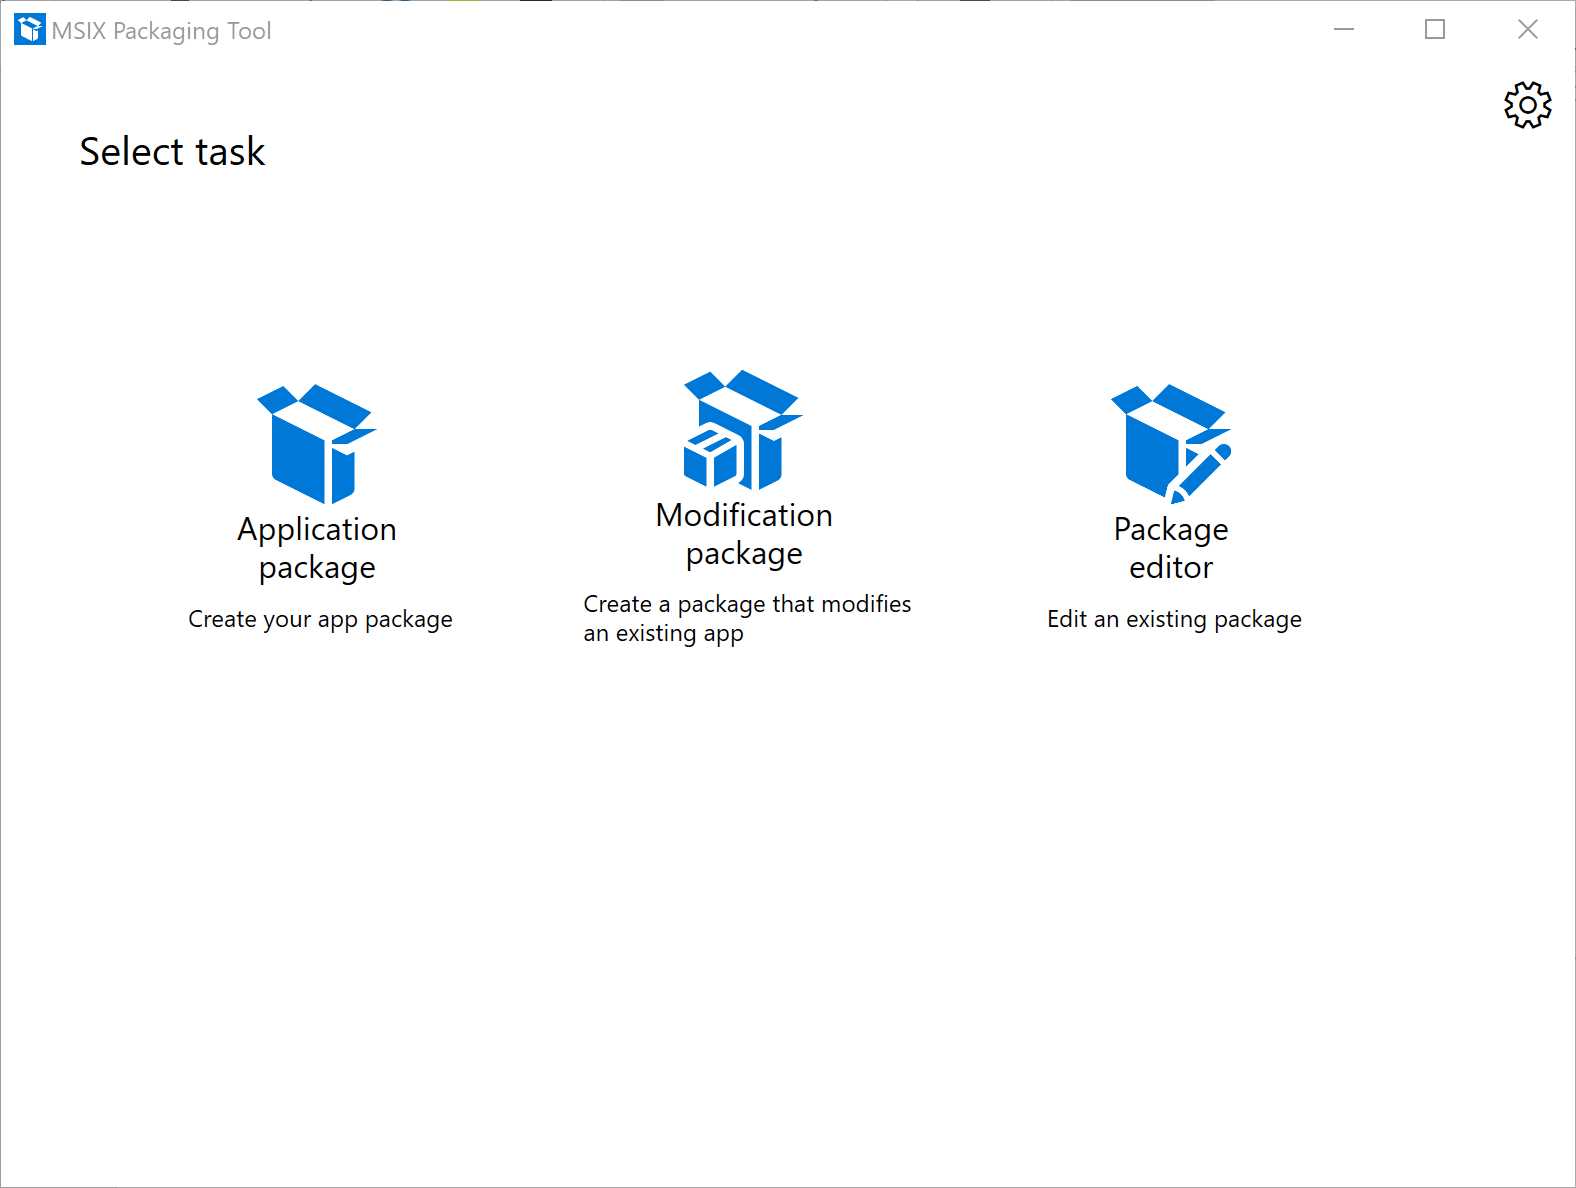
Figure 6: The main screen of the MSIX Packaging Tool
Let’s see the process step by step.
Select installer
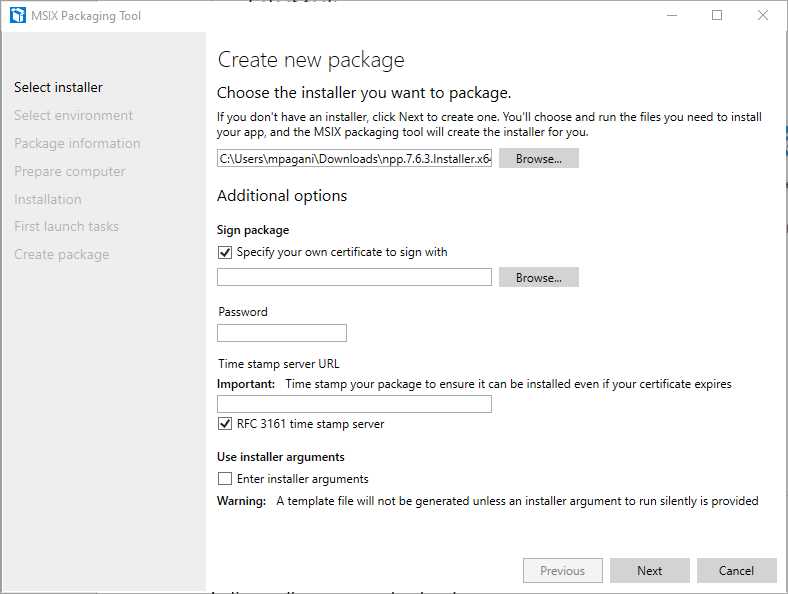
Figure 7: The screen of the “Select installer” step
The first step is to choose the installer of the application you want to package from your hard drive. If you don’t have an installer (for example, because you want to package a self-executable application), you can skip this step. The tool supports any kind of installer, including App-V packages.
The next option is dedicated to the certificate to use for signing the package. As already mentioned in Chapter 1, this is a strict security requirement. To deploy an MSIX package on a machine, it must be signed with a valid certificate trusted by the machine. The only exception is if your goal is to deploy the application on the Microsoft Store. In this case, applications are automatically signed with a trusted certificate issued by Microsoft during the certification phase, removing the requirement of signing the package by yourself. In all the other scenarios, you must provide a valid certificate file from your hard disk and, optionally, its password. You can also specify a time stamp server URL, allowing the package to be installed even if the certificate expires. If you don’t have a certificate, you can generate a self-signing one for testing. It isn’t the best choice for enterprise or public distribution, but it’s perfectly fine for testing purposes. You’re going to learn more about certificates in Chapter 7.
The last option can be used to define additional installer arguments that will be passed when the setup is launched. Arguments can be used to customize the installation process, such as triggering a silent installation.
Once you have defined all the options, click Next to proceed to the next step.
Select environment
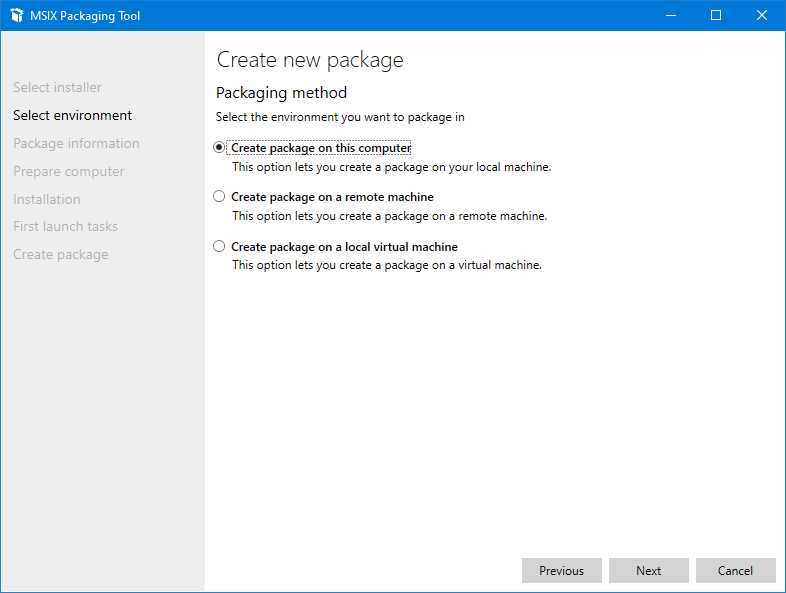
Figure 8: The screen of the “Select environment” step
In this step, you can choose if you want to repackage the application on your local machine, in an existing virtual machine, or on a remote machine. If you choose the second option, you will be able to specify the address and the credentials to log in to the computer. If you instead choose the third option, a drop-down menu will allow you to select one of the existing virtual machines configured in your local Hyper-V setup.
Note: Hyper-V is the Microsoft virtualization platform that, starting from Windows 8, has also been brought to the Pro and Enterprise editions of Windows. In the past, it was available only on the Server editions. You can enable it by searching in the Start menu for the “Turn Windows features on or off” section in the Control Panel and looking for Hyper-V in the list.
The suggested approach is to create a dedicated virtual machine with a clean Windows 10 installation, without any application or service installed other than the default ones. The main reason is that the monitoring process will capture all the operations happening on your machine while the installer is running. In a normal Windows computer, there may be lot of background activities: Windows services, minimized applications, updates, and so on. All these tasks can lead the package to contain many false positives, like files and registry keys that haven’t been generated by the installer itself. A clean Windows 10 virtual machine can help you to reduce this eventuality.
Another reason is that, when the MSIX Packaging Tool installs the application, it’s effectively performing the installation on the machine. Reverting the operating system to the state before the installation is a much easier task on a virtual machine, thanks to checkpoints. You can create a checkpoint before starting the packaging process, and then restore it once the process is ended to return your Windows 10 installation to a clean state.
Package information
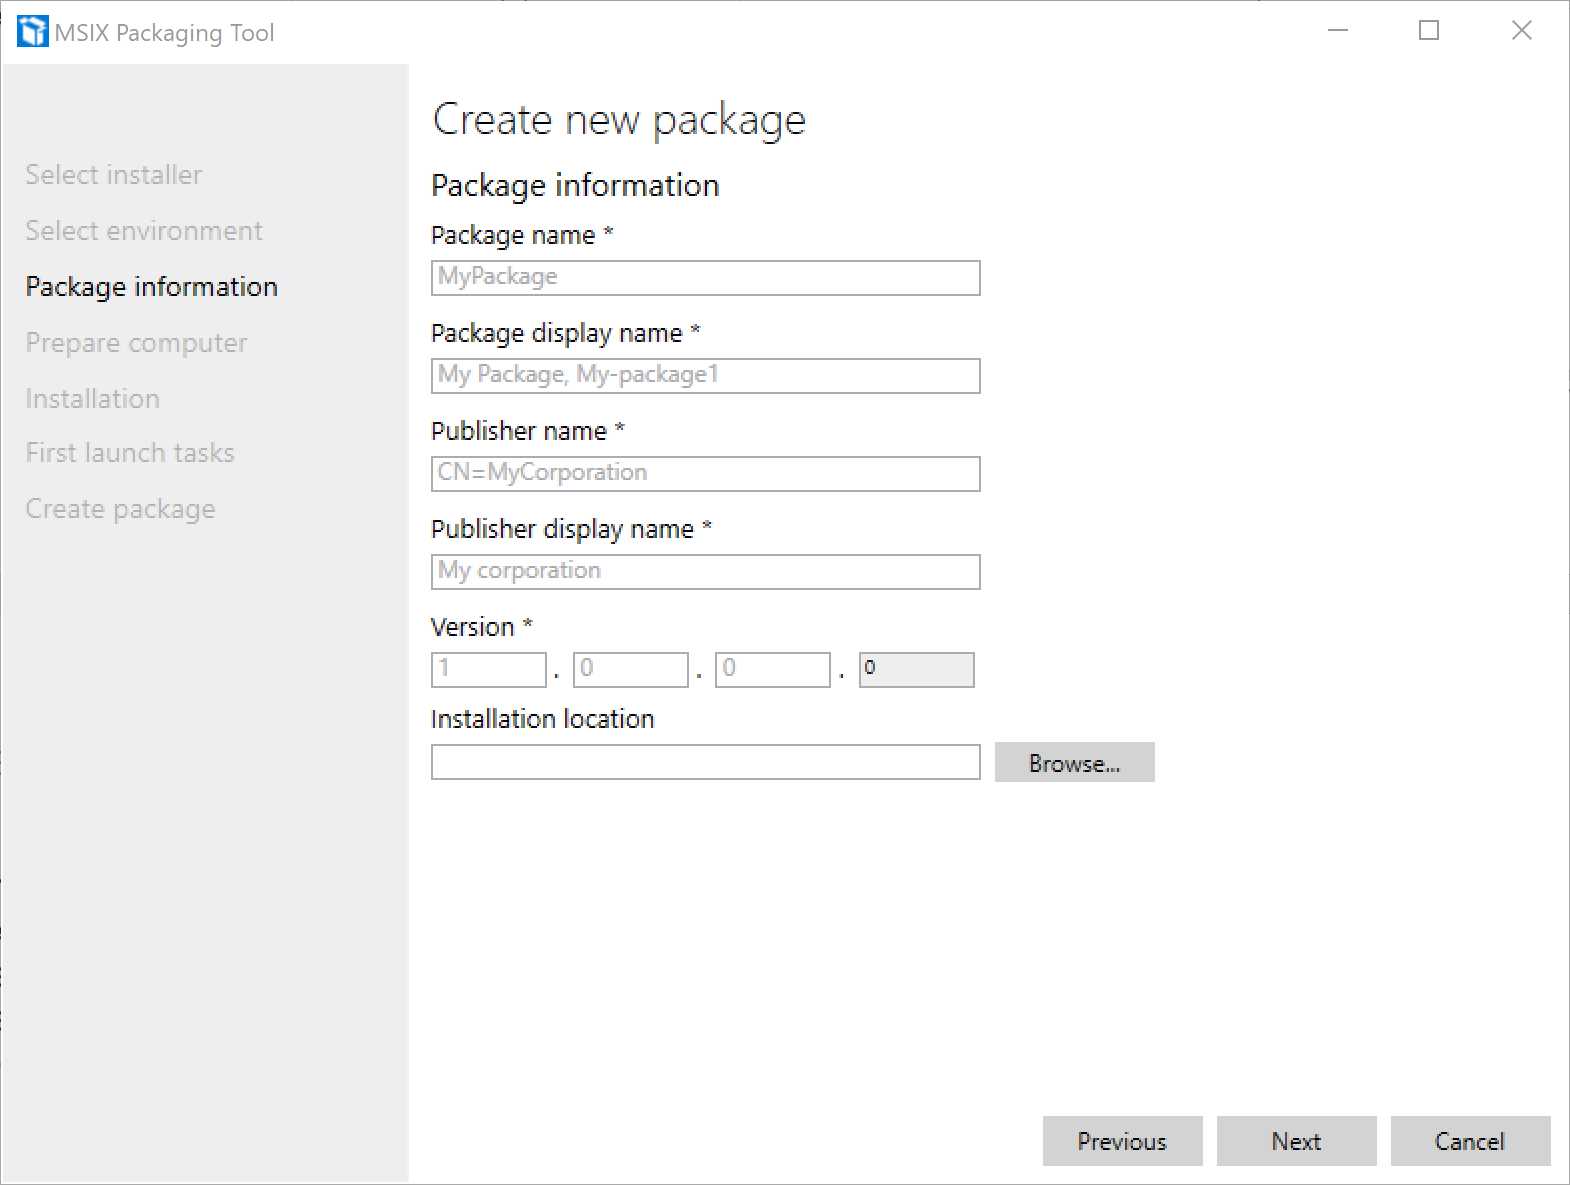
Figure 9: The screen of the “Package information” step
In this step, you can configure the identity of the application. All this information will be included in the manifest file of the package. By default, the tool will try to extract the information from the definition of the original installer. If it fails (like in the previous image), it will be up to you to manually fill all the fields. Let’s see them in detail:
- Package name: The identifier of the application. If you’re packaging an application for enterprise distribution, it’s a free value. If you’re planning to release the application on the Microsoft Store, it must match the identifier that the store has assigned to your application when you reserved the name for publishing.
- Package display name: The name of the application that will be displayed to the user in the Start screen. It’s a free value if the package is meant for enterprise distribution; if it will be published on the Store, it must match the name you have reserved.
- Publisher name: This value will already be filled and read-only if you specified in the first step a certificate to use for signing the package. The requirement is that the subject of the certificate must match the publisher name. If you’re planning to publish the application on the Store, this field must match the value assigned to your developer account when you registered it.
- Publisher display name: The name of the publisher, which will be visible to the user. The rules are the same for the package display name. If it’s an enterprise application, it’s a free value; if it’s an application for the Store, it must match the publisher’s name you chose when you opened your developer account.
- Version: The version number of the application. There isn’t any rule here, except that the last digit must always be zero and, as such, it won’t be editable. If you’re creating an update, remember that this value must be higher than the version of the previous package you generated.
The last field, called Installation location, is dedicated to applications that don’t have an installer or that require some manual extra steps after the installation process. All the files you’re going to copy or modify inside this folder will be captured as part of the installation phase and included in the final package. This field is particularly important if you did not specify any installer in the first step. You can package a self-executable application by simply copying into this folder all the files that comprise it.
Click Next to move on to the next step.
Prepare computer
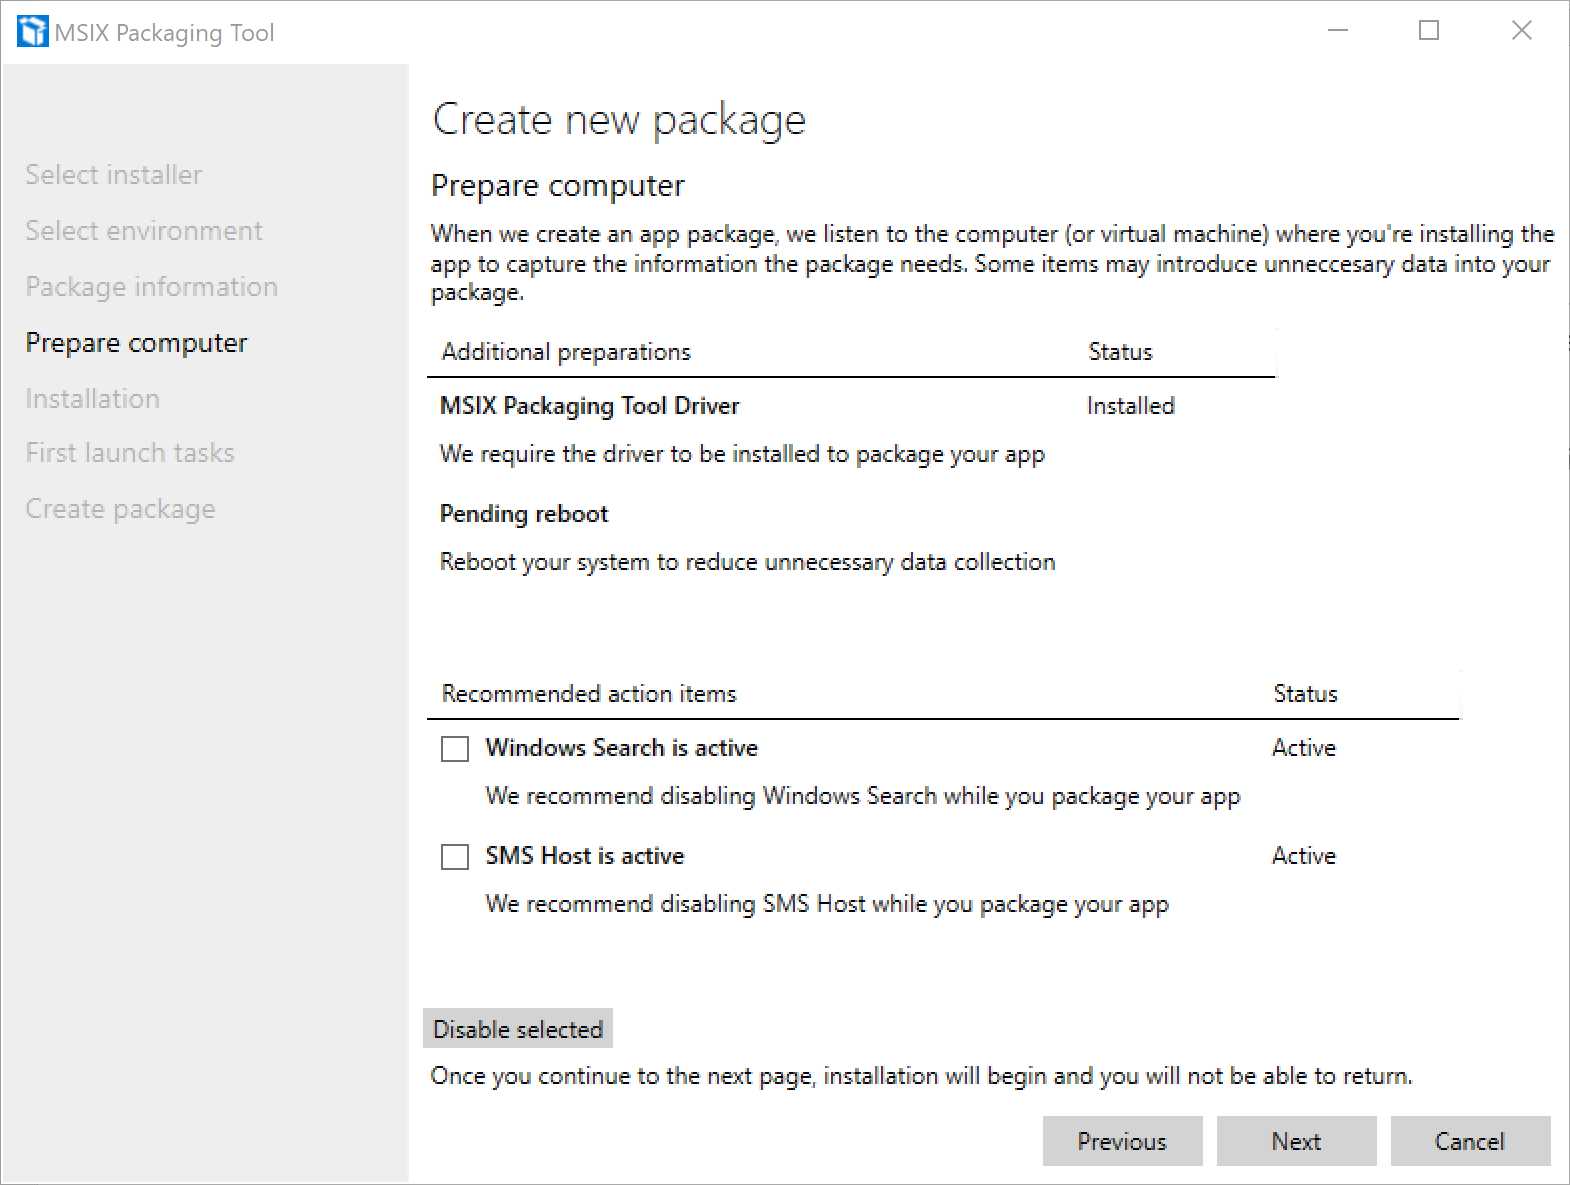
Figure 10: The “Prepare computer” step of the process
This is the last step before starting the real monitoring process, and it will make sure your machine is ready for it. This page will check for a series of factors that could introduce unnecessary data in your package, and it will propose some workarounds.
The only blocker is the MSIX Packaging Tool Driver. This special driver, which comes with Windows 10 version 1809 and later, is required to perform the installation monitoring. Without it, the tool can’t work. If it isn’t installed, the tool will take care of downloading and installing it from Windows Update for you.
If you are in an environment where Windows Update is not accessible, you can download the CAB, which contains the driver from this website (check the section titled, “Installing MSIX Packaging Tool driver FOD in WSUS”). Once you have downloaded it, you must open a PowerShell prompt with administrator rights and run the following command, where (path) is the full path of the CAB file you have downloaded.
Code Listing 3
Dism /Online /add-package /packagepath:(path) |
The Additional preparations section may contain some other suggestions to improve the quality of the capturing process. For example, as you can see in Figure 4, if there’s any update that has triggered a pending reboot, you will be invited to do it before moving on.
The second section, called Recommended action items, will highlight a series of services that may be running on your machine, like Windows Search, and it will give you the option to stop them in order to reduce the potential false data collection.
That’s it. Now we can start the process by clicking Next.
Installation
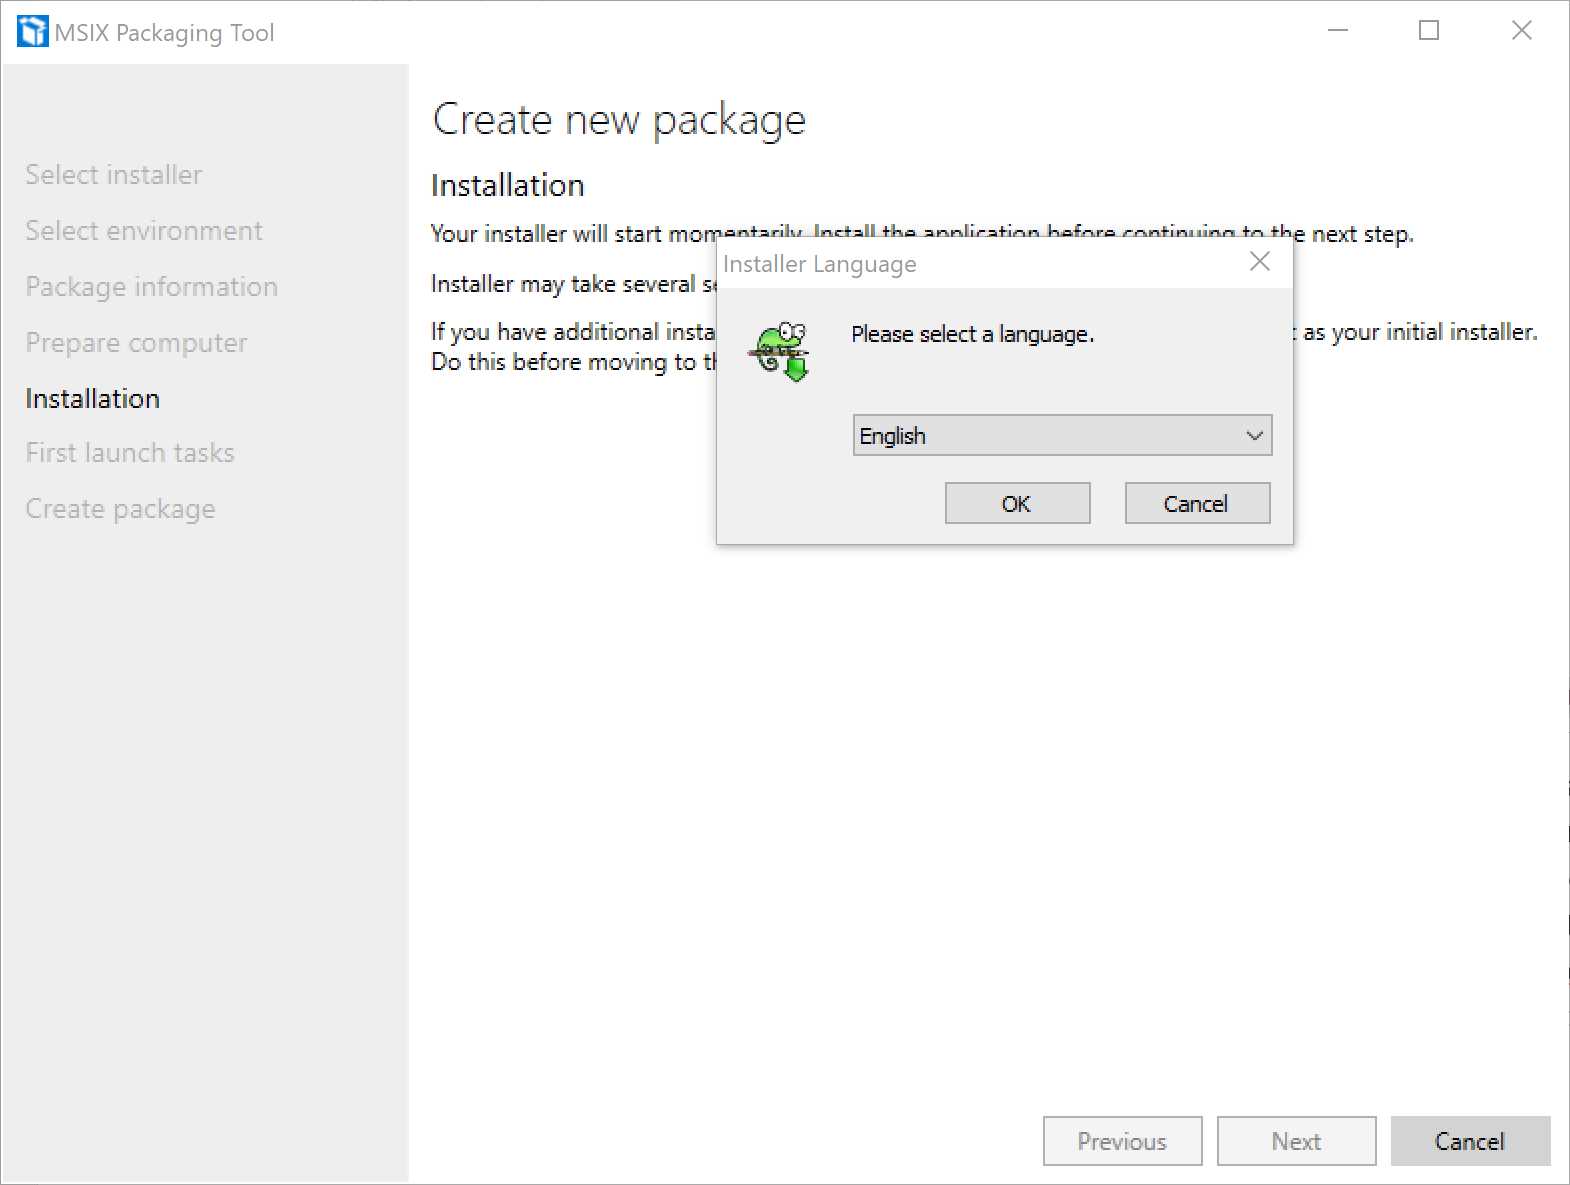
Figure 11: The “Installation” step of the process
The tool will now launch the installer you specified in the first step, and it will start the monitoring process. Now you just install the application, like you would do on a normal machine.
At the end of the setup, the tool will detect that the installation is completed and ask you if you want to terminate the process.
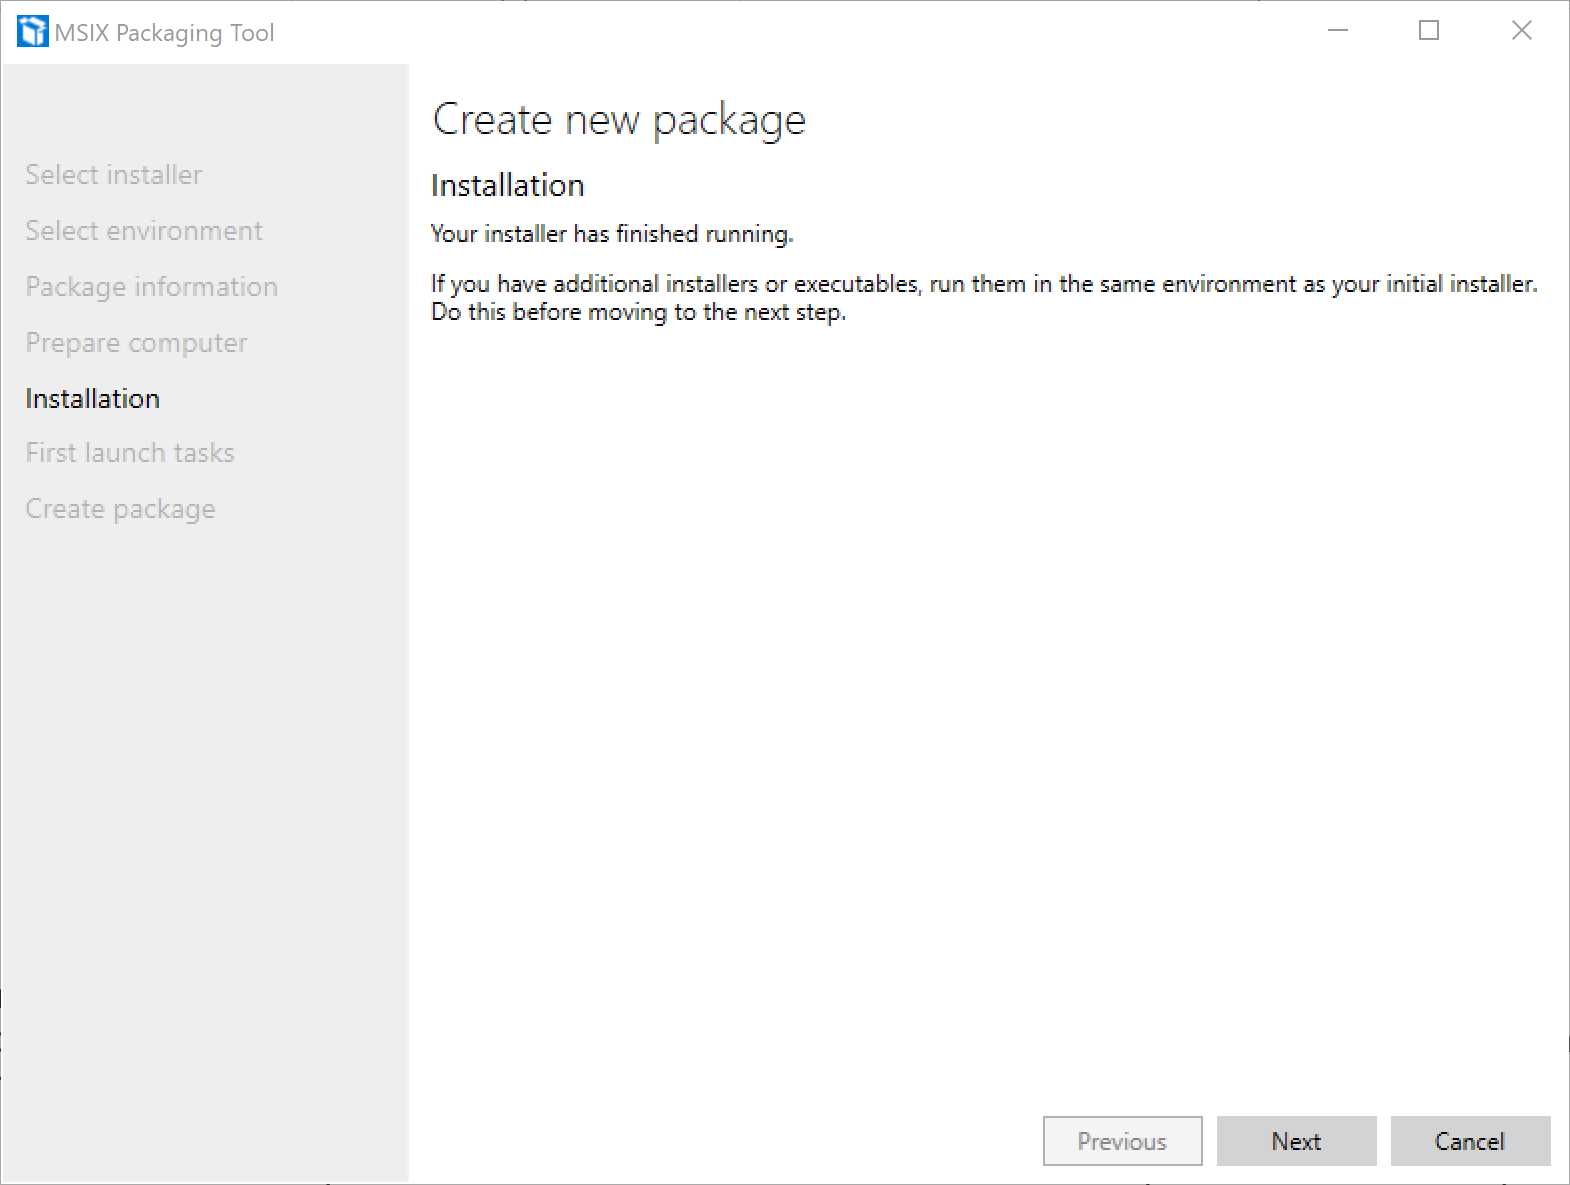
Figure 12: The tool has detected that the setup is completed
However, the monitoring will still be active. At this point, you have the chance to launch additional setups, like a dependent framework or another application. These files will be captured, too, and included in the same package. This feature helps you achieve the goal of building a self-contained package, which doesn’t require the user to manually install any other dependency to use the packaged application.
First launch tasks
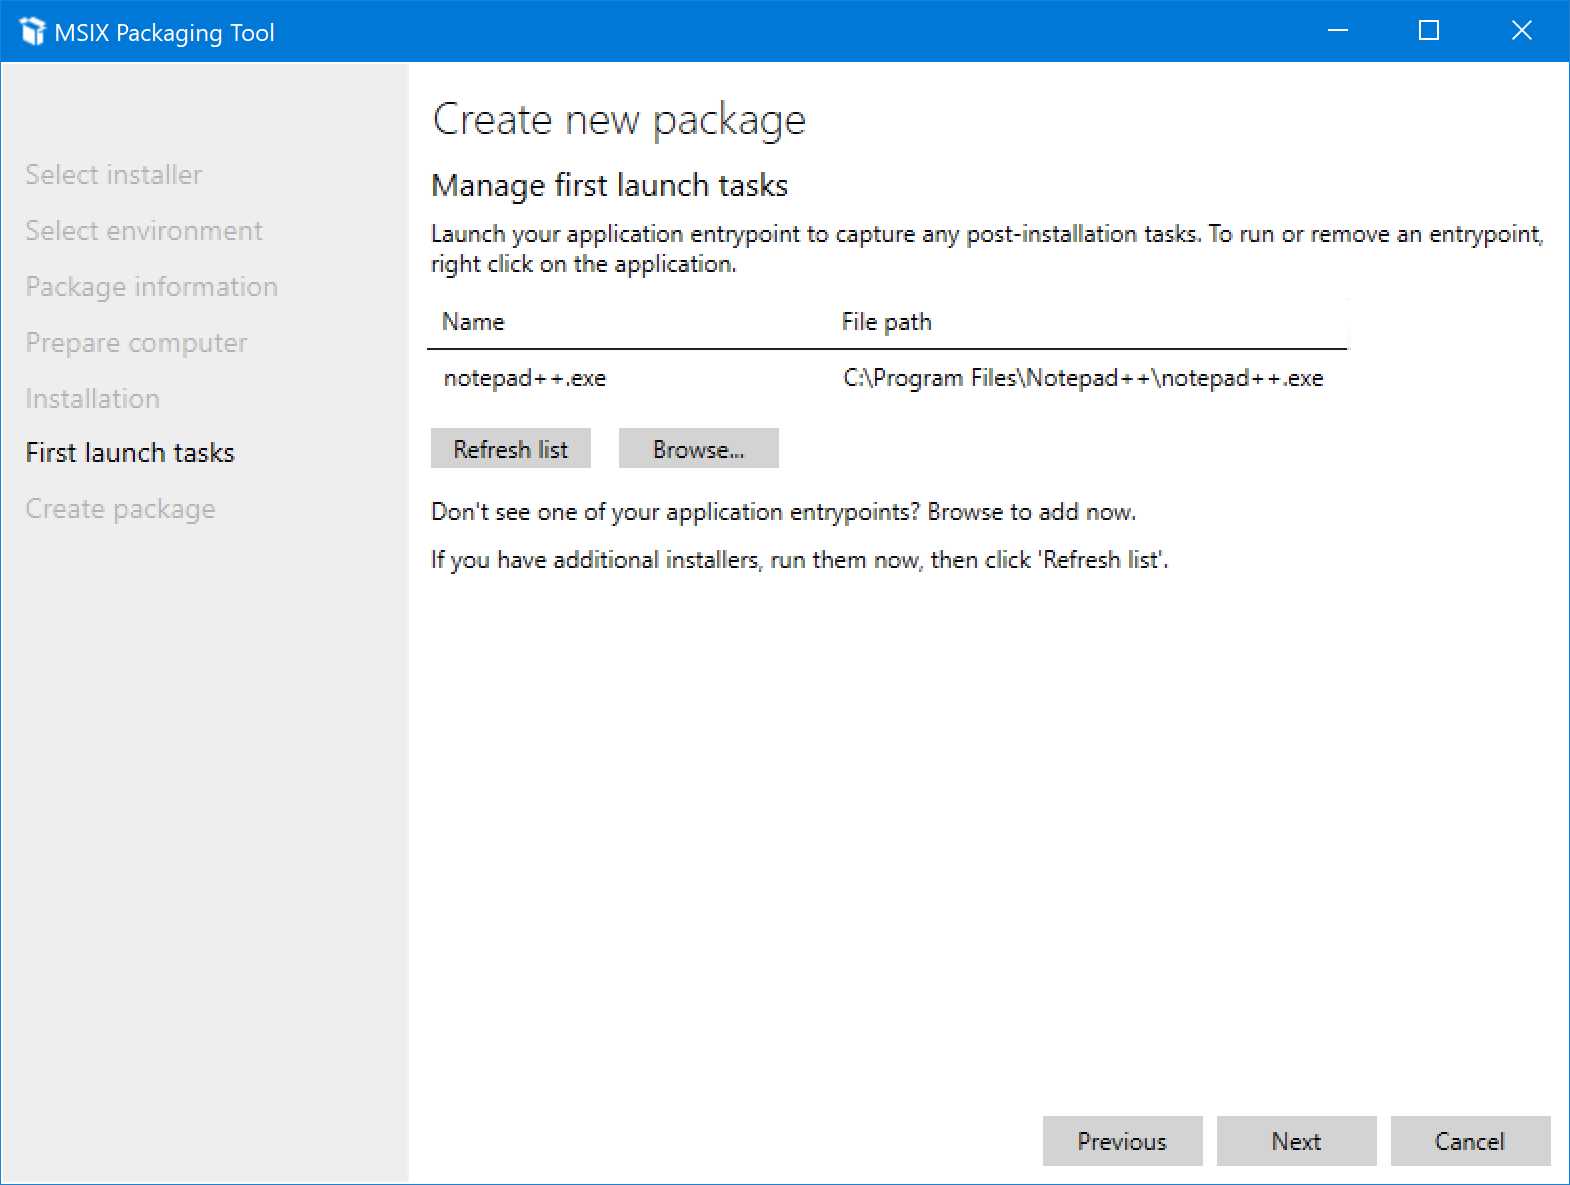
Figure 13: The first launch tasks
In this step, the tool will detect the main executable of the application you have packaged, based on the shortcut that the installer has created in the Start menu or on your desktop. If the tool can’t detect it (for example, if you’re packaging an application without an installer), you can manually choose it by clicking Browse.
The purpose of this step is also to help you capture any potential post-installation tasks of the application. The monitoring process, in fact, is still running. You’re invited to launch the application you have just installed so that you can capture any additional configuration that might be performed at the first start. For example, there are applications that download some additional data the first time they are launched. Thanks to this option, you can include these files directly inside the package, making the deployment phase of the application smoother.
Once you have finished, click Next.
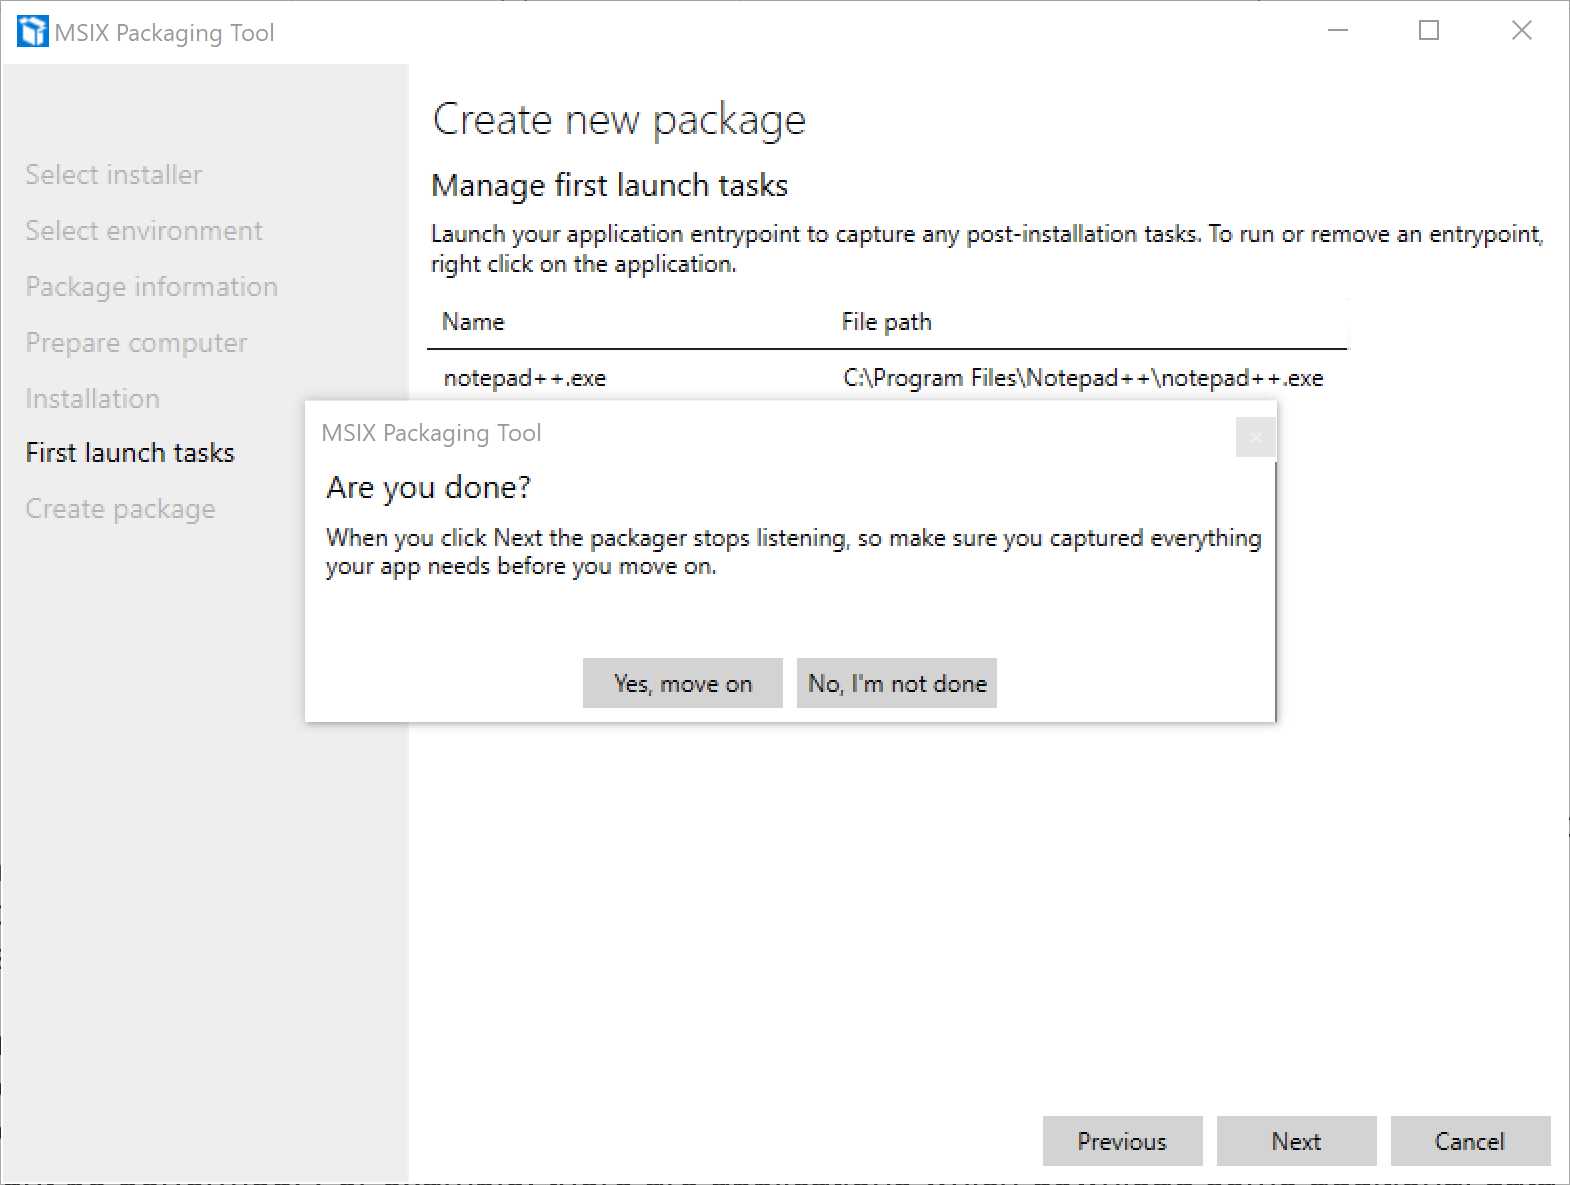
Figure 14: The tool is about to stop the monitoring process
This time, before moving to the next step, you’ll be asked to confirm. The reason is that the tool will stop the monitoring process, and there’s no way to resume it other than starting from scratch with a new packaging process.
Create package
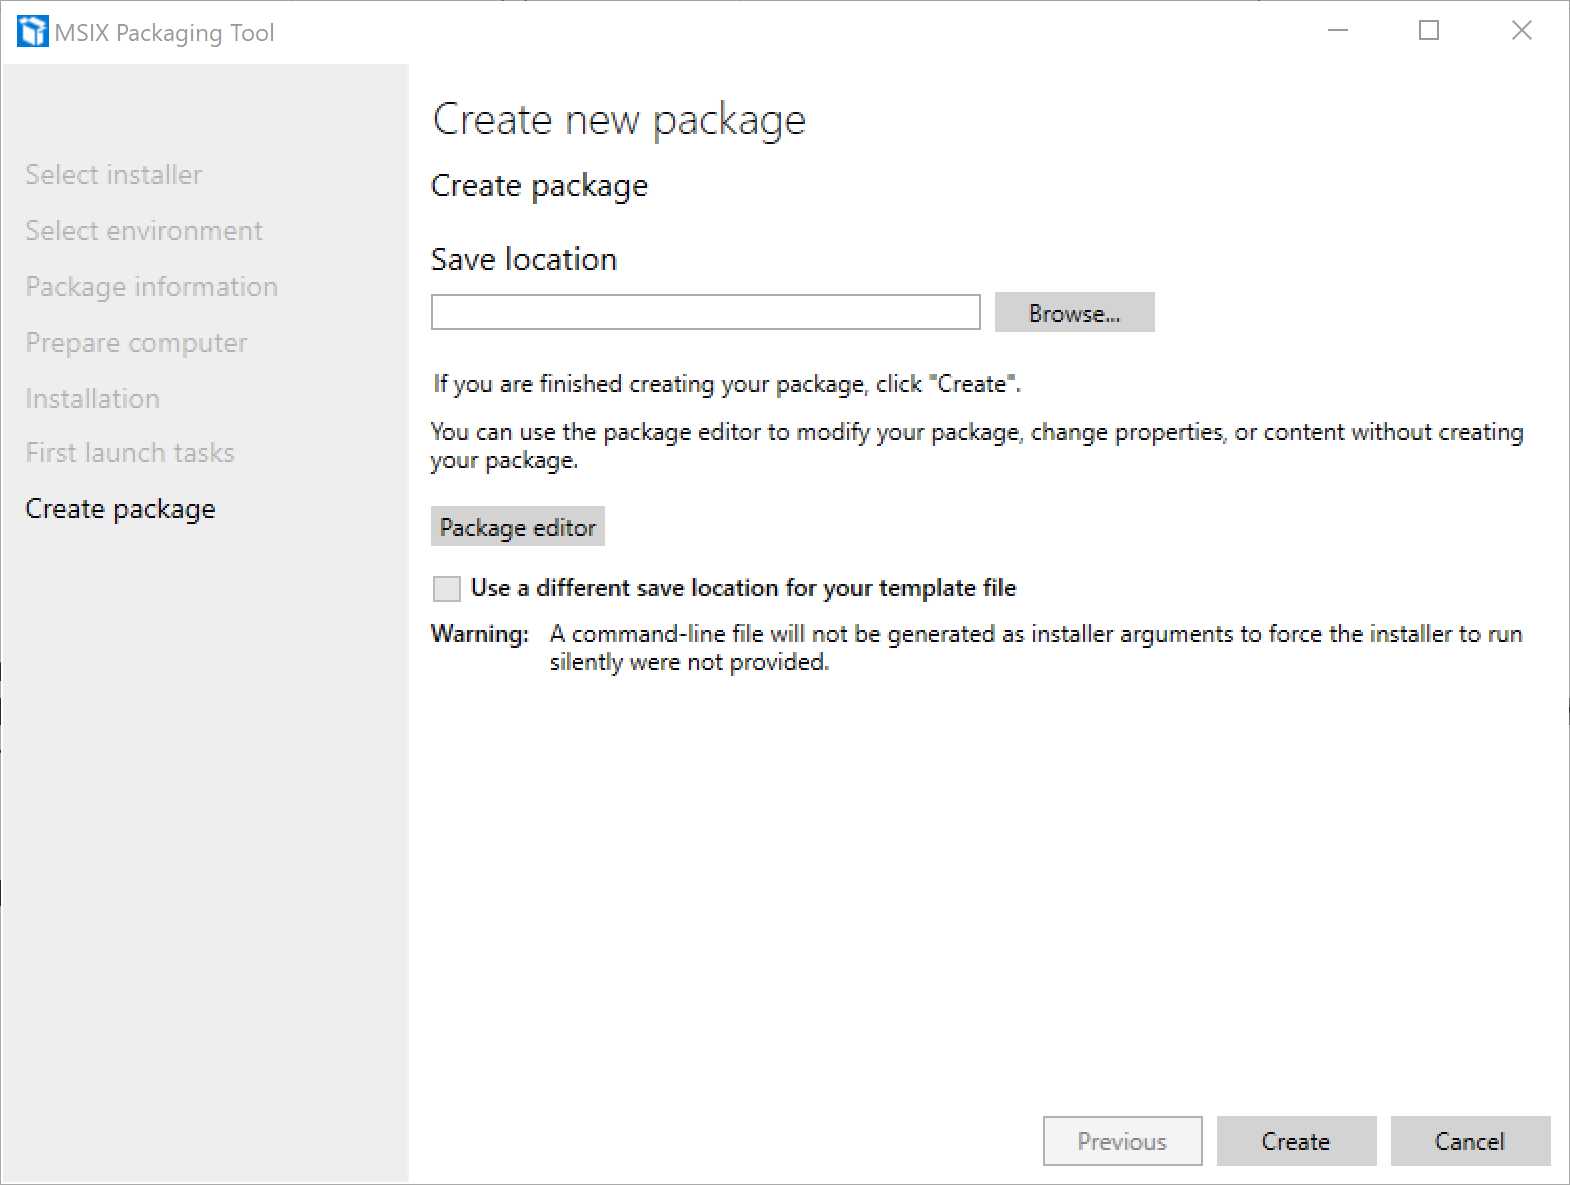
Figure 15: The last step of the packaging process
This is the last step of the process, which will give us the opportunity to choose the folder in which to save the package we have just created. Another option is to use the Package editor to inspect the content of the package to make sure that everything is in the right place. We’ll explore the Package editor in more detail in another section of this chapter.
Click Create to complete the process. After a pop-up window shows a recap of the packaging process, you’ll be redirected to the main screen of the application.
Testing the package
Before manually deploying an MSIX package, you will first to turn on the support for sideloaded apps, which allows Windows to install packages that are signed with any trusted certificate, and not just the ones coming from a public certification authority.
To do this, open the Windows settings and go to Update & Security > For developers. Select Sideload apps or Developer mode and wait for Windows to finalize the operation. The second option is suggested in case you want to execute more advanced tasks we’re going to see in the next chapters, like deploying packages from Visual Studio or launching executables inside the application’s container.
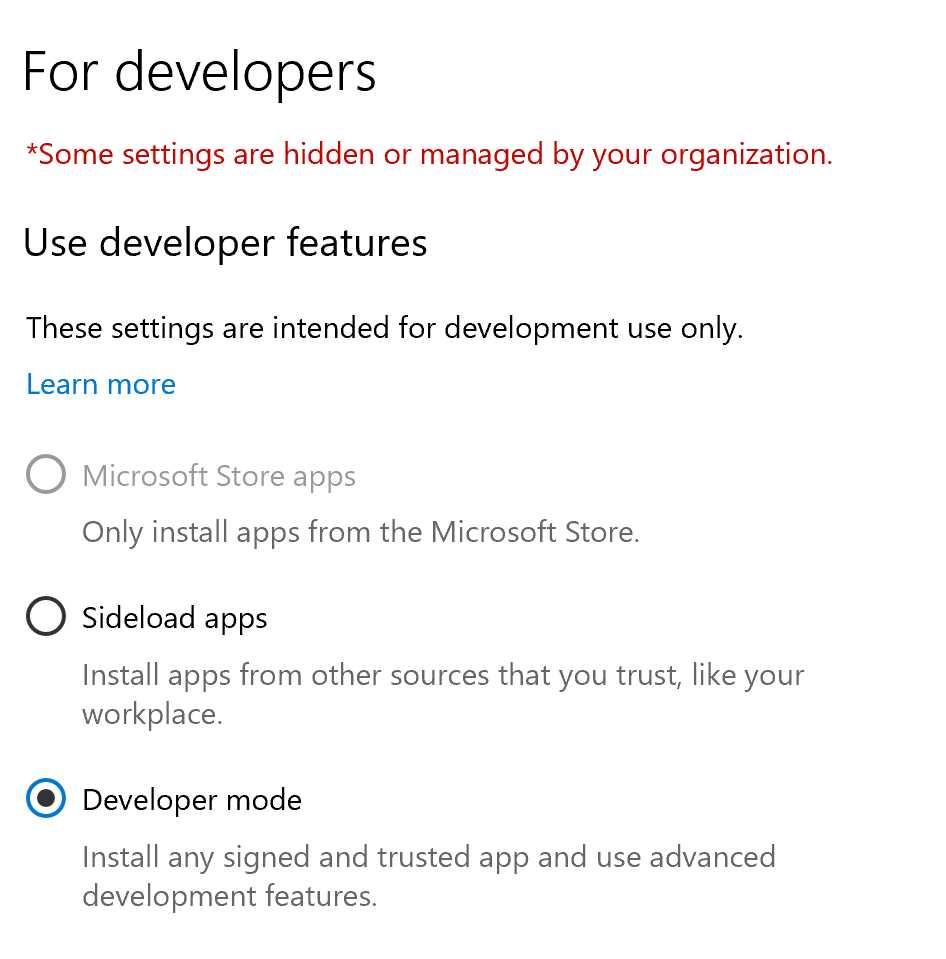
Figure 16: The Windows setting to enable the developer mode
The second step is to make sure that the certificate used to sign the package is trusted on your machine. The easiest way to check it is to right-click on the MSIX package in File Explorer, choose Properties, and move to the Digital Signatures tab. You will find a reference to the certificate used to sign the package. Click Details to see the information about the certificate.
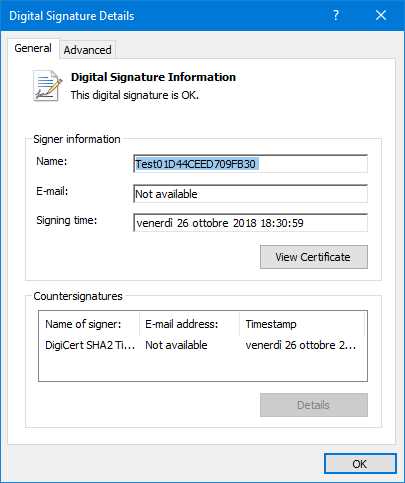
Figure 17: The details of the certificate used to sign the package
In Figure 17, you can see an example of a certificate that is already trusted on the machine. In such a case, you don’t have to perform any extra step.
Otherwise, you need to install the certificate. Click View Certificate, then click Install certificate to start the wizard:
- In the first step, choose to install the certificate for the Local machine. This will trigger the request of admin elevation when you’ll press Next.
- Choose the option Place all certificates in the following store. Then click Browse and, in the list of certificate stores, choose Trusted People. Click OK and then Next.
- The last step is just a confirmation of the operation. Click Finish to complete the process.
Now that the certificate is installed, you can proceed to install the application. Windows 10 offers native support to MSIX packages, so you can just double-click on the file you have generated with the MSIX Packaging Tool.

Figure 18: The Windows screen to manually deploy an MSIX package
If you click Install, the package will be deployed on the local machine, and if you leave the Launch when ready option turned on, the application will be executed at the end of the process. If the package isn’t signed or the certificate isn’t trusted, you will see an error appear inside the window.
Once the application has been deployed, you will find its shortcut in the Start menu and you’ll be able to launch it by simply clicking on its icon. If the conversion has completed successfully and you are respecting all the requirements, you will see your original Windows application starting up.
Automating the packaging process
There are scenarios where you may need to automate the packaging process. In such a scenario, we can’t leverage a user interface—all the operations must be executed without user intervention. For this purpose, the MSIX Packaging Tool can be leveraged from the command line, so that we can automate the full process we have previously seen.
The automation is handled with a template file, which is an XML file that describes the overall process: the installer’s path, the location to store the output package, a set of files and registry keys to eventually exclude, and so on. The starting point for generating a template file is to perform a first conversion with the user interface of the MSIX Packaging Tool, like we previously did. At the end of the process, the tool will generate a template file that we can reuse.
However, the command-line packaging process is allowed only if the installer supports a silent installation, without any user intervention. Since the process is automated, we can’t interact with the installer. If the starting point is an MSI installer, you’re good to go, since it offers built-in support to silent installation, and the tool can automatically leverage it. If, instead, the application leverages another installer technology, you must provide a command argument to trigger the silent installation; otherwise the template file won’t be generated. Let’s take a look again at the first step of the packaging process with the Notepad++ installer.
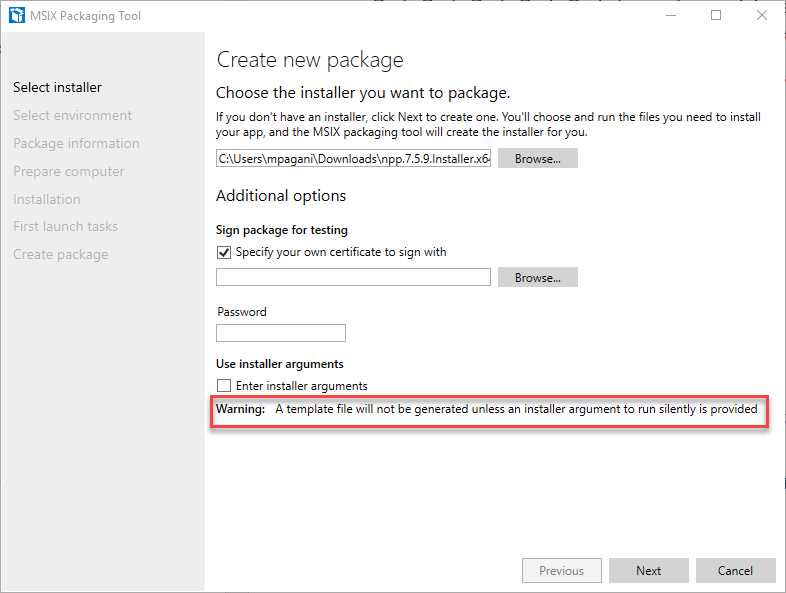
Figure 19: The MSIX Packaging Tool warns us that a template file can’t be generated
As you can see from the image, the MSIX Packaging Tool has recognized that the Notepad++ installer isn’t MSI-based and doesn’t support, by default, a silent installation. As such, it’s warning us that, unless we provide an installer argument to execute it in a silent way, a template file won’t be generated at the end of the process.
There isn’t a fixed rule for supporting a silent installation. Some of the most commonly used arguments are /S, /SILENT, and /QUIET. In the case of Notepad++, the installer argument to use is /S. If you specify it and you repeat the packaging process as we did before, you’ll end up with another file inside the output folder: the template. Let’s take a look at its content.
Code Listing 4
<?xml version="1.0" encoding="Windows-1252"?> <MsixPackagingToolTemplate xmlns="http://schemas.microsoft.com/appx/msixpackagingtool/template/2018"> <Settings AllowTelemetry="true" ApplyAllPrepareComputerFixes="false" GenerateCommandLineFile="true" AllowPromptForPassword="false" EnforceMicrosoftStoreVersioningRequirements="true"> <ExclusionItems> <FileExclusion ExcludePath="[{Local AppData}]\Temp" /> . . . <RegistryExclusion ExcludePath="REGISTRY\MACHINE\SOFTWARE\Wow6432Node\Microsoft\Cryptography" /> . . . </ExclusionItems> </Settings> <PrepareComputer DisableWindowsSearchService="false" DisableSmsHostService="false" DisableWindowsUpdateService="false" /> <SaveLocation PackagePath="C:\ \Notepad++\NotepadPlusPlus_1.0.0.0_x64__e8f4dqfvn1be6.msix" TemplatePath="C:\ \Notepad++\NotepadPlusPlus_1.0.0.0_x64__e8f4dqfvn1be6_template.xml" /> <Installer Path="C:\Downloads\npp.7.5.9.Installer.x64.exe" Arguments="/S" /> <PackageInformation PackageName="NotepadPlusPlus" PackageDisplayName="Notepad++" PublisherName="CN=mpagani" PublisherDisplayName="Matteo Pagani" Version="1.0.0.0" /> </MsixPackagingToolTemplate> |
The template is composed of different entries that define in a programmatic way all the steps we have previously performed with the user interface:
- The PrepareComputer entry defines which Windows services must be disabled or stopped before performing the packaging process.
- The SaveLocation entry defines where to save the output package and template.
- The Installer entry defines the path of the installer to the package and, eventually, the arguments. In this case, since the original installer isn’t an MSIX, we have supplied the /S argument.
- The PackageInformation entry defines the identity of the application, and it includes the information that will be stored inside of the manifest.
The template also includes an ExclusionItems section, which contains the list of elements that could be captured during the packaging process, but that must be excluded because they aren’t coming from the installer. You can have multiple FileExclusion entries for files and RegistryExclusion entries for registry keys. The standard template already includes a default set of exclusions, based on the most common false positives that Windows could generate during the process. However, it can be customized with additional ones.
Once you have a template file, you can use it with the command-line version of the MSIX Packaging Tool. To use it, you need to start a command prompt with administrator rights. The easiest way to do this is to right-click the Start menu and choose Windows PowerShell (Admin). Now you can launch the following command.
Code Listing 5
msixpackagingtool create-package --template "C:\ Notepad++\NotepadPlusPlus_1.0.0.0_x64__e8f4dqfvn1be6_template.xml" |
When you install the MSIX Packaging Tool from the Microsoft Store, it registers a global alias called msixpackagingtool. As such, you can invoke it from any location without having to open a specific folder. The tool is very simple to use. You just need to specify the create-package command and the --template parameter, followed by the path of the template file you previously generated.
The tool will start, and it will execute the same exact packaging process we previously performed with the visual interface, but autonomously and without any user intervention. Once the process is finished, if no errors have happened, you will find in the output location an updated MSIX package and template file.
The package editor
The MSIX Packaging Tool includes a visual package editor, enabling you to modify the content of the package with a simple user interface. The editor can be leveraged as part of the packaging process, or independently.
In the first case, you will have access to the package editor option in the last step of the process. Thanks to this button, you will be able to immediately edit the output of the packaging process before saving the generated package. In the second case, instead, you can access the editor by choosing the package editor option in the main screen of the MSIX Packaging Tool. In this case, you will be asked to choose the package you want to edit.
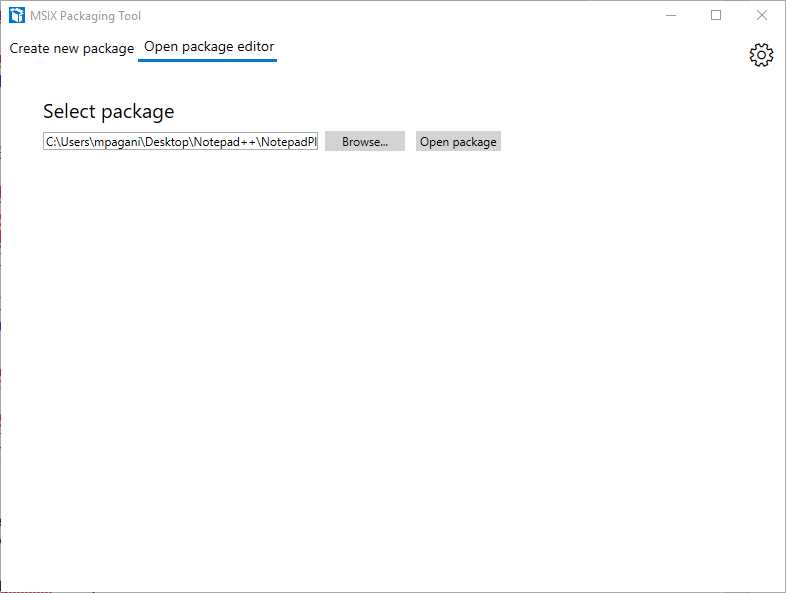
Figure 20: The option to access to the package editor in the MSIX Packaging Tool
Regardless of the choice, the tool will give you access to the same set of options. Let’s see them in detail.
Package information
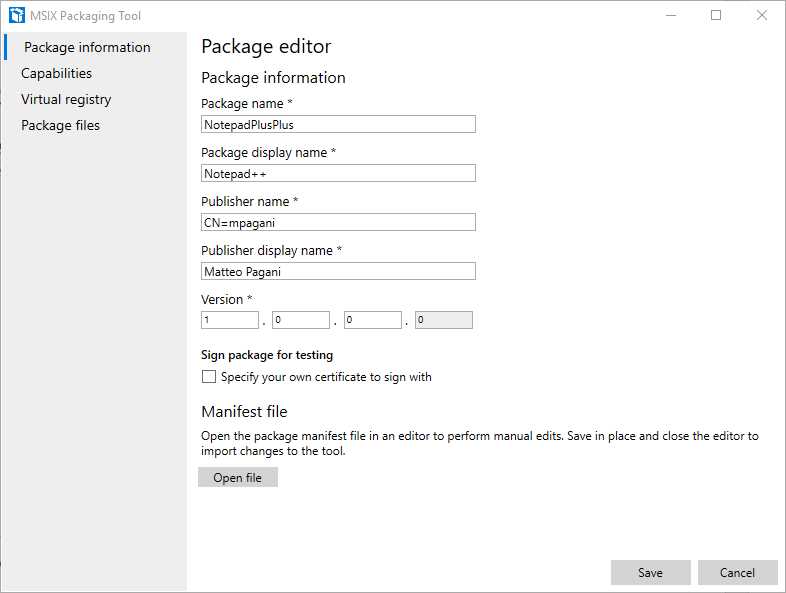
Figure 21: The Package information section of the package editor
This section can be used to change the identity of the application and define a different package name, publisher name, and so on. If you didn’t sign the package when you created it, you can do it now by choosing the certificate on your disk.
You also have the opportunity to see the XML content of the manifest by pressing the Open file button. The file will be opened with a text editor. You will have the chance to make changes manually and save them. The updated manifest will be incorporated back inside the package.
Capabilities
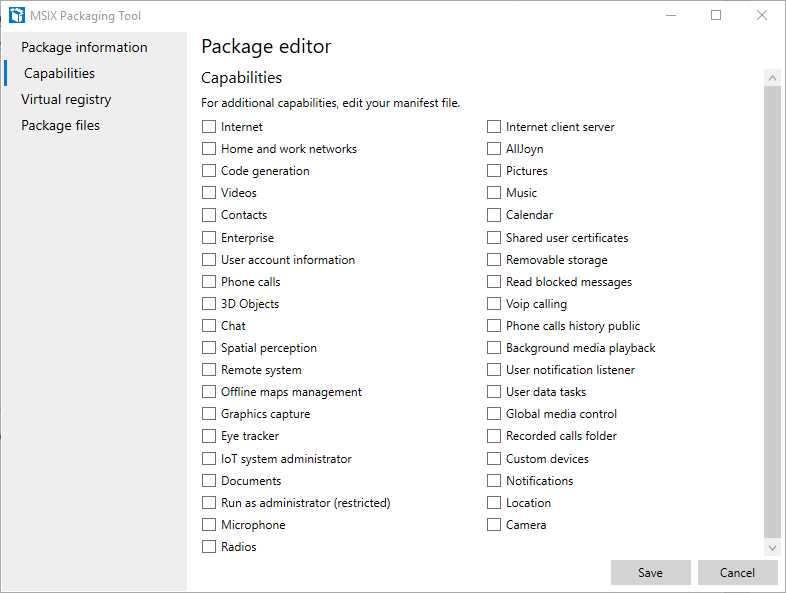
Figure 22: The Capabilities section of the package editor
This section lists all the available capabilities that can be accessed by an application. However, if you recall the section about the manifest in Chapter 1, you’ll know that most of them apply only to Universal Windows Platform applications, and not to classic desktop applications. There may be some exceptions, however. For example, the Run as administrator (restricted) capability can also be leveraged by Win32 applications.
Virtual registry
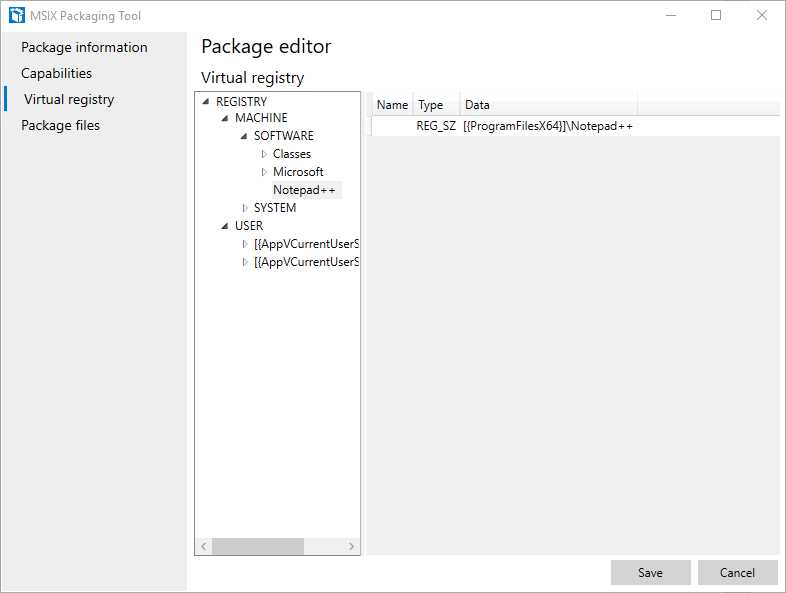
Figure 23: The Virtual registry section of the package editor
This section can be used to explore the .dat files that store the various registry keys created during the deployment process. Due to the virtualized registry approach provided by the MSIX container, these keys won’t be visible in the system registry when the application is installed. As such, it’s important to make any required changes in this section.
This section is also helpful to remove any unnecessary key that might have been captured by mistake or to add keys that might be missing. By right-clicking the various hives in the tree, you will have the option to add, edit, or delete keys and values.
Package files
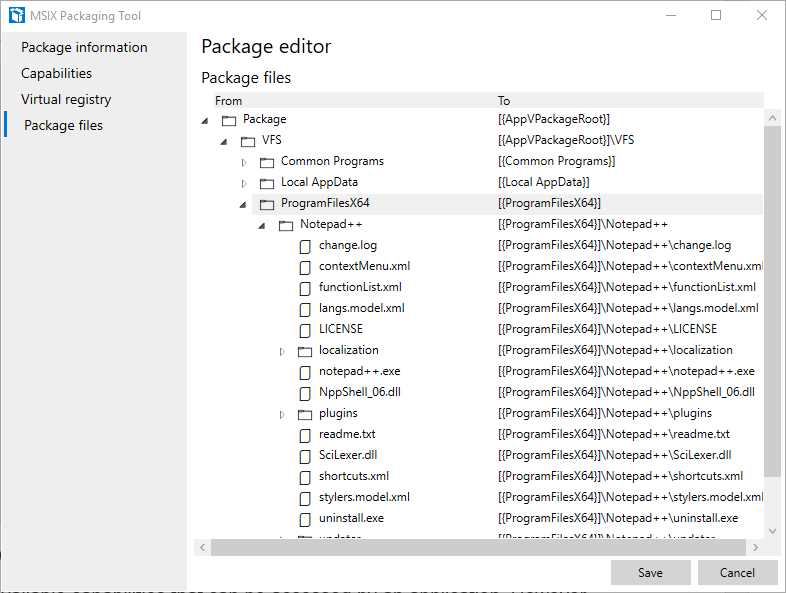
Figure 24: The Package files section of the package editor
You can use this section to explore all the files that are included inside the package. Like for the Virtual registry section, it can be helpful to remove files that aren’t needed, or to add files that might be missing. By right-clicking on any element on the tree, you’ll have the chance to delete it or to add a new file in the same location.
At any time, you can click Save at the bottom, which will generate an updated package with the changes you have applied.
MSIX Packaging Tool Insider Program
Thanks to an Insider Program, Microsoft offers a way to test new features of the MSIX Packaging Tool ahead of the public release. To join the program, you must follow the link included in the documentation, bringing you to a form in which you will be asked to share the Microsoft account you’re using on the Microsoft Store. The Insider Program is managed through the flighting feature offered by the store. This means that the link used to get the application is the same as the standard version. However, if your Microsoft account is included in the program, you will get access to the Insider version, which will be automatically updated like a regular application.
Packaging your application with other tools
Microsoft has worked closely with many partners to bring MSIX support to the most popular authoring tools on the market, like Advanced Installer, InstallShield, Cloudhouse, and InstallAware. You can find the complete list in the official documentation.
Thanks to this integration, you’ll be able to use the existing setup definition you’re already using to generate a classic installer (like an MSI) to create an MSIX package.
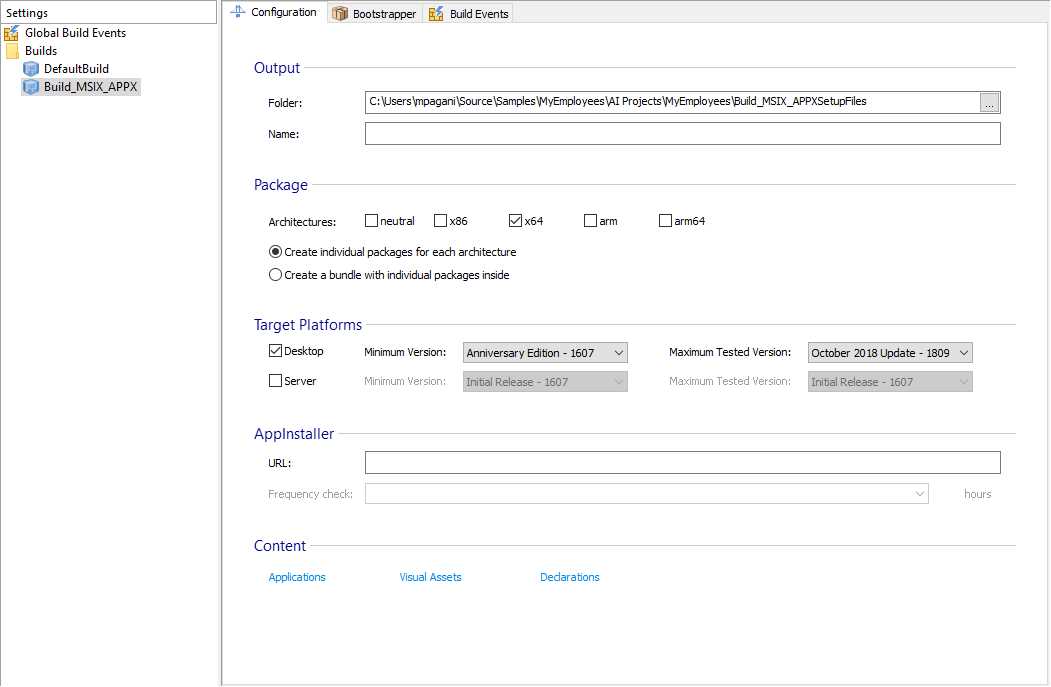
Figure 25: The option in Advanced Installer to generate an MSIX package
Additionally, many of these tools provide a visual front end to make it easier to integrate some of the features we’re going to see in the next chapters, like modification packages and the Package Support Framework.
- 1800+ high-performance UI components.
- Includes popular controls such as Grid, Chart, Scheduler, and more.
- 24x5 unlimited support by developers.