
More UWP Succinctly®

CHAPTER 2
Working with files: storage, database and settings
The storage
Managing the storage in a Universal Windows Platform app is another big difference compared to the traditional Windows apps approach: if desktop apps are able to ideally write and read files in any computer’s folder (always respecting, of course, the security policies of the user), Universal Windows Platform apps run in a sandbox. The storage works like a standard hard drive, but it’s isolated: applications can’t read and write data outside this sandbox (unless the user explicitly allows it). The most important advantage of this approach is security: applications can’t access to the core operating system’s files, so they can’t corrupt the Windows integrity, neither intentionally or by mistake due to a bug. The data saved in the local storage is persisted: even if the application is terminated or suspended, the data is not lost, but it’s always available every time it’s launched again.
The Universal Windows Platform offers different types of storage, which are available thanks to the ApplicationData.Current class that is part of the Windows.Storage namespace. Let’s see in details the various kind of storages, before digging into the APIs that are available to perform common operations like reading or writing files, listing the content of a folder, etc.
The local storage
The local storage is identified by the LocalFolder class and it’s the most widely used: it’s a traditional file system, where you can create files and folders, like you’re used to do on your computer’s hard disk. However, due to the isolated nature of the storage, the stored data can be accessed only by your application. Other applications can access to your data only using a special contract, which will be detailed in the another book of the series.
The local storage follows the same lifecycle of the application: once it’s uninstalled, the storage is also removed. There are no limitations in the storage quota that an application can use other than the free available space on the device. The local storage also offers an easy way to manage a very common scenario in application development, which is storing and reading settings, thanks to a class called LocalSettings. We’ll see later in these chapter how to use it.
One important thing to mention about the local storage is that it’s strictly connected to the backup feature available in Windows 10. The operating system, in fact, includes a built-in backup feature, which can save, other than the device’s settings like the start screen configuration, the e-mail accounts or the lock screen image, also the local storage’s content of Universal Windows Platform applications. This way, if the user resets its devices or buys a new one and restores the backup, he will find it exactly in the same previous state, including application’s data.
It’s important to highlight that this backup is saved to OneDrive (even if it’s transparent to the user, he won’t be able to see the data on his account) and it counts against his quota.
The local cache
The automatic backup feature applied to the local storage is helpful because, as developers, we don’t have to find an alternative way to provide a backup mechanism for our application. However, there are some applications that don’t really need this feature: if the application downloads a lot of data from Internet and it doesn’t allow the user to generate any content, we could waste a lot of space on the user’s OneDrive for nothing, since this data would have to be downloaded again anyway when the application is restored.
Think, for example, about applications connected to music streaming services like Spotify or Groove Music: the local storage can become quite big, since the paid plans of these services allow the user to download the music offline, so that they can listen to it even without an Internet connection. In this case, we’re not talking about content generated by the user, but about content that is simply downloaded from Internet and stored locally. As such, it wouldn’t make sense to store it on OneDrive, since we would have to download it anyway in case of restore and it’s not content that we have created, but we are just consuming it.
For all these scenarios, where saving the whole application’s content would be a waste of space on the user’s OneDrive account, the Universal Windows Platform provides a special storage called LocalCacheFolder, which is also part of the ApplicationData.Current class. It works exactly like the LocalFolder, with the only difference that the data created into this storage is not automatically saved during the backup procedure.
The roaming storage
The roaming storage is identified by the RoamingStorage class offered, as usual, by the ApplicationData.Current object and it has the same basic features of the local storage, which means that the data is isolated and it can store settings (using the RoamingSettings class), files and folder.
The most important feature of the roaming storage is that the data is automatically synchronized with all the Windows 10 devices of the user that are registered with the same Microsoft Account, no matter if they are phones, tablets, traditional desktops, etc. This means that, if the user has installed the same application on multiple devices, we can synchronize the data so that, for example, he can start a task on the tablet and then finish it on the phone; or he can find on the phone the same settings he configured on his computer.
The roaming’s storage doesn’t follow the same lifecycle of the application: even if it’s uninstalled, the roaming data is kept for 30 days, in case the user changes his mind and decides to reinstall the application again. The roaming storage is based on OneDrive, even if it doesn’t count against the user’s quota: however, there’s an important limitation when it comes to the storage’s size. The current limit is, in fact, 100 KB: consequently, the roaming storage is ideal to save small data like the application’s settings or unfinished tasks, but not the real content, like a database. If you need to synchronize the application’s content across multiple devices (also in a cross-platform way), it’s better to rely on a third-party solution, like using the Mobile Apps offered by Azure, the cloud solution by Microsoft.
The 100 KB’s limit, however, isn’t fixed: in the future, Microsoft could decide to increase it. For this reason, when you need to save some data in the roaming storage and you want to make sure to fit the maximum space, you don’t have to check against the 100 KB quota, but against a special property called RoamingStorageQuota. In this case, if Microsoft will decide to increase it in a future Windows 10 update, you won’t have to change your code to support the new quota. The following sample shows how to retrieve this information, so that we can display it to the user with a popup message.
private async void OnShowQuotaClicked(object sender, RoutedEventArgs e) { string quota = string.Format("Roaming quota: {0} KB", ApplicationData.Current.RoamingStorageQuota); MessageDialog dialog = new MessageDialog(quota); await dialog.ShowAsync(); } |
What happens if you exceed the roaming quota? Data won’t simply be synchronized anymore until you delete some content and you return to a size lower than 100 KB. Another important limitation to mention is that the synchronization isn’t performed instantly, but it depends by many scenarios, like the network availability, if the device is running in battery saver mode, etc. Consequently, you shouldn’t rely on the roaming storage for critical scenarios where you need that the data is synchronized as soon as possible on all the devices.
Since the synchronization is performed out of developer’s control, we can subscribe to an event called DataChanged, offered by the ApplicationData.Current class, which is triggered when the synchronization has been performed and the data has been updated. This way if, for example, the settings are changed, we can perform the required operations to properly update the application’s behavior. The following sample shows how to subscribe to this event:
public sealed partial class MainPage : Page { public MainPage() { this.InitializeComponent(); ApplicationData.Current.DataChanged += Current_DataChanged; } private void Current_DataChanged(ApplicationData sender, object args) { //update the application } } |
The temporary storage
Another storage’s type is called temporary storage and is identified by the TemporaryFolder class offered by the ApplicationData.Current object. It’s used mainly for caching scenarios, which means data that can be useful to speed up the application and reduce loading timings (like a set of images downloaded from Internet) but that isn’t critical. This storage, in fact, can be erased any time, without prior notice, by the user (in case he decides to clean up the temporary files) or by the system (in case of a maintenance task).
Unlike the other two storage’s types, the temporary storage doesn’t support settings management (since settings is a kind of data you expect to persist across different usages of the app and that shouldn’t be randomly reset).
The publisher cache folder
As we’ve described in the previous chapters, the storage of each app is isolated and an application can’t read or write data which belongs to other applications. There’s an exception: applications published by the same developer (so under the same publisher name and developer’s account on the Store) can have a shared cache folder, where they exchange files and folder. It’s basically a special area of the storage where every application published by the same developer can read and write files, like a regular storage: the difference is that, in this case, it isn’t isolated per app basis, but per publisher basis.
The first step to support this feature is to declare an extension in the manifest file. Unfortunately, this feature isn’t supported by the visual editor, so you’ll need to right click on the Package.appxmanifest file and choose the option View code. This way, instead of the visual editor, you will see the XML that composes the manifest.
Between the Application and the Capabilities node, you need to place a section called Extensions with the following definition:
<Extensions> <Extension Category="windows.publisherCacheFolders"> <PublisherCacheFolders> <Folder Name="Downloads" /> </PublisherCacheFolders> </Extension> </Extensions> |
As children of the PublisherCacheFolders element, you can place as many Folder items as you want, each of them identified by a unique name. These items represent the list of folders that will be available in the publisher cache storage.
Important! This definition must be added in the manifest file of every application that will be published by you and for which you want to leverage this feature.
Once you have added this definition, you can access to the publisher cache storage by calling the ApplicationData.Current.GetPublisherCacheFolder() method and passing, as parameter, the name of the folder you want to access (which needs to be one of the Folder entries in the manifest).
This method will return a regular StorageFolder object which, as we’re going to see later in this chapter, is the base class that represents a folder in the storage and that we can use to create or read files inside it.
The following sample shows an application (we’re going to call it App A) that gets a reference to the shared storage and writes a text file with some content:
private async void OnSaveData(object sender, RoutedEventArgs e) { StorageFolder folder = ApplicationData.Current.GetPublisherCacheFolder("Downloads"); StorageFile sampleFile = await folder.CreateFileAsync("sample.txt"); await FileIO.WriteTextAsync(sampleFile, "Shared text"); } |
Instead, in another application that we’re going to call App B, which still belongs to us and, as such, in the manifest has declared the same Publisher of App A, we can read the content of the text file by getting access to the shared storage with the same APIs:
private async void OnReadData(object sender, RoutedEventArgs e) { StorageFolder folder = ApplicationData.Current.GetPublisherCacheFolder("Downloads"); StorageFile file = await folder.GetFileAsync("sample.txt"); string content = await FileIO.ReadTextAsync(file); MessageDialog dialog = new MessageDialog(content); await dialog.ShowAsync(); } |
We’ll see later in this chapter more details about the classes we have used to create a file, write data and read data (StorageFolder, StorageFile and FileIO).
Shared folder across users
On some Windows 10 devices (like a desktop) you can have multiple users configured on the same machine. To save space, when you install a Universal Windows App from the Store, it’s installed in a special folder of the computer (C:\Program Files\WindowsApps), which is shared across every user. This way, if you install a triple-A game which size is 30 GB, you won’t have to multiply the occupied space for each user that wants to play the game. The only storage types that are duplicated are the ones we’ve seen so far: every user will have its own local, roaming or temporary storage, so that he can keep his data and settings apart from the other users of the device.
However, in some cases it may be helpful to have a shared storage across every user of the same app on the same machine. For example, the previously mentioned game can offer additional content to download (like a new set of levels), which can be leveraged by every user of the computer: in this case, it wouldn’t make much sense to force every user to download it from scratch.
To get access to this shared folder you can use the ApplicationData.Current.SharedLocalFolder class, which works exactly like any other kind of storage: when your application writes some data into it, the same application running on the same machine but for a different user will be able to read it.
However, there’s a caveat: this special shared folder is available only if the administrator of the machine has allowed it, through the proper group policy. In case this policy hasn’t been set, the ApplicationData.Current.SharedLocalFolder will be null.

- The policy that has to be enabled to enable a shared folder across users
Debugging the storage
Especially when we’re going to see, in the next sections, how to store in a permanent way the data of our application, it may be useful to analyze the content of the local storage so that, in case of problems, we can quickly understand if something went wrong, like a file is missing or the content of one of the folders isn’t the one we’re expecting.
The easiest platform where to debug these scenarios is the desktop one: the local storage of each application is stored into the folder C:\Users\<username>\AppData\Local\Packages, where <username> is the name of the local Windows user. Inside this folder, you’ll find a list of subfolders, one for each Universal Windows Platform app. The name of the folder is based on the Package Family Name of the app, which you can find in the manifest file (in the Packaging section) and it’s automatically generated based on a combination between the publisher’s name and the application’s name. For example, if you’re still in development and debugging stage (so you haven’t reserved a name for your app yet), the app’s folder could be something like 0e022bc4-f11f-4476-a1f6-5c5ffcd22ca0_e8f4dqfvn1be6). Inside the app’s folder, you’ll find many other folders including:
- The local storage, which is stored inside the LocalState folder.
- The roaming storage, which is stored inside the RoamingState folder.
- The temporary storage, which is stored inside the TemporaryState folder.
- The local cache storage, which (the one that isn’t backed up on OneDrive) is stored inside the LocalCache folder.
Working with folders
A common scenario for developers is to organize the storage’s structure using folders, to keep files separated in a logical way. Every folder in the Universal Windows Platform is identified by the StorageFolder class, which offers many methods to perform the most common operations like creating a new file, getting the list of available files, renaming a file, etc.
Consequently, the main root of every storage’s type (for example, the LocalFolder and the RoamingFolder objects) are identified with the StorageFolder class. Here is a brief list of the most common operations that can be performed:
- CreateFolderAsync() to create a new folder.
- GetFolderAsync() to get a reference to an existing sub folder.
- DeleteAsync() to delete a folder.
- RenameAsync() to rename a folder.
The following sample code shows how to create a folder inside the local storage:
private async void OnCreateFolderClicked(object sender, RoutedEventArgs e) { await ApplicationData.Current.LocalFolder.CreateFolderAsync("myFolder"); await ApplicationData.Current.LocalFolder.CreateFolderAsync("myFolder2\\mySubFolder"); } |
As you can see, you’re able to manipulate not just folders, but also subfolders, by using the backslash (\) as separator between one folder and the other. If one of the subfolders doesn’t exist, the Universal Windows Platform will take care of creating it (for example, the second line of code will create both the myFolder2 and mySubFolder folders). In this case, we’re using a double backslash just to properly escape this special character.
The Universal Windows Platform offers also a way to check if a folder already exists before performing any operation, by using the TryGetItemAsync() method. If the folder exists, you will get in return a reference to it, otherwise you’ll get a null object. The following code, before creating a new folder called myFolder, checks if it already exists in the local storage.
private async void OnCreateFolderClicked(object sender, RoutedEventArgs e) { IStorageItem storageItem = await ApplicationData.Current.LocalFolder. TryGetItemAsync("myFolder"); if (storageItem == null) { await ApplicationData.Current.LocalFolder.CreateFolderAsync("myFolder"); } } |
Working with files
Files are identified by the StorageFile class, which offers a set of methods to perform the most common operations, like:
- DeleteAsync() to delete a file.
- RenameAsync() to rename a file.
- CopyAsync() to copy a file from one location to another.
- MoveAsync() to move a file from one location to another.
The starting point to work with a file is the StorageFolder class, since each file belongs to a folder (since, as we’ve previously mentioned, also the storage’s root is treated as a folder). We have two different options: to create a new file, by using the CreateFileAsync() method, or to get a reference to an existing file, by using the GetFileAsync() method.
Let’s see how to write and read a file in the local storage: the Universal Windows Platform offers two different approaches, one based on streams and one on bulk operations.
Creating and reading a file as a stream
To create a file we need to use the CreateFileAsync() method offered by the StorageFolder class, which accepts as parameter the file’s name. The following sample shows how to create a text file in the local storage:
private async void OnCreateFileClicked(object sender, RoutedEventArgs e) { StorageFile file = await ApplicationData.Current.LocalFolder.CreateFileAsync("file.txt"); } |
In return, you’ll get a reference to the file you’ve just created. Also when you’re working with files you can use the TryGetItemAsync() method we’ve previously seen with folders, to check if a file already exists before performing any operation, like in the following sample:
private async void OnCreateFileClicked(object sender, RoutedEventArgs e) { IStorageItem storageItem = await ApplicationData.Current.LocalFolder.TryGetItemAsync("file.txt"); if (storageItem == null) { StorageFile file = await ApplicationData.Current.LocalFolder.CreateFileAsync("file.txt"); } } |
Once you have a reference to the file, you can call the OpenAsync() method to get the reading or writing stream: the type of stream is defined by the FileAccessMode property, which is passed as parameter. To perform a writing operation, we need to use the ReadWrite value, like in the following sample:
private async void OnCreateFileClicked(object sender, RoutedEventArgs e) { IStorageItem storageItem = await ApplicationData.Current.LocalFolder.TryGetItemAsync("file.txt"); if (storageItem == null) { StorageFile file = await ApplicationData.Current.LocalFolder.CreateFileAsync("file.txt"); IRandomAccessStream randomAccessStream = await file.OpenAsync(FileAccessMode.ReadWrite); using (DataWriter writer = new DataWriter(randomAccessStream.GetOutputStreamAt(0))) { writer.WriteString("Sample text"); await writer.StoreAsync(); } } } |
When you open the file using the OpenAsync() method, you get a reference to the content’s stream, which is identified by the IRandomAccessStream class. Thanks to this stream, you’ll be able to use the DataWriter class to perform writing operations: it’s important to highlight that the IRandomAccessStream class provides access both to a writing and a reading stream. In this case, since we want to write some content to the file, we need to the use the output stream, which is obtained using the GetOutputStreamAt() method: the parameter identifies the stream position where we want to start the writing operation; in our case, we use 0 to start from the beginning.
The DataWriter class is a special Universal Windows Platform class that makes easier to write the most common data types to a file: in the sample, you can see the WriteString() method to write a text, but you can use also for example WriteBytes() (to write binary content), WriteDouble() to write a number, WriteDateTime() to write a date and so on. Once you’ve written the content to the file, you can finalize the operation by calling the StoreAsync() method.
The approach, instead, to read the file’s content is very similar: also in this case, after getting a reference to the file using the GetFileAsync() method, we need to open it using the OpenAsync() method. Since, in this case, we just need to read the content we can pass as parameter the Read value of the FileAccessMode enumerator. Here is a full sample:
private async void OnReadFileClicked(object sender, RoutedEventArgs e) { IStorageItem storageItem = await ApplicationData.Current.LocalFolder.TryGetItemAsync("file.txt"); if (storageItem != null) { StorageFile file = await ApplicationData.Current.LocalFolder.GetFileAsync("file.txt"); IRandomAccessStream randomAccessStream = await file.OpenAsync(FileAccessMode.Read); using (DataReader reader = new DataReader(randomAccessStream.GetInputStreamAt(0))) { uint bytesLoaded = await reader.LoadAsync((uint)randomAccessStream.Size); string readString = reader.ReadString(bytesLoaded); MessageDialog dialog = new MessageDialog(readString); await dialog.ShowAsync(); } } } |
As you can see, the code is very close to the writing procedure. The main differences are:
- Since in this case we want to perform a reading operation, we need to retrieve the input stream, by using the GetInputStreamAt() method offered by the IRandomAccessStream class. Also in this case, we need to specify the stream’s position where to start the reading operation: by using 0 we’re going to read the content from the beginning.
- Instead of the DataWriter class, we used the DataReader one, which works in the same way: it offers a set of methods to read the most common data types. In this case, since we’re reading a text file, we call the ReadString() method, but we could have used ReadDouble() to read a number or ReadDateTime() to read a date.
Creating and reading a file with a bulk operation
In the previous section, we’ve seen that, thanks to the DataWriter and DataReader classes, we are able work with files as streams: we can start the writing or reading procedure from any position and not just from the beginning. However, this precision isn’t always required: for these scenarios, the Universal Windows Platform offers a class called FileIO (which is part of the Windows.Storage namespace), which is easier to use to perform basic read and write operations.
The starting point is, as usual, the StorageFile class, so we still need to use the APIs we’ve previously seen to create a file (in case of a writing procedure) or to get a reference to an existing one (in case of a reading procedure). The methods exposed by the FileIO class offers a simple way to write the most common data types, like WriteTextAsync() (to write a string) or WriteBufferAsync() (to write a binary content, like an image). The following sample shows how to create a text file in the local storage:
private async void OnCreateFileClicked(object sender, RoutedEventArgs e) { StorageFile file = await ApplicationData.Current.LocalFolder.CreateFileAsync("file.txt"); await FileIO.WriteTextAsync(file, "Sample text"); } |
You can also add a text to an existing file, by using the AppendTextAsync() method:
private async void OnReadFileClicked(object sender, RoutedEventArgs e) { StorageFile file = await ApplicationData.Current.LocalFolder.GetFileAsync("file.txt"); await FileIO.AppendTextAsync(file, "Sample text to append"); } |
The reading operations are performed in the same way, by using the reading methods offered by the FileIO class, like ReadTextAsync() to read a string or ReadBufferAsync() to read a binary file. The following sample shows how to retrieve the previously saved text:
private async void OnReadFileClicked(object sender, RoutedEventArgs e) { StorageFile file = await ApplicationData.Current.LocalFolder.GetFileAsync("file.txt"); string text = await FileIO.ReadTextAsync(file); } |
Accessing files using URLs
In some scenarios, it can be useful to access the application’s files using an URL, for example when you’re using an Image control and you want to display an image stored in the local storage. In Universal Windows Platform apps, you can use some special protocols to get access to the files of your application:
- The ms-appx:/// protocol is used to provide access to the files that are part of the Visual Studio project. However, to access to these files, you need to make sure that the Build action property (which can be set by right clicking on the file in Visual Studio and choosing Properties) is set to Content. For example, let’s say that you have an image called logo.png placed in the Assets folder of your project: the following sample shows how to display it using an Image control in the XAML.
<Image Source="ms-appx:///Assets/logo.png" /> |
- The ms-appdata:/// protocol is used to provide access to the files that are stored in one the of the available storage’s types. After the protocol, you need to specify which storage you want to use: local, localcache, roaming or temporary. The following sample shows how to use an Image control to display an image stored in the local storage.
<Image Source="ms-appdata:///local/Assets/logo.png" /> |
Managing the application’s settings
A very common scenario while developing an application is settings management: the application can offer a settings page where the user can customize the application based on to their needs. Additionally, these APIs are also often used to save and load the page’s state when the application is suspended, as we’ve seen in the previous chapter. Both the local storage and the roaming storage offer an easy way to manage this scenario, by offering a class (LocalSettings for local storage, RoamingSettings for roaming storage) which is a collection where we can save our settings and identify them with a unique key, so that we can retrieve them later.
Under the hood, settings are identified with a Dictionary<string, object> collection, where we can save our data (which can be a generic object) identified by a string key. This data is automatically serialized and deserialized when it’s needed, so that it’s persisted and maintained even if the application is closed.
The dictionary is stored in the Value property offered by the LocalSettings and the RoamingSettings classes. The following sample shows how to save some data into the roaming settings:
private void OnSaveSettingsClicked(object sender, RoutedEventArgs e) { if (ApplicationData.Current.RoamingSettings.Values.ContainsKey("IsEnabled")) { ApplicationData.Current.RoamingSettings.Values.Remove("IsEnabled"); } ApplicationData.Current.RoamingSettings.Values.Add("IsEnabled", true); } |
First we check, by using the ContainsKey() method, if a value associated with a specific key (in the sample, it’s called IsEnabled) already exists. If yes, before saving it using the Add() method, we delete it from the collection using the Remove() method.
The following sample, instead, shows how to retrieve the just saved value from the roaming settings:
private async void OnReadSettingsClicked(object sender, RoutedEventArgs e) { if (ApplicationData.Current.LocalSettings.Values.ContainsKey("IsEnabled")) { bool isEnabled = (bool)ApplicationData.Current.LocalSettings.Values["IsEnabled"]; MessageDialog dialog = new MessageDialog(isEnabled.ToString()); await dialog.ShowAsync(); } } |
The syntax should be familiar, since it’s the standard one used when you work with Dictionary collections: after checking if the value identified by the IsEnabled key exists, we retrieve it by specifying the key’s name inside square brackets. Since the dictionary can store a generic object, we need to perform a cast to the object’s type we expect: in our case, we cast it to bool since, previously, we saved a bool value.
It’s very important to highlight that the settings can’t store any type of data, but only the native Windows Runtime types, which are listed in the following page of the official MSDN documentation: http://s.qmatteoq.com/WinRT-Types.
When it comes to manage settings, the best storage’s type to use is the roaming one: this way, if you’re working on a Universal Windows Platform app that can be installed on multiple devices, you’ll be able to share the settings across all of them.
Organizing settings
The settings classes we’ve previously seen offers also an easy way to organize the settings in different containers that, for example, can be related to different sections of your application. This way, instead of having all the settings stored in just one collection, you can split them in many dictionaries, each of them with its own unique identifier.
To use containers you first have to call the CreateContainer() method offered by one of the settings classes: the required parameters are the container’s name and a value of the ApplicationDataCreateDisposition enumerator, which tells to the Universal Windows Platform if the container should be created or not if it doesn’t exist. Once you’ve created the container, it works in the same way of the standard settings: you’ll have access to a property called Values, which is a Dictionary<string, object> collection. The following sample shows how to create a collection with name MainSettings, in which we save an integer value:
private void OnSaveSettingsClicked(object sender, RoutedEventArgs e) { ApplicationDataContainer container = ApplicationData.Current.LocalSettings. CreateContainer("MainSettings", ApplicationDataCreateDisposition.Always); container.Values.Add("NumberOfItems", 10); } |
To get access to the existing containers you can use the Containers property offered by the LocalSettings and RoamingSettings classes, which is a collection of all the available containers. Once you’ve retrieved a reference to the desired container, you can use again the Values collection to get the setting you’re looking for, in the same we’ve previously did:
private async void OnReadSettingsClicked(object sender, RoutedEventArgs e) { if (ApplicationData.Current.LocalSettings.Containers.ContainsKey("MainSettings")) { ApplicationDataContainer container = ApplicationData.Current.LocalSettings.Containers["MainSettings"]; int numberOfItems = (int)container.Values["NumberOfItems"]; MessageDialog dialog = new MessageDialog(numberOfItems.ToString()); await dialog.ShowAsync(); } } |
Access to the files that are included in the project
When you download an application from the Store, the operating system takes care of unpacking the package created by Visual Studio in a special system folder, which developers and users can’t access. Typically, the content of this folder matches the structure of your project in Visual Studio. Consequently, you may have the requirement to access to one of these files, like a database or an image, from code while the application is running. You can achieve this goal by using a special class called Package.Current.InstalledLocation, which identifies your project’s root. It behaves like a regular storage: every folder (including the InstalledLocation object itself) is identified with the StorageFolder class, while files are mapped with the StorageFile class.
The only important difference with the local storage is that you can’t write data in the application folder, but you can just read them. Every method to perform writing operations (like CreateFileAsync()) will throw an exception. The following sample shows how to get a reference to a file stored in the project and to copy it to the local storage:
private async void OnCopyFileClicked(object sender, RoutedEventArgs e) { StorageFile file = await Package.Current.InstalledLocation.GetFileAsync("file.xml"); await file.CopyAsync(ApplicationData.Current.LocalFolder); } |
Importing a file or a folder stored in the device
We’ve learned, in this chapter, that the local storage is isolated: we can’t directly access the data created by other applications or stored in the phone (like documents, images or music tracks). Since this approach can become a serious limitation for many apps, the Universal Windows Platform offers a class called FileOpenPicker that can be used to import external files into our application: the FileOpenPicker class opens a special dialog that is managed by the operating system and that can be used to browse the various folders of the devices, to look for one or more files to import in the application.
The basic usage of the FileOpenPicker class to import a file in Windows 10 is very simple, as you can see in the following sample:
private async void OnPickFileClicked(object sender, RoutedEventArgs e) { FileOpenPicker picker = new FileOpenPicker(); picker.FileTypeFilter.Add(".jpg"); picker.FileTypeFilter.Add(".png"); StorageFile file = await picker.PickSingleFileAsync(); if (file != null) { await file.CopyAsync(ApplicationData.Current.LocalFolder); } } |
The first requirement is to set is the kind of files we want to import: this way, the picker will automatically display only the files that match the extension we choose. We need to add at least one extension to the FileTypeFilter collection, otherwise we’ll get an exception; if we want to support any kind of file, we can just add the asterisk (*) as file’s type.
Once you’ve defined the supported extension, you just need to call the PickSingleFileAsync() method: the UI of the picker will be opened and the user will be able to choose any of the files on the device. Once he has made his choice, the picker will be closed and the control will be returned to your application: the PickSingleFileAsync() method will return a StorageFile object, which contains the file selected by the user. The previous sample shows how to copy this file into the local storage: it’s important to always check that the file is not null before performing any operation, since the user has the chance to cancel the import operation.
You can use the FileOpenPicker class also to import multiple files with a single operation, by calling the PickMultipleFileAsync(): it works in the same way of the previous one, with the only difference that, instead of returning a single StorageFile object, it returns a collection of them. The following sample shows how to copy all the selected files into the local storage of the application:
private async void OnPickFilesClicked(object sender, RoutedEventArgs e) { FileOpenPicker picker = new FileOpenPicker(); picker.FileTypeFilter.Add(".png"); IReadOnlyList<StorageFile> files = await picker.PickMultipleFilesAsync(); if (files.Count > 0) { foreach (StorageFile file in files) { await file.CopyAsync(ApplicationData.Current.LocalFolder); } } } |
Files aren’t the only thing that can be imported: you can import also a whole folder, which means that you’ll get access to all the files that are included. The operation is achieved in a very similar way, with the exception that in this case we’re using the FolderPicker class, like in the following sample:
private async void OnPickFolderClicked(object sender, RoutedEventArgs e) { FolderPicker picker = new FolderPicker(); picker.FileTypeFilter.Add("*"); StorageFolder folder = await picker.PickSingleFolderAsync(); if (folder != null) { var files = await folder.GetFilesAsync(); foreach (StorageFile file in files) { MessageDialog dialog = new MessageDialog(file.DisplayName); await dialog.ShowAsync(); } } } |
Also in this case, we need to add at least one element to the FileTypeFilter collection but, since folders don’t have a type, it’s enough to pass an asterisk (*) so that the user can import any folder on the device. Then you can call the PickSingleFolderAsync() method, which will open the usual picker UI: once the user has selected a folder, the method will return a StorageFolder object that references it. This way, you’ll be able to perform additional operations on the folder, like creating, opening or deleting a file, creating a subfolder, etc. The previous sample gets the list of all the files included in the folder and shows, with a dialog, their name.
Access to files stored on an external memory
Many devices offer a way to expand the internal storage memory, by using a SD card or external USB memory. The approach to access to files and folders stored on external memory relies on the same concepts previously explained in this chapter, like using the StorageFolder and StorageFile classes. However, there’s an important difference to keep in mind: you can’t freely access to any file stored in the memory, but you can only read and write files which type has been declared in the manifest file.
Consequently, the first step is to register the extensions we want to manage: we can do it in the Declarations section of the manifest file. We need to add a new File Type Association element, which is available in the Available declarations dropdown menu. This extension, to work properly, requires the following settings:
- A unique name that identifies the extension registration, which needs to be set in the Name field.
- The file extensions we want to support: for each of them, we need to specify the File Type field (which is the extension, like .txt) and, optionally, the Content Type field (for example, in case of a text plain it’s text/plain).
Now we can access to all the files which extensions have been specified in the manifest file. We can do it thanks to the KnownFolders class, which is a static class that offers a quick access to all the device’s libraries. We’ll talk about it again in another book of the series, when we’ll learn how to access to the multimedia libraries. One of these libraries is called RemovableDevices, which is a StorageFolder object that provides access to the removable devices.
It’s important to keep in mind that a Windows device can have multiple removable devices (for example, a tablet with a USB memory and a SD card slot) or no removable devices at all (like a smartphone without a SD card slot). Every device is treated as a folder: to discover all the available removable memories, we need to call the GetFoldersAsync() method on the RemovableDevices class. The following sample code shows a typical scenario for a Windows Mobile application: we get the list of all the available devices and, only if the number of results is greater than zero, it means that the phone supports external memory. Only in this case, we get the list of all the available files stored in the first memory (since a smartphone can’t have more than one SD card slot) and we display it to the user using a ListView control.
private async void OnGetFilesClicked(object sender, RoutedEventArgs e) { StorageFolder card = KnownFolders.RemovableDevices; IReadOnlyList<StorageFolder> folders = await card.GetFoldersAsync(); if (folders.Count > 0) { IReadOnlyList<StorageFile> files = await folders[0].GetFilesAsync(); FilesList.ItemsSource = files; } } |
It’s important to remember that, in this sample, the GetFilesAsync() method won’t return all the files stored in the external memory, but only all the files which extension matches the one we’ve declared in the manifest file. In this sample, it would return only the text files which extension is .txt.
Managing the application’s data
So far, we’ve learned how to manage the different storages that the Universal Windows Platform offers to developers and how we can easily create and read files and folders. However, the most important requirement when it comes to manage local data is to save them in a more structured way, so that it’s easier to perform the most common operations, like adding, removing or editing an item. Let’s say that we want to develop an application that needs to manage a list of customers: we can’t simply write this information into a text file, since it would be hard to create a logical connection between the data and the user interface and to perform simple queries, like retrieving the list of all the customers or adding a new one. Let’s see which are the best techniques to manage this scenario.
Serialization and deserialization
Serialization is the simplest way to store the application’s data in the local storage: this process makes possible to store complex data (like objects) into plain text files, which can be easily saved into the storage. The most common standard languages used for this scenario are XML and JSON. Deserialization is, simply, the opposite approach: the plain data is converted back into complex objects, which can be easily manipulated by the application.
Serialization is made easier by the Universal Windows Platform, since it offers a set of built-in classes that can perform these operations automatically: we won’t have to manually write the XML or the JSON file that matches our data, but the platform will take care of it for us. Usually, the serialization is performed every time the data is modified (for example, an item is added, edited or deleted), so that we can minimize the data loss risk in case of unexpected problems with the applications. Deserialization, instead, is performed when the application is opened or restored from a suspension.
Let’sl see a serialization sample, by using a simple class that describes a person: we’re going to store, in the application, a list of people.
public class Person { public string Name { get; set; } public string Surname { get; set; } } |
In a typical application, we’re going to work with a collection of data, which can be retrieved, for example, from a web service or from a database. In the following sample, we’re going to create a sample set of data:
public sealed partial class MainPage : Page { public MainPage() { this.InitializeComponent(); } protected override void OnNavigatedTo(NavigationEventArgs e) { { new Person { Name = "Matteo", Surname = "Pagani" }, new Person { Name = "Ugo", Surname = "Lattanzi" } }; } } |
Serializing and deserializing data using XML
Since the serialization is performed using a text file, we’re going to use the previously described APIs to create a XML file in the local storage. The following sample creates a file called people.xml in the local storage, using the CreateFileAsync() and OpenAsync() methods we’ve previously seen.
private async void OnSerializeDataClicked(object sender, RoutedEventArgs e) { DataContractSerializer serializer = new DataContractSerializer(typeof(List<Person>)); StorageFile file = await ApplicationData.Current.LocalFolder. CreateFileAsync("people.xml", CreationCollisionOption.ReplaceExisting); IRandomAccessStream randomAccessStream = await file.OpenAsync(FileAccessMode. ReadWrite); using (Stream stream = randomAccessStream.AsStreamForWrite()) { serializer.WriteObject(stream, people); await stream.FlushAsync(); } } |
The XML serialization and deserialization process is performed using the DataContractSerializer class, which is part of the System.Runtime.Serialization namespace. When we create a new instance of this class, we need to specify the data type we’re going to save: in our sample, it’s List<Person>.
Then, as we’ve previously seen in this chapter, we create a new file called people.xml and we open the writing stream, by using the AsStreamForWrite() method on the IRandomAccessStream object. The serialization procedure is performed by the WriteObject() method of the DataContractSerializer class, which requires the destination stream (the file we’ve just created) and the data that we want to serialize (the collection of Person objects). In the end, we call the FlushAsync() method, which forces all the data still in the buffer to be written in the stream.
If you proceed to check the content of your local storage, you’ll find a file called people.xml with the following content, which is a plain representation of our data:
<?xml version="1.0" encoding="utf-8" ?> <ArrayOfPerson xmlns="http://schemas.datacontract.org/2004/07/StorageWin8" xmlns:i="http://www.w3.org/2001/XMLSchema-instance"> <Person> <Name>Matteo</Name> <Surname>Pagani</Surname> </Person> <Person> <Name>Ugo</Name> <Surname>Lattanzi</Surname> </Person> </ArrayOfPerson> |
The opposite process, which is the deserialization, is very similar, since it’s always performed using the DataContractSerializer class: the differences is that, this time, we need just a reading stream, which is passed as parameter of the ReadObject() method offered by the DataContractSerializer class. Let’s see the following sample:
|
private async void OnDeserializeClicked(object sender, RoutedEventArgs e) { StorageFile file = await ApplicationData.Current.LocalFolder.GetFileAsync("people.xml"); DataContractSerializer serializer = new DataContractSerializer(typeof(List<Person>)); IRandomAccessStream randomAccessStream = await file.OpenAsync(FileAccessMode.Read); List<Person> people = new List<Person>(); using (Stream stream = randomAccessStream.AsStreamForRead()) { people = serializer.ReadObject(stream) as List<Person>; } } |
After getting a reference to the people.xml file (using the GetFileAsync() method) and opening the read stream (using the AsStreamForRead() method), we call the ReadObject() method that returns a generic object. It’s our duty to perform a cast, so that we can get back the data type we expect (in our case, it’s a List<People> collection).
Serializing and deserializing using JSON
The Universal Windows Platforms offers also a way to serialize the data using the JSON format, which has a shorter syntax and, consequently, requires less space to be stored. As we’re going to see in the next chapter, it’s also one of the reasons why JSON is the most widely used format when it comes to exchange data over a network: less size means less data to transfer. To work with the JSON format we can use the same exact code we’ve previously seen by using XML: the only difference is that, instead of the DataContractSerializer class, we’re going to use the DataContractJsonSerializer one. Look at the following sample:
As you can see, there are no differences except for the serialization class we’re using. The WriteObject() method will produce the following JSON file:
[ { "Name":"Matteo", "Surname":"Pagani" }, { "Name":"Ugo", "Surname":"Lattanzi" } ] |
Here is how, instead, we can perform deserialization:
|
private async void OnDeserializeClicked(object sender, RoutedEventArgs e) { StorageFile file = await ApplicationData.Current.LocalFolder.GetFileAsync("people.json"); DataContractJsonSerializer serializer = new DataContractJsonSerializer(typeof(List<Person>)); IRandomAccessStream randomAccessStream = await file.OpenAsync(FileAccessMode.Read); List<Person> people = new List<Person>(); using (Stream stream = randomAccessStream.AsStreamForRead()) { people = serializer.ReadObject(stream) as List<Person>; } } |
Controlling the serialization
As default behavior, all the properties that belong to a class are automatically serialized when we use the DataContractSerializer or the DataContractJsonSerializer classes. However, there are some scenarios where we would like to avoid serializing one or more properties, for example because they contain binary data (like an image) so they can’t be properly serialized.
To achieve this goal, the Universal Windows Platform offers a set of attributes that we can use to decorate our class, like in the following sample:
[DataContract] public class Person { [DataMember] public string Name { get; set; } [DataMember] public string Surname { get; set; } public BitmapImage Photo { get; set; } } |
First, we’ve added a DataContract attribute to the whole class; then, we’ve added a DataMember attribute to every property we want to serialize: all the others will be ignored. In the previous sample, only the Name and Surname properties will be serialized: the Photo property (which type is BitmapImage and can’t be serialized) will be ignored.
Using Json.NET
Over the years, a library called Json.NET has started to grow more and more, becoming a standard when it comes to deal with JSON data in a C# application. It has become so widely used then also many Microsoft official libraries and SDKs (like the ones used to interact with Azure services) are leveraging it. The biggest benefit of Json.NET is that it supports every Microsoft technology: it can be used in an ASP.NET website, a WPF application, a Xamarin cross-platform app and, of course, in a Universal Windows Platform app. As a proof of his success, if you open the NuGet Package Manager window (which, by default, orders the available packages by number of downloads), you’ll find Json.NET stable at the top of the list, with almost 40 million of downloads.
Json.NET has many advantages over the built-in DataContractJsonSerializer class we’ve seen before:
- It’s faster and it consumes less memory.
- The serialization and deserialization process is easier, since it works directly with strings and objects and not streams.
- It offers a language that is compatible with LINQ to perform in a simple way complex queries on JSON data.
Json.NET is available as NuGet package (http://www.nuget.org/packages/Newtonsoft.Json/), while the official website (http://www.newtonsoft.com/json) is the best place where to look for samples and documentation.
Let’s see how, thanks to Json.NET, we can simplify the previous code samples we’ve seen to serialize and deserialize some JSON data into the storage. Let’s start with the serialize sample:
private async void OnSerializeData(object sender, RoutedEventArgs e) { StorageFile file = await ApplicationData.Current.LocalFolder.CreateFileAsync("people.json", CreationCollisionOption.ReplaceExisting); string serializedData = JsonConvert.SerializeObject(people); await FileIO.WriteTextAsync(file, serializedData); } |
As you can see, compared to the previous sample with the DataContractJsonSerializer class, the code is more straightforward: we use the JsonConvert class (which belongs to the Newtonsoft.Json namespace) and we call the SerializeObject() method, passing as parameter the object we want to serialize (in our case, the collection of Person objects). As result, we get a string with the serialized data, which we can simply save in a file in the storage using the standard APIs we’ve seen before.
The deserialization procedure is always performed using the JsonConvert class, which offers a DeserializeObject<T>() method, where T is the type of data we expect in return: as input, it simply requires the JSON string we’ve loaded from the storage.
The following example shows how to get back the original collection of Person object starting from the JSON file in the local storage:
private async void OnDeserializeClicked(object sender, RoutedEventArgs e) { StorageFile file = await ApplicationData.Current.LocalFolder.GetFileAsync("people.json"); string serializedData = await FileIO.ReadTextAsync(file); List<Person> people = JsonConvert.DeserializeObject<List<Person>>(serializedData); } |
Also in this case you can see how the code is cleaner, because we aren’t working with streams: we just get a reference to the JSON file, we read the content using the ReadTextAsync() method of the FileIO class and we pass the JSON string to the DeserializeObject<List<Person>>() method. As you can notice, no cast is required: the JsonConvert class takes care of returning us the proper type, based on the value of T.
Controlling the serialization
Json.NET offers some useful attributes to control the serialization and deserialization process, so that we can manually define the mapping between the object’s properties and the JSON properties. By default, JSON properties are serialized using the same name of the object’s properties (so, for example, the Name property of the Person class is converted into a Name property in the JSON file). However, thanks to attributes, we can change this behavior. Let’s see a real sample:
public class Person { [JsonProperty("id")] public int Id { get; set; } [JsonProperty("name")] public string Name { get; set; } [JsonProperty("surname")] public string Surname { get; set; } } |
Thanks to the JsonProperty attribute that has been applied to every property, we can manually define which name to use when the property is translated into a JSON file. The previous sample is very common in real applications, since C# uses a different notation than the JSON one: in C#, properties usually start with an uppercase letter, while in JSON they start with a lowercase one.
Another way to control the serialization is by using a class called JsonSerializerSettings, which offers many settings like how dates, errors or numbers should be managed. The following sample shows another common scenario, which is null values management:
private async void OnSerializeData(object sender, RoutedEventArgs e) { StorageFile file = await ApplicationData.Current.LocalFolder.CreateFileAsync("people.json", CreationCollisionOption.ReplaceExisting); JsonSerializerSettings settings = new JsonSerializerSettings(); settings.NullValueHandling = NullValueHandling.Ignore; string serializedData = JsonConvert.SerializeObject(people, settings); await FileIO.WriteTextAsync(file, serializedData); } |
As default behavior, when Json.NET tries to serialize a property with a null value, it includes it anyway in the JSON file and sets it to null. However, especially when you’re working with web services, this approach can cause some problems: if they find some null properties in the JSON, some services raise an error. Thanks to the JsonSerializerSettings class, we’re able to tell to Json.NET not to include in the JSON the empty properties: we do it by setting the NullValueHandling property to NullValueHandling.Ignore. As you can see, the SerializeObject() method of the JsonConvert class can accept a second parameter, which is the JsonSerializerSettings object we’ve previously defined.
LINQ to JSON
When you load a JSON data from the local storage or from a web service and you want to convert it into objects that can be manipulated in code, the deserialization process is very helpful since it takes care to perform the conversion automatically. However, sometimes it’s not our scenario: for example, we need to load a very complex JSON but we must extract just some of its properties. In these cases, Json.NET offers a powerful language called LINQ to JSON, which we can use to perform LINQ queries on a JSON file, so that we can retrieve only the data we need.
To perform such operations we need to use the JObject class, which offers the Parse() method that is able to convert a plain JSON string in a complex structure that we can explore, like in the following sample:
private async void OnParseJson(object sender, RoutedEventArgs e) { StorageFile file = await ApplicationData.Current.LocalFolder.GetFileAsync("people.json"); string serializedData = await FileIO.ReadTextAsync(file); JObject json = JObject.Parse(serializedData); } |
Let’s see now what the most common operations are that we can perform by using the JObject class.
Simple JSON
Let’s assume that you have a simple JSON string like the following one:
{ "Id":1, "Name":"Matteo", "Surname":"Pagani" } |
In this case, the JObject class behaves like a Dictionary<string, object> collection, so we can retrieve the properties simply by referring to them with their name, like in the following sample:
private async void OnParseJson(object sender, RoutedEventArgs e) { StorageFile file = await ApplicationData.Current.LocalFolder.GetFileAsync("people.json"); string result = await FileIO.ReadTextAsync(file); JObject json = JObject.Parse(result); string value = json["Name"].Value<string>(); } |
To extract the value of the property we use the Value<T>() method, where T is the property’s type: this way, the value is automatically converted to the proper type (in the sample, to a string).
Complex JSON
A JSON string can also contain, like in C#, complex objects, where a property is represented by another object, like in the following sample:
{ "Id":1, "Name":"Matteo", "Surname":"Pagani", "Address":{ "Street":"Fake address", "City":"Milan" } } |
Address is a complex property, since it contains other sub properties, like Street and City. To access to these properties we need to use the SelectToken() method, which requires as parameter the full JSON path. The following sample shows how to extract the value of the City property:
private async void OnParseJson(object sender, RoutedEventArgs e) { StorageFile file = await ApplicationData.Current.LocalFolder.GetFileAsync("people.json"); string result = await FileIO.ReadTextAsync(file); JObject json = JObject.Parse(result); string city = json.SelectToken("Address.City").Value<string>(); } |
Collections
As we’ve already seen in previous samples in this chapter, JSON can be used also to store collections of items. In this case we can use the Children() method of the JObject class to return all the items that belong to the collection. The following sample shows how to create a sub collection that contains only the value of the Name property for each item:
private async void OnGetDataClicked(object sender, RoutedEventArgs e) { StorageFile file = await ApplicationData.Current.LocalFolder.GetFileAsync("people.json"); string result = await FileIO.ReadTextAsync(file); JObject json = JObject.Parse(result); List<string> list = json.Children().Select(x => x["Name"].Value<string>()).ToList(); } |
Using a database: SQLite
Serialization is very easy to use, but it has some limitations: the most important one is that the all the data needs to be stored in memory, since we can’t manipulate the data directly, but we need first to deserialize the entire collection in memory before we can perform any operation. In addition, serialization doesn’t play well when you have a lot of data with relationships between them (for example, you don’t have to manage just a collection of people, but also a collection of orders made by these people).
Databases are the best technology for these scenarios: we can keep all the data in the storage and to retrieve only the subset we need, thanks to queries. In addition, we are also able to create relationships between the data, so that we can easily retrieve, for example, all the orders made by a specific person.
The Universal Windows Platform relies on a third-party technology for database support, which is SQLite that offers the following advantages:
- It’s a widely used open source project, supported by many important companies like Mozilla and Facebook.
- It’s able to work as a disconnected database engine: unlike traditional database solutions, like SQL Server, which require a special service called DBMS to act as a middle man between the data and the applications, SQLite databases are plain binary files, which can be accessed directly from the client application.
- It’s cross platform: you’ll find a SQLite implementation for a lot of platforms, both mobile (Windows, iOS, Android, etc.) and traditional (desktop apps, web apps, etc.)
- It’s written in C/C++, which helps to provide great performances.
Starting from the November Update, the SQLite engine has been natively added in the Universal Windows Platform, so you can use it out of the box. However, if you want stay always up to date with the latest version of the engine, you can add it to your project by installing a specific Visual Studio extension from https://visualstudiogallery.msdn.microsoft.com/4913e7d5-96c9-4dde-a1a1-69820d615936
Once you’ve installed the extension, you’ll find it in the Add Reference menu, which is displayed when your right click on a project in Solution Explorer, inside the category Universal Windows – Extensions.
Interacting with the data: Entity Framework Core 1.0
The engine itself, however, is useless, unless you have a good knowledge of C and C++: being SQLite based on this language, it doesn’t offer any high-level API to interact with it. As such, during time many developers have created third party libraries that can work on top of SQLite and that can help developers to interact with a database using more familiar and widely used languages, like C#, Java or Swift.
The Universal Windows Platform doesn’t make any exception and it provides multiple libraries to leverage C# as a programming language to perform the typical operations that you can perform on a database, like creating tables and adding, updating or deleting new items.
In the first book of this series, we’ve mentioned how Microsoft is going through an important series of changes, with the goal to support in a better way the digital transformation that the IT world is facing in the last years: .NET Core and the Universal Windows Platform are two examples of these changes. Another piece of the puzzle in this transformation is Entity Framework, the ORM created by Microsoft in 2008. ORM stands for Object-Relational Mapping and it’s a technology that has been created with the goal to bridge the gap between the database world and the development world. This gap is caused by the fact that, typically, databases and applications work with different concepts: a database is made by one or more tables, each of them with a set of columns and rows. Applications, instead, work with classes and objects, which are grouped into collections. Consequently, when developers work on applications that need to store data on a database, they need to manually translate one concept into the other and vice versa: when we need to store an object in the database, we need to translate it into a row with a set of columns; on the other side, when we need to retrieve some data from the database, we need to take a set of rows and columns and recreate back a collection of objects.
ORM are libraries that perform this conversion for us: in the application, we’ll continue to work with objects and collections but, under the hood, the ORM will take of generating the underlying SQL queries and turn them into rows to be stored into tables.
There are many ORM libraries available on the market: an example of a very popular one, especially in the early days, was Nhibernate. However, in 2008 Microsoft introduced Entity Framework, with the goal to offer its own ORM implementation for Microsoft developers. Entity Framework is now a mature technology, which is widely used in many desktop and web application and that has reached version 6.0 at the time of writing this e-book
However, for the same reason that brought the .NET Framework team to start from scratch with .NET Core, also the Entity Framework team has started to create a new version of the ORM called Entity Framework Core, which has been recently released in its first version (1.0). The goals of EF Core are the same of .NET Core (and, in fact, the first stable version of both technologies have been released at the same time): providing a more flexible, lightweight and performant platform, which is able not only to run on Windows and to support traditional relational databases like SQL Server, but also to run on competitive platforms like OS X and Linux and to support new database technologies, like NoSQL data stores. Also, Entity Framework Core is an open source technology, published on GitHub and driven not just by Microsoft, but also by the community feedback.
Entity Framework Core play an important role also in our book: being based on .NET Core, it fully supports also the Universal Windows Platform and, among the different supported database providers, we find also SQLite. Consequently, we can use this technology to store the data of our application in a more structured way. Let’s see how to proceed by creating a sample application to store a list of customers.
Note: EF Core 1.0, to properly work in a Universal Windows app, requires at least version 5.2.2 of the .NET Core base infrastructure. As such, the first step to do is to right click on your project, choose Manage NuGet Packages and make sure that the version of package Microsoft.NETCore.UniversalWindowsPlatform is, at least, 5.2.2
Configuring EF Core 1.0 in a Universal Windows Platform app
The first step is to add, to our Universal Windows Platform project, a reference to the following NuGet packages:
- Microsoft.EntityFrameworkCore
- Microsoft.EntityFrameworkCore.Sqlite
- Microsoft.EntityFrameworkCore.Tools
Note: at the time of writing, the package Microsoft.EntityFrameworkCoreTools is available as a prerelease package. As such, to find it using the NuGet Package Manager, you will have to make sure that the option Include prerelease is enabled.
Then we need to create the model of our application, which means the data that we’re going to manipulate that, under the hood, will be translated into tables and rows. In our scenario, we need a class to store some information about a customer, like in the following sample:
public class Customer { public int CustomerId { get; set; } public string Name { get; set; } public string Surname { get; set; } } |
Entity Framework makes use of some naming conventions to simplify the connection between a class and a table: as you can see, the class contains a property called CustomerId, which is the same name of the class with the Id suffix. When Entity Framework finds a property with this naming convention, it will automatically treat this property as the primary key of the table, with an auto generated value (which means that, every time we’re going to add a Customer in the table, the CustomerId property will be automatically filled with a unique identifier, which usually is an auto incremental number).
The second step is to create a class that acts as a context: it defines the tables our database will contain and it will allow us to perform all the operations with it. Here is how a context class looks like:
public class CustomersContext : DbContext { public DbSet<Customer> Customers { get; set; } protected override void OnConfiguring(DbContextOptionsBuilder optionsBuilder) { optionsBuilder.UseSqlite("Filename=Customers.db"); } } |
The class must inherit from the DbContext one (which is included in the Microsoft.EntityFrameworkCore namespace) and it has two purposes:
- It defines a collection for each type of data we want to store inside the database and each of them will be mapped with a table in the database. These collections are identified by a special class, called DbSet<T>, where T is the type of data we want to store. In this sample, we have created a collection which type is DbSet<Customer>, which means that the database will contain a table to store Customer objects. One nice feature to highlight is that Entity Framework Core is able, by default, to handle the plurality of the names: since we have created a class called Customer, it will automatically generate a table in the database called Customers (with the final s).
- It defines which is the kind of database we want to use to store the data. We achieve this goal by overriding the OnConfiguring() method, by using one of the methods offered by the DbContextOptionsBuilder object. In this case, since we are working with a Universal Windows Platform app, we don’t have too many choices: we use the UseSqlite() method, passing as parameter a string with the name of the database we want to create. Entity Framework will automatically take care of generating a file with this name (in our sample, it’s Customers.db) in the local storage of the application.
Now, before using the CustomersContext class, we need to add migrations: it’s a way for Entity Framework to automatically generate the needed code to create the database and tables for us, starting from the definition of our model.
Let’s see a real example, to better understand how they works. Migrations aren’t created automatically, but you need to execute some commands in the NuGet console. As such, in Visual Studio choose Tools -> NuGet Package Manager -> Package Manager Console.
At the bottom of the application you will get access to a console, that can be used to interact with NuGet using Powershell scripts instead of a user interface. For example, you can use it to install new packages or remove existing ones, instead of leveraging the NuGet Package Manager user interface that you get when you right click on a project and you choose Manage NuGet packages.
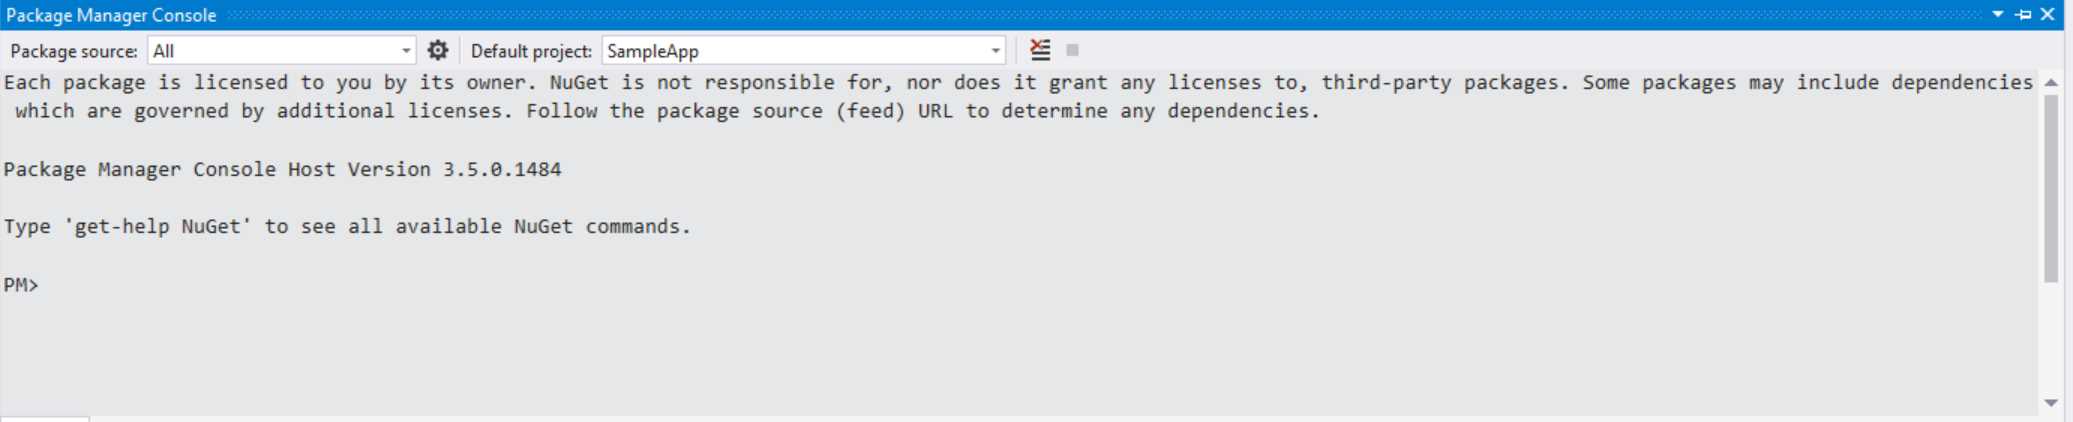
- The NuGet Package Manager Console
To add migrations, you will need to perform the following command in the console:
PM> Add-Migration FirstMigration |
Note: At the time of writing, there’s an issue when you try to create a migration and you’re using an Entity Framework version higher than 1.0.0: the migration will fail with an exception in the Package Manager Console. Until the problem is fixed, the workaround is to add a text file called app.config in your project and include the following XML:
<?xml version="1.0" encoding="utf-8" ?> <configuration> <runtime> <assemblyBinding xmlns="urn:schemas-microsoft-com:asm.v1"> <dependentAssembly> <assemblyIdentity name="System.IO.FileSystem.Primitives" publicKeyToken="b03f5f7f11d50a3a" culture="neutral" /> <bindingRedirect oldVersion="4.0.0.0" newVersion="4.0.1.0"/> </dependentAssembly> <dependentAssembly> <assemblyIdentity name="System.Threading.Overlapped" publicKeyToken="b03f5f7f11d50a3a" culture="neutral" /> <bindingRedirect oldVersion="4.0.0.0" newVersion="4.0.1.0"/> </dependentAssembly> <dependentAssembly> <assemblyIdentity name="System.ComponentModel.Annotations" publicKeyToken="b03f5f7f11d50a3a" culture="neutral" /> <bindingRedirect oldVersion="4.1.0.0" newVersion="4.0.0.0"/> </dependentAssembly> <dependentAssembly> <assemblyIdentity name="Microsoft.EntityFrameworkCore" publicKeyToken="adb9793829ddae60" culture="neutral" /> <bindingRedirect oldVersion="1.0.0.0" newVersion="1.0.1.0"/> </dependentAssembly> <dependentAssembly> <assemblyIdentity name="Microsoft.EntityFrameworkCore.Relational" publicKeyToken="adb9793829ddae60" culture="neutral" /> <bindingRedirect oldVersion="1.0.0.0" newVersion="1.0.1.0"/> </dependentAssembly> </assemblyBinding> </runtime> </configuration> |
This configuration will apply the proper bindings form the original version (1.0.0.0) to the most recent one. In the previous sample, the XML code refers to a project which is using Entity Framework Core 1.0.1.0. In case a new minor version will be released after the release of this book (like 1.0.2.0), you will need to remember to change the value of the newVersion attribute for the assemblies identified by the name Microsoft.EntityFrameworkCore and Microsoft.EntityFrameworkCore.Relational.
Once the operation is completed, you will find a new folder in your project called Migrations, which will contain a couple of classes that, starting from the model we have realized, will take care of generating the proper tables, rows and columns. For example, here is how the FirstMigration class looks like:
public partial class FirstMigration : Migration
As you can see, it contains a method called Up(), which takes care of creating the table, by adding as column each property we have defined in the Customer class. You can also notice that the migration procedure has been able to automatically detect the features of our model based on the naming convention we’ve previously mentioned: the CustomerId property, in fact, is converted into a column with an auto generated value and it’s marked as a primary key. Now that the migration’s tool has generated all the code we need to work with the database, we can start to perform the first operations. The first step is to create the database when the app starts. We can perform this operation, for example, in the OnNavigatedTo() method of the main page of our application:
We don’t have to worry about the fact that the OnNavigatedTo() method will be called every time the user will navigate to the main page: the code generated by Entity Framework Core is smart enough to avoid recreating the table if it already exists. To create the database, it’s enough to call the Migrate() method of the Database property, which is exposed by the context we have previously created (in our case, the CustomersContext object). Note: By including all the operations with the database inside a using statement, we make sure that the connection to the database is properly closed once we have finished the job. Now that the database has been created, we can perform the most common operations, like inserting, updating or deleting customers. Inserting a new item in the tableIf we want to add a new object to the table, we simply need to call the Add() method exposed by the CustomersContext object, passing as parameter a new Customer object. Entity Framework Core will be able to automatically detect which is the correct table where to place this kind of data: in this case, since, we’re passing to the method a Customer object, Entitiy Framework knows that it needs to add it to the DbSet<Customer> collection. However, this code will simply prepare the query to perform, but it won’t effectively execute it: to complete the operation and store the data in the database we need to call the SaveChanges() method on the CustomersContext object. Here is a full example:
We are not forced to call the SaveChanges() method immediately. We can also perform multiple operation of different types (inserts, updates, deletes, etc.) and, once we’re done, we can execute all of them at once. We can also add multiple objects in a single operation by using the AddRange() method, which accepts as parameter a collection of items (in this case, it would expect a collection of Customer objects). Retrieving the items in a tableThe DbSet<T> type, which is used to map a table, is simply a collection of items, so we can use the standard LINQ operators to retrieve the items. For example, if we just want to get all the existing customers, we can simply apply the ToList() extension method to the Customers collection, like in the following sample:
The result is just a collection of data that we can handle in the way we prefer: in the previous sample, we’re setting it as ItemsSource of a ListView control called Customers, which has been placed in the XAML page. Of course, we could have also have applied any LINQ operator to filter the results. For example, we can use the Where() clause if we want to get all the customers with a specific surname:
Updating the items in a tableTo update an item stored inside a table, we first need to get a reference to it, by leveraging the same approach we’ve seen before to get one or more items from an existing DbSet<T> collection. Once we have a reference, we can change the properties we want and then call the Update() method exposed by the context class to perform the changes. Remember that, also in this case, the method will just prepare the query: we need to call the SaveChanges() method to actually execute it.
The previous sample code first looks for a customer in the table identified by Pagani as value of the Surname property. Then, if it finds one, it changes his name and then updates the customer in the table by passing its reference to the Update() method. Also in this case, you the chance to update multiple items at the same time by using the UpdateRange() method. Deleting the items in a tableThe deleting operation is very similar to the update one: we retrieve a reference to the item (or the items) we want to delete and then we call the Remove() method on the context class. In the following sample, we look for a single customer identified by the Surname Pagani and we delete it, by calling first the Remove() method and then the SaveChanges() one.
Also in this case, we have the chance to remove multiple items at once by calling the RemoveRange() method. Debugging the databaseOne common requirements when you’re working with databases is understanding which data is really saved inside it, in case we get unexpected behaviors. We have already seen, at the beginning of the chapter, how to localize the storage of our application: by default, Entity Framework Core creates the database into the LocalState folder. In Internet, there are many tools (free and paid) that can be used to open a SQLite database and explore its content and structure. The official SQLite website offers a list of these tools, that can be found at https://www.sqlite.org/cvstrac/wiki?p=ManagementTools One of the tools I prefer it’s called DB Browser for SQLite, since it’s open source and it’s available for multiple platforms, including Windows. You can download it from the official site: http://sqlitebrowser.org/ Once you have installed it, you can just press the Open database button and look for the database file with a .db extension that has been created by Entity Framework Core in your local storage and start analyzing both the structure (tables, columns, etc.) and the data.
Now that we’re about to talk about relationships, this tool will be very helpful to understand better what Entity Framework Core does under the hood. Managing relationshipsThe example we’ve seen so far was very simple: our database contained just one table, so the application was manipulating only one kind of entity, the Customer one. However, one of the most powerful features of working with a database is support for table relationships: we can have multiple tables and we can establish a connection among them, so that we can keep the various entities separated but, at the same time, create relations between them. Let’s see a very common example by enhancing our application: so far, we have just stored a list of customers, but now we want also to track a list of orders and relate them to the customers who made them. To achieve this goal, we need to make some changes to our existing code. First, we need to create a new class, which will identify a single order:
As you can see, we’re following the same convention we’ve seen for the Customer class: we’ve created a class called Order with a property called OrderId, which will act as primary key of the table, plus a couple of other properties that we need to track the info about the order (the title and the price). We can start to notice something new: since, in this case, we need to handle a relationship (which means that we need to know which customer made the order), we need to add a couple of additional properties: one is called foreign key and it’s the column that contains a reference to the column of the other table that we can use to make the connection. In this case, we’re going to use the CustomerId property: we’re going to store the id of the customer that made the order. This special property will become a real column of the table where all the orders will be stored. The other property, instead, will be used just by Entity Framework Core and it won’t be translated into a real column: it’s just an easy way, for us, to get access to a reference of the Customer object related to the customer that made the order. This way, if we want to know, for example, the name and the surname of the person that made the order, we can just access to this Customer property. The second change we need to make is in the original Customer class: in the same way we have just added a property that allows us, directly from an order, to get all the info about the customer that made it, Entity Framework Core allows you to support also the opposite scenario. We’re going to add, to the Customer class, a property which contains the list of all the orders made by one customer:
Again, also in this case the property called Orders will be used by Entity Framework Core to make our life easier, but it won’t be translated into a real column of the table. The last change we need to make in code is to add a new DbSet<T> collection in the CustomersContext class: in this case, its type will be DbSet<Order>, so that Entity Framework Core will be able to generate a second table in the database to store the orders.
Now we can use again some Entity Framework Code magic to generate some code for us: let’s open again the NuGet Package Manager Console and let’s type the following command:
After a while, we will find a new class called SecondMigration in the Migrations folder of our project. If we look at it, you will notice that it will contain all the code required to generate the Orders table and to create the relationship with the Customers one:
Thanks to the definition we have included in the Orders class, the property called CustomerId will act as foreign key: thanks to this property, we’ll be able to know which customer made a specific order. The migration approach by Entity Framework Core is very smart: do you remember that, in the OnNavigatedTo() method of the main page, we have called the Migrate() method?
This code doesn’t take care just of creating the database the first time but, in case it finds an updated migration class (like the SecondMigration one we’ve just created), Entity Framework Core will understand it and will apply the changes to the existing database, by adding the new table and by updating the existing ones with the new columns. In our new scenario, one of the benefits of using Entity Framework Core is that the foreign key we have just added will be completely transparent to us, since we’ll be able to continue working with classes and objects like we did before. Let’s say, for example, that we want to create a new customer and assign an order to him. As you can see from the following code, thanks to the Customer property that is available in the Order class, we don’t have to manually deal with the foreign key:
First, we create a Customer object, which gets assigned to the Customer property of a new Order object. In the end, we add both of them to the database using the Add() method of the CustomersContext class and, in the end, we save the changes by calling the SaveChanges() method. If we try now to open the database using the tool DB Browser for SQLite we’ve described before, you will realize that most of the complex work has been completely hidden by Entity Framework: for example, if you open the Orders table, you will see that that the CustomerId column contains the proper identifier of the customer we have just created. However, in the code, we didn’t have to take the foreign key in consideration, but we simply had to connect the customer and the order through a regular C# property. Lazy loadingBy default, Entity Framework Core applies a concept called lazy loading, to avoid executing useless queries and having a big impact on the application’s performances if not needed. Let’s say, for example, that you want to retrieve the list of all the orders made by one of your customers:
The previous code, by using the FirstOrDefault() LINQ clause, retrieves the first customer in the table which matches our criteria (the Surname property equal to Pagani) and calculates the number of orders that he made, with the goal to show this information to the user. Out of the box, you would expect this code to work just fine: the purpose of having a collection called Orders inside the Customer class is to make our life easier when it comes to retrieve information about the orders made by a customer. Instead, if you try to run this code, you’ll get a bad surprise: a NullReferenceException will be raised, since the Orders property of the customer will be null. The reason is that, by default, Entity Framework Core applies a lazy loading approach: unless explicitly requested, the relationship between two entities isn’t loaded. This approach helps to improve writing and reading times since, when you need to handle a relationship, you need to leverage the JOIN SQL operator, which has a performance cost compared to a standard plain query. Since, in this case, we didn’t request it, Entity Framework Core took care just of retrieving the first customer that matched our criteria, but it didn’t fill the Orders property with the data coming from the Orders table. To solve this problem, we need to use the Include() method offered by the DbSet<T> collection, which allows us to specify that we want a relationship to be handled when we perform the query. Here is how the updated code looks like:
As you can notice, before applying the FirstOrDefault() LINQ clause, we use the Include() method and we specify, always using a lambda expression, which is the property that defines the relationship that we want to handle. In our case, we want the Orders collection of the Customer class to be filled when we retrieve our customer. The result will be that, now, the Orders collection won’t be null anymore, but it will contain all the orders made by the customer we selected. Of course, the same concept applies the other way around: if we try to retrieve one order without using the Include() method, the Customer object will be null and we won’t get the chance to get all the info about the customer who made the order. Here is the proper code to achieve this result:
In the previous sample, since we have specified that we want to fill the Customer object when we retrieve an item from the Orders table, we have the chance to display a message to the user with the name and the surname of the customer that made it. Without using the Include() method, the Customer object of the order would have been null and, as such, we would have received a NullReferenceException during the creation of the message to display. Making the user interface more responsive when dealing with databasesFor the sake of simplicity, all the examples we’ve seen so far were using synchronous APIs, which means that if you start to stress too much the database (like inserting a lot of data at the same time or performing complex queries), you may risk slowing down the UI thread, making the overall user experience worse. However, all the classes we’ve seen so far offers also an alternative asynchronous version, which you can use with the await prefix. For example, here is how it looks like the asynchronous version of the insert operation:
The basic operations (add, update, remove, etc.) are only synchronous, because under the hood they don’t perform any change to the database, they just prepare the required SQL query. However, when we are ready to commit them on the database, we can rely on the asynchronous method SaveChangesAsync(). Another example is when we want to retrieve the list of existing items in a table: in this case, instead of using the classic ToList() method, we can use the asynchronous version ToListAsync(), like in the following sample.
Performing manual SQL queriesIn most of the cases, Entity Framework Core can provide you all the infrastructure you need to keep working with classes and object, without having to deal with SQL queries, rows and columns. However, at some point, you may need to have better control over the SQL query that is performed against the database (for example, because it’s a complex one and you want to manually optimize it). To handle this scenario, the DbSet<T> collection exposes a method called FromSql() that allows you to execute a query starting from a SQL statement. Entity Framework Core will make your life easier anyway, by not asking to manually parse the returned rows, but by directly returning a collection of type IQueryable<T>. Let’s look at the following example:
As you can see, we’re using the FromSql() method on the Customers table and we’re manually performing a SQL query to retrieve all the existing customers (SELECT * FROM Customers). Since we used this method directly on the Customers table, Entity Framework Core doesn’t ask us to manually parse the result, but it already knows that it needs to return a collection of Customer objects. In this case, the collection is represented by the IQueryable<Customer> type. The advantage of this type is that we are still at a stage where the query hasn’t been really executed yet. This means that we can apply further refinements (by using again the FromSql() method or by using one of the many extension methods offered by the collection) and, only when we call the ToList() method, effectively execute the query and get the results back. The FromSql() method accepts also parameters in a safe way, to avoid SQL injections attacks, like in the following sample:
We can specify multiple parameters, each of them identified by the syntax @px, where x is the parameter number. Then, as parameters of the FromSql() method, other than the SQL query we can pass one or more values, which will be replaced instead of the parameters. In the previous example, the parameter p0 will be replaced by the value of the surname property. Performing advanced operationsWe conclude this overview of Entity Framework Core by highlighting that the DbSet<T> collection exposes many extension methods, that can be used to perform in a C# way most of the standard SQL operations, like:
The following sample shows how to use the Max() clause and a lambda expression to get the maximum price of an order stored in the Orders table:
Storing sensitive dataThe Universal Windows Platform offers a set of classes specifically to store sensitive data, like service credentials. These classes, which are part of the Windows.Security.Credentials namespace, are able to:
The key class to store sensitive data is called PasswordVault, which can store one or more PasswordCredential objects, like in the following sample:
Every credential is identified by a unique name, which is the first parameter passed to the class constructor (in the sample, it’s “YourServiceCredentials”): then you can specify the username and the password to store. To add a PasswordCredential object to the vault, it’s enough to call the Add() method. To retrieve the stored credentials, instead, you can use the FindAllByResource() method offered by the PasswordVault class: it will return a list of PasswordCredential objects that match the given resource name. Typically, you will get just one result, since you can’t have two credentials stored with the same name. The following sample retrieves the previously stored credentials and displays them to the user:
The only thing to highlight is that, before accessing to the Password property of the PasswordCredential class, we need to call the RetrievePassword() method, as a security measure: otherwise, we won’t be able to read its value. |
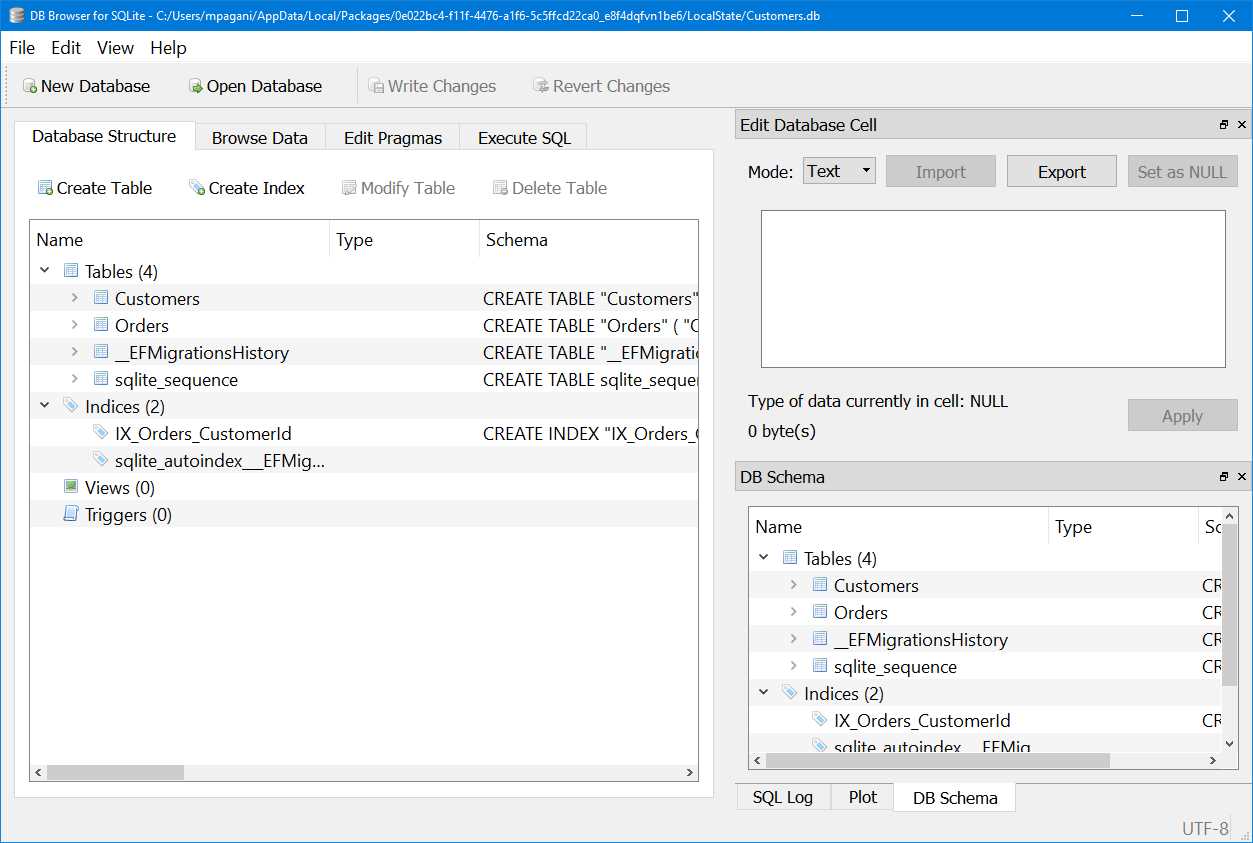
- 70+ advanced UWP components for Windows Store apps.
- UI controls for LOB apps: Charts, DataGrid, Diagram, and more.
- Comprehensive features for building touch-friendly, Windows 10-style applications.