
MonoGame Succinctly®

CHAPTER 3
Creating the First Game
Now that we have MonoGame installed, we can get started on the actual game. Open up Visual Studio and select the New > Project menu item. You’ll see a dialog box that looks like the following:
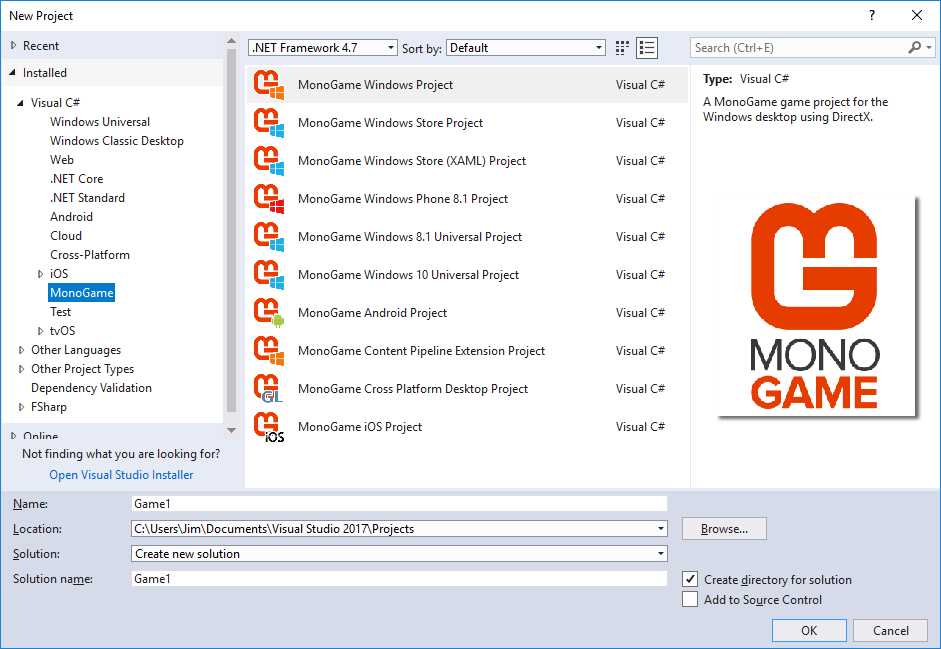
Figure 2 - Visual Studio New Project Dialog
I’ve selected the MonoGame node in the Installed list. Note that there are options not just for PC, but for mobile devices as well. If you want to target multiple platforms at once, you would select the MonoGame Cross-Platform Desktop Project option, but we’ll only be working in Windows. In particular, we want to create a MonoGame Windows Project game. Select this project type, give your project a name (use Ghost Arena if you want to match the code available for download or in the book), select a location if you would like, and click OK. The Solution Explorer will show the basic skeleton of the game that MonoGame provides:
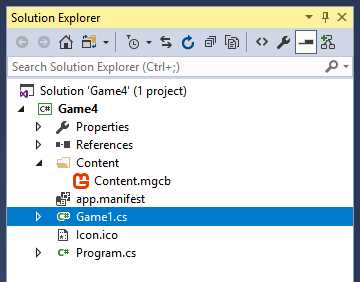
Figure 3 - Default MonoGame Windows Project
The Program.cs file is the entry point for the program:
public static class Program { [STAThread] static void Main() { using (var game = new Game1()) game.Run(); } } |
Code Listing 1 – Program class
The Main method creates an instance of the Game1 class and calls its Run method. This starts an internal game loop that allows you to update and draw objects in every frame. It does this by providing methods in the Game class. This loop will run until you either close the game window or call the Exit method of the Game class.
The Game class is the backbone of the code for a MonoGame project. It provides a number of methods for performing functionality that all games require, such as loading and unloading content (audio, graphics, etc.), drawing, and updating game objects. All of these methods are declared protected virtual, and it’s expected that a project that uses MonoGame will contain a class that derives from it, and overrides the methods, implementing functionality that is needed for that specific game. The standard projects do this by providing a Game1 class:
public class Game1 : Game { GraphicsDeviceManager graphics; SpriteBatch spriteBatch; public Game1() { graphics = new GraphicsDeviceManager(this); Content.RootDirectory = "Content"; } protected override void Initialize() { base.Initialize(); } protected override void LoadContent() { spriteBatch = new SpriteBatch(GraphicsDevice); } protected override void UnloadContent() { } protected override void Update(GameTime gameTime) { if (GamePad.GetState(PlayerIndex.One).Buttons.Back == ButtonState.Pressed || Keyboard.GetState().IsKeyDown(Keys.Escape)) Exit(); base.Update(gameTime); } protected override void Draw(GameTime gameTime) { GraphicsDevice.Clear(Color.CornflowerBlue); base.Draw(gameTime); } } |
Code Listing 2 – Basic Game class
The graphics member sets up and controls the graphics system. You can use it to switch between full-screen and windows modes, and to adjust the window size. We’ll go more in depth in the next chapter.
The spriteBatch member is the object you use to actually draw sprites and text to the screen via the Draw and DrawString methods.
The methods are all commented and should be fairly self-explanatory. We’ll fill in most of the methods in the next couple of chapters with more explanation. For now, just compile and run the project. You should get the standard filled-in window:

Figure 4 - Default game window
Pressing the Escape key or the Back button on a gamepad will close the window, as you can see in the Update method. We’ll replace this with a more robust input-handling system in a couple of chapters, but for now, it suffices to allow you to cleanly exit the game.
Adjusting the graphics subsystem
Before we move on, let’s explore the options available when using the graphics object.
The first thing you’ll want to allow players to do is to run your game in either a window or full-screen. This usually takes a good chunk of code, but with MonoGame, it’s a simple method call:
protected override void Update(GameTime gameTime) { if (GamePad.GetState(PlayerIndex.One).Buttons.Back == ButtonState.Pressed || Keyboard.GetState().IsKeyDown(Keys.Escape)) Exit(); if (Keyboard.GetState().IsKeyDown(Keys.Enter) && previousState != null && previousState.IsKeyUp(Keys.Enter)) { graphics.ToggleFullScreen(); } previousState = Keyboard.GetState(); base.Update(gameTime); } |
Code Listing 3 – Toggle full-screen mode
While the ToggleFullScreen method is what actually does the work, there needs to be a bit of code around it to avoid errors being thrown. We’ll get into the GamePad, Keyboard, and related classes a bit later, but the basic gist of the code is that every time the Enter key is pressed, we flip between the full-screen and windowed modes.
The other main option you will want to give players is the ability to change the resolution of the game window. In order to do this correctly, you’ll need to know which resolutions the user’s machine supports. You can get this information with the following code:
foreach (DisplayMode dm in GraphicsAdapter.DefaultAdapter.SupportedDisplayModes) { Console.WriteLine("\n width, height(" + dm.Width.ToString() + "," + dm.Height.ToString() + "), aspect ratio - " + dm.AspectRatio.ToString()); } |
Code Listing 4 – Supported resolutions
We’ll implement this in a later chapter.
There are other options you may want to allow the user to configure, depending on your game. We’ll cover input options (such as configuring keys for certain actions) in Chapter 5, and audio options in Chapter 6.
Our game will use a sample that Microsoft provided for developing XNA games, the “Game State Management” sample, which can be found here.
This sample provides a good skeleton for building any game, including menu and game screens, and input handling for keyboard or gamepad. If you don’t want to follow along through the book to build the game, you can either download the sample and look at the code, or download the full game code for the game we’ll be developing throughout this book.
The game we’ll be building is a simple top-down shooter. The player controls a character in an arena where ghosts appear out of 10 different entrances. If a ghost touches the character, it drains some health from him and disappears. The player scores points by killing the ghosts, with the goal of the game being to survive as long as possible and get as high a score as possible. The finished game will look like the following screenshot.

Figure 5 - Finished Game Screenshot
The game will keep track of the player’s scores, allowing the highest scores to be displayed. The game will also have achievements that can be earned and displayed. A difficulty system will be implemented to make the game more challenging for skilled players.
With the base game in place, we’ll need to add a lot of classes and folders to get to the point where we can start displaying graphics. First, we’ll add a couple of folders: ScreenManager and Screens. In the ScreenManager folder, add two classes: GameScreen.cs and ScreenManager.cs. Replace the code in the ScreenManager class with the following:
using System; using System.Collections.Generic; using Microsoft.Xna.Framework; using Microsoft.Xna.Framework.Graphics; namespace Ghost_Arena { public class ScreenManager : DrawableGameComponent { List<GameScreen> _screens = new List<GameScreen>(); List<GameScreen> _screensToUpdate = new List<GameScreen>(); bool _traceEnabled; new public Game Game { get { return base.Game; } } public bool TraceEnabled { get { return _traceEnabled; } set { _traceEnabled = value; } } public ScreenManager(Game game, GraphicsDeviceManager graphicsDeviceManager) : base(game) { } protected override void LoadContent() { foreach (GameScreen screen in _screens) { screen.LoadContent(); } } protected override void UnloadContent() { foreach (GameScreen screen in _screens) { screen.UnloadContent(); } } public override void Update(GameTime gameTime) { _screensToUpdate.Clear(); foreach (GameScreen screen in _screens) _screensToUpdate.Add(screen); bool otherScreenHasFocus = !Game.IsActive; bool coveredByOtherScreen = false; while (_screensToUpdate.Count > 0) { GameScreen screen = _screensToUpdate[_screensToUpdate.Count - 1]; _screensToUpdate.RemoveAt(_screensToUpdate.Count - 1); screen.Update(gameTime, otherScreenHasFocus, coveredByOtherScreen); if (screen.ScreenState == ScreenState.TransitionOn || screen.ScreenState == ScreenState.Active) { if (!otherScreenHasFocus) { screen.HandleInput(_input, gameTime); otherScreenHasFocus = true; } if (!screen.IsPopup) coveredByOtherScreen = true; } } if (_traceEnabled) TraceScreens(); } void TraceScreens() { List<string> screenNames = new List<string>(); foreach (GameScreen screen in _screens) screenNames.Add(screen.GetType().Name); } public override void Draw(GameTime gameTime) { foreach (GameScreen screen in _screens) { if (screen.ScreenState == ScreenState.Hidden) continue;
screen.Draw(gameTime); } } public void AddScreen(GameScreen screen) { screen.ScreenManager = this; screen.Initialize(); _screens.Add(screen); } public void RemoveScreen(GameScreen screen) { _screens.Remove(screen); _screensToUpdate.Remove(screen); } public GameScreen[] GetScreens() { return _screens.ToArray(); } } } |
Code Listing 5 – ScreenManager class
Since we’ll have about 10 different screens in our game, a nice, clean way to manage them and be able to transition between them is essential. Each screen, whether it’s a menu, pause, or gameplay screen, will be a separate class. The ScreenManager keeps an array of instances of each screen that’s in use, and tells each one to update and draw itself instead of having to figure out which one is the active one and have it draw and update. It does this by inheriting from DrawableGameComponent, a framework class that provides a method for loading content and drawing. This class in turn inherits from GameComponent, which provides a method for updating itself every frame. The Draw method is also called in every frame. The LoadContent and UnloadContent are only called once, when an instance of the class is created or destroyed.
We’ll fill in some of these methods as we go along, but this is all that’s needed for now.
We need to create an instance of the this class. That will be done in the Game class. Add the member and code to initialize it:
ScreenManager screenManager; protected override void Initialize() { screenManager = new ScreenManager(this, graphics); screenManager.Initialize(); // Activate the first screens. screenManager.AddScreen(new MainMenuScreen()); Components.Add(screenManager); base.Initialize(); } |
Code Listing 6 – ScreenManager creation
We’ll see the first screen that’s displayed when the game starts, the MainMenuScreen, shortly.
The Components member that the ScreenManager instance is added to is a collection of GameComponent (or DrawableGameComponent, as it inherits from GameComponent) objects. The GameComponent class implements four different interfaces that provide some base functionality for objects: IGameComponent, IUpdateable, IComparable, and IDisposable.
IGameComponent provides an Initialize method, IUpdateable:
Properties |
Enabled |
UpdateOrder |
Methods |
Update |
Events |
EnabledChanged |
UpdateOrderChanged |
Table 1 – IUpdateable Members
IComparable gives us a CompareTo method, allowing us to compare two instances and tell us where the two are in relation to each other in the list of GameComponents, and IDisposable provides a Dispose method.
Moving on, replace the code inside the GameScreen class with the following:
using System; using Microsoft.Xna.Framework; namespace Ghost_Arena { public enum ScreenState { TransitionOn, Active, TransitionOff, Hidden, } public abstract class GameScreen { public bool IsPopup { get { return _isPopup; } protected set { _isPopup = value; } } protected bool _isPopup = false; public TimeSpan TransitionOnTime { get { return _transitionOnTime; } protected set { _transitionOnTime = value; } } protected TimeSpan _transitionOnTime = TimeSpan.Zero; public TimeSpan TransitionOffTime { get { return _transitionOffTime; } protected set { _transitionOffTime = value; } } protected TimeSpan _transitionOffTime = TimeSpan.Zero; public float TransitionPosition { get { return _transitionPosition; } protected set { _transitionPosition = value; } } protected float _transitionPosition = 1; public byte TransitionAlpha { get { return (byte)(255 - _transitionPosition * 255); } } public ScreenState ScreenState { get { return _screenState; } protected set { _screenState = value; } } protected ScreenState _screenState = ScreenState.TransitionOn; public bool IsExiting { get { return _isExiting; } protected set { _isExiting = value; } } protected bool _isExiting = false; public bool IsActive { get { return !_otherScreenHasFocus && (_screenState == ScreenState.TransitionOn || _screenState == ScreenState.Active); } } protected bool _otherScreenHasFocus; public ScreenManager ScreenManager { get { return _screenManager; } internal set { _screenManager = value; } } protected ScreenManager _screenManager; public virtual void LoadContent() { } public virtual void UnloadContent() { } public virtual void Initialize() { } public virtual void Update(GameTime gameTime, bool otherScreenHasFocus, bool coveredByOtherScreen) { _otherScreenHasFocus = otherScreenHasFocus; if (_isExiting) { _screenState = ScreenState.TransitionOff; if (!UpdateTransition(gameTime, _transitionOffTime, 1)) { ScreenManager.RemoveScreen(this); _isExiting = false; } } else if (coveredByOtherScreen) { if (UpdateTransition(gameTime, _transitionOffTime, 1)) { _screenState = ScreenState.TransitionOff; } else { _screenState = ScreenState.Hidden; } } else { if (UpdateTransition(gameTime, _transitionOnTime, -1)) { _screenState = ScreenState.TransitionOn; } else { _screenState = ScreenState.Active; } } } bool UpdateTransition(GameTime gameTime, TimeSpan time, int direction) { float transitionDelta; if (time == TimeSpan.Zero) transitionDelta = 1; else transitionDelta = (float)(gameTime.ElapsedGameTime.TotalMilliseconds / time.TotalMilliseconds); _transitionPosition += transitionDelta * direction; if ((_transitionPosition <= 0) || (_transitionPosition >= 1)) { _transitionPosition = MathHelper.Clamp(_transitionPosition, 0, 1); return false; }
return true; } public abstract void Draw(GameTime gameTime); public virtual void ExitScreen() { if (_transitionOffTime <= TimeSpan.Zero) { ScreenManager.RemoveScreen(this); } else { _isExiting = true; } } } } |
Code Listing 7 – GameScreen class
The GameScreen class is the base class for all screens that we’ll have in our game. The four ScreenState enums show the different states a screen can be in that we’ll have to handle. Most of the class is made up of functionality for handling transitions, as menus will slide in and out as well as fade. The Pause screen will be displayed on top of the gameplay screen, so will draw on only part of the screen, with the rest being partly visible behind it.
The TransitionOnTime and TransitionOffTime members control the how long it takes to perform the transition. Note that for the base class, both are set to TimeSpan.Zero, which means the transition is instantaneous.
The TransitionPosition and TransitionAlpha members control how the transition looks as it occurs. This is more for menu screens, since they slide on and off the monitor. Most of the other members should be pretty obvious.
Since the class is a base class from which others will inherit, there’s not much functionality in it except what will be the same in every child class. Classes that inherit from it will be expected to provide the functionality for loading content and drawing (and later, handling input). This is why the methods are abstract or virtual.
The first class that we’ll add that will inherit from it will be another base class, MenuScreen. Add a new class with this name to the Screens folder, and replace the code with the following:
using System; using System.Collections.Generic; using Microsoft.Xna.Framework; using Microsoft.Xna.Framework.Input; using Microsoft.Xna.Framework.Graphics; namespace Ghost_Arena { abstract class MenuScreen : GameScreen { protected List<string> _menuEntries = new List<string>(); int _selectedEntry = 0; protected IList<string> MenuEntries { get { return _menuEntries; } } public MenuScreen() { TransitionOnTime = TimeSpan.FromSeconds(0.5); TransitionOffTime = TimeSpan.FromSeconds(0.5); } public override void Initialize() { base.Initialize(); } protected abstract void OnSelectEntry(int entryIndex); protected virtual void OnNewArrowDown(Keys arrow, int entryIndex) { } protected virtual void OnArrowDown(Keys arrow, int entryIndex, GameTime gameTime) { } protected virtual void OnArrowUp(Keys arrow, int entryIndex) { } protected abstract void OnCancel(); public override void Draw(GameTime gameTime) { Vector2 position = new Vector2(100, 150); float transitionOffset = (float)Math.Pow(TransitionPosition, 2); if (ScreenState == ScreenState.TransitionOn) position.X -= transitionOffset * 256; else position.X += transitionOffset * 512; } } } |
Code Listing 8 – MenuScreen class
Our menu screens will be very simple, just strings that are rendered on-screen with the currently selected item being highlighted by being rendered in a different color and growing and shrinking. We’ll add the code that actually draws this in the next chapter. Pressing the Enter key or A button on a gamepad will “click” the menu item.
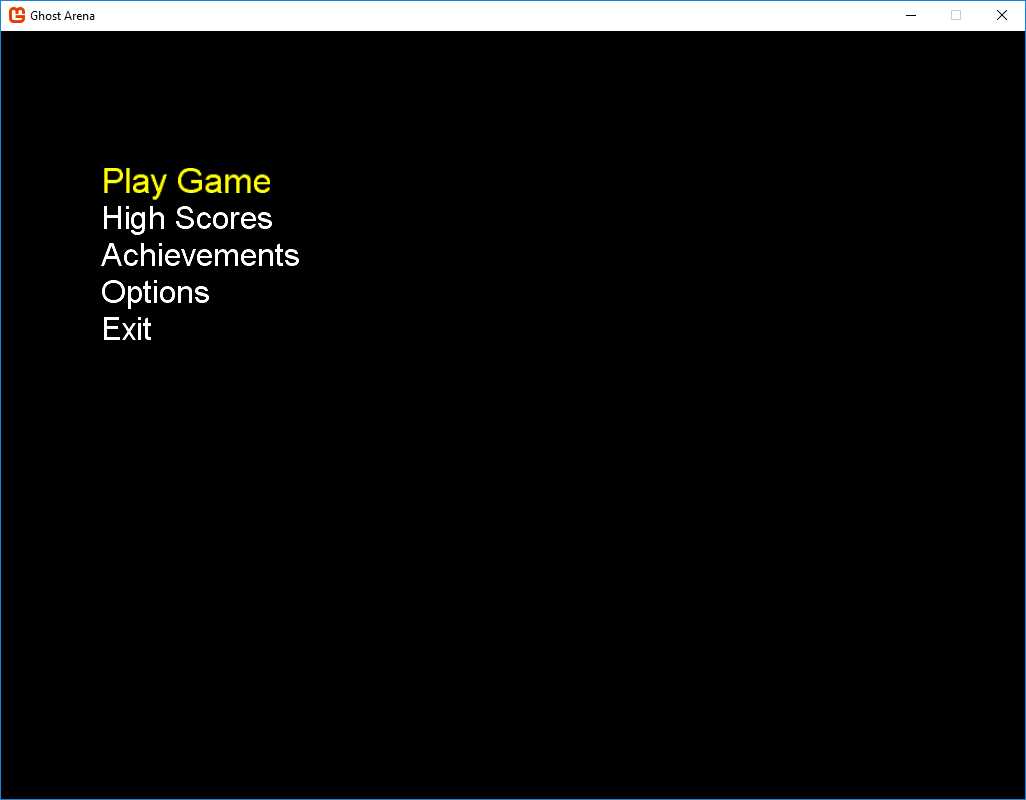
Figure 6 - Main Menu Screen
The MainMenuScreen class is very simple since most of the work is done in the base class. Add this class to the Screens folder:
using System; namespace Ghost_Arena { class MainMenuScreen : MenuScreen { public MainMenuScreen() { _menuEntries.Add("Play Game"); _menuEntries.Add("High Scores"); _menuEntries.Add("Achievements"); _menuEntries.Add("Options"); _menuEntries.Add("Exit"); } public override void Initialize() { base.Initialize(); } protected override void OnSelectEntry(int entryIndex) { switch (entryIndex) { case 0: _screenManager.AddScreen(new DifficultyScreen()); break; case 1: _screenManager.AddScreen(new HighScoreScreen()); break; case 2: _screenManager.AddScreen(new AchievementsScreen()); break; case 3: _screenManager.AddScreen(new OptionsMenuScreen()); break; case 4: OnCancel(); break; } } protected override void OnCancel() { const string message = "Are you sure you want to exit this game?"; MessageBoxScreen messageBox = new MessageBoxScreen(message); messageBox.Accepted += ExitMessageBoxAccepted; _screenManager.AddScreen(messageBox); } void ExitMessageBoxAccepted(object sender, EventArgs e) { _screenManager.Game.Exit(); } } } |
Code Listing 9 – MenuScreen class
We add the list of menu items to display in the constructor, override the OnSelectEntry method to add the applicable screen to the ScreenManager, and make sure the player really wants to quit when they select the Exit menu item.
We see in this class the first place we’ll use the MessageBoxScreen class. It overlays the existing screen to look like a dialog box.

Figure 7 - Message Box Screen
Add this class to the Screens folder:
using System; using Microsoft.Xna.Framework; using Microsoft.Xna.Framework.Graphics; namespace Ghost_Arena { class MessageBoxScreen : GameScreen { string _message; Texture2D _gradientTexture; public event EventHandler<EventArgs> Accepted; public event EventHandler<EventArgs> Cancelled; public MessageBoxScreen(string message) { const string usageText = "\nA button, Space, Enter = ok" + "\nB button, Esc = cancel"; _message = message + usageText; _isPopup = true; _transitionOnTime = TimeSpan.FromSeconds(0.2); _transitionOffTime = TimeSpan.FromSeconds(0.2); } public override void LoadContent() { _gradientTexture = Game1.Instance.Content.Load<Texture2D>("gradient"); } public override void Draw(GameTime gameTime) { } } } |
Code Listing 10 – MessageBoxScreen class
We’ll add a method of input-handling and drawing the dialog in the next few chapters.
The PauseMenuScreen class could have been an instance of the MessageBoxScreen class, but making it inherit from MenuScreen allows you to add functionality to it in the future, such as saving the game. It also uses the MessageBoxScreen class as a confirmation selection, so making it inherit from that class would probably look strange. Add the following class to the Screens folder:
using System; using Microsoft.Xna.Framework; namespace Ghost_Arena { class PauseMenuScreen : MenuScreen { public PauseMenuScreen() { _menuEntries.Add("Resume Game"); _menuEntries.Add("Quit Game"); IsPopup = true; } protected override void OnSelectEntry(int entryIndex) { switch (entryIndex) { case 0: ExitScreen(); break; case 1: const string message = "Are you sure you want to quit this game?"; MessageBoxScreen messageBox = new MessageBoxScreen(message); messageBox.Accepted += QuitMessageBoxAccepted; _screenManager.AddScreen(messageBox); break; } } protected override void OnCancel() { ExitScreen(); } void QuitMessageBoxAccepted(object sender, EventArgs e) { LoadingScreen.Load(_screenManager, LoadMainMenuScreen, false); } void LoadMainMenuScreen(object sender, EventArgs e) { _screenManager.AddScreen(new MainMenuScreen()); } public override void Draw(GameTime gameTime) { base.Draw(gameTime); } } } |
Code Listing 11 – PauseMenuScreen class
We’ll add one line to this class in the next chapter when we implement our drawing functionality.
This class uses the LoadingScreen class in case you want to add functionality, such as saving the game, which might take a few seconds. If the user chooses to end the game and nothing seems to happen, she may think something is wrong with the game. Displaying a screen that lets her know something is going on is a good thing to do. Add this class to the Screens folder:
using System; using Microsoft.Xna.Framework; using Microsoft.Xna.Framework.Graphics; namespace Ghost_Arena { /// <summary> /// The loading screen coordinates transitions between the menu system and the /// game itself. Normally one screen will transition off at the same time as /// the next screen is transitioning on, but for larger transitions that can /// take a longer time to load their data, we want the menu system to be entirely /// gone before we start loading the game. This is done as follows: /// /// - Tell all the existing screens to transition off. /// - Activate a loading screen, which will transition on at the same time. /// - The loading screen watches the state of the previous screens. /// - When it sees they have finished transitioning off, it activates the real /// next screen, which may take a long time to load its data. The loading /// screen will be the only thing displayed while this load is taking place. /// </summary> class LoadingScreen : GameScreen { bool _loadingIsSlow; bool _otherScreensAreGone; EventHandler<EventArgs> loadNextScreen; public bool LoadingIsSlow { get { return _loadingIsSlow; } set { _loadingIsSlow = value; } } public bool OtherScreensAreGone { get { return _otherScreensAreGone; } set { _otherScreensAreGone = value; } } private LoadingScreen() { _transitionOnTime = TimeSpan.FromSeconds(0.5); } public static void Load(ScreenManager screenManager, EventHandler<EventArgs> loadNextScreen, bool loadingIsSlow) { foreach (GameScreen screen in screenManager.GetScreens()) screen.ExitScreen(); LoadingScreen loadingScreen = new LoadingScreen(); loadingScreen.LoadingIsSlow = loadingIsSlow; loadingScreen.loadNextScreen = loadNextScreen; screenManager.AddScreen(loadingScreen); } public override void Update(GameTime gameTime, bool otherScreenHasFocus, bool coveredByOtherScreen) { base.Update(gameTime, otherScreenHasFocus, coveredByOtherScreen); // If all the previous screens have finished transitioning // off, it is time to actually perform the load. if (_otherScreensAreGone) { ScreenManager.RemoveScreen(this); loadNextScreen(this, EventArgs.Empty); } } public override void Draw(GameTime gameTime) { // If we are the only active screen, that means all the previous screens // must have finished transitioning off. We check for this in the Draw // method, rather than in Update, because it isn't enough just for the // screens to be gone: in order for the transition to look good we must // have actually drawn a frame without them before we perform the load. if ((ScreenState == ScreenState.Active) && (ScreenManager.GetScreens().Length == 1)) { _otherScreensAreGone = true; } // The gameplay screen takes a while to load, so we display a loading // message while that is going on, but the menus load very quickly, and // it would look silly if we flashed this up for just a fraction of a // second while returning from the game to the menus. This parameter // tells us how long the loading is going to take, so we know whether // to bother drawing the message. if (_loadingIsSlow) { const string message = "Loading..."; } } } } |
Code Listing 12 – LoadingScreen class
I’ve left the comments in this class, since this is one of the more complicated pieces of code. It stores an event that’s called once the code that is being executed (that is causing the pause) in the game completes.
You can customize the text by changing the message variable in the Draw method. As with the other classes, there is a lot that we’ll add to this method in the next chapter.
Going back to the Main Menu list, we have three other screens left. The first is the HighScoreScreen. Add this code to the Screens menu:
using System; using System.Collections.Generic; using System.Text; using Microsoft.Xna.Framework; using Microsoft.Xna.Framework.Graphics; namespace Ghost_Arena { class HighScoreScreen : GameScreen { private HighScoreList _list; public HighScoreScreen() { //load high score list _list = new HighScoreList(); TransitionOnTime = TimeSpan.FromSeconds(1.5); TransitionOffTime = TimeSpan.FromSeconds(0.5); } public override void LoadContent() { base.LoadContent(); } public override void Draw(GameTime gameTime) { Vector2 textPosition;
int count = 0; //loop through list and draw each item if (_list.Scores != null) { foreach (HighScore item in _list.Scores) { textPosition = new Vector2(50, 150 + 50 * count);
count++; } } } } } |
Code Listing 13 – HighScoreScreen class
The High Score screen will display the date, score, and highest level the player reached for the game:
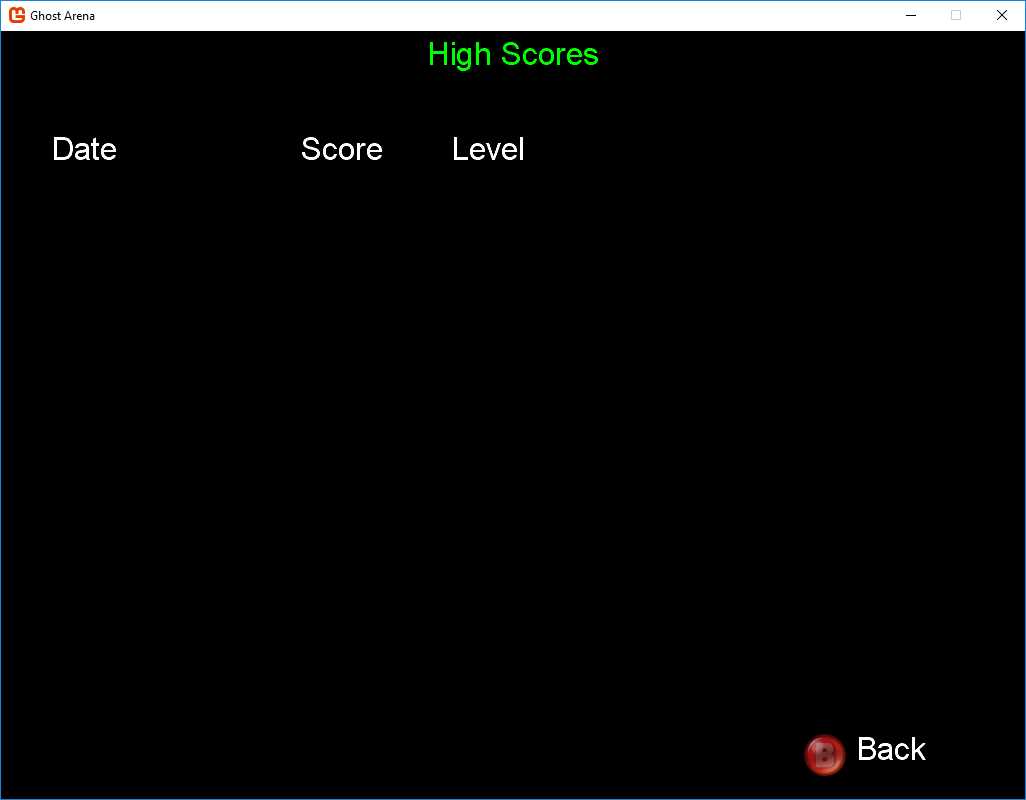
Figure 8 - High Score Screen
The screen uses a class we don’t have yet, so let’s add a stub so we don’t get a compile error. Create a new class in the root folder called HighScoreList and update it with the following code:
public class HighScore { public string Date; public int Level; public int Score; public HighScore() { } public HighScore(string date, int level, int score) { Date = date; Level = level; Score = score; } } public class HighScoreList { private List<HighScore> _scores; public List<HighScore> Scores { get {return _scores;} } } |
Code Listing 14 – HighScoreList class
For every three minutes the player stays alive, the level increases. A countdown timer is displayed at the top of the Game Play screen, below the character’s health bar. This can be seen in the finished game screenshot shown earlier in the book. The speed of the ghosts increases a bit each time the level increases. There should come a time when the speed of the ghosts is high enough that the player can’t kill them all quick enough to keep his health from reaching 0.
The OptionsMenuScreen allows the player to configure whether or not the game runs in full-screen mode and the controls that perform various actions. It’s another fairly simple class that inherits from MenuScreen:
using Microsoft.Xna.Framework; namespace Ghost_Arena { class OptionsMenuScreen : MenuScreen { public OptionsMenuScreen() { _menuEntries.Add("Toggle Full-Screen"); _menuEntries.Add("Configure Controls"); _menuEntries.Add("Back"); } public override void Update(GameTime gameTime, bool otherScreenHasFocus, bool coveredByOtherScreen) { base.Update(gameTime, otherScreenHasFocus, coveredByOtherScreen); } protected override void OnSelectEntry(int entryIndex) { switch (entryIndex) { case 0: break; case 1: ScreenManager.AddScreen(new ControlsScreen()); break; case 2: ExitScreen(); break; } } protected override void OnCancel() { ExitScreen(); } } } |
Code Listing 15 – OptionsMenuScreen class
We’ll implement the functionality to toggle full-screen mode in the next chapter when we get our graphics system up and running. As we’ve seen, it’s basically one line of code. If the user wants to change the controls used for various actions (move horizontally and vertically, fire, rotate), an instance of the ControlsScreen is displayed. We’ll take a look at this later when we look at MonoGame’s functionality for handling input.
Our game will have three difficulty levels, so after the player selects the Play Game item, we display another menu to have them choose the difficulty:
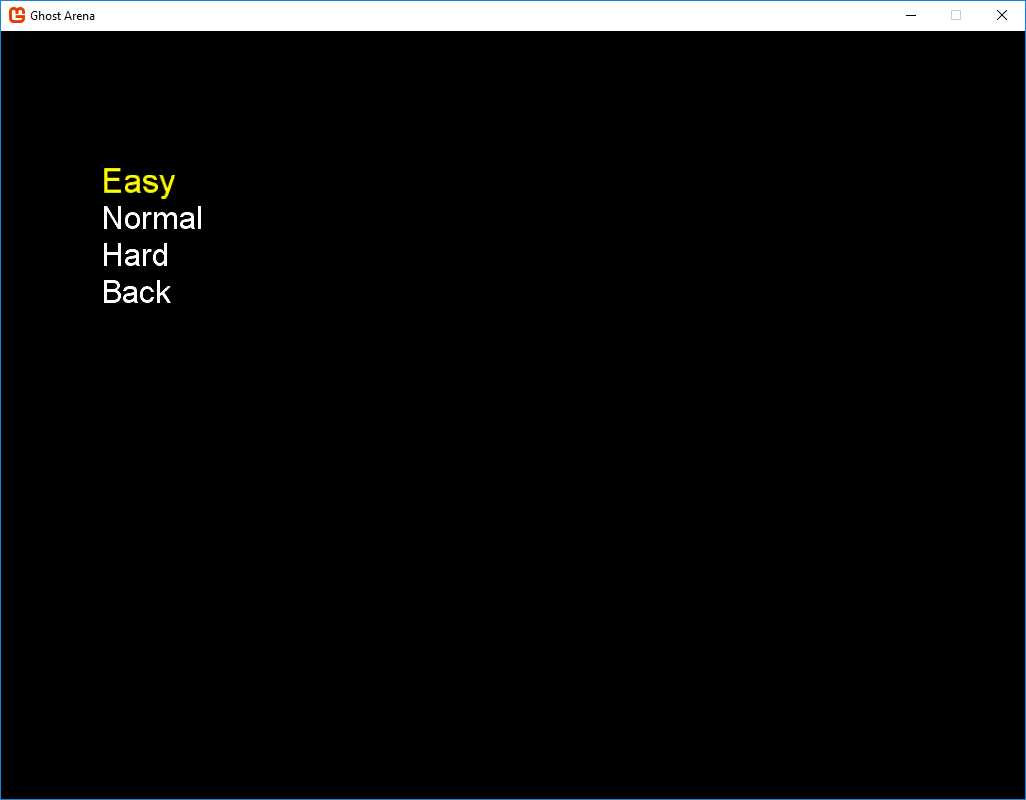
Figure 9 – Difficulty Screen
This class is a very simple version of the MenuScreen class:
using Microsoft.Xna.Framework; namespace Ghost_Arena { class DifficultyScreen : MenuScreen { public override void Initialize() { string[] names = ((Game1)ScreenManager.Game).Difficulty.GetDifficultyNames(); foreach (string item in names) { _menuEntries.Add(item); } _menuEntries.Add("Back"); base.Initialize(); } public override void Update(GameTime gameTime, bool otherScreenHasFocus, bool coveredByOtherScreen) { base.Update(gameTime, otherScreenHasFocus, coveredByOtherScreen); } protected override void OnSelectEntry(int entryIndex) { switch (entryIndex) { case 0: case 1: case 2: foreach (GameScreen screen in ScreenManager.GetScreens()) screen.ExitScreen(); ScreenManager.AddScreen(new GameplayScreen(entryIndex)); break;
case 3: ExitScreen(); break; } } protected override void OnCancel() { ExitScreen(); } } } |
Code Listing 16 – DifficultyScreen class
You’ll notice a line in the Initialize method that won’t compile—we haven’t added the DifficultySystem member to the Game class yet. We’ll get to it shortly. There a several other additions we’ll make as well, after we finish adding the rest of our screen classes. For now, if you’re creating the game by going along with this book and adding the code, you can comment out the lines in the Initialize method that cause the error. You won’t need this screen until we actually get the Game Play screen up and running, and that won’t happen until we get some graphics to display. We’ll look at this next.
- 1800+ high-performance UI components.
- Includes popular controls such as Grid, Chart, Scheduler, and more.
- 24x5 unlimited support by developers.