
Microsoft Bot Framework Succinctly®

CHAPTER 3
Publishing Our Bot
Introduction
In the previous chapter, we created a simple but useful bot that takes screenshots from websites. In short, we did something nice that solved a problem and automated a repetitive task.
In this chapter we’ll explore each of the steps required for registering our application on the Bot Developer Portal, and then we’ll publish it on Skype.
There won’t be any coding involved at all, just steps related to the registration of the bot and publishing process, which are actually quite straightforward and easy to follow. Sounds awesome, so let’s not wait any further. Rock and roll bot!
Registration basics
Every time we compile our bot code and run it, a browser window will appear that reminds us to register our bot—see Figure 2.2.
Typically, I don’t recommend registering your bot until you have tested it thoroughly and are confident it works on your local machine.
The idea of not publishing until we are ready is what inspired the Bot Emulator, which is able to connect to the bot’s localhost endpoint and simulate that it’s actually live and published. This is great for debugging and testing.
If the emulator did not exist, we would have to publish our bot every time we wanted to test something, which is definitely not ideal. Not all bot frameworks out there have an emulator, so the Microsoft Bot Framework is a huge time saver.
With our coding and debugging sessions behind us, we are now ready to register our bot. However, I highly recommend that you read this excellent article from the official Bot Framework documentation, which is helpful if you run into any authentication problems when testing your bot.
If you point your browser to the Bot Framework’s main page, there’s an option clearly labeled Register a bot, so let’s explore this further.

Figure 3.0: MS Bot Framework Main Page
Let’s click the Register a bot option. When you click on it, you’ll be prompted to sign in with a Microsoft (Hotmail, Live, or Outlook.com) account.
If you have not signed in to the Bot Framework before, you might be asked to subscribe to a regular newsletter. You might also be asked to select a country or region. Opting out is an option.
If you do opt-in, you’ll receive a regular email newsletter with updates about the framework—definitely recommended if you want to stay current on any developments and news from the Microsoft team behind this awesome project.
When you’ve signed in, this is what the registration page looks like—very straightforward.
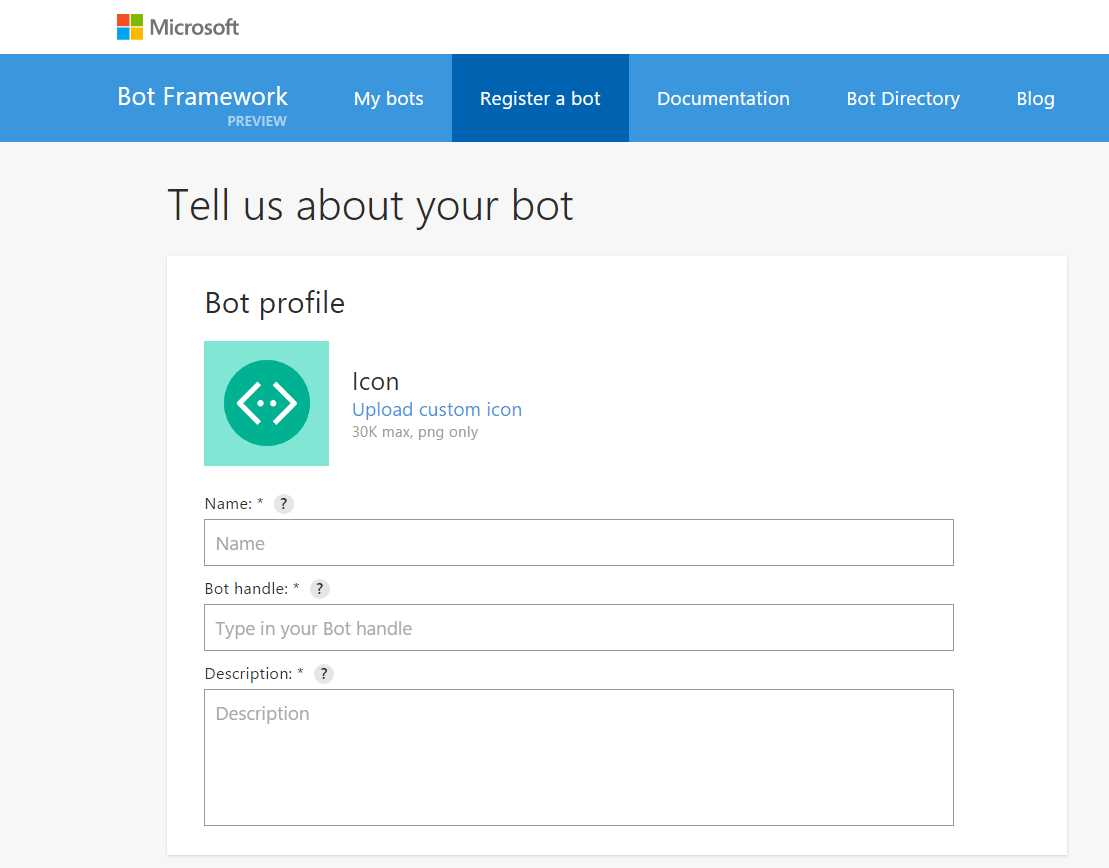
Figure 3.1: Bot Registration Page
As you can see, there are three basic fields that are mandatory. The first field represents the bot’s name, which will be used to identify the bot within the Bot Directory (if we later decide to make it public). It cannot be longer than 35 characters.
The second field is the bot’s handle, which will be used as part of the bot’s public URL. It only allows alphanumeric and underscore characters, and it cannot be changed after registration.
The third field is the bot’s description. The first 46 characters are displayed on the bot’s card on the Bot Directory. The rest of the description is displayed under the bot’s details.
Let’s add some details to our bot.
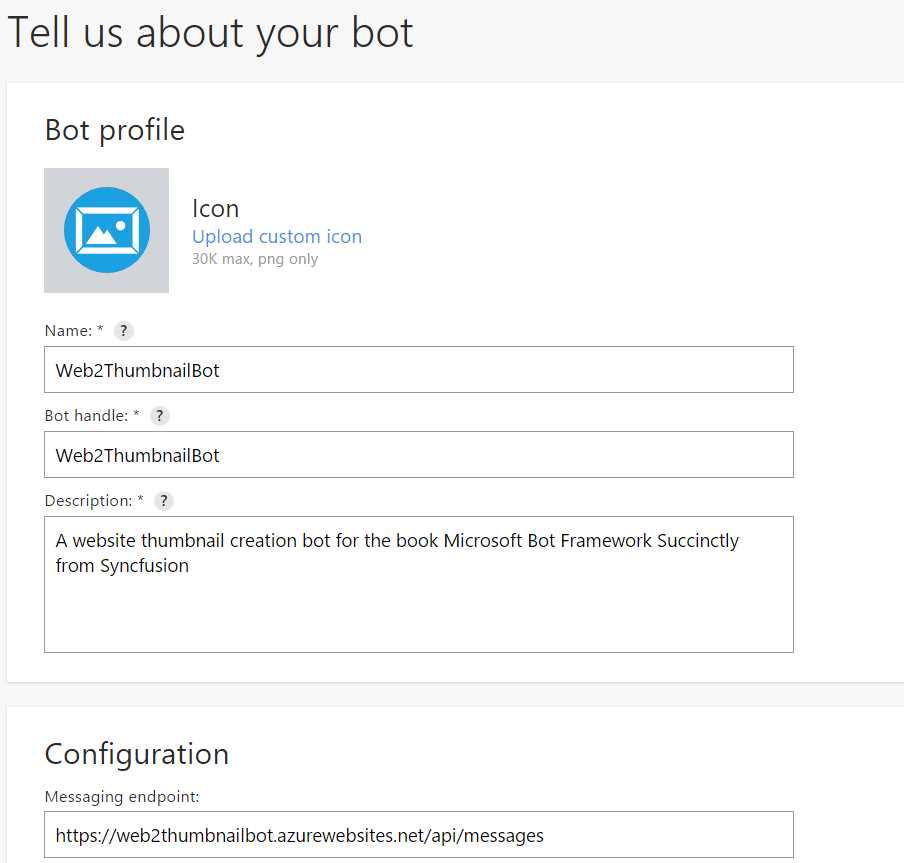
Figure 3.2: Registration Page with Our Bot’s Info
Cool! So we have now entered the basics details, but we are not done yet registering our bot.
If we scroll down the page, we will see that we are also being asked to enter a messaging endpoint and an App ID, which we don’t have yet because we haven’t actually published the bot.
Let’s leave this page open in our browser and switch over to Visual Studio to publish our bot and carry on with the registration process.
Publishing our Bot
If you don’t have Visual Studio running, open it and load your bot project. Once the project is loaded, right-click on the project’s name and select the Publish option from the context menu.
You will see the screen shown in Figure 3.3. Here we are being asked to select a publish target, which in our case will be Microsoft Azure App Service. Let’s choose that one.
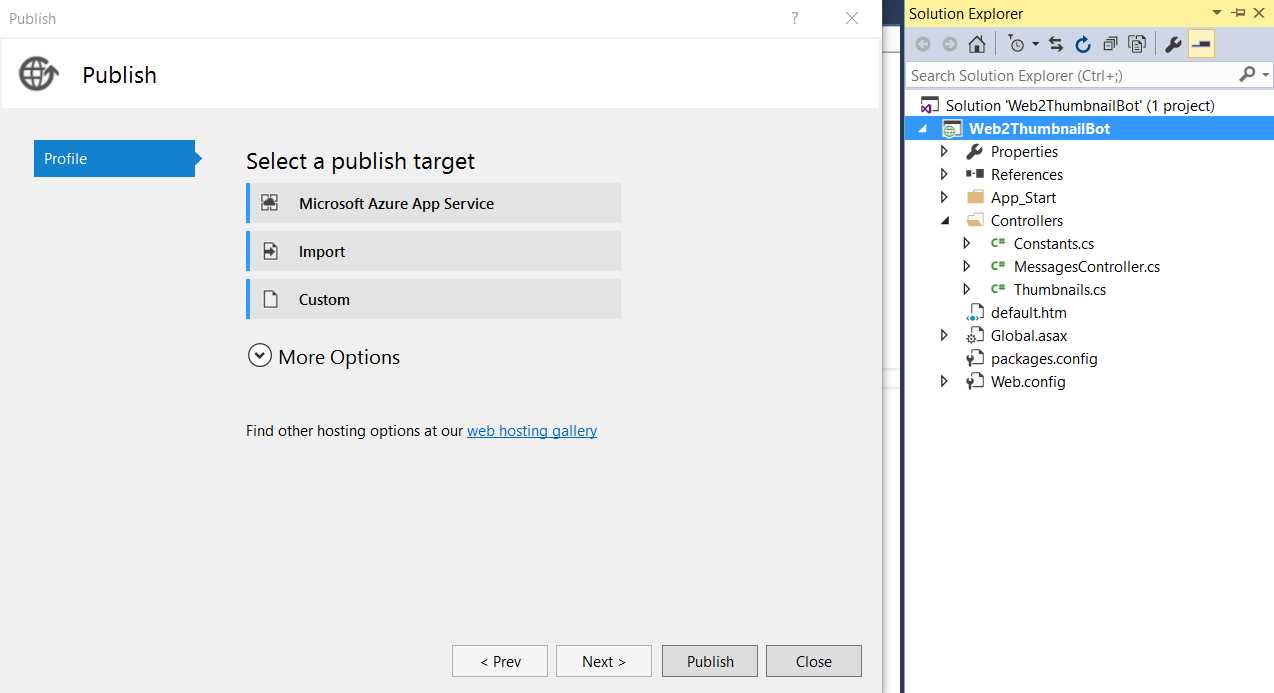
Figure 3.3: Initial Bot Publishing Screen within Visual Studio
When you’ve chosen that option, the publishing wizard will ask us to use an existing Azure App Service to host our bot or to create a new one. You will see the screen shown in Figure 3.4.

Figure 3.4: App Service Initial Screen within Visual Studio
I already have a couple of App Services created in Azure that I do not wish to use for the bot. I’d like the bot to have its own App Service, not shared with other applications I’ve created, so I’ll choose to create a new one by clicking New, which leads to the screen in Figure 3.5.
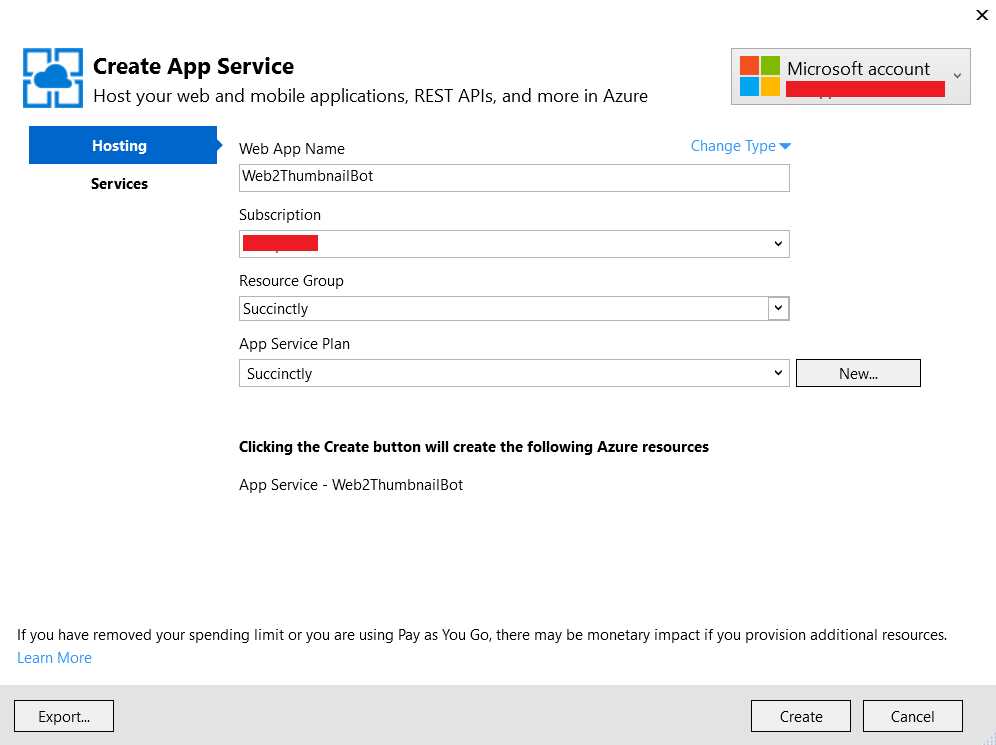
Figure 3.5: App Service Creation Screen within Visual Studio
I’ve given my App Service the same name as the bot (also the same name as the VS project) in order to keep naming conventions simple and consistent. You may choose to do this differently; however, I strongly recommend simplicity and using the same name.
Even though I want to create a new App Service, I’ve decided to reuse some existing Azure resources that I’ve used for apps I’ve built previously, such as the Resource Group and Service Plan.
Finally, in order to create the Azure App Service that will host the bot, let’s click Create.
Awesome! The App Service has been created, and the publishing process can continue. Next, we are presented with a final window that contains information about our bot and how it will be deployed to Azure.
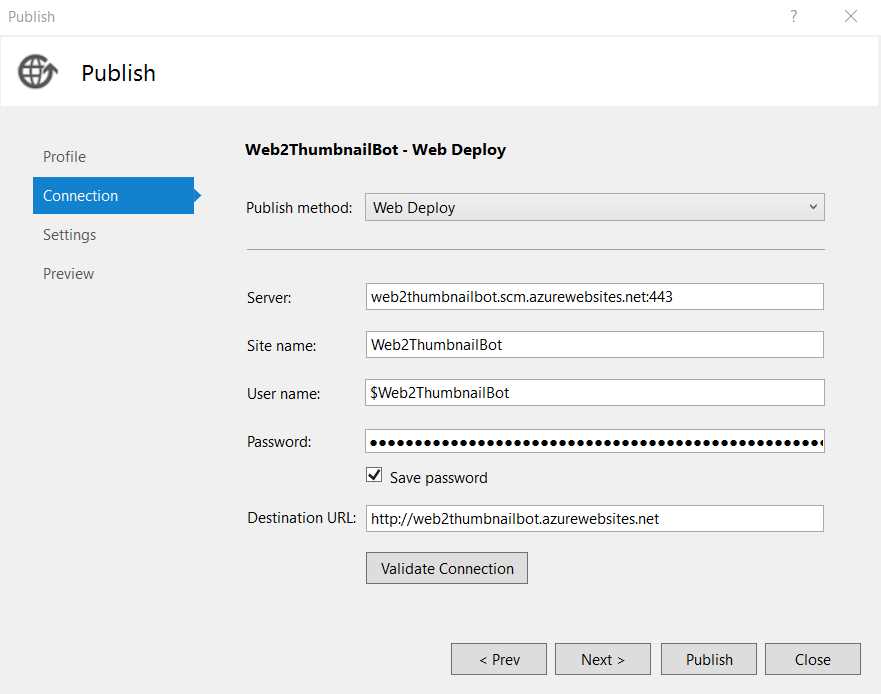
Figure 3.6: Web Deploy Publishing Screen within Visual Studio
The values are automatically filled in by Visual Studio with the details that the Azure App Service has provided, which means you may quickly test the connection to Azure by clicking Validate Connection before clicking Publish.
After clicking Publish, Visual Studio will start its magic. It will build the solution and deploy it to its corresponding App Service on Azure. This can take a couple of minutes. When that’s done, you will see the Output pane shown in Figure 3.7.
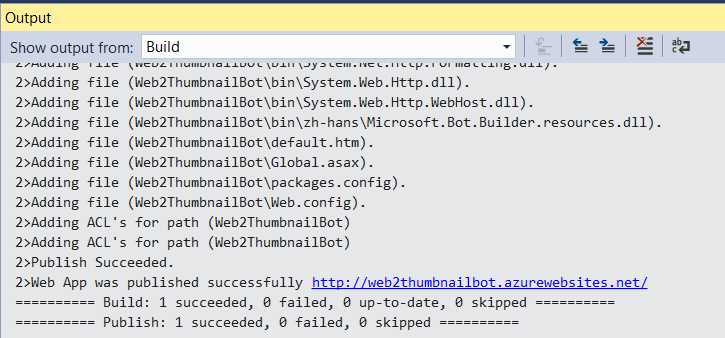
Figure 3.7: Output Pane in Visual Studio—Bot Published
At this stage, the bot has been published successfully and Visual Studio will open a browser window that looks like Figure 3.8.
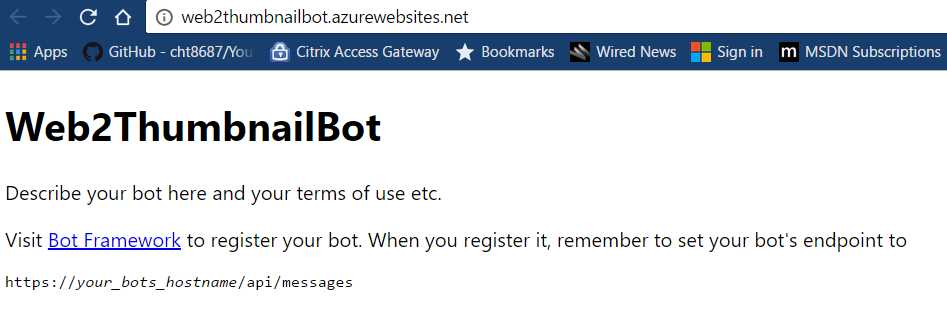
Figure 3.8: Bot Running on Azure
Notice that unlike when we ran the code in Debug mode, the browser window we have open now points to the URL where our bot resides on Azure.
With our bot published and running on Azure, we can continue the registration process.
Finishing the registration process
With our bot published, we can continue the registration process within the developer portal.
We now have the endpoint that was requested of us, but we still do not have an App ID. So, let’s enter the endpoint first.
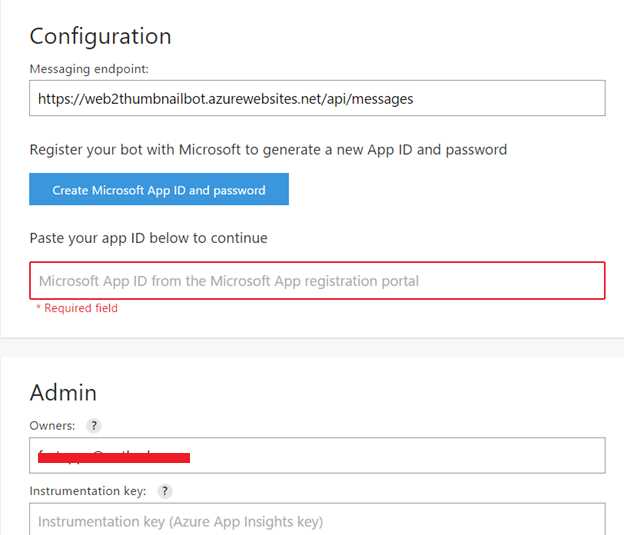
Figure 3.9: Additional Registration Details
Next, click Create Microsoft App ID and password. This will take us to the next screen.
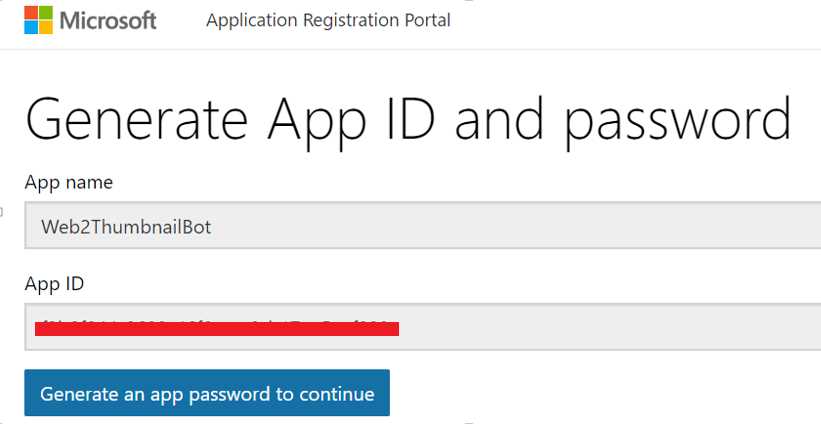
Figure 3.10: The Generate App ID Screen
The ID is automatically generated. Next, we need to click Generate an app password to continue. This will create the application password we will need to copy and paste into the Web.config file in Visual Studio, along with the App ID. After that, we’ll again publish our bot, but we’ll do this later.
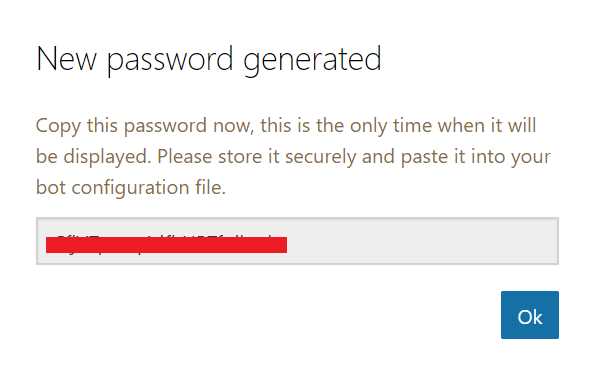
Figure 3.11: The Generated Password Screen
When you get this pop-up window, copy and save the value of the generated password, then click OK. This will bring us back to the original screen.
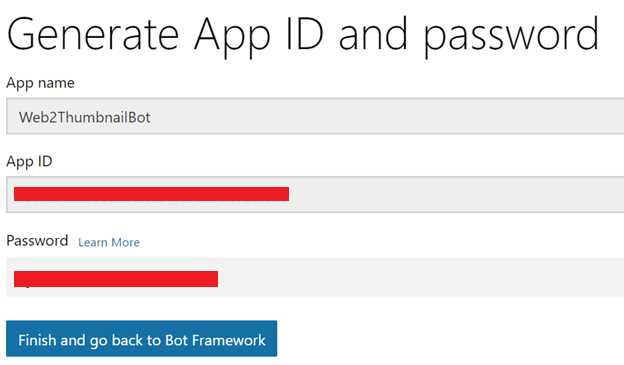
Figure 3.12: The Generated App ID and Password Screen
To finish this process, click Finish and go back to Bot Framework. This will bring you back to the main registration screen.
There, type your email in the Owners text box, accept the terms and conditions, then finish the process by clicking Register.
If you have an Azure App Insights key, you may enter this value as well, but it is not required.
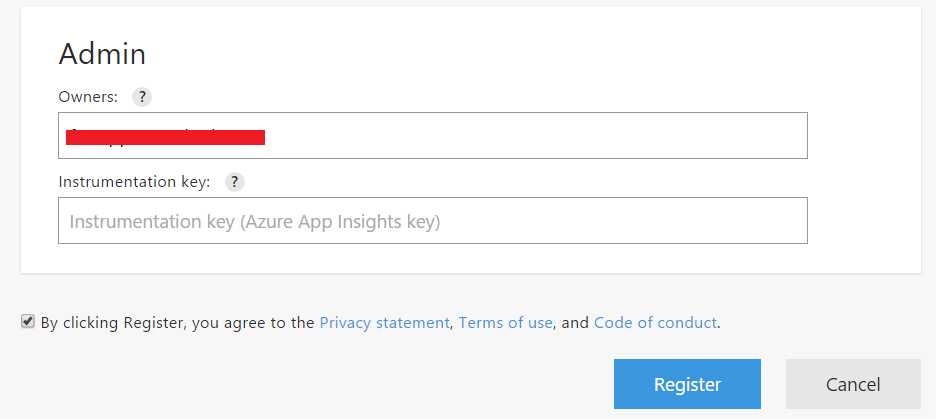
Figure 3.13: Final Registration Step
This will register the bot on the Bot Developer Portal. However, it will not publish it on the Bot Directory, nor will it enable channels such as Skype. This will lead to the screen in Figure 3.14.
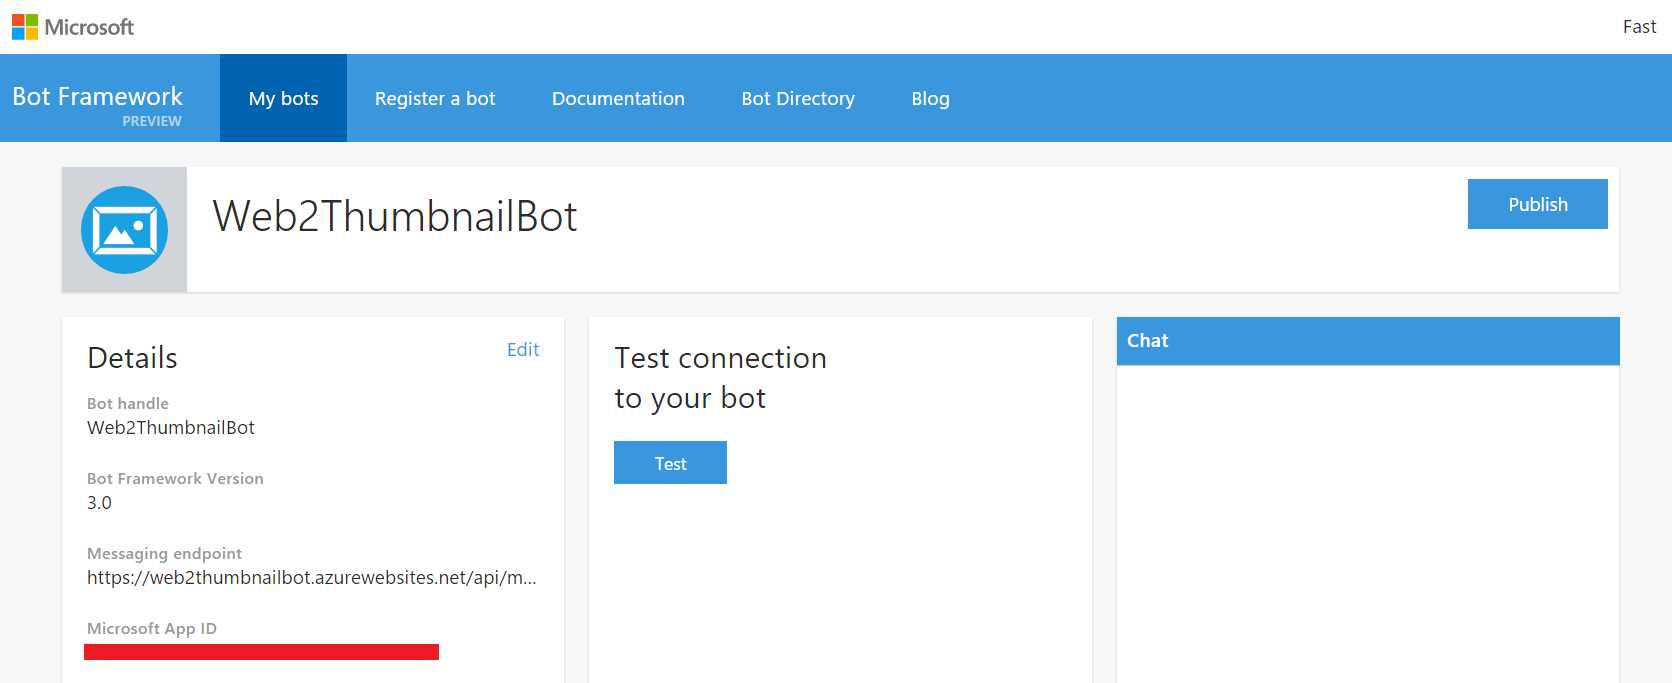
Figure 3.14: The Bot’s Page on the Developer Portal
Exciting—our bot is now registered!
Re-publishing our bot
We now have the App ID and password from the Bot Developer Portal. We need to add this to our Visual Studio project in the Web.config file and re-publish.
If we don’t re-publish, our bot won’t be able to communicate with the Bot Service or use any channels we might add to it. So, let’s go to Visual Studio, look for the Web.config file in our solution, and open it.
Code Listing 3.0: The AppSettings Part of the Web.config File
<appSettings> <!-- update these with your BotId, Microsoft App ID, and your Microsoft App Password--> <add key="BotId" value="" /> <add key="MicrosoftAppId" value="" /> <add key="MicrosoftAppPassword" value="" /> </appSettings> |
Let’s enter the values we have for the BotId, MicrosoftAppId, and MicrosoftAppPassword.
The BotId is the bot handle, the MicrosoftAppId is the App ID, and the MicrosoftAppPassword is the autogenerated password we previously copied.
If you used the same bot name on the developer portal as you did for the Visual Studio project and the Azure App service, the BotId will be the name of the Visual Studio project.
When you’ve entered the values, save the changes in Visual Studio and publish the bot again.
This time the publishing screen will look slightly different, and it’s a one-click process because only a minimal change needs to be synced to the Azure App Service where our live bot is hosted.
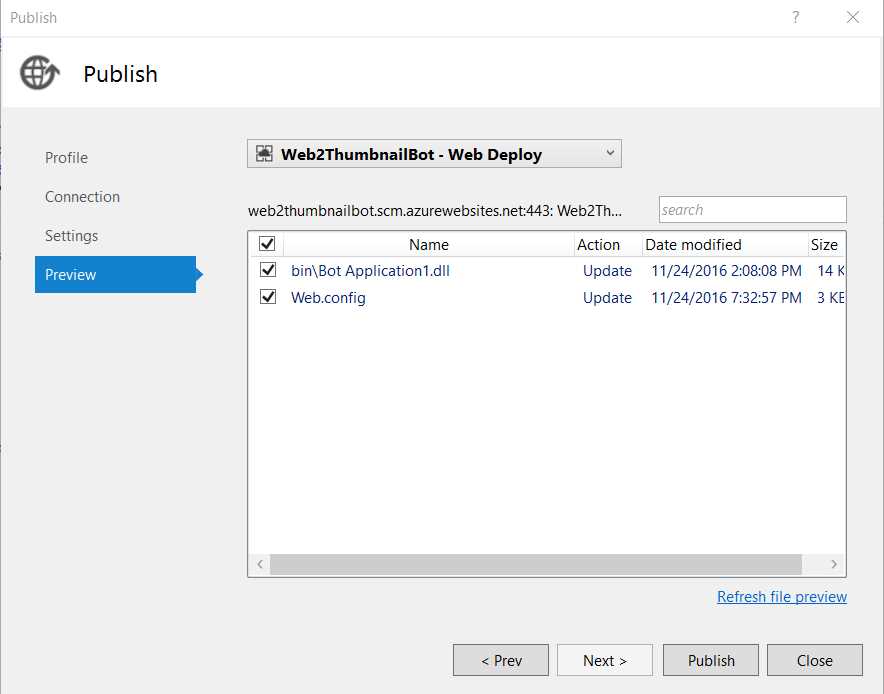
Figure 3.15: The Re-Publishing Process
The publish wizard knows which changes have taken place with our Visual Studio solution, and therefore it knows which changes it needs to commit to the Azure App Service host.
In this case, we changed only the Web.config file, so it will only commit the resulting DLL that is the actual bot itself (once compiled) and, obviously, the Web.config file.
Our bot is now live—hosted on Azure and capable of communicating with the Bot Service and any of the channels available (once these are enabled for our bot).
Let’s go back to the developer portal page of our bot, run a small test, then add Skype as a channel.
Adding Skype as a channel
Now that our bot is live, you’ll see a button for testing the connection to the bot on the developer portal. There’s also a chat window just next to it where you can interact with the bot. This interaction is with the live bot hosted on Azure App Service. Let’s try it out.
First, click Test and check that the authorization is successful. Next, send the bot a message in the Chat window on the right and see if it works.

Figure 3.16: The Developer Portal Bot Testing Options
Awesome! It’s all working as expected. The authorization succeeded, and the bot is able to return the requested screenshot and thumbnail of the site.
The two problems you're likely to run into are authentication and authorization. If for some reason the authentication process does not work, refer to this documentation.
We can now add our bot to Skype, which is enabled as a default channel. To do this, scroll a bit down the same page and there you will find the Skype channel.
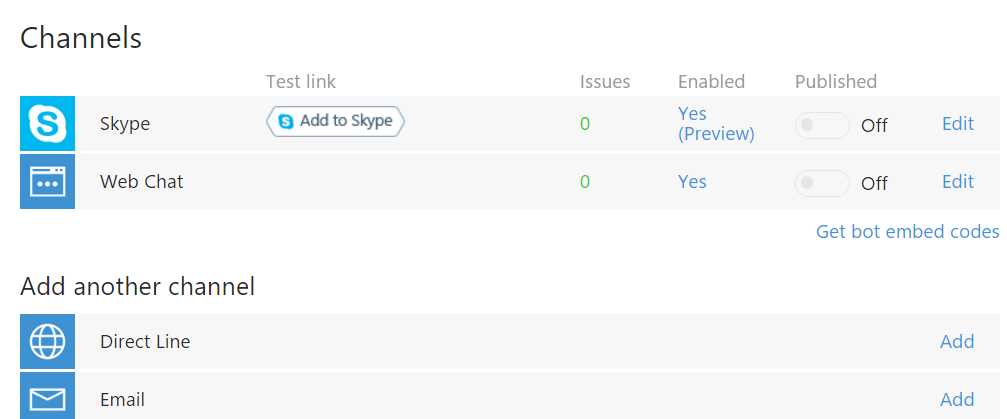
Figure 3.17: The Default Enabled Channels
A quick way to add the bot to Skype is by clicking Add to Skype. By doing this, you’ll be able to add the bot to your contact list. Another way is to make it Published (by default this is set to Off), which means it will be publicly available in the Skype directory for all users.
For now, we simply want to interact with it through our contact list and send some requests. Let’s add it the quick way, by clicking Add to Skype. When we do that, we get the screen shown in Figure 3.18.

Figure 3.18: Adding the Bot to Our Skype Contacts
There, simply click Add to Contacts. The browser will then ask if you want to launch the Skype application. If you accept, the bot will be added to your contact list.
We’ve come a long way. We now have the bot on our Skype contact list, so now let’s try it out for real.
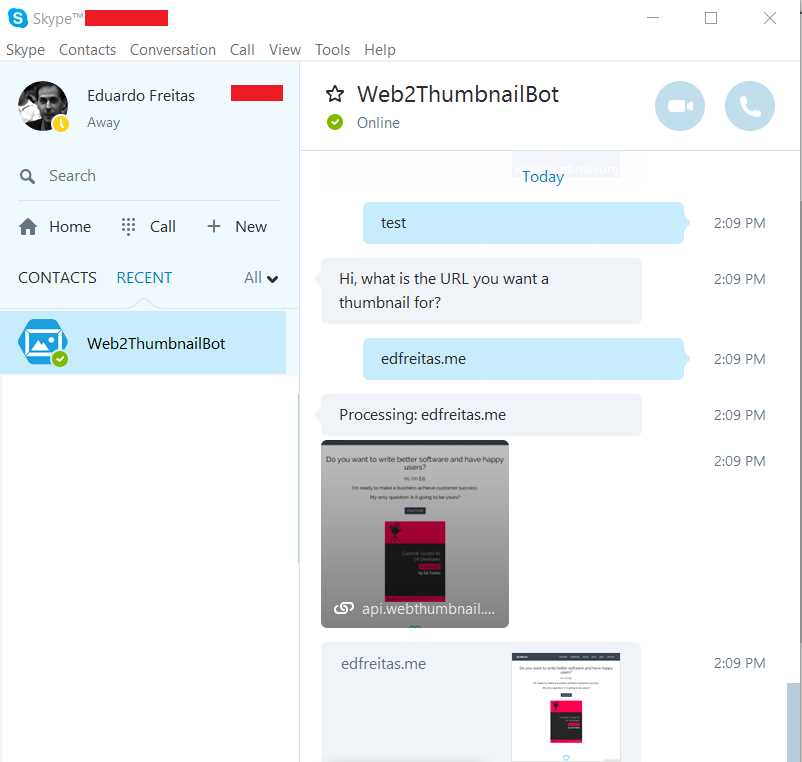
Figure 3.19: Interacting with Our Bot on Skype
It’s worth noticing that any bot will always show up on Skype as active (green color).
Fantastic. We are able to interact with our bot, and it works like a charm. And because a bot is a bot, it will not go “away” or go into “don’t disturb” mode. That’s a relief!
Summary
We’ve accomplished our objective of writing, registering, and publishing a simple bot. In this chapter, we’ve gone from interacting with our bot in the Bot Emulator to registering it on the Bot Developer Portal, then publishing it on Azure and adding it to Skype.
We’ve explored in detail the steps required to make this happen, and although there were indeed various steps required, the process was logical and relatively straightforward.
These steps will be necessary when registering and publishing another bot, but we won’t cover them again—it will be assumed that we’ve gone through this explanation and therefore we can focus more on the bot itself and other complementary APIs that will make our next bot more aware and smarter.
We’ll make use of FormFlow and an interesting external API. The examples that follow should be interesting, challenging, and fun.
- 1800+ high-performance UI components.
- Includes popular controls such as Grid, Chart, Scheduler, and more.
- 24x5 unlimited support by developers.