
Microsoft Bot Framework Succinctly®

CHAPTER 2
Our First Bot
Introduction
In the previous chapter, we explored the basics of the Bot Framework and its parts. At this point we have a good understanding of what the framework can allow us to achieve, but we still haven’t really had any action with it.
That’s about to change. Now, we’ll create our first bot—a very interesting one. Not particularly smart to the extent that the word “bot” itself tends to imply, but one that performs a rather nontrivial and tedious task.
We’ll start digging into the code right away, and as we go, we’ll expand our understanding of the framework and use this later to build an even more complex and interesting bot app.
Thumbnail bot setup
Our first bot application will be a screenshot bot. We will provide the name of the website or URL we are interested in, then the bot will take a screenshot of the main page of that website and return a thumbnail image of it.
That’s basically all the bot will do. Simple, but still fun—an interesting and time-saving tool.
In case you didn’t save the Visual Studio project when we previously selected the Bot Application template, create a new VS project and select the template.
Let’s name our bot Web2ThumbnailBot (you are free to use any name you wish, just be consistent and use the same name even when registering and publishing it).
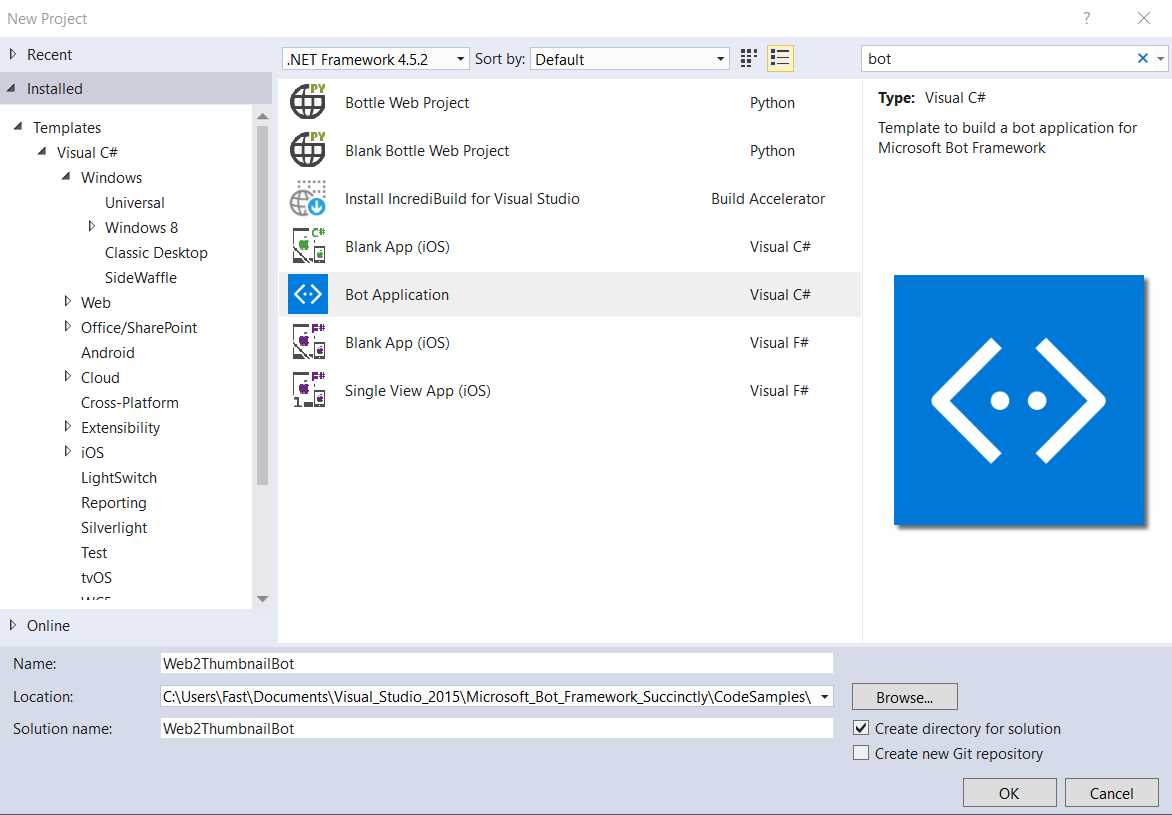
Figure 2.0: New VS Project with the Bot Application Template Selected
When the project has been created successfully, if we open the Solution Explorer within Visual Studio, we will immediately see that it is simply a Web API project.

Figure 2.1: VS Project Structure
Before digging any further into the structure of the project, let’s run the application in Debug mode by pressing F5.
Next, IIS Express is loaded and a browser window with a localhost site is launched.
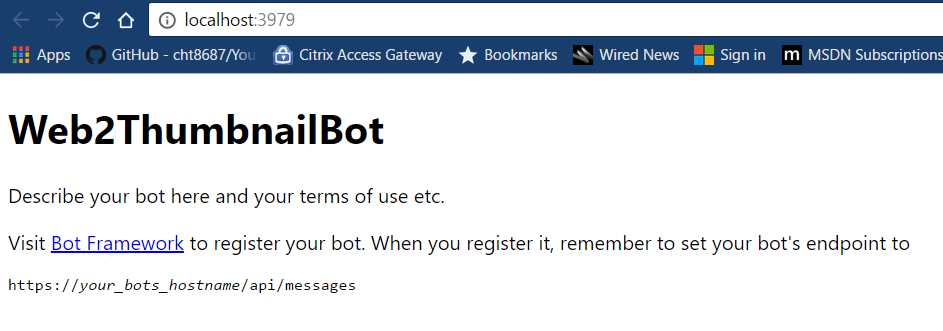
Figure 2.2: Bot Running on Localhost
Now that the bot is running for the first time, open the Bot Framework Channel Emulator and set the Bot URL to the same port where the bot site is running. In my case, that is http://localhost:3979/api/messages.
The port number might be different on your machine, but the rest of the URL (aside from the port number) needs to be the same.
Notice that the URL suffix /api/messages is required for the Bot Emulator to communicate with the bot app.
You can type any text. What we get by default is an echo response that replies with the string length that our message contains.
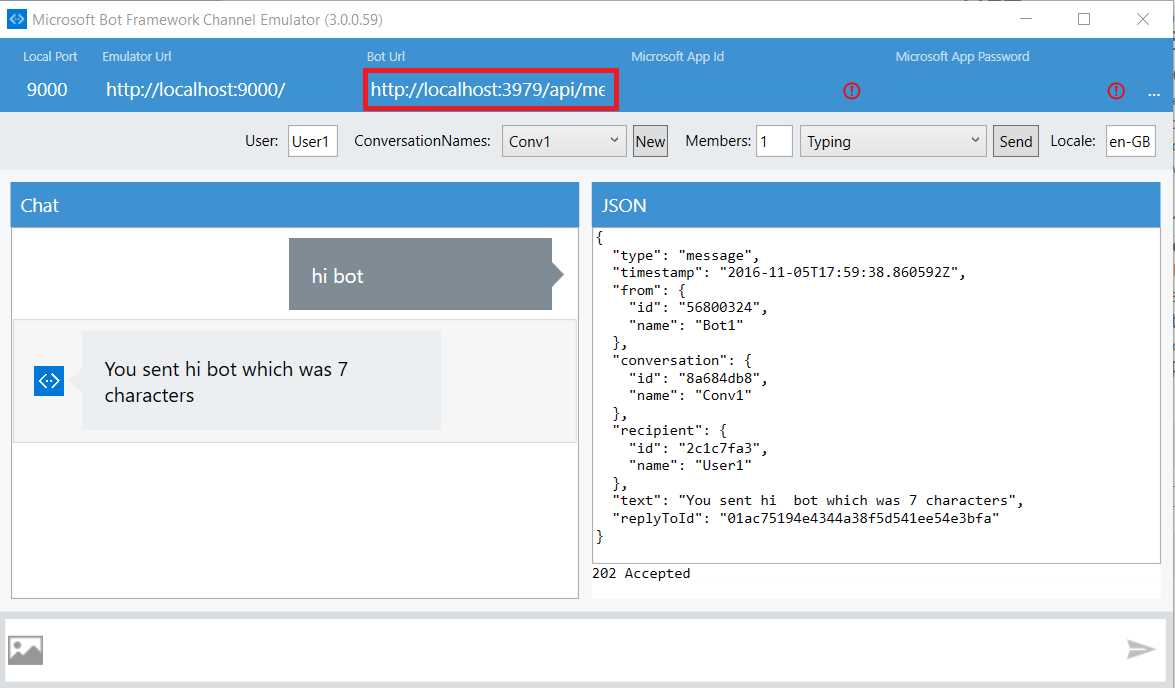
Figure 2.3: Echo Response on Bot Emulator
Very straightforward so far, but now it’s time to dive a bit deeper and explore what’s happening behind the scenes.
The Bot Framework Emulator is under active development and the UI is likely to be somewhat different from the one shown in this e-book. However, you shouldn’t have much trouble with any UI changes.
Let’s go back into the Solution Explorer in Visual Studio and expand the Controllers folder. Inside this folder is a file called MessagesController.cs that defines all the methods and properties that control our bot.
Now, let’s examine the code. I’ve only slightly modified the output message (to make the response shorter) after running the prebuilt code the first time—you’ll see a comment in the following code.
Code Listing 2.0: MessagesController.cs
using System; using System.Net; using System.Net.Http; using System.Threading.Tasks; using System.Web.Http; using Microsoft.Bot.Connector; namespace Web2ThumbnailBot { [BotAuthentication] public class MessagesController : ApiController { /// <summary> /// POST: api/Messages /// Receive a message from a user and reply to it. /// </summary> public async Task<HttpResponseMessage> Post([FromBody]Activity activity) { if (activity.Type == ActivityTypes.Message) { ConnectorClient connector = new ConnectorClient(new Uri(activity.ServiceUrl)); // Calculate something for us to return. int length = (activity.Text ?? string.Empty).Length; // Reply to the user – I made the response shorter :) Activity reply = activity.CreateReply( $"{activity.Text} is {length} characters"); await connector.Conversations.ReplyToActivityAsync(reply); } else { HandleSystemMessage(activity); } var response = Request.CreateResponse(HttpStatusCode.OK); return response; } private Activity HandleSystemMessage(Activity message) { if (message.Type == ActivityTypes.DeleteUserData) { // Implement user deletion here. // If we handle user deletion, return a real message. } else if (message.Type == ActivityTypes.ConversationUpdate) { // Handle conversation state changes, like members being // added and removed. Use Activity.MembersAdded and // Activity.MembersRemoved and Activity.Action for info. // Not available in all channels. } else if (message.Type == ActivityTypes.ContactRelationUpdate) { // Handle add/remove from contact lists. // Activity.From + Activity.Action represent what // happened. } else if (message.Type == ActivityTypes.Typing) { // Handle knowing that the user is typing. } else if (message.Type == ActivityTypes.Ping) { } return null; } } } |
In this class, the Post method takes care of the request received from the user and sends a reply back with the length of the message received. This is possible because we are checking that the Activity.Type is of type ActivityTypes.Message.
Notice that it is also possible to handle other ActivityTypes that might occur while the bot is running. These are handled within the HandleSystemMessage method.
See also how the reply to the message received is handled with an asynchronous method called ReplyToActivityAsync. In essence, all the bot’s communication is done asynchronously—this is important to keep in mind.
Finally, if we take a step back and analyze the sample code automatically generated by the Bot Application template, we can see that we have the most important foundation for our bot, which is basic communication handling.
Now we simply need to create the necessary logic for generating website thumbnails.
We can write this logic inside a separate .cs file, then invoke a method from the new class we will create from the Post method.
Let’s name our new project file Thumbnails.cs and get rolling. We can create this file as a standard C# class within the Controllers folder of our VS project.
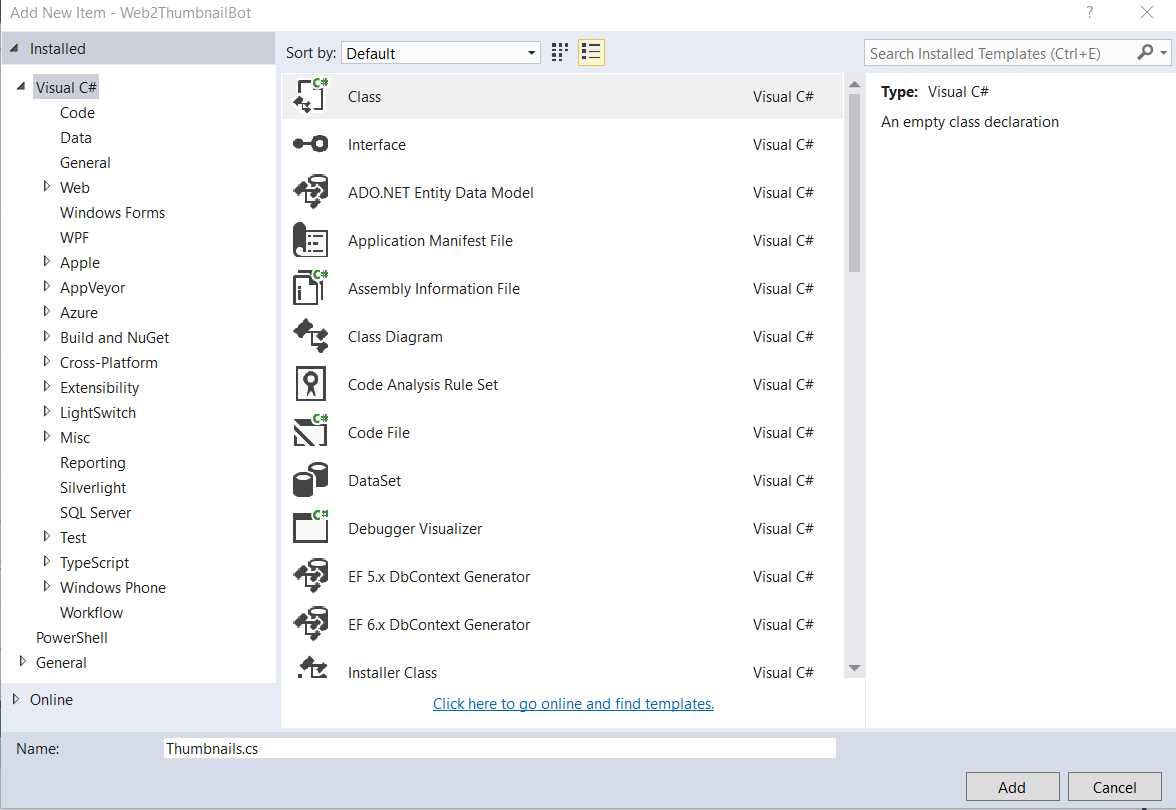
Figure 2.4: Adding the Thumbnails.cs Class
To generate a site’s thumbnail, we can use an existing API or write our own code. If something has already been created, let’s not reinvent wheel and instead use what is out there.
There are several libraries and APIs that allow us to take screenshots of a website such as Selenium WebDriver and PhantomJS. However, we won’t be using either of them, as their implementations can be quite tricky. Instead, we’ll be using a simple yet effective and reliable external API called Webthumbnail.org.
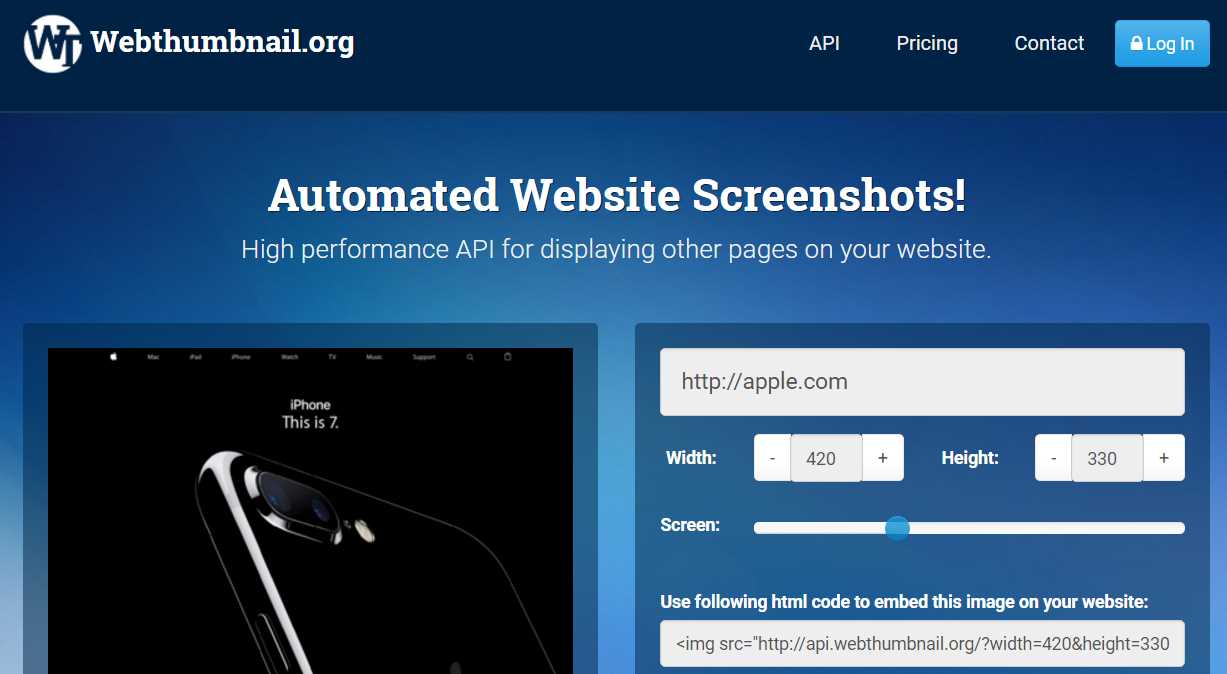
Figure 2.5: Webthumbnail.org
The site’s API is incredibly simple and reliable. All we need to use this API is make an HTTP request to this URL:
http://api.webthumbnail.org/?width=...&height=...&screen=...&url=...
Simply replace the … with integer values no greater than 1024 for width / height and 1920 for the screen parameter. The url parameter works with or without the http or https prefixes.
The API details can be found here.
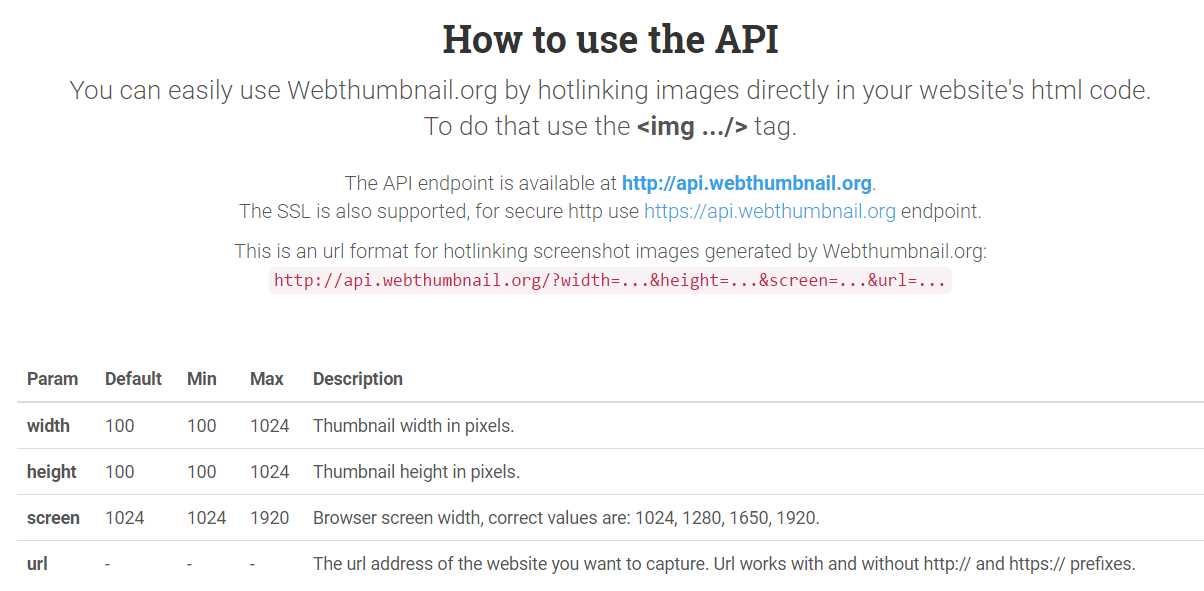
Figure 2.6: How to Use the Webthumbnail.org API
I’ve never seen such a simple and effective API. Now let’s write some code that uses it.
Using the Webthumbnail.org API
In order to use this API, we’ll need to install the RestSharp library, which is available as a NuGet package.
We can do this by right-clicking the References item in the Solution Explorer of our Visual Studio project and then selecting the option Manage NuGet Packages.
Once we’ve done this, we select RestSharp from the list in the Visual Studio NuGet Package window, type rest in the search bar, then click Install to install the package. This will bring the required references and any dependencies into the project.
Once installed, you can always update this library to the newest version by clicking Update.
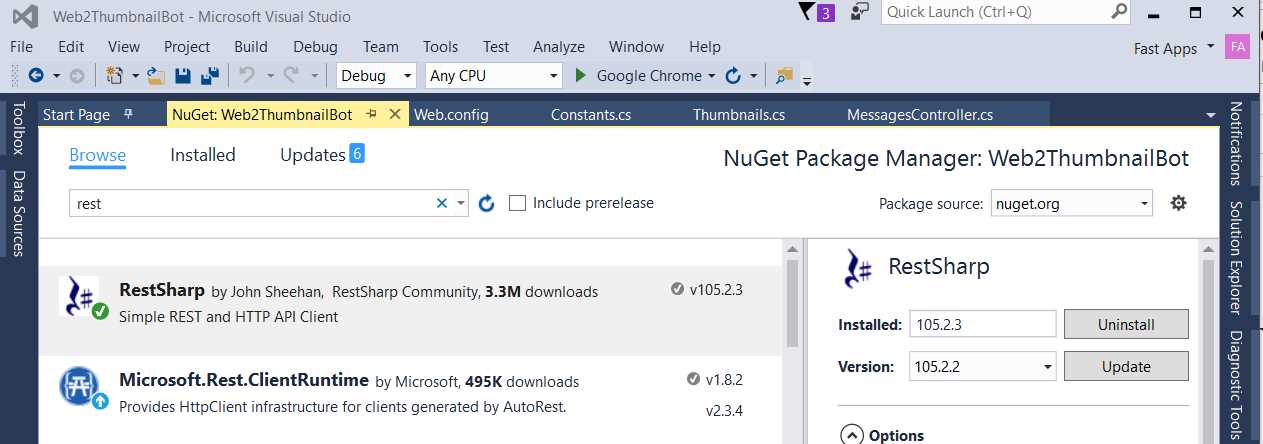
Figure 2.7: The RestSharp NuGet Package
Now that RestSharp has been installed, we are ready to start implementing the logic that our bot will use to capture screenshots using the Webthumbnail.org API. We’ll do this next.
The bot’s capture logic
One of the reasons this API was chosen (besides its simplicity and reliability) is that the Bot Framework doesn’t give us the ability to keep files on disk—it is basically a Web API application.
So, we invoke the Webthumbnail.org API and get back a URL that points to a thumbnail image of the site we requested. This is perfect because we can then return the URL back to the user as a response card.
Let’s write this logic in our Thumbnails.cs file to keep all the logic related to the creation of the thumbnail and create the response card in one place—separate from the main bot logic.
Code Listing 2.1 shows how the code will look.
Code Listing 2.1: Thumbnails.cs
using Microsoft.Bot.Connector; using System.Collections.Generic; using System.Threading.Tasks; using RestSharp; namespace Web2ThumbnailBot { public class Thumbnails { public static async Task ProcessScreenshot(ConnectorClient connector, Activity msg) { Activity reply = msg.CreateReply($"Processing: {msg.Text}"); await connector.Conversations.ReplyToActivityAsync(reply); await Task.Run(async () => { string imgUrl = GetThumbnail(msg.Text); reply = CreateResponseCard(msg, imgUrl); await connector. Conversations.ReplyToActivityAsync(reply); }); } public static string GetThumbnail(string url) { string r = Constants.cStrApiParms + url; RestClient rc = new RestClient(Constants.cStrThumbApi); RestRequest rq = new RestRequest(r, Method.GET); IRestResponse response = rc.Execute(rq); return Constants.cStrThumbApi + r; } public static Activity CreateResponseCard(Activity msg, string imgUrl) { Activity reply = msg.CreateReply(imgUrl); reply.Recipient = msg.From; reply.Type = "message"; reply.Attachments = new List<Attachment>(); List<CardImage> cardImages = new List<CardImage>(); cardImages.Add(new CardImage(imgUrl)); ThumbnailCard plCard = new ThumbnailCard() { Subtitle = msg.Text, Images = cardImages }; Attachment plAttachment = plCard.ToAttachment(); reply.Attachments.Add(plAttachment); return reply; } } } |
There are some string constants used in the previous code that are kept in a Constants.cs file.
Code Listing 2.2: Constants.cs
namespace Web2ThumbnailBot { public class Constants { public const string cStrHttp = "http://"; public const string cStrHttps = "https://"; public const string cStrThumbApi = "http://api.webthumbnail.org/?"; public const string cStrApiParms = "width=1024&height=1024&screen=1024&url="; } } |
We will be using a value of 1024 for the width, height, and screen parameters of the API. These have been hard-coded into the cStrApiParms string.
The Thumbnails class is responsible for making the call to the Webthumbnail.org API, then returning the URL of the thumbnail created as a reply to the user.
The main method of the class is called ProcessScreenshot, and it does two things: it invokes the GetThumbnail method, then passes the imgUrl variable to the CreateResponseCard method, creating a response card that contains the URL of the thumbnail taken and also a small image of the screenshot.
The CreateResponseCard method then returns an Activity object that is passed on to the ReplyToActivityAsync method in order to send the response back to the user.
A response card is simply a message displayed as a card that contains both text and an image. Now let’s quickly analyze the CreateResponseCard method.
Code Listing 2.3: The CreateResponseCard Method
public static Activity CreateResponseCard(Activity msg, string imgUrl) { Activity reply = msg.CreateReply(imgUrl); reply.Recipient = msg.From; reply.Type = "message"; reply.Attachments = new List<Attachment>(); List<CardImage> cardImages = new List<CardImage>(); cardImages.Add(new CardImage(imgUrl)); ThumbnailCard plCard = new ThumbnailCard() { Subtitle = msg.Text, Images = cardImages }; Attachment plAttachment = plCard.ToAttachment(); reply.Attachments.Add(plAttachment); return reply; } |
We can see that an Activity instance is created to be used as the reply that will be sent back to the user. This reply object has an Attachments property to which a ThumbnailCard object is added.
The ThumbnailCard object contains a list of CardImage objects. Multiple CardImage instances can be attached to a ThumbnailCard object, but in this case we’ll attach only one cardImage.
The CreateResponseCard method is responsible for creating a response that contains a small image of the captured screenshot along with its URL, which will be sent back to the user.
Now, let’s have a quick look at the ProcessScreenshot method.
This method first sends a reply back to the user saying that the request is being processed. This is done by invoking the first ReplyToActivityAsync method.
Code Listing 2.4: The ProcessScreenshot Method
public static async Task ProcessScreenshot(ConnectorClient connector, Activity msg) { Activity reply = msg.CreateReply($"Processing: {msg.Text}"); await connector.Conversations.ReplyToActivityAsync(reply); await Task.Run(async () => { string imgUrl = GetThumbnail(msg.Text); reply = CreateResponseCard(msg, imgUrl); await connector. Conversations.ReplyToActivityAsync(reply); }); } |
After that, we call the GetThumbnail method. Its result is passed on to the CreateResponseCard method, which returns the final response to the user—the second call to the ReplytoActivityAsync method.
We have wrapped this up into a Task because these operations are “glued” together, and the final response depends on the result of both the GetThumbnail and CreateResponseCard methods. They constitute one indivisible processing block that should be executed as a single task, but asynchronously, so that it doesn’t block the bot from processing other requests.
In order to wrap this up, we need to remove the original call to activity.CreateReply and replace it with ProcessResponse within the Post method of MessagesController.cs, as in Code Listing 2.5.
Code Listing 2.5: The Updated Post Method in MessagesController.cs
public async Task<HttpResponseMessage> Post([FromBody]Activity activity) { if (activity.Type == ActivityTypes.Message) { ConnectorClient connector = new ConnectorClient(new Uri(activity.ServiceUrl)); // Return our reply to the user. await ProcessResponse(connector, activity); } else { HandleSystemMessage(activity); } var response = Request.CreateResponse(HttpStatusCode.OK); return response; } |
Code Listing 2.6 shows what the ProcessResponse method looks like.
Code Listing 2.6: The ProcessResponse Method in MessagesController.cs
private async Task ProcessResponse(ConnectorClient connector, Activity input) { Activity reply = null; string exMsg = string.Empty; if (IsValidUri(input.Text, out exMsg)) { await Thumbnails.ProcessScreenshot(connector, input); } else { reply = input.CreateReply( "Hi, what is the URL you want a thumbnail for?"); await connector.Conversations.ReplyToActivityAsync(reply); } } |
We can see that this method checks whether the incoming request is a valid URL, and, if so, it invokes the static ProcessScreenshot method from the Thumbnails class. Otherwise, it returns a default response.
Here’s the full code for the updated MessagesController.cs file including the IsValidUri method.
Code Listing 2.7: The Updated Full MessagesController.cs File
using System; using System.Net; using System.Net.Http; using System.Threading.Tasks; using System.Web.Http; using Microsoft.Bot.Connector; namespace Web2ThumbnailBot { [BotAuthentication] public class MessagesController : ApiController { /// <summary> /// POST: api/Messages /// Receive a message from a user and reply to it. /// </summary> public async Task<HttpResponseMessage> Post([FromBody]Activity activity) { if (activity.Type == ActivityTypes.Message) { ConnectorClient connector = new ConnectorClient(new Uri(activity.ServiceUrl)); // Return our reply to the user. await ProcessResponse(connector, activity); } else { HandleSystemMessage(activity); } var response = Request.CreateResponse(HttpStatusCode.OK); return response; } public bool CheckUri(string uri, out string exMsg) { exMsg = string.Empty; try { using (var client = new WebClient()) { using (var stream = client.OpenRead(uri)) { return true; } } } catch (Exception ex) { exMsg = ex.Message; return false; } } private bool IsValidUri(string uriName, out string exMsg) { uriName = uriName.ToLower().Replace( Constants.cStrHttps, string.Empty); uriName = (uriName.ToLower().Contains(Constants.cStrHttp)) ? uriName : Constants.cStrHttp + uriName; return CheckUri(uriName, out exMsg); } private async Task ProcessResponse(ConnectorClient connector, Activity input) { Activity reply = null; string exMsg = string.Empty; if (IsValidUri(input.Text, out exMsg)) { await Thumbnails.ProcessScreenshot(connector, input); } else { reply = input.CreateReply( "Hi, what is the URL you want a thumbnail for?"); await connector.Conversations. ReplyToActivityAsync(reply); } } private Activity HandleSystemMessage(Activity message) { if (message.Type == ActivityTypes.DeleteUserData) { // Implement user deletion here. // If we handle user deletion, return a real message. } else if (message.Type == ActivityTypes.ConversationUpdate) { // Handle conversation state changes, like members being // added and removed. // Use Activity.MembersAdded and Activity.MembersRemoved // and Activity.Action for info. // Not available in all channels. } else if (message.Type == ActivityTypes.ContactRelationUpdate) { // Handle add/remove from contact lists. // Activity.From + Activity.Action represent what // happened. } else if (message.Type == ActivityTypes.Typing) { // Handle knowing that the user is typing. } else if (message.Type == ActivityTypes.Ping) { } return null; } } } |
Let’s run the application with Visual Studio and use the Bot Emulator to interact with it. We will test with my own website, edfreitas.me, but you can use any other.
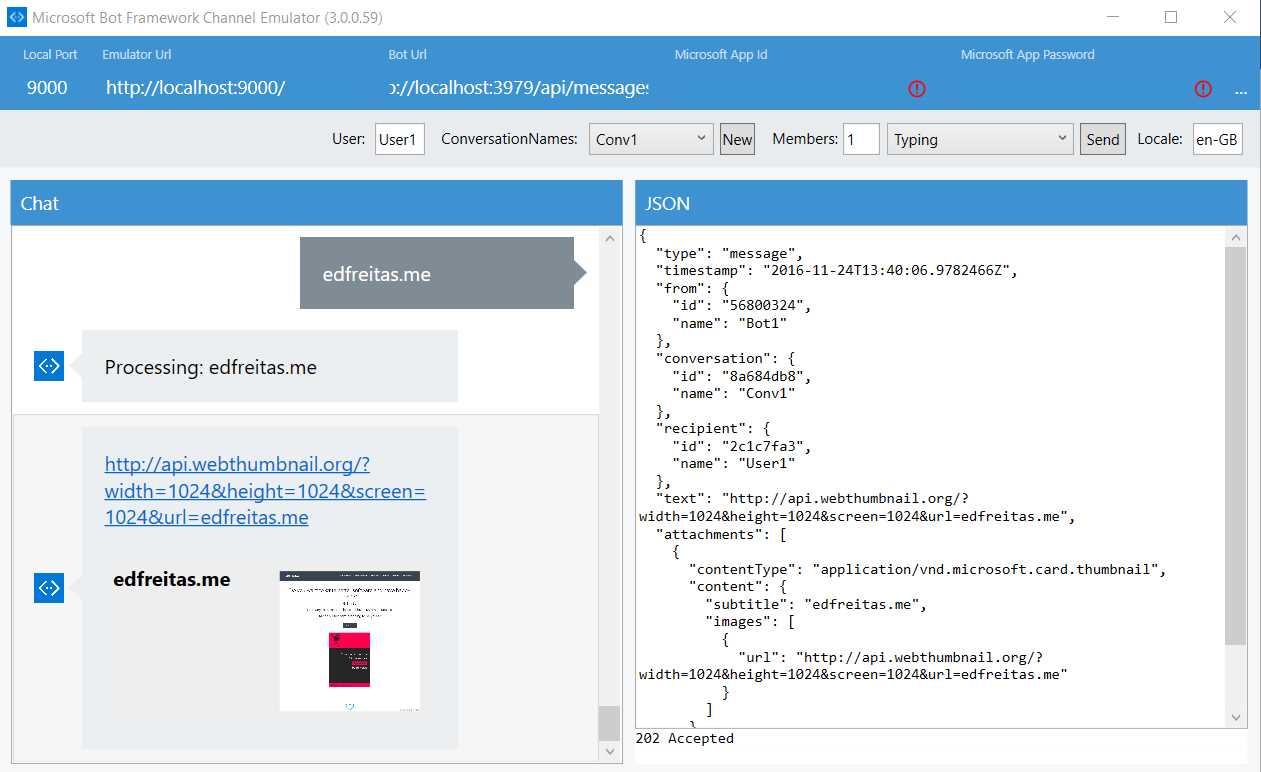
Figure 2.8: Bot Execution Results
We can see that we requested the bot to fetch a screenshot of edfreitas.me, and a ThumbnailCard object response was returned that contains the URL of the thumbnail taken and a small picture of the screenshot.
Figure 2.9 shows how the actual thumbnail taken looks in the browser if we click on the URL provided in the response.
Figure 2.9: Thumbnail Taken by the Bot as Seen on the Browser
Awesome! Our bot application actually does what it was set to do, which is impressive considering that the code base is quite small, and it’s also interesting because we were able to combine all this functionality into just a couple of classes. How cool is that?
By making the ProcessScreenshot method asynchronous, we pretty much guarantee that each request is independent from any other, and multiple requests can be made simultaneously without blocking the application to process other requests. That’s great, and there’s still room for further improvement. For example, we could add more asynchronous capabilities and threading or even explore other thumbnail libraries (or create one of our own). That’s beyond the scope of this chapter, but it is definitely something worth exploring in your free time if you want to have a bit of extra fun.
You can find the full source code (VS project) for this bot here.
Summary
Throughout this chapter, we’ve explored how to write a small, simple, yet interesting bot with a defined goal and practicality in mind.
It’s not particularly the brightest and smartest of the bots out there, but it does perform an interesting task that could be quite tedious to perform manually. So, it’s definitely worth our time and attention.
We’ve also looked at how to streamline the bot by making it capable of handling requests asynchronously, which makes it far more responsive than having it deal with one request at a time in a sequential and synchronous manner.
We’ve also noticed that when creating bots, we should keep the bot focused on being a bot. Anything that doesn’t correspond to the bot itself might well be outsourced to an external service or API.
In other words, a bot should be a coordinator app and not a full-blown engine that does lots of things internally, as that would add complexity both in terms of tasks to manage and asynchronous execution.
In the next chapter, we’ll look at how we can register and publish our bot to Skype.
Beyond that, the chapters that follow will focus on creating a bot that is conversationally fluid by using FormFlow.
We are starting to scratch the surface of bot development, and we can already start to appreciate its beauty and complexity. Most importantly, this should be a fun, immersive, engaging, and motivating experience.
- 1800+ high-performance UI components.
- Includes popular controls such as Grid, Chart, Scheduler, and more.
- 24x5 unlimited support by developers.