
LightSwitch Succinctly®

CHAPTER 6
Application Editor
Extending LightSwitch applications
Writing custom code or custom user controls is sometimes referred to as level-one extensibility. LightSwitch allows you to extend your application beyond what comes out of the box, and does not require you to have Visual Studio completely installed. Level-one extensibility is available in the stand-alone version of LightSwitch as well.
As this suggests, there are higher levels of extensibility as well. Level-two extensibility adds capabilities to a LightSwitch application that can be reused in different applications. They are distributed via Visual Studio Extensions (.vsix) and can be purchased directly from a vendor or downloaded from the Visual Studio Gallery (http://visualstudiogallery.msdn.microsoft.com/site/search?query=LightSwitch&f%5B0%5D.Value=LightSwitch&f%5B0%5D.Type=SearchText&ac=8).
Traditionally, these extensions will add one or more of the following capabilities to your Visual Studio LightSwitch IDE or application:
- Reusable WCF services
- Reusable Business Types
- Reusable Controls
- Reusable Screen Templates
- Reusable Shells
- Reusable Themes
The final two, themes and shells, provide an easy way to change the entire look and feel (respectively) of your application with just a couple of clicks.
Installing an extension in Visual Studio
Close your LightSwitch application, and from the Tools menu in Visual Studio, select the Extension Manager.
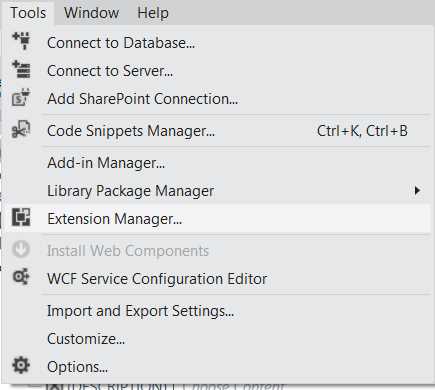
Figure 66: Opening the Extension Manager
In the Extension Manager, search the Online Extensions for a LightSwitch theme, shell, or both. Click the Install button, and then close the Extension Manager.
Activating an extension in your application
To activate your chosen shell or theme, select the LightSwitch project in the Solution Explorer and press Alt+Enter, or right-click on it and select Properties from the context menu.

Figure 67: Opening the Application Designer
This opens up the fourth and final LightSwitch-specific designer, the Application Designer.
Navigate to the Extensions tab.
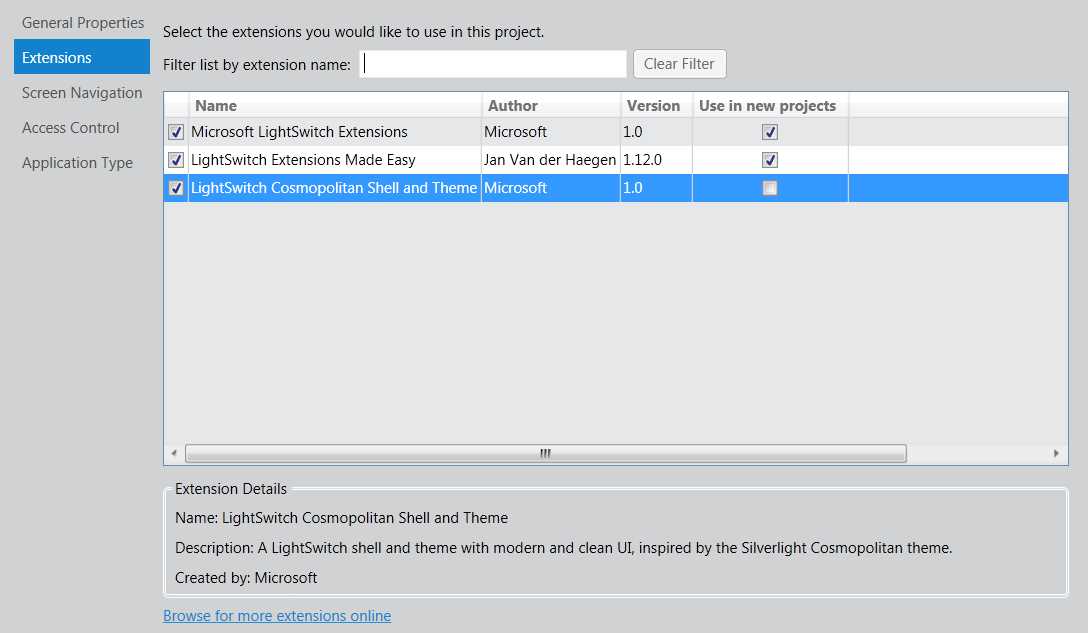
Figure 68: Activating an extension
In this tab in the Application Designer, you get an overview of all LightSwitch-specific extensions that you have available on your machine. Select the check box next to the extension that you have downloaded to activate it in this application.
In the previous figure, you can see I downloaded the LightSwitch Cosmopolitan Shell and Theme, which is now included in Visual Studio LightSwitch 2012 RC as the new default shell and theme.
The General Properties tab
Once activated, the level-two extensibility capabilities—the shell and the theme—can be used in this LightSwitch application. Selecting which shell or theme is used is done from the General Properties tab.

Figure 69: The Application Designer’s General Properties tab
Change the selected Shell to the now available shell, and/or the selected Theme to the theme that you downloaded.

Figure 70: Selecting a shell or a theme to use in the LightSwitch client application
The other properties on the General Properties tab are worth a quick review as well:
- Application name: The name of the application, I changed it to My time, my money
- Logo: The logo to use if the shell supports it (which the LightSwitch Cosmopolitan Shell does).
- Icon: The icon of the application.
- Version: The application’s major and minor release version. A third number, the revision number, is appended each time you publish the application with the same major and minor release version.
- Culture: The culture of the application. This is used for globalization and translations throughout the application. At the moment, LightSwitch only supports one culture at a time.
Press F5 to build and debug the application, and see how the entire look and feel of your application has changed.
Screen Navigation
The Screen Navigation tab allows you to take control of the navigation menu of your application. Screens can be grouped in different groups, and the order and labels can be changed with this editor.

Figure 71: Exploring the Screen Navigation tab
You might have noticed that there’s an Administration group, which wasn’t visible at run time.

Figure 72: The LightSwitch application does not have an Administration group like the Navigation Tab suggested
The reason is twofold: We haven’t activated a User Authentication Mode yet, and we do not have the correct permission to access these screens yet. Both can be changed from the Access Control tab.
The Access Control tab
The fourth Application Editor tab provides control over the authentication mode, allows you to define permissions, and allows you to force a secure connection for your OData endpoints (see Chapter 3).
The three supported authentication modes are:
- Windows authentication: Automatically log in using your Windows credentials. Advised for applications that run within a company.
- Forms authentication: Start the application with a login screen where users have to supply their username and password. Advised for applications that have users from different companies.
- None: Start the application and require no authentication. This authentication mode is never advised unless you’re the only user and are running the application on your local machine.

Figure 73: The Application Designer’s Access Control tab
For this application, change the Authentication mode to Use Forms authentication. When the application is run from Visual Studio, i.e. with the debugger attached, LightSwitch will automatically skip the login screen and log in with a user called Test User.
When it comes to authorization, LightSwitch implements a permission-based system. These permissions are defined in this tab of the Application Designer, and later checked anywhere you need to via custom code. This can be done on a screen level, entity level, or even operation level.
By checking the Granted for debug check box (see Figure 73) next to the only predefined permission, called SecurityAdministration, you are adding this permission to the Test User that will be used when debugging. Press F5 to build and start debugging, and notice the difference.

Figure 74: After setting the access control properties, the Administration menu is visible
For those of you who do not like “find the 7 differences” games, notice the CurrentUserControl is now visible at the top right to show that LightSwitch has indeed logged in a Test User automatically—another great time saver.
This Test User also has the SecurityAdministration permission, which is required to see the Administration group in the navigation menu. This group contains two screens where a security administrator can manage the users and their permissions. Note that your test data is not deployed when you deploy your application, including these users and their permissions, so changes made via these screens during development will not be reflected in your deployment. These screens will really only become useful after deploying your application.
Speaking of which…
The Application Type tab
Time for the final jaw-dropper, the pièce de résistance, the climax of our symphony. We started this e-book by referring to Visual Studio LightSwitch as “the easiest way to build data-centric applications for the desktop or the cloud,” however throughout the tutorial, with the exception of mentioning the public OData endpoints of the server in Chapter 3, we haven’t really stated anything about the architecture or target platform of the application. So what did we build? A single-tier desktop application, a multi-tier one, or a web application that can be hosted in the cloud?
Because of the metadata-driven implementation of LightSwitch, the final tab of the Application Designer, called the Application Type tab, allows you to make these decisions at the latest possible stage of development. This offers more application flexibility than the traditional development cycle in which you have to decide your application deployment environment at the very start. LightSwitch’s flexibility also allows you to change the application type without having to rework entire parts of your application.

Figure 75: Application Designer’s Application Type tab
Think about the latest large data-centric application you worked on. Consider that the application was originally written as a desktop application that directly accessed the database (single tier), and after some time a decision was made to refactor it to a web application that called web services (multi-tier). How long would it have taken to refactor the application?
Here comes the LightSwitch version of that story.
With one click, change the Client type to Web. This automatically disables the choice to run the Application Server on the same tier as the client. Press F5 to build and start debugging.
During the build process, LightSwitch will take the metadata that you have designed in the Entity Designer, along with any that you have designed in the Query Designer, the Screen Designer, and all the choices you have made in the Application Designer, to generate a multi-tier web application.

Figure 76: Changing a single-tier desktop application to a multi-tier web application with one simple click
Publishing time…
If you are satisfied with the result, click the Publish… button in the bottom right of the Application Tab in the Application Designer, and start dreaming about a lucrative subscription model for your freshly created application.
- 1800+ high-performance UI components.
- Includes popular controls such as Grid, Chart, Scheduler, and more.
- 24x5 unlimited support by developers.