
Kubernetes Succinctly®

CHAPTER 8
Packaging Applications with Helm
After deploying applications again and again in the course of this book, you might have realized that writing YAML specs for each component—such as deployments, replica sets, and services that make up the cluster—is difficult. If you are working on more extensive applications, this problem becomes even harder to solve. Enter Helm, a package manager for Kubernetes that makes it easy for developers to package, configure, and deploy applications on Kubernetes clusters.
Introduction
You probably interact with package managers in your day-to-day life, such as Python’s pip, Debian’s apt, and Microsoft’s NuGet. Just like the other package managers, Helm can perform the following activities for you:
- Fetch software packages from repositories.
- Configure software deployments.
- Install software and its dependencies.
- Upgrade software packages to the version that you need.
Helm is made up of two components: a command line interface (CLI), helm, and a server component, tiller. As a developer, you will interact with the helm CLI, while the tiller component will run on the Kubernetes cluster, and will manage the deployment of your software packages.
The software packages in the world of Helm are called charts, and you can find several well-known charts at the official Helm chart repository. Let’s investigate the components that make up a chart.
The anatomy of a chart
A typical chart is composed of several YAML configuration files. Here’s how a typical chart looks.
Code Listing 87: Chart Files
package-name/ charts/ templates/ Chart.yaml LICENSE README.md requirements.yaml values.yaml |
Helm recognizes only the files and directories shown in the previous code listing, and it will leave the other files in the directory unprocessed. Therefore, the names of the files and directories are important. The following are the various components that make up a chart:
- values.yaml: This file contains default configuration values for the chart.
- requirements.yaml: This file contains the list of dependencies of the chart.
- charts/: This directory contains managed chart dependencies that you don’t want to link to, or can’t link to, from an internet-accessible source. It is recommended to use the requirements.yaml configuration for dependencies if you can.
- templates/: This directory contains template files that are referenced by the values.yaml file to define the configuration. Since programming language Go has been used to build Helm, values.yaml uses the Go template format.
- Chart.yaml: This file contains the necessary metadata about the chart, such as the name, version, website, and maintainer details. You can define metadata for your chart such as Kubernetes version, Helm version, and other constraints in this file, which will be useful to the users of this chart.
- LICENSE: This file contains the chart licensing information.
- README.md: This file contains information necessary for the users to use the chart.
Using the helm command, you can install a chart from your local directory or from a chart repository. You can also supply a compressed version of the chart directory in the form of a tar.gz (or .tgz) file to the helm command, which is the format also used by the helm repository for sending charts to the client.
By default, Helm installs charts from the default chart repository. A chart repository lists the location of charts and their related metadata. This repository is called stable and you can find it on GitHub. There is another repository called incubator located in the same repository that contains all the charts that are not yet ready for promotion to stable. In addition to these repositories, you can also find many charts at the Bitnami Helm charts repository that are not present in the official repo.
Installation
To install Helm and Tiller on your developer machine, follow the instructions from the official documentation. The easiest way to install Helm is to execute the following command via Homebrew on your macOS.
Code Listing 88: Install Helm on macOS
brew install kubernetes-helm |
Likewise, on your Windows machine, you can install it through Chocolatey using the following command.
Code Listing 89: Install Helm on Windows
choco install kubernetes-helm |
After installing Helm, you can execute the following command from your terminal to install Tiller.
Code Listing 90: Install tiller
helm init --upgrade |
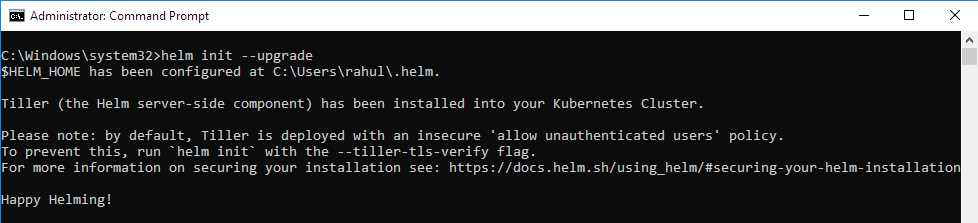
Figure 62: Output Tiller install
This command applies some configurations on your local system and deploys Tiller on your local Kubernetes cluster in the kube-system namespace. You can inspect the deployment by executing the following command in your terminal.
Code Listing 91: Describe deployment tiller
kubectl describe deployment tiller-deploy -n kube-system |
Note: Helm will become a single-service component from version 3, and there will be no Tiller component as part of Helm installation.
You can check the version of Helm installed on your system by running the version command.
Code Listing 92: Check version
helm version |
This command will output the versions of both the Helm client and the Tiller running on the cluster.
Creating charts
To understand Helm in detail, let’s create a Helm chart for our application. Let’s create a chart for the v1 remind-me-web application that we created earlier. Execute the following command to create a chart named remind-me-web.
Code Listing 93: Create chart
helm create remind-me-web |
This command will create a new folder named remind-me-web with the following directory structure. Note that we have deliberately removed some of the unnecessary files from the generated chart template.
Code Listing 94: Chart Template
remind-me-web | .helmignore | Chart.yaml | values.yaml | +---charts \---templates deployment.yaml NOTES.txt service.yaml _helpers.tpl |
Let’s talk briefly about the files present in the template folder:
- deployment.yaml: This file contains the YAML definition for your deployment object.
- service.yaml: This file contains the YAML definition for your service object.
- _helpers.tpl: This is a template that consists of partials and helper functions that can be used in the deployment and service definitions.
- NOTES.txt: The contents of this file are printed on the console after the chart is successfully deployed. You should write the next steps in this file that the user needs to take after deploying your chart.
The default chart template is configured to deploy nginx on a cluster. For this exercise, we will modify the default chart to deploy our service. Remember that we created a service and deployment for provisioning the first version for our application.
Let’s start by defining the service in our chart. The most important part of the chart is the contents in the templates/ directory. All Kubernetes objects, such as deployments and services, are defined in the manifests present in this directory. The easiest way to translate a manifest to the chart is to dump the manifest in this directory and use the helm install command to deploy the chart on a cluster.
Helm takes all files present in this directory through a Go Template rendering engine to substitute parameters present in templates with actual values to generate a valid definition. Open the file service.yaml present in the templates folder to define our service, and replace the code with the following code listing.
Code Listing 95: Define service
apiVersion: v1 kind: Service metadata: name: {{ include "remind-me-web.fullname" . }} # remind-me-web.fullname is defined in /templates/_helpers.tpl labels: name: {{ include "remind-me-web.name" . }} helm.sh/chart: {{ include "remind-me-web.chart" . }} spec: type: NodePort ports: - port: {{ .Values.service.port }} # Select port from parameter values defined in Values.yaml targetPort: {{ .Values.service.targetPort }} protocol: TCP nodePort: {{ .Values.service.nodePort }} selector: name: {{ include "remind-me-web.name" . }} --- |
Helm defines three objects that you can use within your templates to provide configurable values for your chart attributes: .Release, .Chart, and .Value. The .Release object gets values from command line. The .Chart object is used to provide information about the chart, such as the name and version. You can set values for this object in the Chart.yaml file. The .Value object exposes custom configurations for a chart. The values for this object are stored in the Values.yaml file.
Now, let’s move on to define the configuration for our deployment. Open the /templates/deployment.yaml file in your editor and change the code in the file to the code in the following listing.
Code Listing 96: Define configuration
apiVersion: apps/v1beta2 kind: Deployment metadata: name: {{ include "remind-me-web.fullname" . }} labels: name: {{ include "remind-me-web.name" . }} helm.sh/chart: {{ include "remind-me-web.chart" . }} spec: replicas: {{ .Values.replicaCount }} # substitute value of replica count from the value in Values.yaml file. selector: matchLabels: name: {{ include "remind-me-web.name" . }} template: metadata: labels: name: {{ include "remind-me-web.name" . }} spec: containers: - name: {{ .Chart.Name }} # the substitution value of this parameter is present in Chart.yaml file. image: "{{ .Values.image.repository }}:{{ .Values.image.tag }}" ports: - name: http containerPort: 80 protocol: TCP --- |
To keep the chart configurable by the end user, we have used several parameters in our definitions. Let’s define the default values of these parameters in the Values.yaml file. Modify the code in the file to reflect the following code listing.
Code Listing 97: Define default values
|
nameOverride: "" fullnameOverride: "" service: port: 80 targetPort: 80 nodePort: 31120 image: repository: "kubernetessuccinctly/remind-me-web" tag: "1.0.0" |
As a good practice, let’s now modify the code in the Chart.yaml file to add metadata for our chart to help the users. Modify the code to reflect the following code listing.
Code Listing 98: Metadata
apiVersion: v1 appVersion: "1.0" description: Helm chart for remind-me-web v1 name: remind-me-web version: 0.1.0 |
Our chart is now ready for deployment to our cluster. In the next section, we will deploy our chart to our cluster and perform some common operations on it.
Deploying charts
Now that our chart is ready, let’s validate whether our chart is appropriately formed by processing it through a linter. Execute the following command in your terminal to validate your chart.
Code Listing 99: Validate chart
helm lint ./remind-me-web |

Figure 63: Output validate chart
Now that we have a green signal from the linter, let’s move on to deploy this chart on the local cluster with this command.
Code Listing 100: Deploy chart
helm install --name remind-me-web ./remind-me-web |
In this command, you can see that we have provided the value of the .Release.Name parameter in the command. We have used this parameter in the /templates/_help.tpl template and the NOTES.txt file.
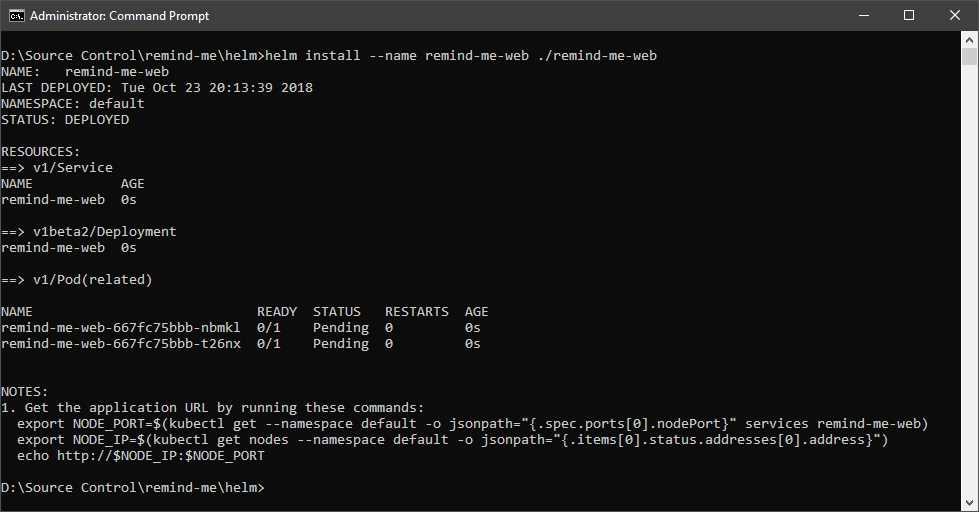
Figure 64: Installing chart
Your service should not be available on http://localhost:31120. Congratulations! You have successfully deployed your first chart on a live cluster.
You can modify values in your Deployment template or the Values template and reinstall the chart to make any modifications to your deployment.
Debugging charts
Writing charts can be tricky because the templates are rendered on Tiller, which in turn sends the generated templates to the Kubernetes API server for processing. If you want to check the generated value of an expression, then comment out the expression that you want to test and execute the following command.
Code Listing 101: Check chart expression
This command will return the manifest with the comment intact. For example, if we want to evaluate the value of the following complex expression in the helper’s template, we can copy the relevant section, paste it in either the deployment or service template, and execute the previous command.
Code Listing 102: Update template
apiVersion: v1 kind: Service ... removed content for brevity # problem: can't figure out what this will evaluate to? # {{- default .Chart.Name .Values.nameOverride | trunc 63 | trimSuffix "-" -}} |
After executing the helm install command with the dry-run and debug flags, you will be able to see the evaluated value of the expression in comments.
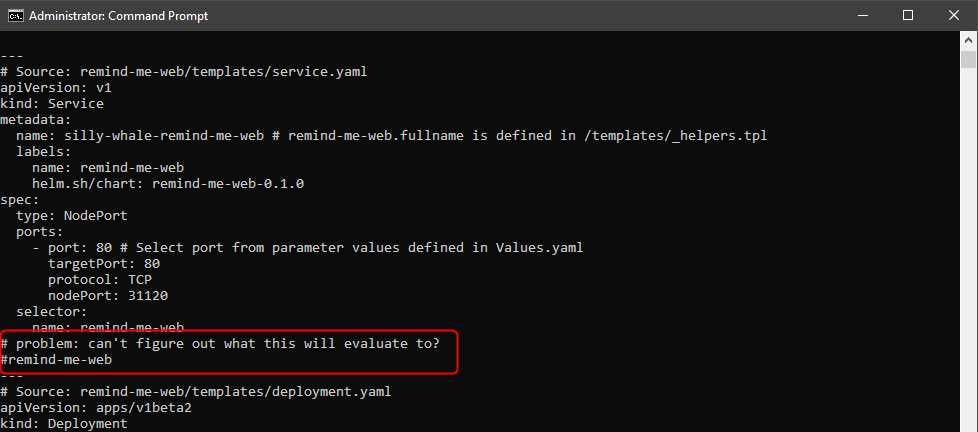
Figure 65: Output Helm install debug
Let’s now prepare our chart for broader distribution by packaging it.
Packaging charts
To make our charts available to our friends, colleagues, and family, we need to package it in the form of a TAR file. The following command will package your chart and generate a zipped TAR file in the current working directory.
Code Listing 103: Package chart
helm package ./remind-me-web |
The output of this command will tell you the path where the package was generated.

Figure 66: Output package chart
Helm supports discovering and installing charts from HTTP server. It reads the list of available charts from an index file hosted on the server and downloads charts from the location mentioned in the index file for a chart. You can also use Helm command helm serve to serve charts from your local system.
To create the index file for your charts, execute the following command in your terminal at the same working directory where your charts are located.
Code Listing 104: Create Index
helm repo index . |
We copied the index file and the remind-me-web chart to a GitHub repository that we can now use as a HTTP server for our charts. Execute the following command in your terminal to add the Helm repository to your system.
Code Listing 105: Add repository
helm repo add myhelmrepo https://raw.githubusercontent.com/Kubernetes-Succinctly/helmrepo/master/ |
After adding the repo, you can search for charts available in the repository by executing the following command.
Code Listing 106: Search chart
helm search myhelmrepo |

Figure 67: Output search repository
Let’s now install the chart that we just added from the repository rather than the local system. Clear the existing deployment from your system and execute the following command in your terminal.
Code Listing 107: Installing chart
helm install --name remindmeweb-fromrepo myhelmrepo/remind-me-web |
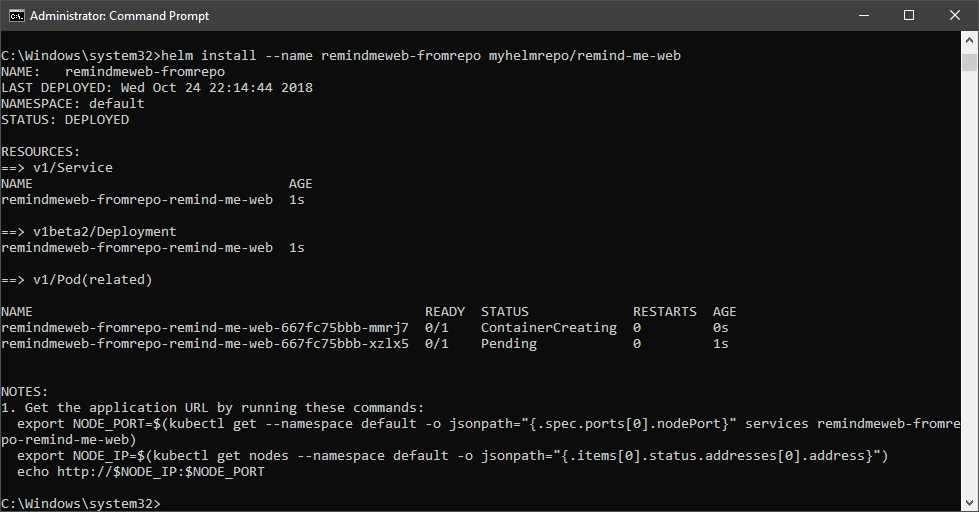
Figure 68: Output install chart
Your web application should now be humming happily on http://localhost:31120. In a larger application, your charts will have dependencies on other charts. If the application dependencies are not available in an inaccessible repository, you can copy them under the chart’s directory in your Helm chart. The preferred method is to declare your dependencies in the /requirements.yaml file in your chart. If your application requires MySQL to be present in the cluster as well, then write the following code in your requirements.yaml file.
Note: The repository name can either be a complete URL to the chart repository or an alias, such as @stable.
You can define dependencies in the following way.
Code Listing 108: Defining dependencies
dependencies: - name: mysql version: 0.10.2 repository: '@stable' |
To download the dependency package in your chart, execute the following command, which will download the MySQL chart inside the /charts directory of your chart.
Code Listing 109: Installing dependencies
helm dep update ./remind-me-web |
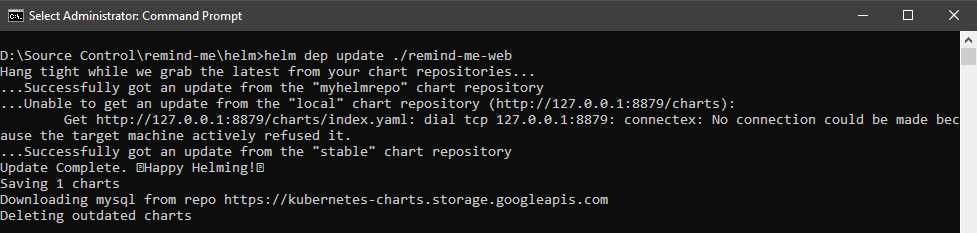
Figure 69: Output update chart
Next, package the chart again and deploy it to your repository. Now, when you install the chart, you will see that MySQL objects will be deployed to your cluster as well.
Summary
In this chapter, we discussed how we can package our applications using Helm. Helm makes it easy for everyone to discover and deploy your applications on their clusters without writing their own specifications.
Finally, let us look at some of the exciting projects coming up in the Kubernetes ecosystem and see how we can get involved with the Kubernetes community.
- Shared infrastructure for efficient resource management
- Self-service analytics for easy data exploration
- Enhanced security with row-level security and SSO
- Customizable dashboards to meet your specific needs