
Java Succinctly® Part 1

CHAPTER 2
Getting Started
In this section, we will examine how to install the Eclipse Integrated Development Environment (IDE). Eclipse is a tool used to program, maintain, debug, and compile Java applications. An IDE is a collection of tools that make application development easier. Java, like many languages, can be programmed with nothing more than a console and a text editor (such as Notepad). However, using Notepad as an IDE is laborious and can lead to errors. A fully functional IDE such as Eclipse can greatly reduce the amount of time it takes to solve problems in a language. Eclipse offers syntax highlighting, bug-fixing suggestions, single-click testing and debugging of an application, and literally thousands of other options for helping to make programming simpler.
Downloading and installing Eclipse
To get the latest version of Eclipse, head over to https://eclipse.org/downloads/.
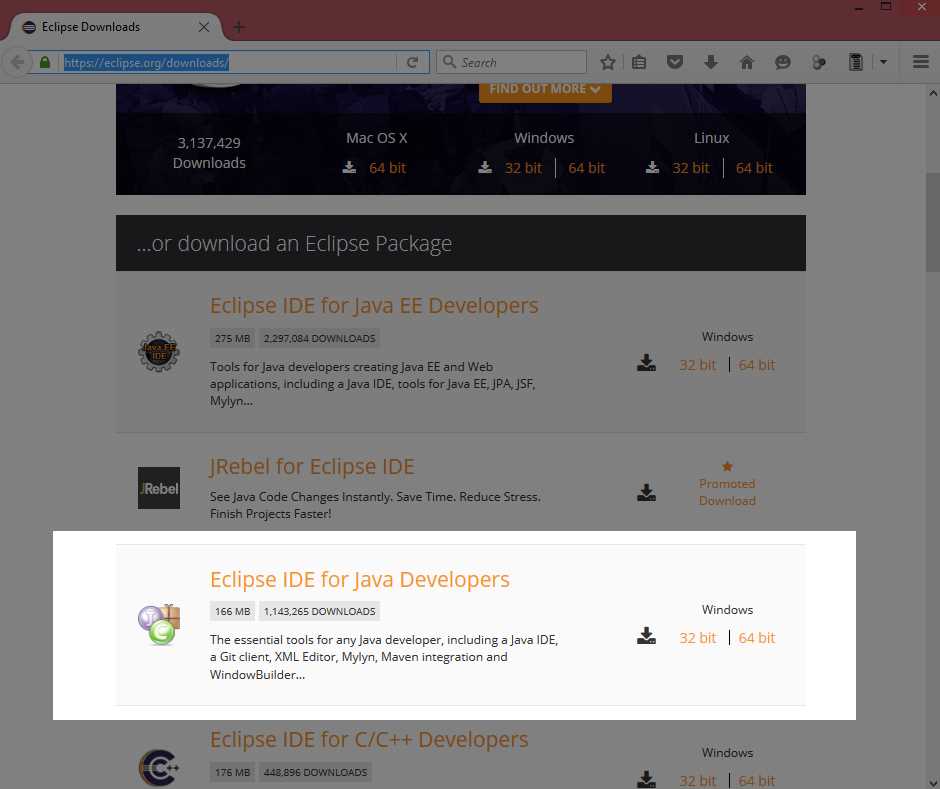
Figure 3: Eclipse Download Page
There are several versions of Eclipse available for download (and several languages for which Eclipse can be used to develop). I have used the Eclipse IDE for Java Developers in this e-book, the version is Mars.1 Release (4.5.1). Older and newer versions of Eclipse will also be fine. At the time of writing, the top of the main Eclipse download page also offers the Eclipse installer, which is an installation wizard designed to make installing Eclipse simple. If you have trouble installing Eclipse with the manual method described here, you might try installing with the installation wizard.
On the right side of the highlighted region in Figure 4, you have two options: 32-bit and 64-bit. I recommend that you use the 64-bit version of Eclipse unless you are certain that your machine is only 32 bits.
When you click the orange button marked “64-bit” (or the button marked “32-bit”), you will be taken to the site for selecting a mirror. This is the source from which to download Eclipse. Choose the mirror that is closest to your region (this is most likely the default mirror displayed on the left). See Figure 4.
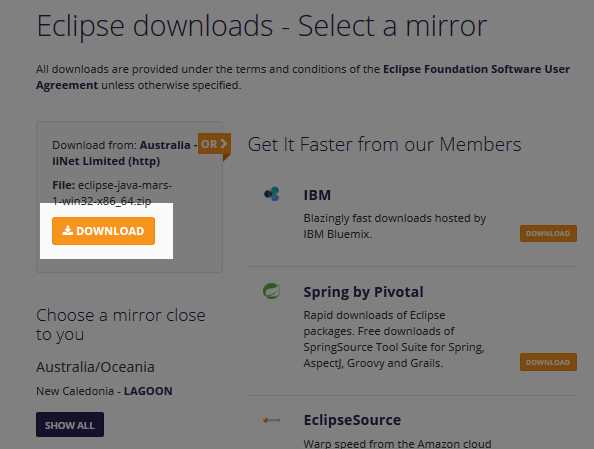
Figure 4: Selecting a Mirror
Selecting different mirrors may alter the amount of time needed for your download to complete, and, generally speaking, the nearer the mirror to your geographical location, the faster you can download Eclipse.
After you select the mirror, you will be taken to a page that allows you to donate to the Eclipse foundation if you wish. The download should begin. You will be asked where you want the file to download. The exact mechanisms for saving files are different depending on your web browser, but make sure that you know where the download is going because we need to extract the file when it is finished downloading. When the download is complete, you will have a file called something similar to “eclipse-java-mars-1-win32-x86_64.zip,” which is a compressed Zip archive of the Eclipse program.
When the download has finished, find this file and extract it. The exact location where you wish to place Eclipse is entirely up to you, but for the 32-bit version, it is probably a good idea to place it in an application folder such as “C:\Program Files” or “C:\Program Files (x86).” Create the folder you want to place Eclipse into, copy the Zip file into this folder, and extract it by right-clicking the file and selecting the Extract to option (as per Figures 5 and 6).
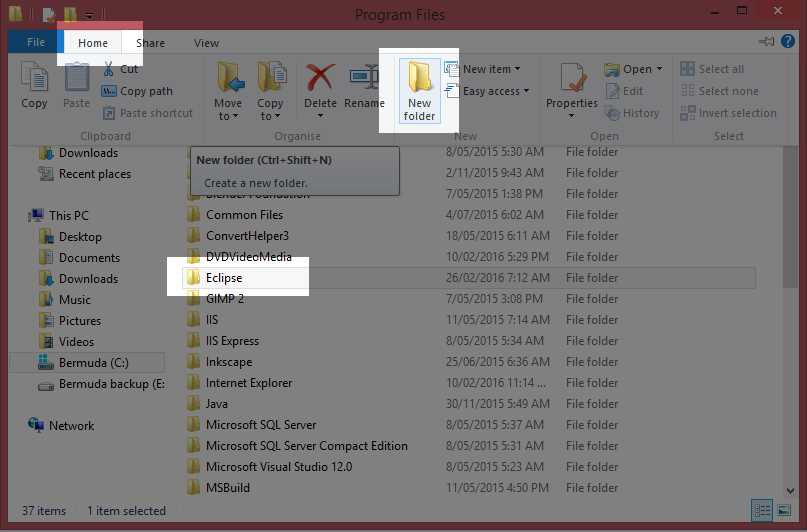
Figure 5: Creating the Eclipse Folder
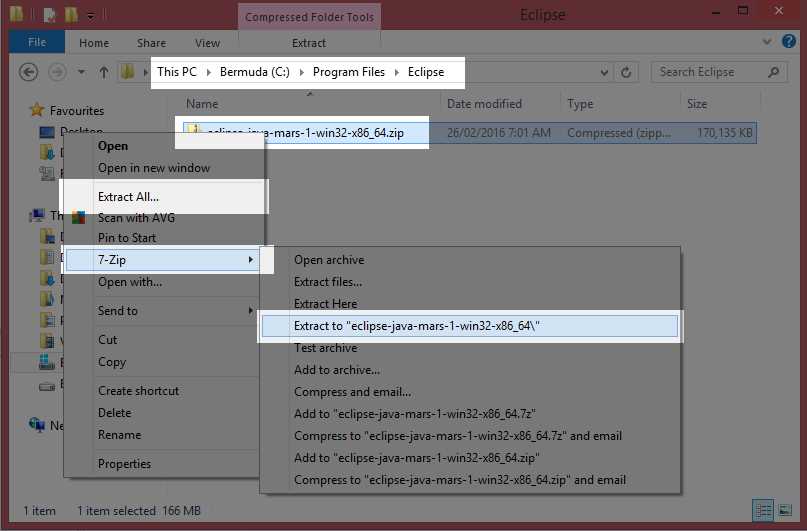
Figure 6: Extracting the Eclipse Zip File
Note: On Windows 8 and above, we are able to extract Zip files by right-clicking the file and selecting “Extract All” from the context menu. Alternately, you can install dedicated archiving extraction and compression software. I recommend the program 7-Zip, which is a powerful and flexible freeware-compression tool.
After we use “Extract All” or some dedicated extraction tool to extract the contents of the Eclipse Zip file, we will have a subfolder in the Eclipse folder called “eclipse-java-***” in which the *** is the version of Eclipse. Navigate into this folder and into the following “eclipse” subfolder, and you will see the main Eclipse files, as per Figure 7. In order to start the Eclipse IDE, double-click the file called Eclipse.exe.
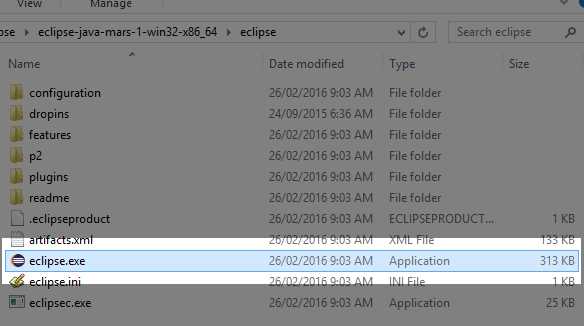
Figure 7: Extracted Eclipse Files
Tip: If you right-click the file Eclipse.exe, you can select the option “Create Shortcut.” Clicking this option will create a shortcut to the Eclipse.exe file in the same folder as the EXE. You can then cut and paste this shortcut to your desktop for easy access.
Note: You will also need the Java Runtime Environment installed (this is installed automatically if you selected to download the Eclipse installer package from the website above). If you do not have the Java Runtime Environment installed, you can download and install it from http://www.oracle.com/technetwork/java/javase/downloads/index.html.
Projects and workspaces
A Java project is a collection of classes, files, and other resources that collectively form a coherent application. A workspace is a collection of Java projects in a folder on the developer's machine. In this section, we will look at creating a new Java project in Eclipse, adding a main class and an application entry point. Our program will not do anything visible at this point.
Workspaces
Eclipse organizes projects into folders called Workspaces. You can create a new workspace for each project, or you can use a single workspace for several related projects, such as libraries and a front end that uses them. When you first run Eclipse, you will be asked to specify the workspace in which you would like to store your applications while you develop. You can create more workspaces later, but for now let’s use the default workspace—located in the user’s folder (C:\Users\Chris in my case) and in a subfolder called “workspace” (see Figure 8).
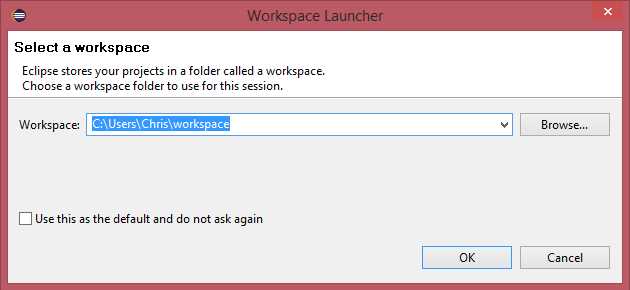
Figure 8: Selecting a Workspace
Selecting the option “Use this as the default and do not ask again” will cause all subsequent projects you create to be created in the same workspace. This is a good idea, except that eventually you might have hundreds of projects and locating the projects you need to work on can become tedious.
Projects
In order to program a Java application, we need to create a Java project. A project is simply a collection of related files, folders, and resources that form an application. In order to begin a new project, click New in the File menu, then Java Project, as per Figure 9.
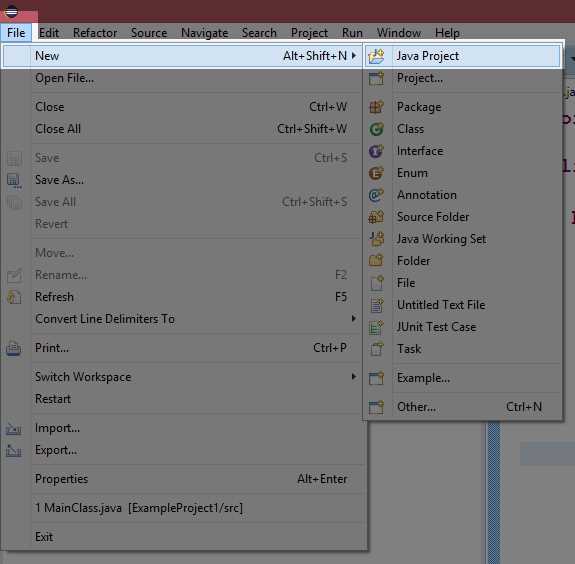
Figure 9: Creating a New Project
When you create a new project, Eclipse will show the New Project Wizard (Figure 10).
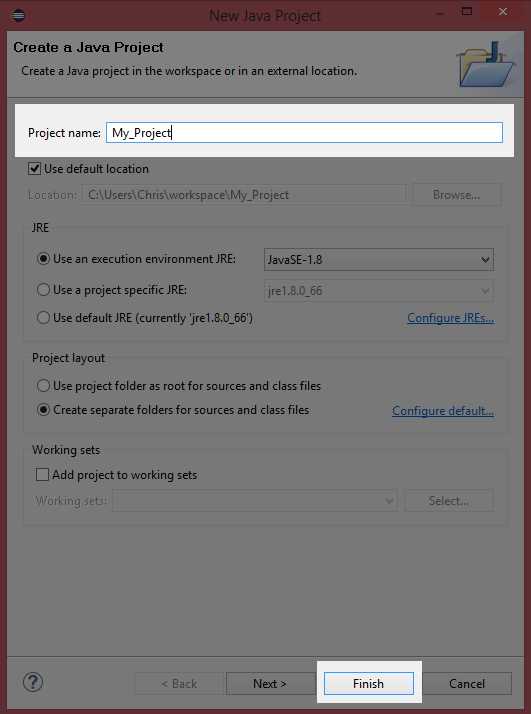
Figure 10: New Java Project Wizard
In the New Java Project Wizard dialog box, give your project a name and click Finish (the name of each project must be unique within the workspace—I have called the project My_Project in Figure 10). If you select Next instead of clicking Finish, you can change several more advanced features of your project, such as the output folder, and whether or not you wish to reference other existing projects.
Package explorer
After you have selected Finish in the New Java Project Wizard, Eclipse will create a basic project for you, including an src folder for storing your Java source files and a collection of system libraries that are referenced by default. The JRE System Libraries have a lot of useful functions that keep us from having to program them ourselves. We will examine these later.
The package explorer (Figure 11) contains a tree view of all the projects in the current workspace. At the moment, it only holds a single project called My_Project. The nodes of the tree view can be expanded and collapsed by clicking the small triangles on the left.

Figure 11: Package Explorer
Java source code
Source code is a term meaning the text of a particular computer programming language. Java source is typed into plain text files that we add to our projects as classes. The Java Compiler (a program called javac.exe that was installed with the Java SDK along with Eclipse), reads the source code files in a project and converts them into machine code. The machine code can be understood and executed as an application by the JVM.
Before we do anything else, we want to add a new Java class to our project. We will explore the meaning of the term “class” when we look at object-oriented programming. For now, our class will give us a starting point for our application. In the package explorer, right-click the src folder and select New and Class from the context menus that open, as per Figure 12. The src folder is the main folder for storing our source code files.
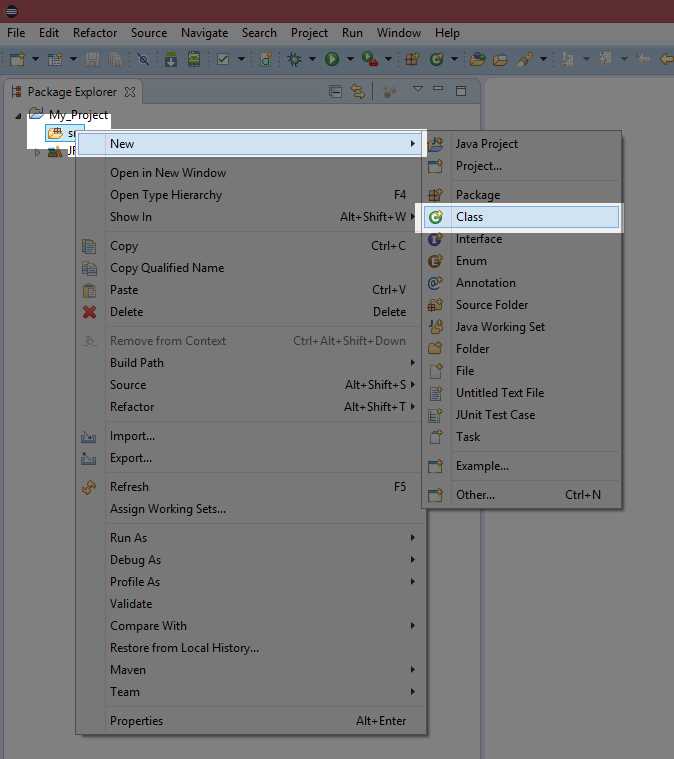
Figure 12: Adding a New Class
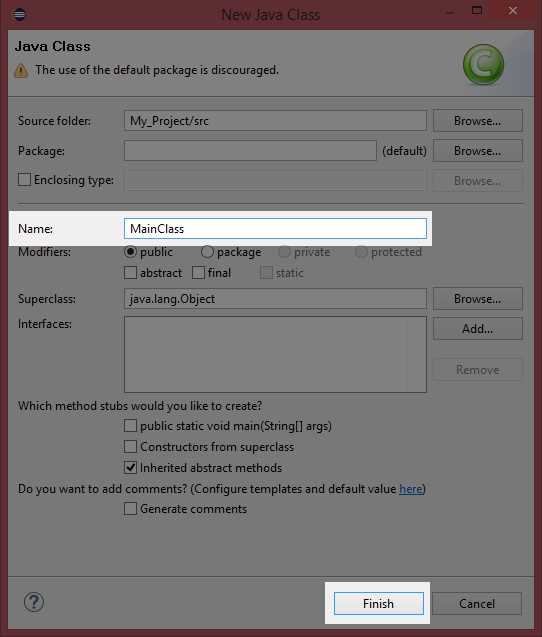
Figure 13: New Java Class Wizard
In the New Java Class window, type a name for your new class, such as MainClass, then click Finish in order to continue. Eclipse will create a new source code file for you and will fill out the basic skeleton of a Java class.
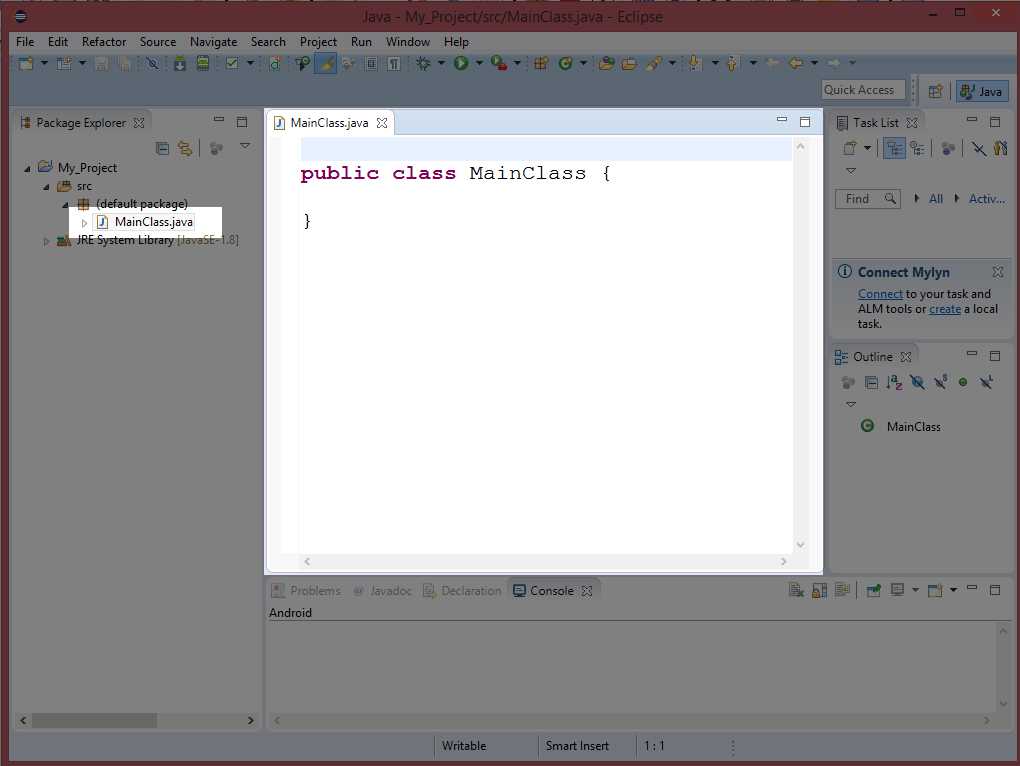
Figure 14: The Code Window
In Figure 14, the code window shows the beginnings of our first program. We type our Java source code into this window. At the moment, it has the declaration of the class we requested, but nothing else. If you cannot see the MainClass.java code in your source code window, try locating the file in the package explorer—expand the src node and double-click the file called MainClass.java.
We will add many classes to our projects in future chapters. The method for adding a class is always the same—right-click the src folder in the package explorer, select New and Java class, and give the class a unique name.
Do-nothing program
At the moment, we have a project, but it has no entry point. There is no place for the JVM to begin executing our code. The default entry point for a Java application is called the main method. It consists of a public, static method called main that takes an array of strings as parameters. We will look at exactly what this means later. For now, in order to include a main method we need to type the declaration of the method and add braces for the body inside the MainClass (see Code Listing 2.0).
Code Listing 2.0: Do-Nothing Program
public class MainClass { public static void main(String[] args) { } } |
Code Listing 2.0 shows the simplest Java application possible. It is an application that does nothing but exit the moment it is run. When the JVM is asked to load an application (either by debugging our app or running it), it looks for an entry point. The default entry point is a method called main with the exact definition as per Code Listing 2.0: public static void main(String[] args).
Note: Java is case sensitive. If you choose to type the code in the example listings in this e-book rather than copying and pasting the code, you must be very careful to match case exactly. This means that the compiler sees the terms PUBLIC, Public, PuBlIc, and public as completely different terms.
If there is no method exactly matching the definition of the main method in Code Listing 2.0, the JVM will not know where to start executing code and the program will not run.
Note: The main method must have the exact declaration, except for the identifier name of the args parameter. This parameter is simply an array of strings that can potentially be passed to our application when invoking from the command line. When we invoke a program from the command line, we can optionally supply a list of arguments (hence the name args for this parameter). For our purposes, we will ignore this parameter and assume it will always be empty, and we will always call it args.
Project output
Eclipse stores all the files related to our project in the folder we specify at start up. Figure 15 shows the folder in Windows Explorer. You will notice that there is an src folder that was visible in the package explorer. When we add source files to our package, they will in turn be added to this folder.
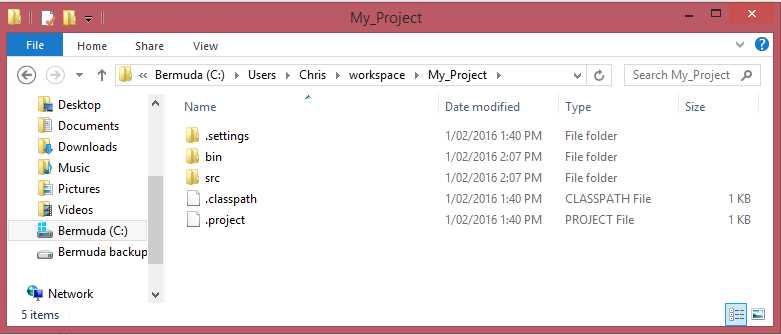
Figure 15: Project Output
Figure 15 shows several other folders. The .settings folder is used to store all of the configuration settings for the project in a preferences file that defaults to org.eclipse.jdt.core.prefs. The bin folder is used to store the binary application output, which is the executable machine code and other required resource files that the Java compiler produces from our source code.
Debugging and running applications
Let’s test our application. To debug an application is to run it in such a way that we are offered extra information that will help us track down and eliminate bugs. Typically, when we develop a Java application, we test the program at intervals in order to make sure everything is running smoothly. As our projects become larger, we must examine all of the interacting components in great detail in order to be certain that we have not done anything wrong.
Eclipse allows us to debug an application, but it also allows us to run the application. Running the application is like debugging, except that we get less information as to what's happening within the application. When we use Run, the compiler (javac.exe) might optimize our code and remove all debugging information. It is recommended that while an application is being developed, we use Debug. When you are satisfied that your application is complete and working properly, you can use Run to build your application’s first release.
In order to debug your code in Eclipse, click Debug (it has a beetle icon, as in Figure 16). The Play button (to the right of the debug), is for running your application without debugging.
![]()
Figure 16: Debug and Run Buttons
Tip: There are many configurable shortcut keys available in Eclipse. The shortcut key for Debug is F11. The shortcut key for Run is Ctrl+F11.
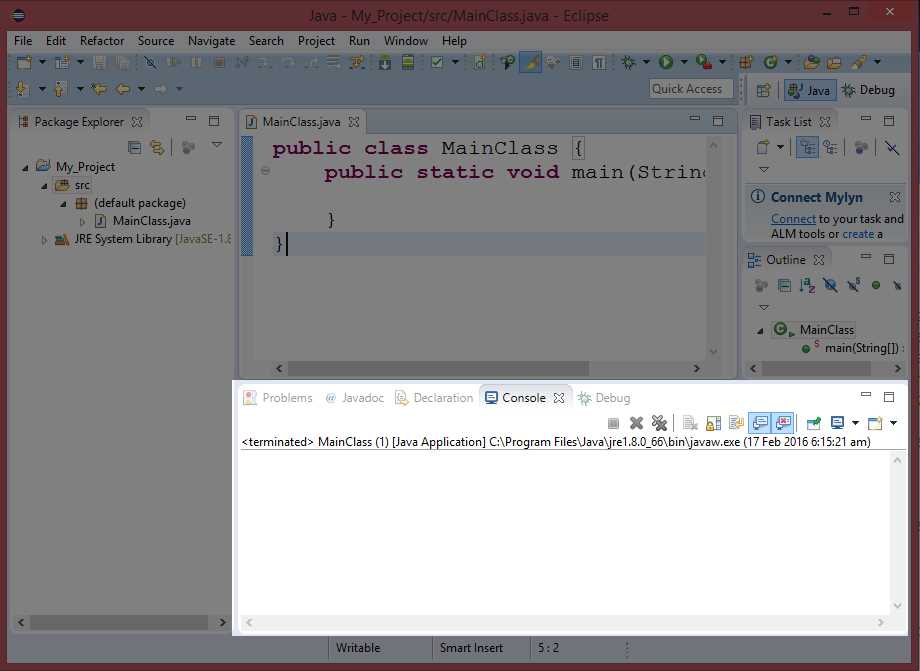
Figure 17: Output Console
When we run or debug our application, the output of the application will appear in a window at the lower portion of the Eclipse screen. Notice that there is a collection of tabbed pages in Figure 17, including a tab named Console. Our current program does nothing, so this Console tab is blank after we debug or run the application from Code Listing 2.0, but in future chapters we will print text to this console and read data from the keyboard.
Now that we have examined how to start a new application, how to add a class, and how to add the main method as an entry point to our program, we can start programming Java to perform tasks for us.
- 1800+ high-performance UI components.
- Includes popular controls such as Grid, Chart, Scheduler, and more.
- 24x5 unlimited support by developers.