
Ionic Succinctly®

CHAPTER 1
Setting up Ionic
Who is this book for?
This book is aimed at developers who have no previous experience with Ionic—even no previous experience with Ionic 1. However, it does help a bit if you do have some previous experience with the framework, Angular, or TypeScript—although these are not must-haves.
This book is not a migration manual from Ionic 1, and it’s perfectly alright if you are starting out with Ionic-Angular (version 2 or higher of the Ionic framework) from scratch.
Why a complete framework rewrite?
There are several reasons why the Ionic team did a complete rewrite of the Ionic framework. Probably the most important one is that Ionic-Angular is built with the most recent versions of Angular, which is a massive departure from Angular 1 (also known as AngularJS).
Basically, building on top of the latest Angular versions enabled Ionic-Angular to benefit from various improvements, including increases in performance and a more standardized way of writing and building apps, especially when using TypeScript—like being able to use dependency injection, components, and modules.
For instance, version 1 of the Ionic framework used UI router for navigation. Even though UI router is quite powerful, in Ionic-Angular this has been taken a step further in order to achieve a more natural way of moving from screen to screen.
Another awesome feature in Ionic-Angular is that the framework is capable of detecting if your app is running on an Android or iOS device, and thus render the respective platform theme automatically.
Furthermore, the Ionic team continues to improve the way the internal build system works by using tools like Gulp for building, serving, and performing live reload when a file is changed.
Also, by using TypeScript for compilation, SASS for CSS extension and optimization, and NPM for package management, the Ionic team has made this newest version a truly modern and enjoyable mobile app development platform. They have looked at optimizing as much as they could without compromising efficiency and the overall developer experience.
Some of these optimizations are related to better caching, faster navigation between screens, and also the use of internal virtual lists to enable scrolling of very long lists—in order to have native-like performance.
All these improvements make Ionic-Angular a wonderful new version of the framework—one that many developers love.
Ionic-Angular is a framework that is in constant evolution—at an incredibly fast pace. So it is highly likely that between the time this book was written and the time you read it, some code or project structure for a new scaffolded app might be slightly or quite different from what is described here. Nevertheless, you should be able to easily find your way around, as it’s been written and reviewed to be as up-to-date as possible.
Nice-to-haves
In order to make the most of this book, there are a couple of technologies that would be good for you to be familiar with: TypeScript and a recent version of Angular. All the code in this book will make use of them. TypeScript will be installed when installing Ionic, which is really handy.
But don’t worry—not having any previous knowledge of them is not a showstopper. If you are a software developer experienced with other web technologies, you should also be able to pick this up fairly quickly, and without too much effort.
Luckily, the Succinctly series has you covered, and there’s an awesome book written by Steve Fenton called TypeScript Succinctly that can get you up-to-speed with this technology in no time.
Furthermore, Angular 1 is covered extensively by AngularJS Succinctly, which is brilliantly authored by Frederik Dietz, and Angular 2 is nicely and easily explained in Angular 2 Succinctly by Joseph D. Booth. Some familiarity with Angular’s dependency injection and how data binding works is beneficial.
If you feel that you need to refresh your TypeScript and Angular know-how—or get started from scratch—these are magnificent resources that I highly encourage you to have a look at.
Installing Ionic-Angular
In order to really get started, the next thing we need to do is install Ionic-Angular. All developments done in Ionic are based around a Node.js command line tool called Ionic CLI, so first, we need to download Node.js and grab the appropriate installer for our operating system. Whether you’re on a Windows PC or Mac, Node.js will work just fine.

Figure 1-a: The Node.js Home Page
On the Node.js home page, download the appropriate installer for your operating system—in my case, I’ve downloaded the LTS (Long Term Support) version recommended for most users.
The Node.js website has detected that I’m on a Windows 64-bit machine, and has presented me with the option to download the appropriate runtime for Windows 64 bits.
Installing Node.js basically consists of downloading the installer package and clicking through the prompts in order to get it installed quickly—it’s as simple as that.

Figure 1-b: The Node.js Installer on Windows
With Node.js installed, we can focus on getting Ionic-Angular up and running. In order to do that, open the command prompt as an Admin user—in my case, I use this lovely emulator on top of the Windows command prompt. Type in the following command.
Code Listing 1-a: The Ionic and Cordova Installation Command
npm install -g ionic cordova |

Figure 1-c: Installing Ionic and Cordova
We have to execute this NPM (Node Package Manager) command, because in order to create Ionic projects, we need to install the Ionic Command Line Interface (CLI), and also Cordova globally. You can find more details on Ionic’s official documentation.
Once the command has successfully executed, we are ready to start creating apps with Ionic.
Creating a new Ionic project
In order to start working with Ionic, we need to create a new Ionic project—this can be done by using the Ionic CLI.
Let’s type in the following command in order to start a new project, which we’ll build throughout this book. Make sure you run this command from the folder where your project’s source code will be stored.
Code Listing 1-b: Creating a new Ionic App
ionic start IonicAppSuccinctly sidemenu --ts |
This command will create a subfolder called IonicAppSuccinctly, which will contain all the app’s code.
The --ts option indicates that we will be using TypeScript as our language of choice instead of the default, JavaScript. The sidemenu option indicates that the app will have a swipeable menu layout on the side.
Before the command execution actually starts, you might be prompted to answer if you would like this app with Cordova to target native iOS and Android.
Feel free to respond with Yes or No—in my case, I’ve chosen No. Once you do that, installing the project dependencies might take several minutes.
After the project dependencies have been installed, you might also be asked to install the free Ionic Pro SDK and connect your app. Feel free to respond with Yes or No—in my case, I’ve chosen Yes.
After Ionic Pro has been installed—if you’ve chosen Yes—you might be asked to confirm the name of the app that you’d like the CLI to create. In my case, I’ve chosen IonicAppSuccinctly.
There are other available project templates besides sidemenu—more information can be found in the official Ionic documentation.
When this command first executes, it creates the folder IonicAppSuccinctly, then downloads the template information, and finally, goes into the folder and executes npm install in order to install all the dependencies required by the project, which are specified in the package.json file.
If for some reason the execution of the npm install command fails, simply go into the IonicAppSuccinctly subfolder and manually execute npm install in order to try again.
![]()
Figure 1-d: Running the “npm install” Command Manually
If you take a look inside the \IonicAppSuccinctly subfolder, you should see the following files (or similar).
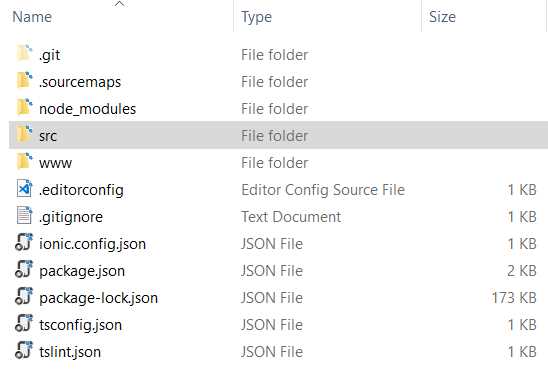
Figure 1-e: The IonicAppSuccinctly Project Files
At this stage, Ionic has created a project structure for us, which we will use as the foundation to build our app.
Let’s quickly look at the scaffolded folder and file structure by opening the project in Visual Studio Code (VS Code). If you don’t have it installed, now is probably a good time to do so. You don’t have to necessarily use VS Code, and can use any editor of your choice, such as Atom or Sublime.
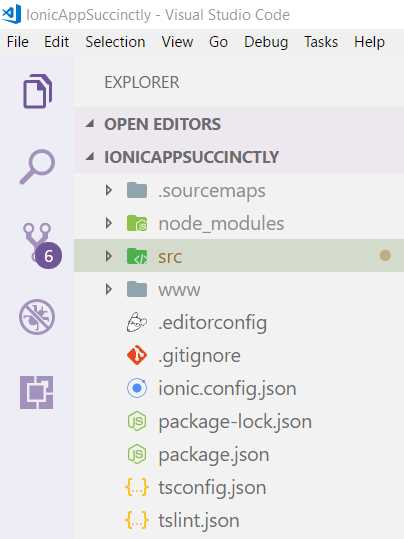
Figure 1-f: The IonicAppSuccinctly Project Structure in VS Code
We’ll later explore this project structure in more detail, so for now let’s not worry too much about it.
Testing the scaffolded app
Now that we’ve created the Ionic project that will eventually become our application, let’s see how we can test it using a browser and see how it looks. This is the simplest and most common way of quickly checking things.
We can do this by typing in the following command from the \IonicAppSuccinctly project subfolder—you’ll need to cd into \IonicAppSuccinctly.
Code Listing 1-c: The “ionic serve” Command
ionic serve |
This command will basically compile the TypeScript and SCSS (Sassy CSS) code—the one that the Ionic CLI has scaffolded for us—and then launch a web server locally. Let’s go ahead and do that to see what happens.

Figure 1-g: The Ionic App in Chrome
We can see that Ionic has started up a web server on http://localhost:8100 on my machine (the port number might be different on yours).
If your browser’s window is fully maximized, you may have noticed that the app looks a bit strange because it’s not really designed for a desktop browser.
What you might want to do in that case is press the F12 key (if you are using Chrome or Edge as your browser)—this will open up the Developer Tools. Then, toggle the device toolbar and select a mobile display—this is illustrated in the figure that follows.
You may also choose to dock the Developer Tools panel to either the left or right side of your screen (according to your preference) so you can get more of a feeling that you are actually viewing it on a mobile device.

Figure 1-h: Adjusting the View Using Chrome Developer Tools
If you are using other browsers, similar options likely exist—so please check their respective documentation or Help.
As you can see, the application renders nicely on a Nexus 5X virtual device layout. You can also test it on any other emulated device.
Live or Hot Reload
One really cool feature that helps a lot during development is what we usually refer to as Live or Hot Reload, which is the ability to reload automatically in the browser a page that has been just edited and saved.
To demonstrate this, I will open up VS Code and go to the src\pages\home folder, then open up the home.html file and change the default text from Ionic Menu Starter to Ionic App Succinctly.
Once you have done this, go ahead and check how the app looks in the browser. Ionic should have automatically reloaded the page, and it should now reflect the changes you just made, after saving the file. Let’s have a look.

Figure 1-i: The App after a Live Reload
This is a great feature that gives us the ability to quickly test the look and feel of the app and iterate through UI changes quickly. If we want to close the app and web server, we can press Ctrl + C from the command line.
As an additional note, throughout most of this book we’ll be using the ionic serve command in order to test our app, since it is quick and easy to use.
Nevertheless, let’s quickly explore how we can test the app with Ionic View.
Ionic View and Ionic Pro
Ionic View is a tool that allows us to quickly test and run Ionic apps on an actual device without having to deploy the app. It’s ideal when you want to share your Ionic app within your organization or with testers without any provisioning.
Ionic View and Ionic Pro are rapidly evolving tools, so it is possible that by the time you read this, some of the screens might look slightly different. In any case, you should be able to find your way around easily with the instructions that follow.
Ionic View is basically a native app that can be installed from the App Store or Google Play, and runs your Ionic app’s code on your device.
In order to use Ionic View, we have to install the Ionic View app itself on the device and deploy our Ionic app to Ionic Pro, which you can think of as Ionic’s cloud.
From your mobile device, go to the Ionic View website and install the respective version for either your iOS or Android device. I’ll be testing using an iPhone 5.

Figure 1-j: The Ionic View Site Seen from My iPhone
I’ll install the iOS version on my device, which has a slightly different look and feel to it than the older (legacy) version, so the screen shots you will see will reflect this UI. The Android version can be found here.
The older iOS version and the legacy Android version were designed to work with an older version of Ionic Cloud, compatible with an older version of the Ionic CLI that uses the obsolete ionic upload command. This was part of the old Ionic Cloud product, replaced by Ionic Pro.
I strongly suggest you do not use any legacy versions and follow along with these steps with the latest version of Ionic View—compatible with Ionic Pro.
Once you have the Ionic View app installed on your device, the next thing to do is create an account on Ionic Pro so we can upload our app to it.
After creating an account and logging in for the first time, you will see a screen similar to the one in Figure 1-k. Select the type of plan to use—I’ll be using the Kickstarter Edition for the purpose of the app we’ll be building throughout this book.
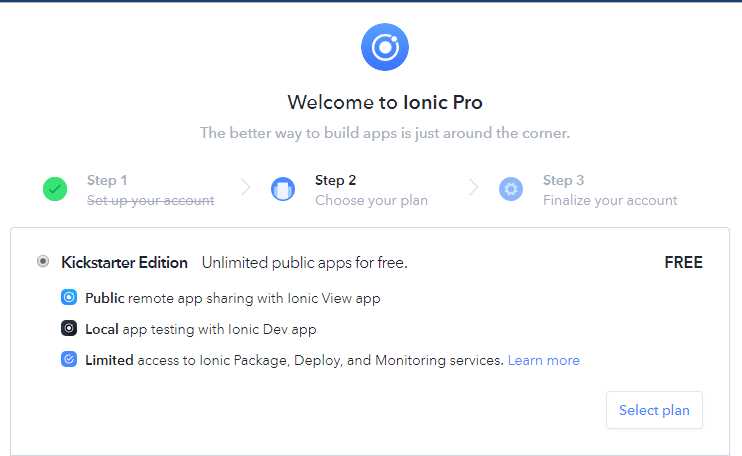
Figure 1-k: Setting Up an Account on Ionic Pro
Once you’ve selected the type of account, you’ll be prompted to create a new app. Click Create app in order to finalize the process—with that done, you’ll see the following.

Figure 1-l: The App on Ionic Pro
With our app created in Ionic Pro, all we need to do is link to it and upload the code by following the instructions listed in the previous figure—which in my case, are the following ones.
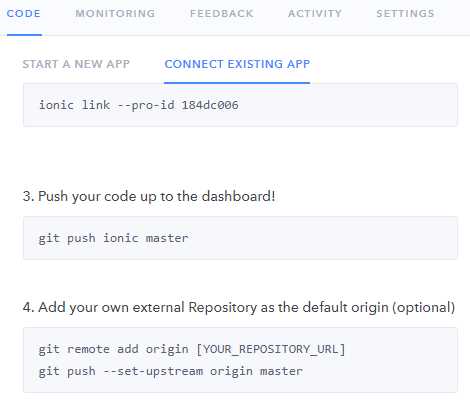
Figure 1-m: Instructions for Connecting an Existing App to Ionic Pro
When executing these commands, run the command line from the same root folder where the package.json file is located.
When we execute ionic link --pro-id…, our local app is linked to the app repository we’ve just created on Ionic Pro. This command requires that we enter our Ionic Pro credentials, which are the same ones used when signing up.
Code Listing 1-d: The “ionic link” Command
ionic link --pro-id 184dc006 |
You’ll likely be asked to configure SSH settings when executing this command. To make the process easy and straightforward, I strongly suggest you select the option Automatically setup a new SSH key pair for Ionic Pro when prompted.
An SSH key is required in order to push your app’s code securely to Ionic Pro. You can find more info about this topic in Ionic’s official documentation.
The following output is what I got when I executed this command on my machine—you might have a similar output.

Figure 1-n: Connecting our Existing App to Ionic Pro
Deploying to Ionic Pro
The ionic link --pro-id command has been executed successfully.
According to the instructions shown in Figure 1-m, the next thing we should do is execute the git push ionic master command.
There’s a small but important step missing—which it’s assumed that most developers with git experience would automatically notice—before actually executing git push (people without any git experience might not notice this at all).
This missing step is that we actually need to commit our code first before pushing it. In order to do this, we need to make a small change to our code. In my case, I’ll make a small modification to the index.html file found under the \IonicAppSuccinctly/src folder by changing the text found on the <title> tag.
Once you’re done, save the changes. Let’s commit the code—we can do this by running the following command: git add . followed by git commit -m "init".
Code Listing 1-e: The “git add” Command
git add . |
Code Listing 1-f: The “git commit” Command
git commit -m "init" |
This will commit any changes done to the master git repository—now we are ready to git push our code.
So, execute git push ionic master in order to upload our app’s code to the cloud.
Code Listing 1-g: The “git push” Command
git push ionic master |
Once you’ve done that, you should see an output similar to the following.
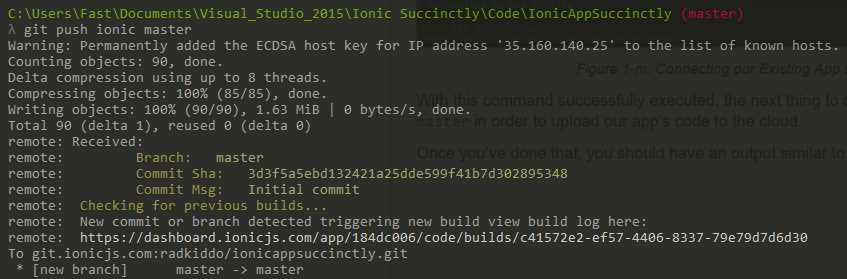
Figure 1-o: Pushing our Existing App Code to Ionic Pro
Awesome—our app is now being deployed to the cloud and hosted on Ionic Pro.
If we browse to the URL mentioned on the output of the command prompt (as seen in Figure 1-o), we can actually follow the build process taking place—here’s mine.
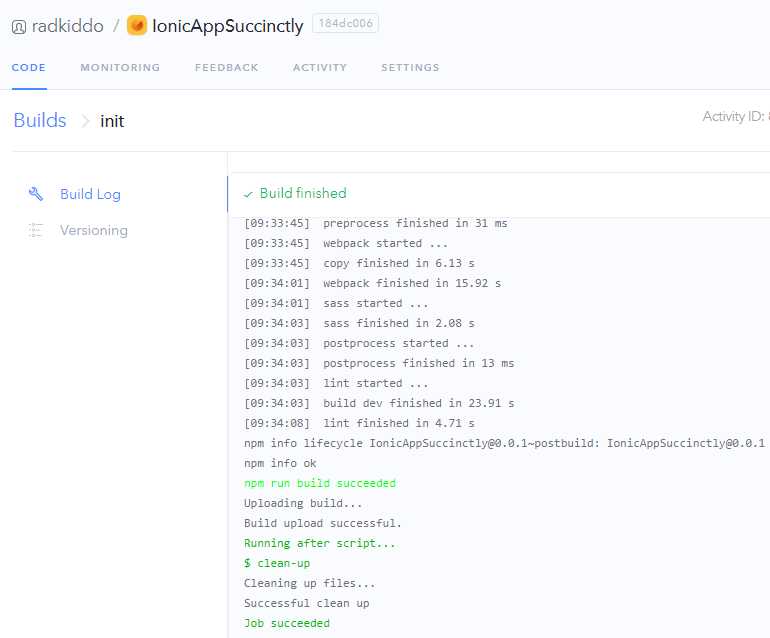
Figure 1-p: The App Code Build Process
We are almost ready to check our app with Ionic View, but before we can do that we need to get the app’s shareable ID. You can find it by clicking Share App on the Ionic Pro dashboard, and then clicking the PUBLIC VIEW APP tab, as seen in the following figure.

Figure 1-q: The Share App Option
Finally, we also need to make the Master channel public. We can do this from the Ionic Pro dashboard by going into Channels and clicking on Master.

Figure 1-r: Deployment Channels in Ionic Pro
Once you’ve clicked Master, a pop-up window will appear. Go to the SETTINGS tab, and then click Make public.

Figure 1-s: The Master Channel Settings in Ionic Pro
On your device, open the Ionic View application you previously installed, and go to the settings tab to enter your Ionic Pro credentials.
Figure 1-t shows how this looks from my device—it might look similar on yours.
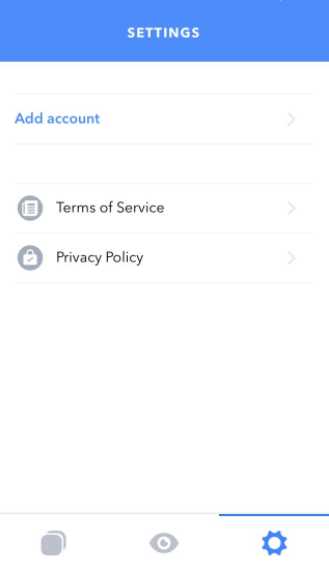
Figure 1-t: Settings Tab on the Ionic View App on My Device
Tap Add Account and enter your Ionic Pro email address and password. With this done, Ionic View is now linked to your Ionic Pro account. Next, tap the middle icon (which looks like an eye) and enter the app ID code.

Figure 1-u: Entering the App ID on Ionic View on My Device
Once done, tap VIEW APP to see the app running on Ionic View. Once you’ve tapped the VIEW APP button, you should see the name IonicAppSuccinctly on the list—tap it in order to load the application on your device. Here is how it looks on my iPhone.

Figure 1-v: The App Running on Ionic View
We’ve quickly seen how we can use Ionic Pro and Ionic View to deploy and test our Ionic app, respectively.
If we have other apps to view within Ionic View, we can simply go back to the app list and exit the current application we are viewing by shaking our device when the Ionic View app is running—very handy!
We’ve just scratched the surface of what is possible with Ionic Pro and gone through the steps required to have our code deployed in the cloud so it can be tested with the Ionic View app.
Ionic Pro’s main feature is that it makes it easy to push remote app updates in real-time without going through traditional App Store release processes.
Summary
In this chapter, we jumped right into the Ionic ecosystem and scaffolded the basic structure of the application we’ll be building throughout this book.
We also installed the necessary tooling and went through the steps required to test our application, both in the browser, and using the Ionic View app—which also introduced us to Ionic’s cloud, Ionic Pro.
In the next chapter, we’ll explore the scaffolded project structure in detail in order to understand it well and be able to expand the app’s functionality later.
We’ll skip how to test the app on an emulator, as this requires setting up various SDKs, which is a complicated process. However, I encourage you to check Ionic’s official documentation on this subject.
Later in the upcoming chapters, we’ll see how Ionic-Angular components work so we can start to build our scaffolded app from the ground up.
- 1800+ high-performance UI components.
- Includes popular controls such as Grid, Chart, Scheduler, and more.
- 24x5 unlimited support by developers.