
Ionic Succinctly®

CHAPTER 4
Building the App
Quick intro
One of the things I love most about Ionic is how easy it is to cover a lot of ground with barely any information overload. So far, we’ve seen how to scaffold a project, add pages, and wire those pages up, and also how to do testing with Ionic View and the browser, and deploy to Ionic Pro.
That’s actually an impressive feat on its own, considering that it’s all been outlined in a small number of pages. This is only possible because the framework accommodates for this level of brevity without sacrificing on essential content.
But like everything in life, the best way to learn something new—no matter how concise the content might be—is by building something. That’s what we’ll be doing throughout this chapter.
To make the most of this chapter, I highly advise you to check the great Ionic component documentation as we go along, also, which you can find here.
At the end of this chapter, you can find the link to download the full source code of this app.
Before we start
But before we start, I want to mention that I like to keep things simple—because it not only allows for easier knowledge retention, but also limits the scope to just the necessary essentials required to get something done.
With this philosophy in mind, let’s create our Succinctly Library app by keeping it as simple as possible. This means our app won’t use a database or perform AJAX requests, so all the data required will be hard-coded.
Of course, you may later modify the app to make it more complex and include such features, but that’s something I’ll totally leave up to you.
The Library page
The app’s Library page will be the main entry point to the application. As we’ve recently seen, it contains the side menu with the links to the other main pages of the app.
I’m a big fan of having a side menu in an app; however, I believe that the main content of the Library page should include some cards that also point or reference the other main pages of the app, such as Books and Paths—so let’s add some cards to the Library page in order to achieve this.
In order to add some data that we’ll display on these cards, we’ll need to open up the library.ts file and add the following code.
Code Listing 4-a: Card Data on the library.ts File
cardData = [ {title: 'Paths', description: 'Learning paths', pushPage: 'PathsPage'}, {title: 'Books', description: 'Books in the library', pushPage: 'BooksPage'} ]; |
This code can be added to the LibraryPage class just before the constructor. This is how the updated library.ts file with this code now looks:
Code Listing 4-b: Updated library.ts File
import { Component } from '@angular/core'; import { IonicPage, NavController, NavParams } from 'ionic-angular'; import { PathsPage } from '../../pages/paths/paths'; import { BooksPage } from '../../pages/books/books'; @IonicPage() @Component({ selector: 'page-library', templateUrl: 'library.html', }) export class LibraryPage { cardData = [ {title: 'Paths', description: 'Learning paths', pushPage: 'PathsPage'}, {title: 'Books', description: 'Books in the library', pushPage: 'BooksPage'} ]; constructor(public navCtrl: NavController, public navParams: NavParams) { } ionViewDidLoad() { console.log('ionViewDidLoad LibraryPage'); } } |
We’ll use the cardData object within the library.html file in order to build a couple of cards to display within the UI. Let’s do this next.
Let’s open up library.html and add the following code within the ion-content tag.
Code Listing 4-c: The ion-card Markup
<ion-list *ngFor="let card of cardData" no-padding> <ion-card> <div class="card-title" [navPush]=card.pushPage>{{card.title}} </div> </ion-card> </ion-list> |
Let’s quickly examine this. We’ve added the ion-list component in order to be able to iterate through the various elements of the cardData object—this can be achieved by using ngFor.
Each element of cardData, represented by the card object, is then referenced within the ion-card component. The card.pushPage property is used to allow the user to navigate to the page that corresponds to card.title.
After making this change, this is how the library.html file looks:
Code Listing 4-d: The Updated library.html File
<ion-header> <ion-navbar> <button ion-button menuToggle> <ion-icon name="menu"></ion-icon> </button> <ion-title>Succinctly Library</ion-title> </ion-navbar> </ion-header> <ion-content padding> <h3>Welcome to the Succinctly Series</h3> <ion-list *ngFor="let card of cardData" no-padding> <ion-card> <div class="card-title" [navPush]=card.pushPage>{{card.title}}</div> </ion-card> </ion-list> <button ion-button secondary menuToggle>Toggle Menu</button> </ion-content> |
We can preview the UI changes in the browser by running the ionic serve command.
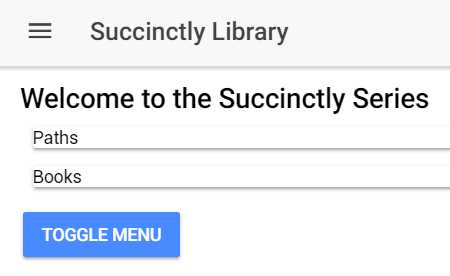
Figure 4-a: The Updated Library Page
In order to test Ionic-Angular’s navigation features, let’s click on either the Paths or the Books card. As expected, and as seen in Figure 4-b, the corresponding page is displayed and added to the navigation stack. This is possible because card.pushPage references the page that Ionic will mount.
![]()
Figure 4-b: The Mounted Paths Page
We can unmount the current page on the navigation stack and return to the previous one—in this case, the Library page—by simply clicking the back arrow button.
We now have our Library page working; however, we can still improve the way the card component looks, so let’s do that next.
Making a nicer card
As the saying goes, “looks are not everything, but they do matter.” In today’s highly competitive app market, users are spoiled with choice, and nice-looking, appealing apps have a better chance of remaining on people’s devices than ones that have less appealing UIs.
Therefore, it is somewhat important to create a good user experience, and in order to do that, having a relatively appealing UI is key.
As the card component will be an essential part of our application, and probably used on most of the app’s pages, it’s worthwhile to spend some time creating a nicer-looking card. This will not only make our app look better, but will also provide the user a better experience.
Let’s go ahead and do that. The following code will be the base for our new and improved card.
Code Listing 4-e: A Nicer Card
<ion-card> <ion-item> <h2>Card Header</h2> <p>Card Short Description</p> </ion-item> <img src="" /> <ion-card-content> <ion-card-title> Card Title </ion-card-title> <p> Card Long Description </p> </ion-card-content> <ion-row> <button ion-button [navPush]=card.pushPage>{{card.title}}</button> </ion-row> </ion-card> |
Let’s now take this code and replace the previous card within the library.html file. The library.html file will now look as follows.
Code Listing 4-f: The Updated library.html File
<ion-header> <ion-navbar> <button ion-button menuToggle> <ion-icon name="menu"></ion-icon> </button> <ion-title>Succinctly Library</ion-title> </ion-navbar> </ion-header> <ion-content padding> <h3>Welcome to the Succinctly Series</h3> <ion-list *ngFor="let card of cardData" no-padding> <ion-card> <ion-item> <h2>Card Header</h2> <p>Card Short Description</p> </ion-item> <img src="" /> <ion-card-content> <ion-card-title> Card Title </ion-card-title> <p> Card Long Description </p> </ion-card-content> <ion-row> <button ion-button [navPush]=card.pushPage>{{card.title}} </button> </ion-row> </ion-card> </ion-list> <button ion-button secondary menuToggle>Toggle Menu</button> </ion-content> |
Let’s now execute the ionic serve command to see how this looks.

Figure 4-c: The Updated Library Page
That looks a bit nicer than the previous version of the card, as it contains an image (which we still need to specify), various text elements, and a button.
Not super sexy yet from a UI point of view, but at least something that provides a bit more information and a better experience to the user.
With this new card structure and outline, let’s add the card elements required for the Paths and Books pages and upgrade the look and feel of the Library page.
Updating the Library page
Now that we’ve got a new card style, let’s finalize updating the Library page. From a UI perspective, the HTML markup of the Library page is pretty much done; however, we need make those text elements dynamic for each card.
Let’s start doing this by expanding the cardData object within the library.ts file and replacing it with the code that follows.
Code Listing 4-g: The Updated cardData Object
cardData = [ { img: '../../assets/imgs/logo.png', header: 'Paths', short: 'Learning paths', title: '', description: 'Paths are books organized by related topics', buttontxt: 'Explore Paths', pushPage: 'PathsPage' }, { img: '../../assets/imgs/azure.jpg', header: 'Books', short: 'Books to read', title: '', description: 'Over 130 books on technologies that matter', buttontxt: 'Browse Books', pushPage: 'BooksPage' } ]; |
As you may have noticed in Code Listing 4-g, I’ve also dropped a couple of images into the \assets\imgs\ folder. So, after updating the cardData object, our library.ts file now looks as follows.
Code Listing 4-h: The Updated library.ts File
import { Component } from '@angular/core'; import { IonicPage, NavController, NavParams } from 'ionic-angular'; import { PathsPage } from '../../pages/paths/paths'; import { BooksPage } from '../../pages/books/books'; @IonicPage() @Component({ selector: 'page-library', templateUrl: 'library.html', }) export class LibraryPage { cardData = [ { img: '../../assets/imgs/logo.png', header: 'Paths', short: 'Learning paths', title: '', description: 'Paths are books organized by related topics', buttontxt: 'Explore Paths', pushPage: 'PathsPage' }, { img: '../../assets/imgs/azure.jpg', header: 'Books', short: 'Books to read', title: '', description: 'Over 130 books on technologies that matter', buttontxt: 'Browse Books', pushPage: 'BooksPage' } ]; constructor(public navCtrl: NavController, public navParams: NavParams) { } ionViewDidLoad() { console.log('ionViewDidLoad LibraryPage'); } } |
The updated markup, library.html, now looks as follows.
Code Listing 4-i: The Updated library.html File
<ion-header> <ion-navbar> <button ion-button menuToggle> <ion-icon name="menu"></ion-icon> </button> <ion-title>Succinctly Library</ion-title> </ion-navbar> </ion-header> <ion-content padding> <h3>Welcome to the Succinctly Series</h3> <ion-list *ngFor="let card of cardData" no-padding> <ion-card> <ion-item> <h2>{{card.header}}</h2> <p>{{card.short}}</p> </ion-item> <img src="{{card.img}}" /> <ion-card-content> <ion-card-title>{{card.title}}</ion-card-title> <p>{{card.description}}</p> </ion-card-content> <ion-row center> <ion-col text-center> <button ion-button [navPush]=card.pushPage> {{card.buttontxt}} </button> </ion-col> </ion-row> </ion-card> </ion-list> </ion-content> |
Let’s execute the ionic serve command again in order to see how these changes look.

Figure 4-d: The Updated Library Page
Awesome! Our app looks much better than it did—small changes can go a long way.
With our Library page out of the way, let’s focus on updating our Paths page.
Updating the Paths page
As mentioned earlier, we are going to be hardcoding the data that our application will be using. The Paths page is nothing more than a small collection of topics into which books are organized—topics that are related to each other, thus forming a learning path.
In order to organize the book topics into paths, we need to create a pathData object within the paths.ts file that will indicate which book topics correspond to which learning path.
Let’s define the pathData object as follows.
Code Listing 4-j: The pathData Object
pathData = [ { name: 'Database', books: [ { title: 'Force.com Succinctly', page: this.pg }, { title: 'Azure Cosmos DB and DocumentDB Succinctly', page: this.pg } ] }, { name: 'Web Development', books: [ { title: 'Force.com Succinctly', page: this.pg } ] }, { name: 'Cloud', books: [ { title: 'Azure Cosmos DB and DocumentDB Succinctly', page: this.pg } ] }, { name: 'Microsoft & .NET', books: [ { title: 'Microsoft Bot Framework Succinctly', page: this.pg }, { title: 'Twilio with C# Succinctly', page: this.pg }, { title: 'Customer Success for C# Developers Succinctly', page: this.pg }, { title: 'Data Capture and Extraction with C# Succinctly', page: this.pg }, ] }, { name: 'Mobile Development', books: [ { title: 'Twilio with C# Succinctly', page: this.pg } ] }, { name: 'Miscellaneous', books: [ { title: 'Customer Success for C# Developers Succinctly', page: this.pg } ] } ]; |
What we’ve done here is created a number of categories (learning paths), and under each, defined a number of books that correspond to them. Each book points to the Book Overview page—this is defined with this.pg.
To keep things simple—given that there are over 130 books in the series—I’ve just added the titles I’ve written, that have been published at the time of writing of this book.
With the pathData JSON data object defined, our paths.ts file now looks as follows.
Code Listing 4-k: The Updated paths.ts File
import { Component } from '@angular/core'; import { IonicPage, NavController, NavParams } from 'ionic-angular'; @IonicPage() @Component({ selector: 'page-paths', templateUrl: 'paths.html', }) export class PathsPage { pg = 'BookoverviewPage'; pathData = [ { name: 'Database', books: [ { title: 'Force.com Succinctly', page: this.pg }, { title: 'Azure Cosmos DB and DocumentDB Succinctly', page: this.pg } ] }, { name: 'Web Development', books: [ { title: 'Force.com Succinctly', page: this.pg } ] }, { name: 'Cloud', books: [ { title: 'Azure Cosmos DB and DocumentDB Succinctly', page: this.pg } ] }, { name: 'Microsoft & .NET', books: [ { title: 'Microsoft Bot Framework Succinctly', page: this.pg }, { title: 'Twilio with C# Succinctly', page: this.pg }, { title: 'Customer Success for C# Developers Succinctly', page: this.pg }, { title: 'Data Capture and Extraction with C# Succinctly', page: this.pg }, ] }, { name: 'Mobile Development', books: [ { title: 'Twilio with C# Succinctly', page: this.pg } ] }, { name: 'Miscellaneous', books: [ { title: 'Customer Success for C# Developers Succinctly', page: this.pg } ] } ]; constructor(public navCtrl: NavController, public navParams: NavParams) { } ionViewDidLoad() { console.log('ionViewDidLoad PathsPage'); } } |
Let’s now work on updating the UI of the Paths page. In order to do that, open up the paths.html file. Let’s replace the existing markup with the following.
Code Listing 4-l: The Updated paths.html File
<ion-header> <ion-navbar> <ion-title>Paths</ion-title> </ion-navbar> </ion-header> <ion-content padding> <ion-list *ngFor="let path of pathData" no-padding> <ion-card> <ion-item> <ion-row center> <ion-col text-center> <h1><b>{{path.name}}</b></h1> </ion-col> </ion-row> </ion-item> <ion-list *ngFor="let book of path.books" no-padding> <ion-card-content> <ion-row center> <ion-col text-center> <h2>{{book.title}}</h2> </ion-col> </ion-row> <ion-row center> <ion-col text-center> <button ion-button [navPush]=book.page> Check book </button> </ion-col> </ion-row> </ion-card-content> </ion-list> </ion-card> </ion-list> </ion-content> |
As we can see, I’ve added some markup to the paths.html file so it looks relatively nice and is still simple enough to be easily read and understood.
I’ve added two ngFor loops—one that loops over the learning paths, and another that loops through the book titles of each learning path.
The rest of the code is simply regular markup that uses common standard Ionic components such as ion-card, ion-item, ion-card-content, ion-row, and ion-col, among regular HTML markup.
If we now execute the ionic serve command, our Paths page looks as follows.
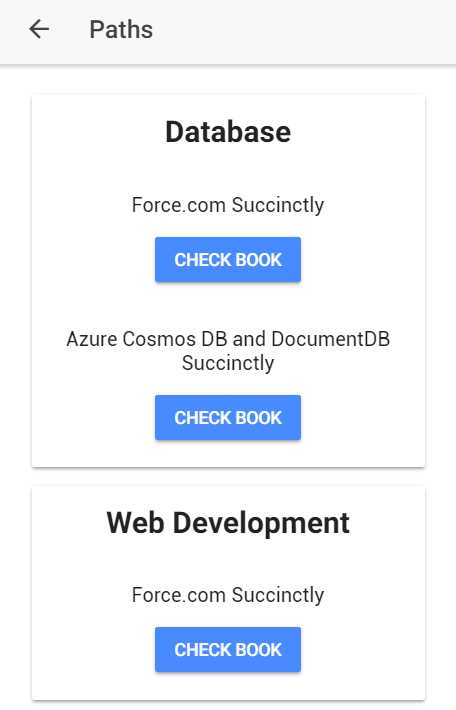
Figure 4-e: The Updated Paths Page
With a little code, we now have a good-looking page and the books organized by learning paths.
Updating the Books page
Let’s now move on and update the Books page, which will be quite similar to the Paths page. The difference is that the Books page will only contain information about the books within the library, without specifying which learning path they relate to.
You can think of the Books page as a trimmed-down version of the Paths path—instead of using two instances of ngFor in our markup, we’ll require only one to loop around all the book titles.
First of all, let’s define a booksData object within the books.ts file as follows.
Code Listing 4-m: The booksData Object
booksData = [ { title: 'Force.com Succinctly', page: this.pg }, { title: 'Azure Cosmos DB and DocumentDB Succinctly', page: this.pg }, { title: 'Microsoft Bot Framework Succinctly', page: this.pg }, { title: 'Twilio with C# Succinctly', page: this.pg }, { title: 'Customer Success for C# Developers Succinctly', page: this.pg }, { title: 'Data Capture and Extraction with C# Succinctly', page: this.pg } ]; |
With the booksData object defined, let’s now update the books.ts file accordingly.
Code Listing 4-n: The Updated books.ts File
import { Component } from '@angular/core'; import { IonicPage, NavController, NavParams } from 'ionic-angular'; @IonicPage() @Component({ selector: 'page-books', templateUrl: 'books.html', }) export class BooksPage { pg = 'BookoverviewPage'; booksData = [ { title: 'Force.com Succinctly', page: this.pg }, { title: 'Azure Cosmos DB and DocumentDB Succinctly', page: this.pg }, { title: 'Microsoft Bot Framework Succinctly', page: this.pg }, { title: 'Twilio with C# Succinctly', page: this.pg }, { title: 'Customer Success for C# Developers Succinctly', page: this.pg }, { title: 'Data Capture and Extraction with C# Succinctly', page: this.pg } ]; constructor(public navCtrl: NavController, public navParams: NavParams) { } ionViewDidLoad() { console.log('ionViewDidLoad BooksPage'); } } |
Let’s now work on updating the UI of the Books page. In order to do that, open the books.html file. Let’s replace the existing markup with the following.
Code Listing 4-o: The Updated books.html File
<ion-header> <ion-navbar> <ion-title>Books</ion-title> </ion-navbar> </ion-header> <ion-content padding> <ion-list *ngFor="let book of booksData" no-padding> <ion-card> <ion-card-content> <ion-row center> <ion-col text-center> <h2><b>{{book.title}}</b></h2> </ion-col> </ion-row> <ion-row center> <ion-col text-center> <button ion-button [navPush]=book.page> Check book </button> </ion-col> </ion-row> </ion-card-content> </ion-card> </ion-list> </ion-content> |
As you can see, just like the Paths page, this page uses Ionic framework components such as ion-card, ion-item, ion-card-content, ion-row, and ion-col, among standard HTML markup.
To see how the Books page looks, let’s execute the ionic serve command as we normally do.
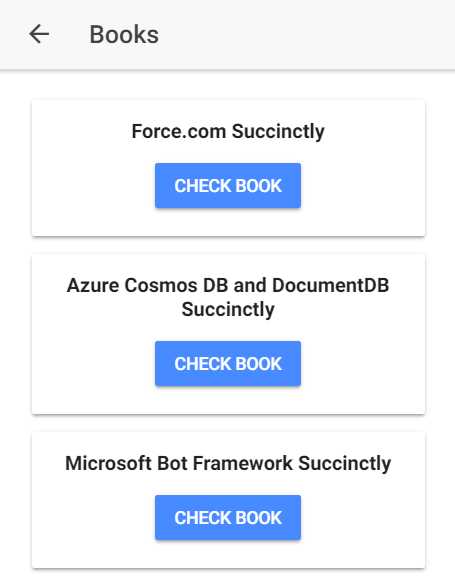
Figure 4-f: The Updated Books Page
Great—we’ve finished the Books page. Next on our list is the Book Overview page.
The Book Overview page
We’ve reached an interesting milestone in building our app. Until now, all the pages we’ve created and updated have been pretty much self-contained, meaning that the objects and variables they use are found within the same Angular component that defines the page itself.
With the Book Overview page, this won’t be the case any longer. Because we have several book titles in our application’s library, it’s not practical to create an individual page for each one.
For a moment, just imagine we actually have all the Succinctly series titles in our app’s list. We would need to create more than 130 pages—this would not be practical or feasible.
In other words, the Book Overview page must be a generic page, to which we could pass as parameters the details of the book that we want the page to display.
Before we go and update the Book Overview page, we first need to talk a bit about navigation parameters within Ionic pages—also known as navParams.
NavParams
Navigation parameters, just like the name implies, let us pass information from one page to another. This is incredibly useful, and defines the process of how we can send record-specific data to a page—which is exactly what we need in order to make the Book Overview page generic enough that it can be used to display data from any given book.
This also means we’ll have to slightly modify the Paths and Books pages in order to pass the necessary navigation parameters for the books listed on both these pages.
But before we make any adjustments to the Paths and Books pages, let’s first understand how navigation parameters actually work, and how they can be passed, by looking at some generic code samples.
The first way to specify navigation parameters is by adding a navParams directive, as can be seen in the following code.
Code Listing 4-p: The navParams Directive
<button ion-button [navPush]=book.page [navParams]=book.params> Check book </button> |
We are able to assign a book.params object to the navParams directive, thus passing the required navigation parameters to book.page.
The other way we can achieve this is by code, as shown in the following example.
Code Listing 4-q: Passing navParams by Code
pushPage() { this.navCtrl.push(OtherPage, {name: 'Force.com Succinctly', author: 'Ed Freitas', url: 'https://…'}); } |
Now that we know how to pass parameters to the page we are navigating to, how do we actually receive those parameters and do something with them?
The answer is very simple: basically, each Ionic-Angular page component constructor receives a navParams parameter, which contains all the navigation parameters passed on to the page.
All Ionic-Angular page components have this constructor. Here’s an example.
Code Listing 4-r: Page Component Constructor
constructor(public navCtrl: NavController, public navParams: NavParams) { } |
Now that we know how to pass on parameters to pages and use them, we can appreciate how essential they are for us to be able to make pages generic.
Now, we’re ready to get back to work and update the Book Overview page.
Updating the Book Overview page
As its name implies, the Book Overview page will contain just a short overview of the book with some basic information, such as the author’s name, date published, and the number of pages.
To understand the hierarchical structure of how the Book Overview (and also later, the Book Detail) page will display book information, let’s look at the following diagram.

Figure 4-g: Hierarchical Book Information
With this in mind, let’s update this page accordingly—we can do this by adding this basic information to the page’s existing HTML markup, as follows.
Code Listing 4-s: Updated bookoverview.html File
<ion-header> <ion-navbar> <ion-title>Overview</ion-title> </ion-navbar> </ion-header> <ion-content padding> <ion-card> <ion-card-content> <ion-row center> <ion-col text-center> <h1>{{book.title}}</h1> </ion-col> </ion-row> <ion-row center> <ion-col text-center> <h2><b>Author:</b> {{book.overview.author}}</h2> </ion-col> </ion-row> <ion-row center> <ion-col text-center> <h3><b>Published:</b> {{book.overview.published}}</h3> </ion-col> </ion-row> <ion-row center> <ion-col text-center> <h3>{{book.overview.numpages}} pages</h3> </ion-col> </ion-row> <ion-row center> <ion-col text-center> <button ion-button [navPush]= book.overview.details.page [navParams]=book> Book details </button> </ion-col> </ion-row> </ion-card-content> </ion-card> </ion-content> |
Based on this example, we can see that the page is using a book data object that contains the book’s information. The properties specific to the book’s overview, such as date published, number of pages, and author, are grouped under the book.overview property.
We can see that this page invokes the Book Details page—this is done by assigning book.overview.details.page to navPush.
Notice that the whole book object is passed to the Book Details page through navParams.
It’s cool that we have our Book Overview page UI ready, but how does the BookoverviewPage class actually process the navParams passed from the Books or Paths pages?
This is possible because the navParams.data object—which contains the actual data passed through the navigation parameters—is assigned to a book object within the constructor of the BookoverviewPage class, as we can see in the following code.
Code Listing 4-t: Updated bookoverview.ts File
import { Component } from '@angular/core'; import { IonicPage, NavController, NavParams } from 'ionic-angular'; @IonicPage() @Component({ selector: 'page-bookoverview', templateUrl: 'bookoverview.html', }) export class BookoverviewPage { public book; constructor(public navCtrl: NavController, public navParams: NavParams) { this.book = navParams.data; } ionViewDidLoad() { console.log('ionViewDidLoad BookoverviewPage'); } } |
This explains how the Book Overview page is able to receive and use the navParams sent by the invoking page.
However, we still do not know how the Books or Paths page actually invoke the Book Overview page, and what exactly is passed as navParams—this is what we’ll explore next.
Adding navParams to the Books page
To be able to invoke the Book Overview page from the Books page, we need to be able to assign the book object to navParams.
So, in essence, our Books page HTML markup should now look as follows.
Code Listing 4-u: Updated books.html File
<ion-header> <ion-navbar> <ion-title>Books</ion-title> </ion-navbar> </ion-header> <ion-content padding> <ion-list *ngFor="let book of booksData" no-padding> <ion-card> <ion-card-content> <ion-row center> <ion-col text-center> <h2><b>{{book.title}}</b></h2> </ion-col> </ion-row> <ion-row center> <ion-col text-center> <button ion-button [navPush]=book.page [navParams]=book> Overview </button> </ion-col> </ion-row> </ion-card-content> </ion-card> </ion-list> </ion-content> |
As you can see, the only thing new is that on the button, the book object is being assigned to navParams—which is what the BookoverviewPage class later uses.
That’s cool—however, let’s not forget that the Paths page also invokes the Book Overview page, so in essence, both the Books and Paths pages should share the book object—as both pages need to use it. Any change to the book object would affect both pages.
To achieve this, we need to modify the books.ts file and make the book object accessible to the Paths page. But because we have more than one book object, what we really have is an array of book objects.
So let’s define a BooksData array within books.ts that will contain the various book objects that our application will handle.
Code Listing 4-v: The BookData Array
export let BooksData = [ { title: 'Force.com Succinctly', page: 'BookoverviewPage', overview: { author: 'Ed Freitas', numpages: 100, published: 'December 08, 2017', details: { page: 'BookdetailPage', pic: 'https://cdn.syncfusion.com/content/images/downloads/ebook/ebook- cover/forcedotcomsuccinctly.jpg?v=09012018021233', url: 'https://www.syncfusion.com/ebooks/forcedotcomsuccinctly' } } }, { title: 'Azure Cosmos DB and DocumentDB Succinctly', page: 'BookoverviewPage', overview: { author: 'Ed Freitas', numpages: 103, published: 'May 23, 2017', details: { page: 'BookdetailPage', pic: 'https://cdn.syncfusion.com/content/images/downloads/ebook/ebook- cover/Azure_Cosmos_DB_and_DocumentDB_Succinctly.jpg?v=09012018021233', url: 'https://www.syncfusion.com/ebooks/azure_cosmos_db_and_documentdb_succinctly' } } }, { title: 'Microsoft Bot Framework Succinctly', page: 'BookoverviewPage', overview: { author: 'Ed Freitas', numpages: 109, published: 'May 02, 2017', details: { page: 'BookdetailPage', pic: 'https://cdn.syncfusion.com/content/images/downloads/ebook/ebook-cover/Microsoft_Bot_Framework_Succinctly.jpg?v=09012018021233', url: 'https://www.syncfusion.com/ebooks/azure_cosmos_db_and_documentdb_succinctly' } } }, { title: 'Twilio with C# Succinctly', page: 'BookoverviewPage', overview: { author: 'Ed Freitas', numpages: 107, published: 'April 03, 2017', details: { page: 'BookdetailPage', pic: 'https://cdn.syncfusion.com/content/images/downloads/ebook/ebook-cover/Twilio_with_C_sharp_Succinctly.jpg?v=09012018021233', url: 'https://www.syncfusion.com/ebooks/twilio_with_c_sharp_succinctly' } } }, { title: 'Customer Success for C# Developers Succinctly', page: 'BookoverviewPage', overview: { author: 'Ed Freitas', numpages: 97, published: 'October 03, 2016', details: { page: 'BookdetailPage', pic: 'https://cdn.syncfusion.com/content/images/downloads/ebook/ebook-cover/Customer_Success_Succicntly.jpg?v=09012018021233', url: 'https://www.syncfusion.com/ebooks/customer_success_for_c_sharp_developers'} } }, { title: 'Data Capture and Extraction with C# Succinctly', page: 'BookoverviewPage', overview: { author: 'Ed Freitas', numpages: 85, published: 'September 19, 2016', details: { page: 'BookdetailPage', pic: 'https://cdn.syncfusion.com/content/images/downloads/ebook/ebook-cover/Data_Capture_And_Extraction_Succinctly.jpg?v=09012018021233', url: 'https://www.syncfusion.com/ebooks/data_capture_and_extraction_with_c_sharp_succinctly' } } } ]; |
Notice that each book object within the BooksData array contains general information, but also an overview object, and within that, a details object. So, essentially, every instance of BooksData array—each book object—contains the book’s general information, the book’s overview (which is used by the BookoverviewPage class), and the book’s details (which will be used by the BookdetailPage class—we’ll see this shortly).
This is how the modified books.ts file now looks.
Code Listing 4-w: Updated books.ts File
import { Component } from '@angular/core'; import { IonicPage, NavController, NavParams } from 'ionic-angular'; export let BooksData = [ { title: 'Force.com Succinctly', page: 'BookoverviewPage', overview: { author: 'Ed Freitas', numpages: 100, published: 'December 08, 2017', details: { page: 'BookdetailPage', pic: 'https://cdn.syncfusion.com/content/images/downloads/ebook/ebook- cover/forcedotcomsuccinctly.jpg?v=09012018021233', url: 'https://www.syncfusion.com/ebooks/forcedotcomsuccinctly' } } }, { title: 'Azure Cosmos DB and DocumentDB Succinctly', page: 'BookoverviewPage', overview: { author: 'Ed Freitas', numpages: 103, published: 'May 23, 2017', details: { page: 'BookdetailPage', pic: 'https://cdn.syncfusion.com/content/images/downloads/ebook/ebook- cover/Azure_Cosmos_DB_and_DocumentDB_Succinctly.jpg?v=09012018021233', url: 'https://www.syncfusion.com/ebooks/azure_cosmos_db_and_documentdb_succinctly' } } }, { title: 'Microsoft Bot Framework Succinctly', page: 'BookoverviewPage', overview: { author: 'Ed Freitas', numpages: 109, published: 'May 02, 2017', details: { page: 'BookdetailPage', pic: 'https://cdn.syncfusion.com/content/images/downloads/ebook/ebook-cover/Microsoft_Bot_Framework_Succinctly.jpg?v=09012018021233', url: 'https://www.syncfusion.com/ebooks/azure_cosmos_db_and_documentdb_succinctly' } } }, { title: 'Twilio with C# Succinctly', page: 'BookoverviewPage', overview: { author: 'Ed Freitas', numpages: 107, published: 'April 03, 2017', details: { page: 'BookdetailPage', pic: 'https://cdn.syncfusion.com/content/images/downloads/ebook/ebook-cover/Twilio_with_C_sharp_Succinctly.jpg?v=09012018021233', url: 'https://www.syncfusion.com/ebooks/twilio_with_c_sharp_succinctly' } } }, { title: 'Customer Success for C# Developers Succinctly', page: 'BookoverviewPage', overview: { author: 'Ed Freitas', numpages: 97, published: 'October 03, 2016', details: { page: 'BookdetailPage', pic: 'https://cdn.syncfusion.com/content/images/downloads/ebook/ebook-cover/Customer_Success_Succicntly.jpg?v=09012018021233', url: 'https://www.syncfusion.com/ebooks/customer_success_for_c_sharp_developers'} } }, { title: 'Data Capture and Extraction with C# Succinctly', page: 'BookoverviewPage', overview: { author: 'Ed Freitas', numpages: 85, published: 'September 19, 2016', details: { page: 'BookdetailPage', pic: 'https://cdn.syncfusion.com/content/images/downloads/ebook/ebook-cover/Data_Capture_And_Extraction_Succinctly.jpg?v=09012018021233', url: 'https://www.syncfusion.com/ebooks/data_capture_and_extraction_with_c_sharp_succinctly' } } } ]; @IonicPage() @Component({ selector: 'page-books', templateUrl: 'books.html', }) export class BooksPage { booksData = BooksData; constructor(public navCtrl: NavController, public navParams: NavParams) { } ionViewDidLoad() { console.log('ionViewDidLoad BooksPage'); } } |
Notice how the BooksData array is assigned to the booksData object, which is used in books.html within the ngFor directive on the ion-list component, in order to iterate through each of the books.
Adding navParams to the Paths page
To be able to invoke the Books Overview page from the Paths page, we need to be able to assign the book object to navParams.
The Paths page HTML markup should now look as follows.
Code Listing 4-x: Updated paths.html File
<ion-header> <ion-navbar> <ion-title>Paths</ion-title> </ion-navbar> </ion-header> <ion-content padding> <ion-list *ngFor="let path of pathData" no-padding> <ion-card> <ion-item> <ion-row center> <ion-col text-center> <h1><b>{{path.name}}</b></h1> </ion-col> </ion-row> </ion-item> <ion-list *ngFor="let book of path.books" no-padding> <ion-card-content> <ion-row center> <ion-col text-center> <h2>{{book.title}}</h2> </ion-col> </ion-row> <ion-row center> <ion-col text-center> <button ion-button [navPush]=book.page [navParams]=book> Check book </button> </ion-col> </ion-row> </ion-card-content> </ion-list> </ion-card> </ion-list> </ion-content> |
Now that we’ve assigned the book object to navParams, let’s refactor a bit the code we previously wrote for paths.ts.
We need to do this in order to make use of the BooksData array that we created within books.ts, so we can use it inside paths.ts. We can do this by also importing BooksData within our BooksPage import clause. The following is the refactored paths.ts file.
Code Listing 4-y: Updated paths.ts File
import { Component } from '@angular/core'; import { IonicPage, NavController, NavParams } from 'ionic-angular'; import { BooksPage, BooksData } from '../../pages/books/books'; @IonicPage() @Component({ selector: 'page-paths', templateUrl: 'paths.html', }) export class PathsPage { pg = 'BookoverviewPage'; pathData = [ { name: 'Database', books: [ BooksData[0], BooksData[1] ] }, { name: 'Web Development', books: [ BooksData[0] ] }, { name: 'Cloud', books: [ BooksData[1] ] }, { name: 'Microsoft & .NET', books: [ BooksData[2], BooksData[3], BooksData[4], BooksData[5] ] }, { name: 'Mobile Development', books: [ BooksData[3] ] }, { name: 'Miscellaneous', books: [ BooksData[5] ] } ]; constructor(public navCtrl: NavController, public navParams: NavParams) { } ionViewDidLoad() { console.log('ionViewDidLoad PathsPage'); } } |
Notice that I’ve refactored the books array objects within pathData by using the BooksData object imported from the Books page. This way, we don’t need to repeat any book data.
In a real-life scenario, you’ll probably fetch a similar data structure like BooksData from a web server using a RESTful API, with an AJAX request through an Angular service. However, the same focus on modularity and reusability should be kept.
We have now updated all the existing pages that invoke the Book Overview page. The only remaining bit of our application is to update the Book Detail page, which we’ll do shortly.
Before we do that, let’s run the ionic serve command once again to check how the Book Overview page looks when accessed from the Paths page.
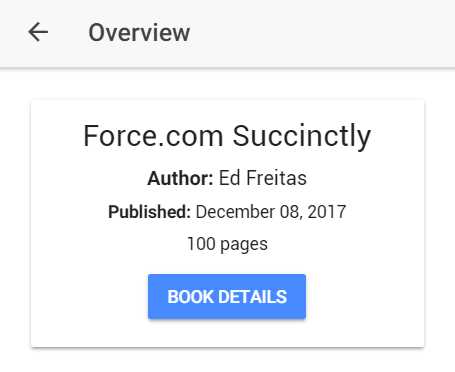
Figure 4-h: The Book Overview Page Invoked from the Paths Page
Now, let’s do the same thing, but by navigating to the Book Overview page from the Books page.

Figure 4-i: The Book Overview Page Invoked from the Books Page
We can see that we were able to navigate to the Book Overview page for two different books: one through the Paths page, and the other through the Books page.
The only thing we need to do to finalize our application is update the Book Detail page, which is what we’ll do next.
Updating the Book Detail page
We’re on the last stretch of this app. The Book Detail page, as its name clearly implies, is responsible for displaying the properties of the details object for each book.
In order to do that, let’s modify our existing bookdetail.html file and add the following markup.
Code Listing 4-z: Updated bookdetail.html File
<ion-header> <ion-navbar> <ion-title>Details</ion-title> </ion-navbar> </ion-header> <ion-content padding> <ion-card> <ion-card-content> <img src="{{book.overview.details.pic}}" /> <ion-row center> <ion-col text-center> <button ion-button> Get book (For future use)</button> </ion-col> </ion-row> </ion-card-content> </ion-card> </ion-content> |
As you’ve probably noticed, we are only displaying the pic property. This is because I’d like to leave you a challenge to figure out on your own.
The challenge is to use the templateUrl property and add it to the button, so that when clicking on it in a browser window, it can be opened and you can grab the book directly from the Syncfusion website.
I’ll give you a hint—you’ll be able to do this by launching in App Browser—this is possible by using the InAppBrowser Cordova plugin. More details can be found here, so feel free to have a look.
With the UI of the Book Detail page done, let’s now move on and focus on the bookdetail.ts file, and update it accordingly. We can see the updated code in Code Listing 4-aa.
Code Listing 4-aa: Updated bookdetail.ts File
import { Component } from '@angular/core'; import { IonicPage, NavController, NavParams } from 'ionic-angular'; @IonicPage() @Component({ selector: 'page-bookdetail', templateUrl: 'bookdetail.html', }) export class BookdetailPage { public book; constructor(public navCtrl: NavController, public navParams: NavParams) { this.book = navParams.data; } ionViewDidLoad() { console.log('ionViewDidLoad BookdetailPage'); } } |
All we are really doing here is getting the navParams.data object (the actual navigation parameters received from the Book Overview page) and assigning the parameters to the book object, which is what the bookdetail.html uses.
Let’s now execute the ionic serve command once again in order to view the changes we’ve done.
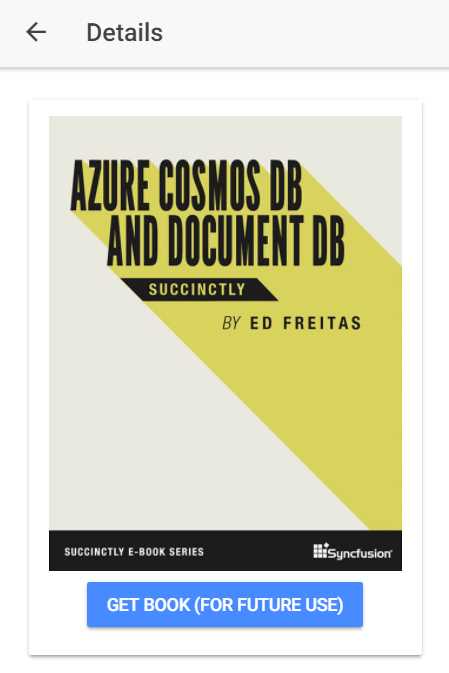
Figure 4-j: The Book Detail Page
Awesome—we now have a fully working app. We’ve gone through all the steps in order to create a small, but fully working Ionic application—congrats!
Full source code
You can download the full source code of this app here. Please note that this includes the complete project, which can be opened in your development environment of choice—in my case, I used Visual Studio Code.
Also note that this project doesn’t include the \node_modules folder, so in order to install the required Node.js modules, you need to go into the project folder and run the npm install –g ionic cordova command.
Summary
This has been a long but interesting chapter, as we’ve seen how to navigate through the various app pages and give the application its character and functionality.
Given the breadth of the Ionic framework, it’s impossible to cover it all in one short book. However, with the step-by-step approach we’ve taken to build this app, we’ve explored most of the essentials you’ll need in order to get off the ground with this framework and create your own app.
In the next and final chapter, we’ll quickly review various Ionic resources that should help you expand your understanding of this framework, so you can keep exploring it on your own.
- 1800+ high-performance UI components.
- Includes popular controls such as Grid, Chart, Scheduler, and more.
- 24x5 unlimited support by developers.