
Intelligent Mobile Apps with .NET MAUI Succinctly®

CHAPTER 4
Speech Recognition and Text-to-Speech
In this chapter, you will integrate Azure Speech Services into the AI-powered travel companion app. This includes implementing speech recognition to execute voice commands and text-to-speech to convert text into spoken output. These capabilities improve accessibility and hands-free interaction within the app.
Setting up Speech Services
Similar to what you did in the previous chapter for Computer Vision, you need to set up the Azure AI Speech service in the Azure Portal. Follow these steps:
- Go to the Azure Portal and sign in with your Azure account credentials.
- Click Azure AI Services.
- Click Create on the Speech service card.
- Choose your Azure subscription in the Subscription dropdown and specify the resource group you created previously in the Resource group dropdown (see Figure 17).
- Choose the Region closest to your location and give the service a unique Name.
- In the Pricing tier dropdown, select Free F0.
- Click Review + Create, and then click Create.
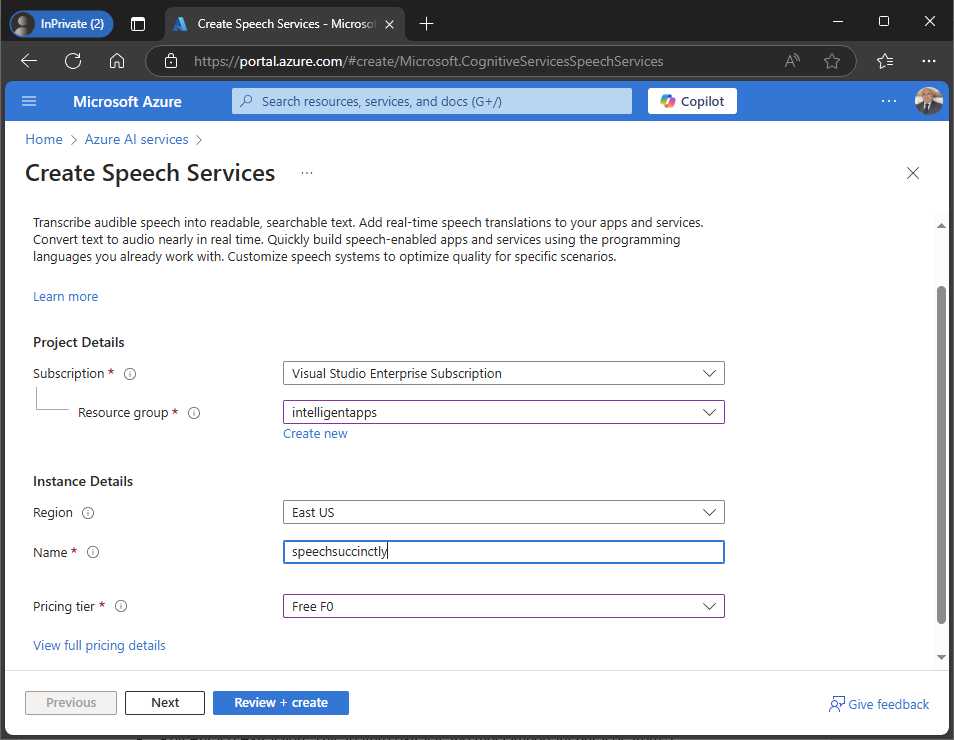
Figure 17: Creating and configuring the Speech Services
When the summary page appears, click Go to resource. The new service will appear in the list of services within the current resource group, so click on it. A webpage for the new service appears. Exactly like you did in Chapter 3 for AI Vision, click the Click here to manage keys hyperlink, which brings you to the page where you will be able to retrieve the API key, the service endpoint URL, and the service region. The result you get is similar to Figure 11. You will need this information to access the service from C# code, so keep it ready while you open the solution in Visual Studio.
Specifying permissions
The application needs permission to access the microphone to provide speech recognition features. To accomplish this, in the Android manifest, add the RECORD_AUDIO permission. In the Info.plist iOS file, add the following lines:
<key>NSMicrophoneUsageDescription</key>
<string>Accessing the microphone is required for voice commands</string>
Follow the instructions in Chapter 3 for adding permissions to the manifest files.
Implementing speech recognition
The first step to implement speech recognition is to install the Microsoft.CognitiveServices.Speech NuGet package. Follow the steps in the previous chapter to add this package to the project. Figure 18 shows how the package appears in the NuGet user interface.
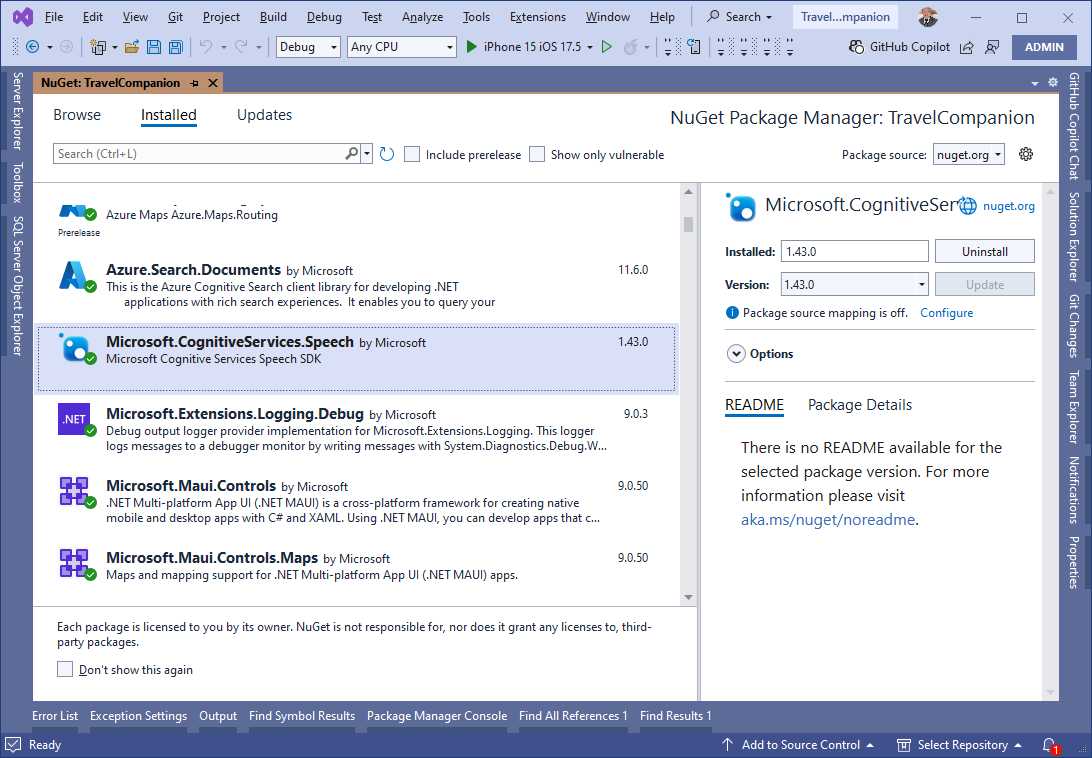
Figure 18: Installing the NuGet package for Speech Services
This package is also necessary to implement text-to-speech. The goal of the current example is to extend the image analysis feature from the previous chapter to recognize a voice command that starts the image analysis operation, instead of requiring users to click a button.
Defining the user interface
Instead of creating a new page, you will extend the existing image analysis page with two buttons: one that recognizes speech to initiate a voice command, and one that will be used to make the application speak the AI-generated description of the image. With these in mind, modify the XAML of the page as shown in Code Listing 3.
Code Listing 3
<?xml version="1.0" encoding="utf-8" ?> <ContentPage xmlns="http://schemas.microsoft.com/dotnet/2021/maui" xmlns:x="http://schemas.microsoft.com/winfx/2009/xaml" x:Class="TravelCompanion.ImageAnalysisPage" Title="ImageAnalysisPage"> <Grid Padding="20" VerticalOptions="Fill"> <Grid.RowDefinitions> <RowDefinition Height="Auto" /> <RowDefinition Height="300"/> <RowDefinition Height="Auto" /> <RowDefinition Height="Auto" /> <RowDefinition Height="200"/> <RowDefinition Height="Auto" /> </Grid.RowDefinitions> <Button Text="Pick an Image" Clicked="OnPickImageClicked" Margin="5" /> <Image x:Name="SelectedImage" Aspect="AspectFit" Grid.Row="1" /> <Button Text="Analyze Image" Margin="5" Clicked="OnAnalyzeImageClicked" Grid.Row="2" /> <Button Text="Use voice command" Margin="5" Clicked="OnVoiceCommandClicked" Grid.Row="3" /> <Label x:Name="AnalysisResult" FontAttributes="Bold" FontSize="Medium" Text="Analysis results will appear here" Grid.Row="4" /> <Button Text="Read Description" Clicked="OnReadDescriptionClicked" Grid.Row="5" Margin="5" /> </Grid> </ContentPage> |
The changes are simple: the Grid has been extended with two rows and two new buttons have been added. The event handler for the button related to text-to-speech capabilities will be implemented in the appropriate section later in this chapter.
Performing speech recognition in C#
You will now extend the code in the ImageAnalysisPage.xaml.cs file as follows. First, add the following fields that must be assigned with the Speech Services API key and region, respectively:
private const string SpeechSubscriptionKey = "your-api-key";
private const string SpeechRegion = "service-region";
The next step is to check whether the app has permission to access the microphone. This is accomplished with the RequestMicrophonePermissionsAsync method, defined as follows:
private async Task<bool> RequestMicrophonePermissionsAsync()
{
var micStatus = await Permissions.
CheckStatusAsync<Permissions.Microphone>();
if (micStatus != PermissionStatus.Granted)
{
micStatus = await Permissions.
RequestAsync<Permissions.Microphone>();
}
return micStatus == PermissionStatus.Granted;
}
The method returns true if the value of PermissionStatus is Granted, which means that the user has granted the permission. The last piece for speech recognition is the following code, which handles the button click:
private async void OnVoiceCommandClicked(object sender, EventArgs e)
{
bool permissionCheck = await RequestMicrophonePermissionsAsync();
if (!permissionCheck)
{
await DisplayAlert("Error",
"You do not have permissions to access the microphone",
"OK");
return;
}
var speechConfig = SpeechConfig.
FromSubscription(SpeechSubscriptionKey, SpeechRegion);
using var recognizer = new SpeechRecognizer(speechConfig);
var result = await recognizer.RecognizeOnceAsync();
if (result.Text.Contains("Analyze image",
StringComparison.OrdinalIgnoreCase))
{
OnAnalyzeImageClicked(sender, e);
}
}
The first part of the code checks for microphone permissions. The SpeechConfig class enables access to the Speech Services, invoking the FromSubscription method, which receives the API key and service region as credentials. The SpeechRecognizer class and its RecognizeOnceAsync method are used to interpret voice commands, specifically the phrase "analyze image" to activate the OnAnalyzeImageClicked method. In this example, the code searches for a specific phrase, but the Text property of the SpeechRecognitionResult return type contains the full recognized text. This is useful if you need to transcribe what the user says or make more complex decisions based on the input.
The following is a list of additional types and members from the Azure SDK for AI Speech:
· The AudioConfig class manages audio inputs and outputs, and an instance of it can be passed as the second argument of the SpeechRecognizer constructor. The FromDefaultMicrophoneInput method is used to capture audio from the default microphone of the system (which is also the default if you do not explicitly use this class). AudioConfig can also be initialized from other sources, such as FromWavFileInput for reading audio from a WAV file or FromStreamInput for capturing audio from a stream.
· The SpeechRecognizer class also supports continuous recognition via the StartContinuousRecognitionAsync method, which allows the application to keep listening and transcribing speech until explicitly stopped by StopContinuousRecognitionAsync. This can be useful for transcribing long conversations or speeches.
· The SpeechRecognitionResult class represents the outcome of a speech recognition operation. The Reason property is of type ResultReason and indicates whether the recognition was successful (RecognizedSpeech) or encountered issues, like NoMatch or Canceled. The recognized text is typically accessed through the Text property. Table 1 summarizes possible values for the Reason property.
· The VoiceInfo class represents individual voices available for speech synthesis. Its ShortName property identifies each voice by a concise identifier (such as en-US-AriaNeural), which is used to set the SpeechSynthesisVoiceName in the SpeechConfig instance.
Table 1: Values from the ResultReason enumeration
Value | Description |
|---|---|
NoMatch | Indicates speech could not be recognized. |
Canceled | Indicates that the recognition was canceled. |
RecognizingSpeech | Indicates the speech result contains hypothesis text. |
RecognizedSpeech | Indicates the speech result contains final text that has been recognized. |
RecognizingIntent | Indicates the intent result contains hypothesis text and intent. |
RecognizedIntent | Indicates the intent result contains final text and intent. |
TranslatingSpeech | Indicates the translation result contains hypothesis text and its translations. |
TranslatedSpeech | Indicates the translation result contains final text and corresponding translations. |
SynthesizingAudio | Indicates the synthesized audio result contains a non-zero amount of audio data. |
SynthesizingAudioCompleted | Indicates the synthesized audio is now complete for this phrase. |
RecognizingKeyword | Indicates the speech result contains (unverified) keyword text. |
RecognizedKeyword | Indicates that keyword recognition completed recognizing the given keyword. |
SynthesizingAudioStarted | Indicates the speech synthesis is now started. |
TranslatingParticipantSpeech | Indicates the transcription result contains hypothesis text and its translations for other participants in the conversation. |
TranslatedParticipantSpeech | Indicates the transcription result contains final text and corresponding translations for other participants in the conversation. |
TranslatedInstantMessage | Indicates the transcription result contains the instant message and corresponding translations. |
TranslatedParticipantInstantMessage | Indicates the transcription result contains the instant message for other participants in the conversation and corresponding translations. |
EnrollingVoiceProfile | Indicates the voice profile is being enrolled and more audio is needed to complete a voice profile. |
EnrolledVoiceProfile | Indicates the voice profile has been enrolled. |
RecognizedSpeakers | Indicates successful identification of some speakers. |
RecognizedSpeaker | Indicates successful verification of a speaker. |
ResetVoiceProfile | Indicates a voice profile has been reset. |
DeletedVoiceProfile | Indicates a voice profile has been deleted. |
VoicesListRetrieved | Indicates the voices list has been retrieved successfully. |
Note: The official documentation contains the full list of synthesized voices and supported languages.
Before running the example, you will complete the code with the implementation of text-to-speech features.
Implementing text-to-speech
Text-to-speech converts written text into spoken audio, leveraging the device’s audio output. The Azure AI Speech service includes text-to-speech capabilities, which can be invoked via the .NET objects defined in the Microsoft.CognitiveServices.Speech NuGet package that you installed previously. Given that most of the code setup has been done in the previous section about speech recognition, the only code that you need to add is the following event handler:
private async void OnReadDescriptionClicked(object sender, EventArgs e)
{
try
{
if (string.IsNullOrEmpty(AnalysisResult.Text))
return;
var speechConfig = SpeechConfig.
FromSubscription(SpeechSubscriptionKey, SpeechRegion);
using var synthesizer = new SpeechSynthesizer(speechConfig);
await synthesizer.SpeakTextAsync(AnalysisResult.Text);
}
catch (RequestFailedException ex)
{
await DisplayAlert("Error", ex.ErrorCode, "OK");
}
catch (Exception ex)
{
await DisplayAlert("Error", ex.Message, "OK");
}
}
The following is a list of the relevant types and members in the code:
· The SpeechConfig class has the same purpose as the previous example. In this case, it is worth mentioning the SpeechSynthesisVoiceName property, which allows you to specify the voice to use for synthesis. For instance, you might set this to en-US-JennyNeural for a specific American English voice.
· The SpeechSynthesizer class handles the conversion of text into spoken audio. It requires a SpeechConfig object for initialization. The SpeakTextAsync method takes a string of text and synthesizes it into speech, which is then played through the configured audio output device. For more control, the SpeakSsmlAsync method can be used to synthesize speech from Speech Synthesis Markup Language (SSML) input, enabling finer control over speech characteristics. Additionally, StartSpeakingAsync begins synthesis and returns immediately, allowing the app to perform other tasks while synthesis continues in the background.
· The SpeechSynthesisResult class contains the result of the text-to-speech operation. The Reason property indicates whether the synthesis was successful (SynthesizingAudioCompleted) or encountered problems. Possible values are listed in Table 1. The AudioData property contains the synthesized audio data in raw bytes, which can be saved or processed further.
At this point, you can finally run the application and observe the result. More information about what is available in the Speech SDK can be found in the official documentation.
Running the application
Press F5 to run the application on the device (physical or emulator) of choice. Select an image from your gallery and select Use voice command. Say “Analyze image,” and after a few seconds you will see the description of the image in the label. You have achieved the same result as Chapter 3, but with a voice command. Figure 19 shows an example of the image analysis result, along with the user interface edits.
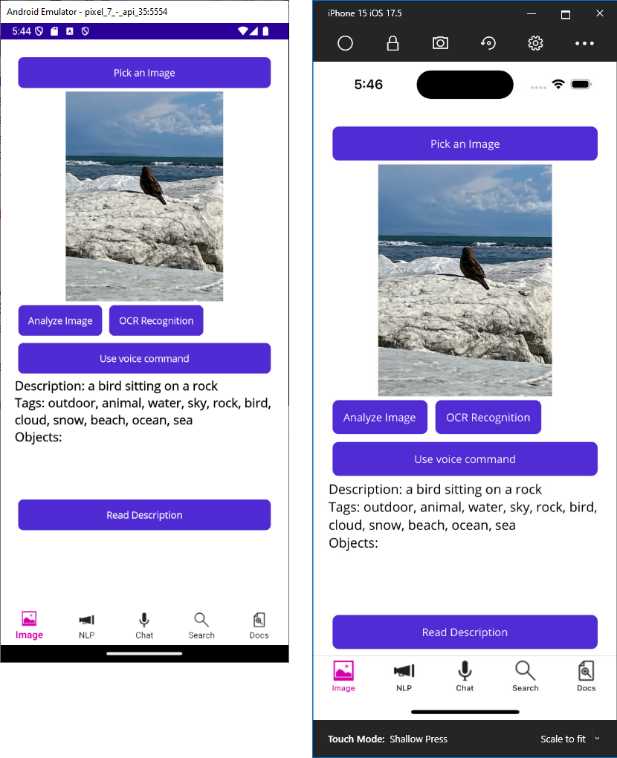
Figure 19: The image analysis result triggered by a voice command
If you now select Read Description, your device will read the description text aloud (make sure the device is not in silent mode or muted). With very little effort, you have implemented voice commands with speech recognition and text-to-speech, dramatically enhancing the user experience.
Chapter summary
In this chapter, you have seen how to implement speech recognition and text-to-speech offered by the Azure AI Speech service to improve the user experience in a .NET MAUI project. You have seen how to request microphone permissions and how to implement voice commands with the SpeechRecognizer class. Finally, you have seen how to leverage the SpeechSynthesizer class to convert text into spoken audio. This enhances the user experience by allowing hands-free interaction. In the next chapter, you will explore natural language processing services.
- An ever-growing .NET MAUI control suite with rich feature sets.
- DataGrid, Charts, ListView, Scheduler, and more.
- Active community and dedicated support.
- Phone, tablet, and desktop support.