
HoloLens Succinctly®

CHAPTER 2
Tooling
The tooling for creating MR experiences will be familiar to developers on the Microsoft stack, especially if you have done any mobile development. The tooling is based on Unity 3D for setting up the 3D space, and Visual Studio for managing code and business logic. There is also an as-real-as-possible emulator for developers who don’t have a physical device.
The tooling is all free, which significantly lowers the barrier to entry. In fact, you don’t have to have a physical HoloLens device to develop for it—although having one makes it a lot more fun! As you will learn in this chapter, the tooling can be downloaded and used instantly to create HoloLens apps for the UWP.
Unity 3D
Traditionally, a cross-platform game-development engine, Unity 3D is a tool for modeling a 3D experience, or series of experiences. It currently supports 27 different platforms and is a preferred development tool for companies like Nintendo and Microsoft HoloLens.
To develop experiences for HoloLens you will have to use Unity 3D to design what is known as the scene. Granted, you aren’t required to use Unity to develop for HoloLens, but the way the integration and tooling is laid out, you will make your life a whole lot harder by not using it. For the remainder of this book, we will only use Unity to create and work on the scene in our app.
Installing Unity 3D
Getting ahold of Unity 3D is like any other piece of standard software. It is a simple installer for either Windows or Mac OS that you can download from the Unity 3D website.[3]
Select the default settings when going through the installation wizard and choosing the components to install. If you intend to develop Unity projects for other platforms, you will probably want to choose additional components.
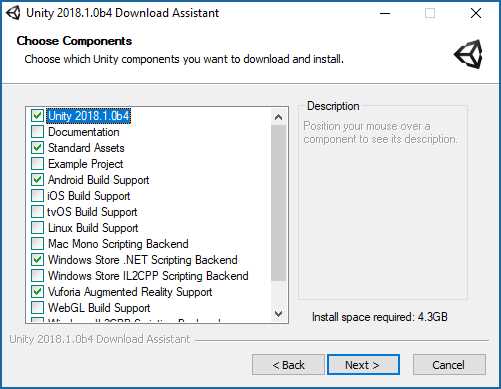
Figure 7: Unity 3D Installation Screen—Choose Components
The installer will download the required components, and once Unity is installed, it is ready to go.
Starting a new project
Creating a new project in Unity 3D is straightforward. You can either create a new project from the start screen, or you can do it from the File menu once Unity is loaded successfully, which in turn will bring up the start screen.
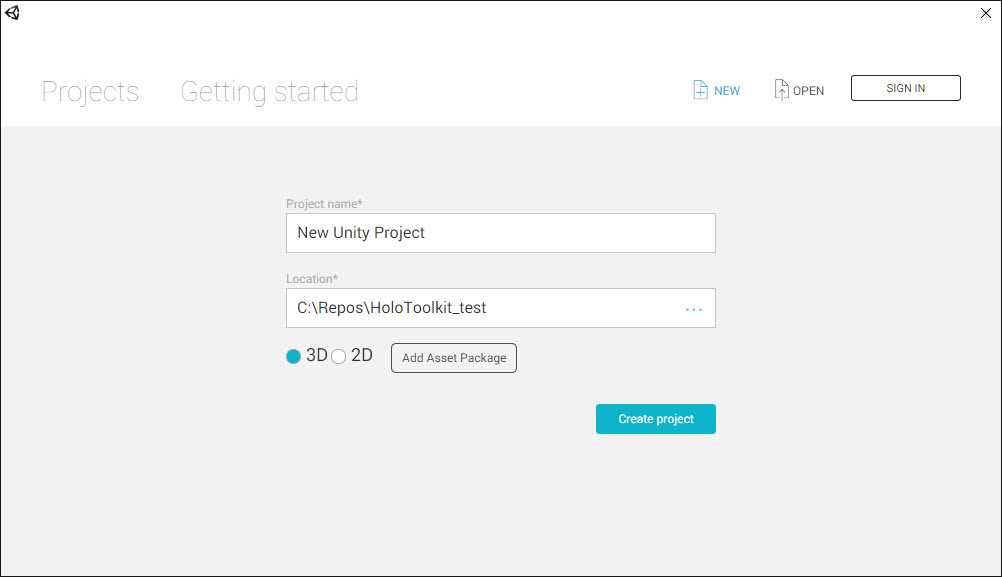
Figure 8: Unity Start Screen
If you have an online profile, you can sign in, and any projects will be linked to your profile.
Always choose the 3D option for a new HoloLens project. This will set the scene view (your workspace) to 3D, set the lighting to conform to 3D, set the camera up correctly, and in general make sure the environment is 3D ready.
Creating 3D objects
One of the main aims of HoloLens development and creating mixed reality experiences, is to provide natural experiences for the end users. Part of this goal is achieved through realistic and believable 3D models. If you are anything like me (a developer with no design skills whatsoever), you will be dependent on 3D models from asset stores, designers, and other places. While you wait for artwork to arrive, use basic Unity 3D shapes as placeholders. Once you get the real asset, you can then replace it for the simple shape and write the scripts and behaviors for the real model.
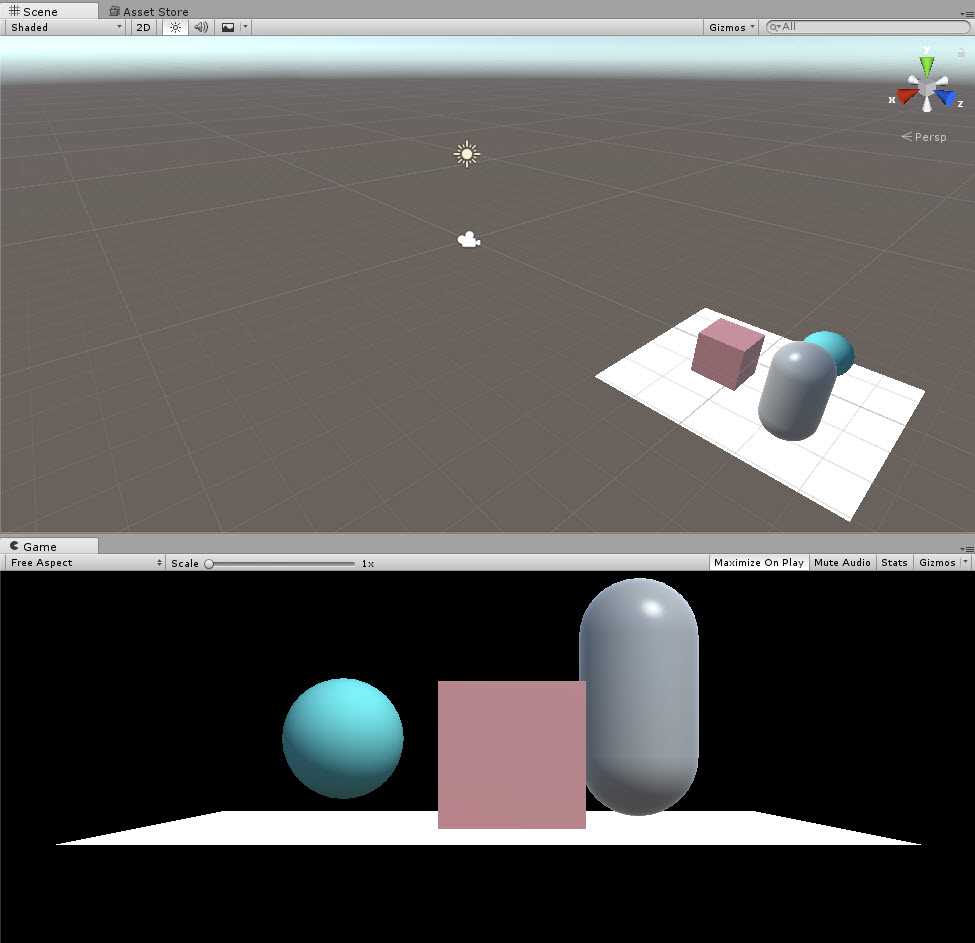
Figure 9: Unity 3D Objects
3D modeling
Building and designing 3D models is a job that goes well beyond software development. If you aren’t a designer or someone with a good understanding of 3D objects and models, it is best to leave this to someone who is. There are many ways to get ahold of great 3D models for your projects, such as searching the Unity 3D asset store and other online 3D asset stores, using a freelance modeler, or just teaming up with someone who does 3D visual work.
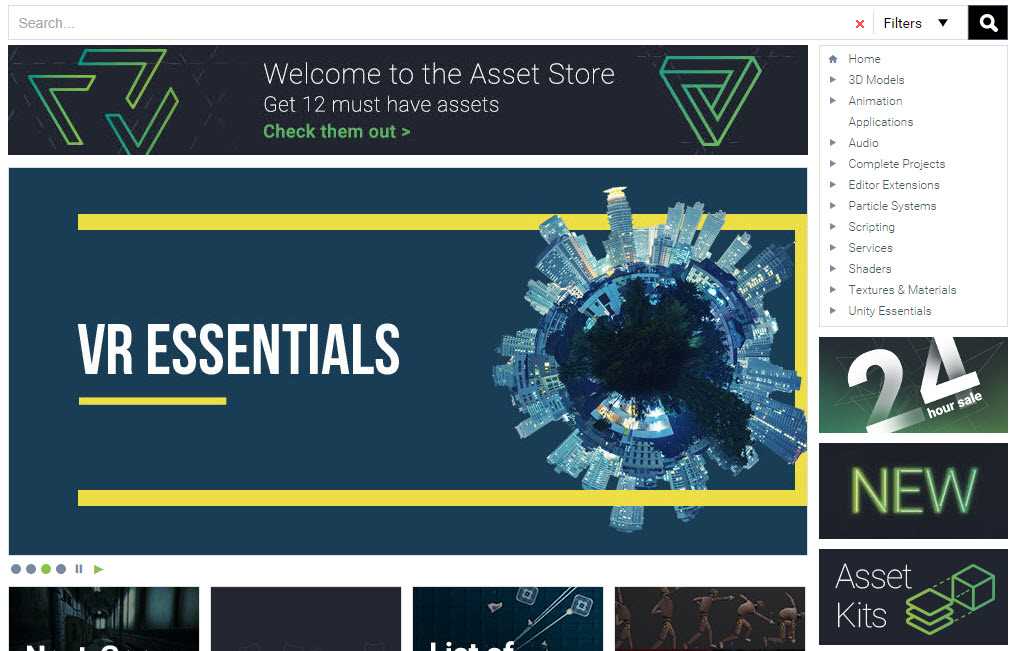
Figure 10: Unity Asset Store
Visual Studio
As with Unity, if you are doing HoloLens development, it is extremely difficult to get around Visual Studio as the primary editor and tool for development. If you haven’t used Visual Studio before, you are in for a treat. At first glance, it is daunting and somewhat confusing, but the depth and thought put into the product are amazing. It is the tool for developing anything on the Microsoft stack (and other non-Microsoft technologies).
Note: This book describes developing mixed reality experiences with Visual Studio 2017.
Installing Visual Studio 2017
The community edition of Visual Studio 2017 is free and fully supports HoloLens development. You can download it from here, then install it in as little as 15 minutes and be on your way.
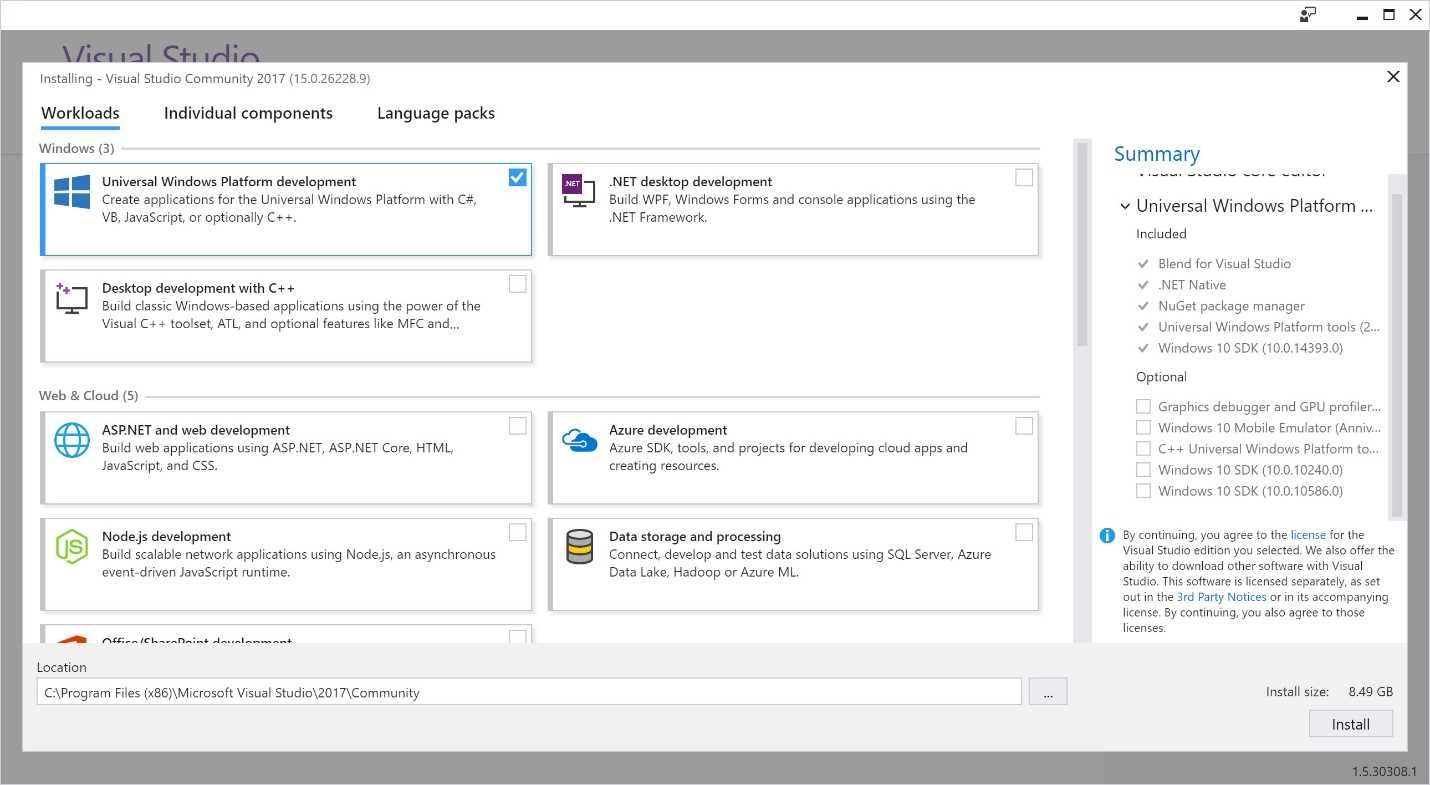
Figure 11: Visual Studio 2017 Installation
Windows 10 SDK
During the installation, select the Universal Windows Platform development package in the Workloads tab. This is what you need to build and compile Windows Holographic apps. Because the HoloLens itself runs on Windows 10, the apps you build are Universal Windows Platform apps (as mentioned in Chapter 1), and the Windows 10 SDK gives you the latest headers, libraries, and tools for building Windows 10 apps. If you already have VS 2017 installed, launch the Visual Studio Installer program, click Installed > Modify, and then select the Universal Windows Platform development package.
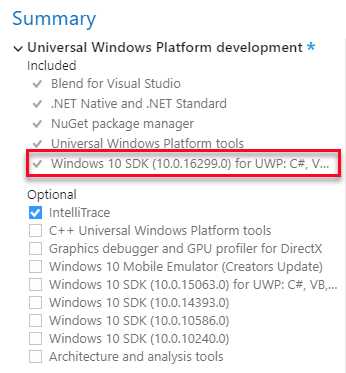
Figure 12: Select Windows 10 SDK
HoloLens Emulator
Chances are that you might not have a physical HoloLens. First of all, they aren’t readily available in many countries, and second, they are very pricey. Unless you have a specific purpose or project for buying a HoloLens (or someone else is paying), it’s not an item you “just get.” Luckily, the HoloLens emulator is completely free. It is as close as you can get to having a real HoloLens without having one.
Note: The HoloLens emulator is the main reason you need a version of Windows 10 with Hyper-V. If you have a physical HoloLens, Hyper-V is not needed, but does make development easier.
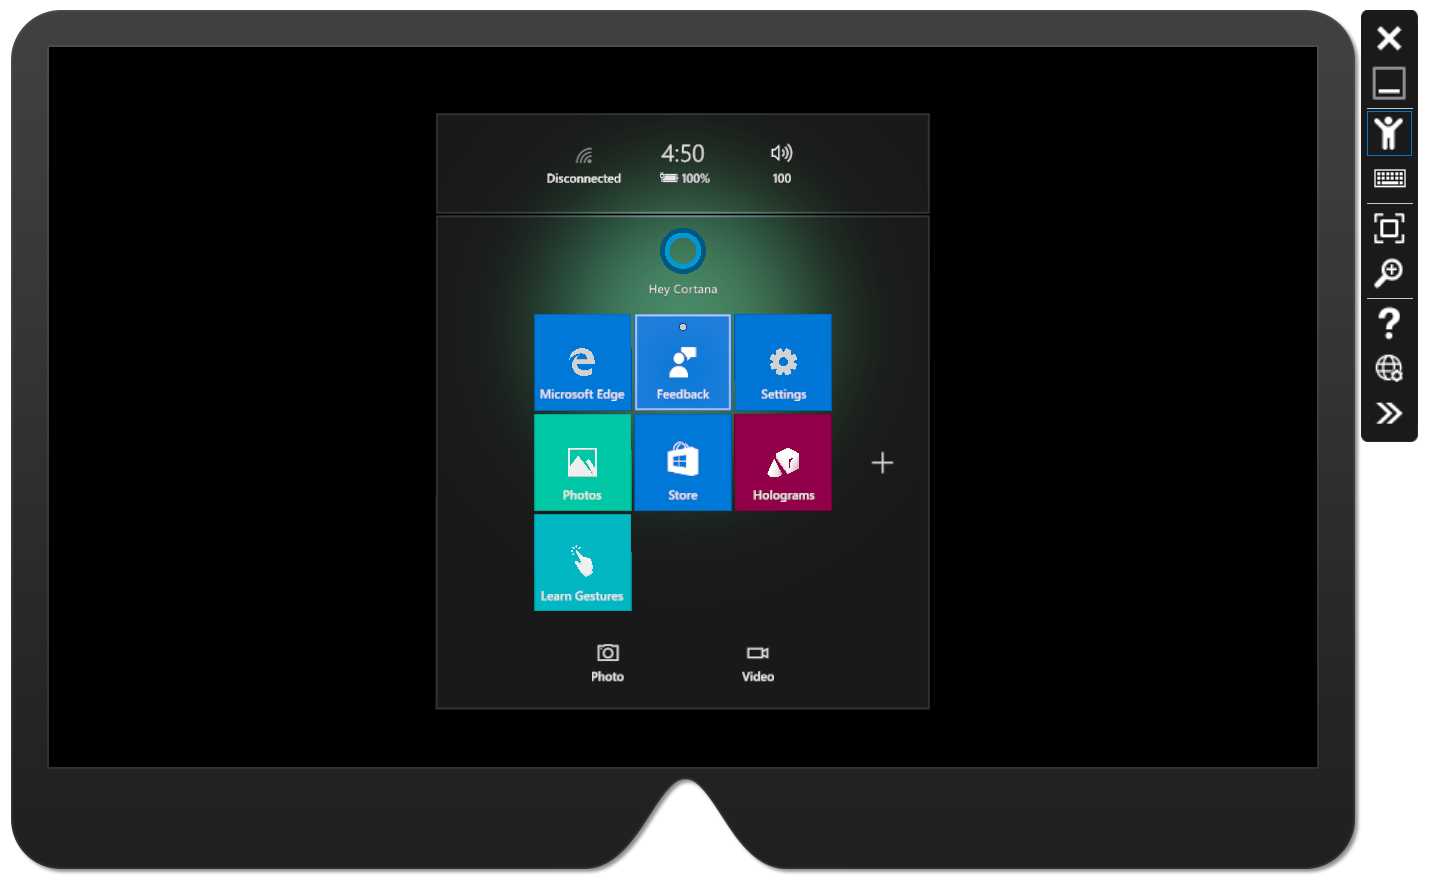
Figure 13: HoloLens Emulator
The emulator comes with tooling to help you emulate a real device as much as possible. Apart from the device portal (see Chapter 9 “Testing HoloLens Experiences”), there is a whole second tools screen for the emulator input and output. You can monitor the simulation coordinates of the actor in the emulation for body, head, and hands (gestures). You can also change the spatial mapping of the location (in other words change the room layout), and use a Microsoft account to log into the emulator and view network configuration values.
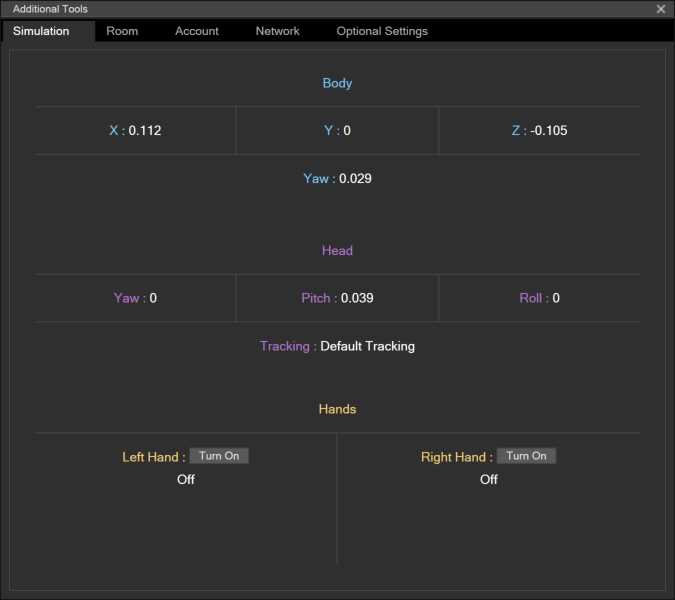
Figure 14: Emulator Tools—Simulation
HoloLens
We are talking about HoloLens development, and of course, having a physical HoloLens is the best part of it all. The device is groundbreaking, and experiencing the mixed reality in person is truly unique. There is no reason you can’t develop HoloLens apps without a physical device, but having one available does make the whole experience a lot more enjoyable. If you do develop without using a device, I would recommend testing your app on a real device before releasing it to the wild.
- 1800+ high-performance UI components.
- Includes popular controls such as Grid, Chart, Scheduler, and more.
- 24x5 unlimited support by developers.