
Hadoop for Windows Succinctly®

CHAPTER 1
Installing Hadoop for Windows
Choosing a Hadoop distribution to install
In the first chapter I will do an installation of Apache Hadoop for Windows. This is a version of Hadoop that is totally free, and is the basis of all Hadoop distributions. To test whether Hadoop can be installed on pretty much any Windows PC, I will do a local installation on Windows 8. While the screenshots I show are from Windows 8, the process on Windows 10 and Windows Server is similar, and you shouldn't have any trouble making the necessary adjustments. It’s important that you don’t feel you need the latest shiny, new PC to run Hadoop, though later when we look at multi-node installations, we will use multiple Windows Server 2016 machines. The PC in this exercise meets the requirements shown in Table 1, with 8 GB of RAM, a Quad Core 2.4 GHz AMD processor, and solid-state drives.
Apache Hadoop installation prerequisites
- JAVA 1.6 or later: You can download the 64-bit Windows .jdk file jdk-8u191-windows-x64 from here. It is important to state why a prerequisite is required, so the nature of the dependency on the prerequisite is understood. Hadoop is a Java-based application that creates various dependencies on Java. For example, in a single-node Hadoop installation, there is a single Java process running all Hadoop functions. Without Java, all those functions would be unavailable. It is essential to have the right version and architecture of Java, and a 64-bit JDK higher than 1.6 should always be chosen to install Hadoop for Windows.
- Hadoop 2.0 or later: You can download the Hadoop binary file hadoop-2.9.2.tar.gz from here.
- Microsoft Windows: Windows 7, 8, 10, and Windows Server 2008 and above.
- Additional prerequisites: You’ll also need a text editor, such as Notepad or Notepad ++, for writing short amounts of code, and Winutils 3.1, which you can download from GitHub.
Java installation for Hadoop for Windows
Run the downloaded Java installer, following the onscreen instructions to complete the installation. Ensure that you right-click on the Java installation file and choose Run as administrator from the menu. You will see a User Account Control message asking you to allow the application to make changes to your computer, to which you answer Yes. Follow the onscreen prompts to install Java, including the following screen, where you can accept the default installation path.
Figure 9: Default Java installation path |

Figure 10: Successful Java installation |
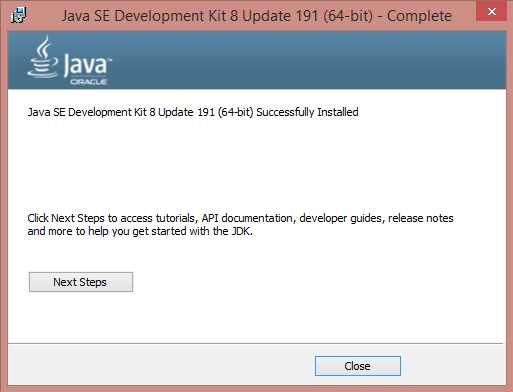
Ensure that you see the screen informing you that Java has been successfully installed.
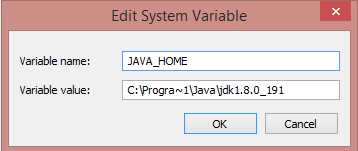
Go to Control Panel > System and Security > System and click Advanced System Settings, and then click the System Environment Variables button. Whether creating a new environment variable for JAVA_HOME or editing an existing one, you must alter the Program Files text to text that Hadoop can interpret. On Windows 8, to create a Hadoop-compatible JAVA_HOME file instead of entering Program Files, insert Progra~1 when entering the Java location in the Variable value field. On Windows 10 and Windows Server, avoid folder names with blank spaces.
Figure 11: Hadoop compatible Java Home |
Please ensure that you add the JAVA_HOME to the Path variable in System Variables. In this instance, it is done by adding %JAVA_HOME%\bin between semi colons in the Path Variable value field. Use the java -version command from a command prompt to ensure that Java is installed and running correctly.
Figure 12: Adding Java Home to the Path Variable |

Apache Hadoop installation
- Create a folder called C:\hadoop on your hard drive.
- Using an application such as 7-Zip File Manager, extract the Hadoop binary file hadoop-2.9.2.tar.gz from this website to a directory of your choice, or directly to C:\hadoop\hadoop-2.9.2. If you choose to extract the files to a directory of your choice, then you first have to copy the extracted files to C:\hadoop. You may find it more convenient to extract them directly to C:\hadoop, which will then have an extracted folder in it called hadoop-2.9.2, so you end up with the C:\hadoop\hadoop-2.9.2 folders.
- You can now create a HADOOP_HOME similar to how we created one previously, by going back to Control Panel > System and Security > System, clicking Advanced System Settings, and then clicking the Environment Variables button. Create the Hadoop home by adding the system variable name HADOOP_HOME, with the system variable value being the folder that we extracted the Hadoop binary to, which was C:\hadoop\hadoop-2.9.2.
Figure 13: Creating a Hadoop Home |

Figure 14: Adding Hadoop Home to the Path variable |

We must add the HADOOP_HOME file to the Path variable in System variables. In this instance, it is done by adding %HADOOP_HOME%\bin between semi colons in the Variable value field.
In addition, we must add a second HADOOP_HOME to the Path variable for the folder in Hadoop called sbin. This is done by adding %HADOOP_HOME%\sbin between semi colons in the Variable value field. You should now have Hadoop and Java homes, and two Hadoop path variables.
Figure 15: Java and Hadoop homes |

The resource page I mentioned previously is an official Apache resource that will assist us in finishing the installation. The area of the site we need first is “Section 3.1. Example HDFS Configuration,” which states:
“Before you can start the Hadoop Daemons you will need to make a few edits to configuration files. The configuration file templates will all be found in c:\deploy\etc\hadoop, assuming your installation directory is c:\deploy.”
Since our installation is at C:\hadoop\hadoop-2.9.2, our configuration file templates will be located at C:\hadoop\hadoop-2.9.2\etc\hadoop\. The first file we need to edit is the core-site.xml file. The following code listing shows the format of the core-site.xml file, which is the style that we need to adapt. You will need your code editor at this point (I am using Notepad++).
Code Listing 1: The core-site.xml file format
<configuration> <property> <name>fs.default.name</name> <value>hdfs://0.0.0.0:19000</value> </property> </configuration> |
We need to substitute the name and value elements shown on the core-site.xml file on the Apache Wiki page for values in the installation we are carrying out. The values we require are contained in the following code listing and reflect our current Hadoop installation.
Code Listing 2: Editing the core-site.xml file
<?xml version="1.0" encoding="UTF-8"?> <configuration> <property> <name>fs.defaultFS</name> <value>hdfs://localhost:9000</value> </property> |
We need to do the same for the hdfs-site.xml file template, and the new values we require are in the following code listing.
Code Listing 3: Editing the hdfs-site.xml template
<configuration> <property> <name>dfs.replication</name> <value>1</value> </property> <property> <name>dfs.namenode.name.dir</name> <value>file:///C:/Hadoop/hadoop-2.9.2/namenode</value> </property> <property> <name>dfs.datanode.data.dir</name> <value>file:///C:/Hadoop/hadoop-2.9.2/datanode</value> </property> </configuration> |
Note: You must create two folders in the C:\Hadoop\hadoop-2.9.2\ folder in Windows Explorer to reflect the namenode and datanode directories mentioned in Code Listing 3. Note that the Hadoop configuration files use forward slashes instead of backward slashes in file paths, even on Windows systems.
Next, we need to edit the mapred-site.xml configuration file; the values required are shown in the following code listing.
Code Listing 4: Editing the mapred-site.xml configuration file
<configuration> <property> <name>mapreduce.framework.name</name> <value>yarn</value> </property> </configuration> |
We also need to edit the yarn-site.xml configuration file; the values required are provided in the following code listing.
Code Listing 5: Editing the yarn-site.xml configuration file
<configuration> <property> <name>yarn.nodemanager.aux-services</name> <value>mapreduce_shuffle</value> </property> <property> <name>yarn.nodemanager.auxservices.mapreduce.shuffle.class</name> <value>org.apache.hadoop.mapred.ShuffleHandler</value> </property> </configuration> |
Next, follow these steps:
- Replace the bin folder at C:\hadoop\hadoop-2.9.2\bin with a bin folder extracted from here.
- Extract the bin folder from the apache-hadoop-3.1.0-winutils-master file downloaded from here.
- Make a copy of the bin folder at C:\hadoop\hadoop-2.9.2\bin, and then delete the folder you made the copy from.
- Copy the bin folder you extracted from the apache-hadoop-3.1.0-winutils-master file to C:\hadoop\hadoop-2.9.2\; it replaces the bin folder you deleted.
Now we must follow the instructions in section 3.4 of the Hadoop Wiki page, “3.4. Format the FileSystem.” This is done by executing the following command (with administrator privileges) from a command shell:
Code Listing 6: Format of the Filesystem
hdfs namenode -format |
Figure 16: Successful formatting of the Filesystem |

You must now copy the hadoop-yarn-server-timelineservice-2.9.2 file from C:\hadoop\hadoop-2.9.2\share\hadoop\yarn\timelineservice to the folder C:\hadoop\hadoop-2.9.2\share\hadoop\yarn. We can start Hadoop with the instructions in sections 3.5 and 3.6. of the Hadoop Wiki page, called “3.5. Start HDFS Daemons” and “3.6. Start YARN Daemons and run a YARN job.”
You start HDFS daemons by running the following code from the command prompt.
Code Listing 7: Start HDFS Daemons command
start-dfs.cmd |
You start YARN daemons and run a YARN job by running the following code.
Code Listing 8: Start YARN daemons and run a YARN job command
start-yarn.cmd |
Figure 17: Hadoop namenode and datanode started successfully |

Figure 18: Yarn resourcemanager and Yarn nodemanager successfully started |
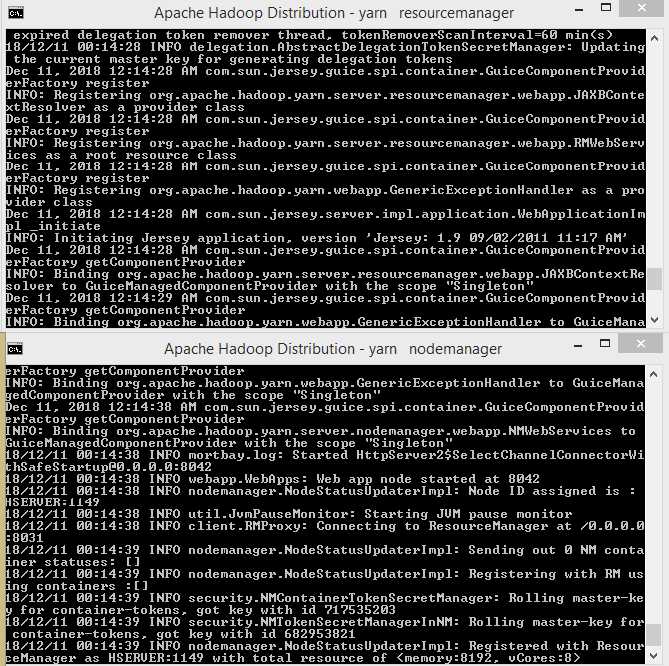
Figure 19: Final Hadoop installation directory |

Let’s create a directory called bigdata by running the following code.
Code Listing 9: Creation of directory called bigdata
hadoop fs -mkdir /bigdata |
The next section of code, hadoop fs -ls /, confirms the directory has been created by listing its contents.
Code Listing 10: Listing of Directory Contents
C:\Windows\system32>hadoop fs -ls / Found 1 items drwxr-xr-x - Dave supergroup 0 2018-12-11 13:52 /bigdata |
We can copy the ukhousetransactions.txt file and the ukhousetransactions2.txt to the HDFS after first changing directory to the datastore folder, by using the change directory command: cd C:\hadoop\hadoop-2.9.2\datastore. Both tables have the same data and are used to check that duplicate records can be identified and removed by any tool that accesses them.
Try to remember the code you used for the first file to copy the second file, ukhousetransactions2.txt, from memory. If you’re new to Hadoop, you’ll get used to using the command line much quicker if you remember the basic commands.
Code Listing 11: Copying Text Files to the Hadoop Distributed File System (HDFS)
hadoop fs -put ukhousetransactions.txt /bigdata hadoop fs -put ukhousetransactions2.txt /bigdata |
We can now list the files we have copied with the following command.
Code Listing 12: Listing of copied files to HDFS
C:\hadoop\hadoop-2.9.2\datastore>hadoop fs -ls -R / |
Figure 20: Apache Hadoop is now running on Microsoft Windows |

Connecting to data sources within HDFS
Figure 21: HDFS connector for Power BI |

Now that we have Hadoop installed, we can revisit this by selecting the Hadoop File (HDFS) connection in Power BI and clicking Connect. The aim is to connect to HDFS without a Hive ODBC driver.
Figure 22: Connecting to HDFS from Power BI |

Figure 23: Connecting to HDFS from Power BI in Windows |

Figure 24: Security Access Options for HDFS on Power BI |

Figure 25: Loading files from HDFS into Power BI without Hive ODBC |

Figure 26: HDFS Data in the Power BI Environment |

Figure 27: Combining multiple files from HDFS in Power BI |

Figure 28: Removing duplicates from the house transactions files in Power BI |

Now we can create dashboards from the HDFS data; the integration is such that we can automatically convert numeric text to numeric values. This allows us to ask math-based questions using free text, a function seen previously in the online BI tool IBM Watson Analytics.

Figure 29: Creating a Dashboard from HDFS data in Microsoft Power BI
I started typing the question "How many England and Wales Aug" and before I could type the full sentence it automatically calculated 105k.This is a rounding up of the correct answer of 104590 as shown next. It automatically offered the option to select data for the other months.

Figure 30: Power BI calculating a math answer from a free text question
Everything we required to do this exercise runs in the same Windows environment. As good as this is, how would you recommend it to peers? HDInsight is only online for Linux, and HDP is archived or a VM, leaving manual Apache Hadoop or Syncfusion Big Data Platform.
Summary
Despite learning about the Linux dominance of Hadoop and questions surrounding the ability of Windows to run Hadoop, we were able to install Apache Hadoop 2.9.2 on Windows 8 quite easily. We did this with no changes to Windows, other than installing the required software. We then created a directory within HDFS to store files and accessed them with ease from Power BI.
This was an advantage over having to access Hadoop on Linux from an external Windows system running BI tools. Using the command prompt in Windows felt no different than using Hadoop in Linux. The memory management was good, and seldom went above 4GB of RAM; there was no deterioration of the system performance at any time. You can freely download Hadoop and a free version of Power BI, and you probably already have Windows. This is the strength of Hadoop for Windows: the lack of disruption. Everything else you need already runs on Windows. It's all already there, so it makes sense to invite Hadoop into Windows rather than move to Linux.
- 1800+ high-performance UI components.
- Includes popular controls such as Grid, Chart, Scheduler, and more.
- 24x5 unlimited support by developers.