
Gulp Succinctly®

CHAPTER 5
Gulp in Visual Studio
Introduction
Visual Studio 2015 has recently been released; it’s a great upgrade in a line of successful IDE’s over the years by Microsoft. It’s great to see that the team behind ASP.NET has also opted for Gulp as their task runner of choice.
Bundling and minification
In former versions of ASP.NET, we were introduced to the System.Web.Performance namespace, which helped out to minify and bundle CSS and JavaScript files. The benefit in doing this is making the size of the files smaller through minification. By bundling files together into one file, the number of concurrent files to be downloaded is also reduced. That is good news as browsers only allow a small amount of these at the same time. I always found this article to be a good introduction into this specific subject. Take some time to read it after you have finished this book.
ASP.NET 5
ASP.NET 5 is going to be the first version by Microsoft that will run cross-platform, meaning that your code will also be able to run on a Mac or on a Linux-based distribution. That’s a pretty big thing, and a complete shift with the past. At the moment of writing this book, ASP.NET 5 was still in beta, so perhaps some things might still change. Be sure to keep an eye on the release notes of ASP.NET 5 when it ships to see what’s inside the box and what isn’t, or how to make use of things. The rest of this chapter is based on how it works with ASP.NET 5 Beta 8.
Grunt
When the first beta templates shipped, they came with Grunt. Grunt is also a JavaScript-based task runner, just like Gulp. It’s older, however, and its use of plugins is a bit slower than Gulp’s. The main reason for this is that it doesn’t make use of the pipe stream like Gulp does. Instead, Grunt saves to disk after every plugin "step." Grunt is still very popular though, so you might encounter it with projects you are going to be assigned to.
The following code listing shows a possible Grunt file; it’s been taken from the documentation pages directly.
Code Listing 57: gruntfile.js - /gruntfile.js
module.exports = function (grunt) { grunt.initConfig({ pkg: grunt.file.readJSON('package.json'), concat: { options: { separator: ';' }, dist: { src: ['src/**/*.js'], dest: 'dist/<%= pkg.name %>.js' } }, uglify: { options: { banner: '/*! <%= pkg.name %> <%= grunt.template.today("dd-mm-yyyy") %> */\n' }, dist: { files: { 'dist/<%= pkg.name %>.min.js': ['<%= concat.dist.dest %>'] } } }, qunit: { files: ['test/**/*.html'] }, jshint: { files: ['Gruntfile.js', 'src/**/*.js', 'test/**/*.js'], options: { // options here to override JSHint defaults globals: { jQuery: true, console: true, module: true, document: true } } }, watch: { files: ['<%= jshint.files %>'], tasks: ['jshint', 'qunit'] } }); grunt.loadNpmTasks('grunt-contrib-uglify'); grunt.loadNpmTasks('grunt-contrib-jshint'); grunt.loadNpmTasks('grunt-contrib-qunit'); grunt.loadNpmTasks('grunt-contrib-watch'); grunt.loadNpmTasks('grunt-contrib-concat'); grunt.registerTask('test', ['jshint', 'qunit']); grunt.registerTask('default', ['jshint', 'qunit', 'concat', 'uglify']); }; |
As you can see, Grunt files might become large pretty quickly compared with Gulp files, due to all kinds of configuration settings.
Gulp
During the development of ASP.NET 5, the community asked Microsoft to replace Grunt with Gulp. This was for various reasons: it’s a faster, better, upcoming technology that is getting more followers every day, and has a healthy plugin ecosystem. Over the past years, Microsoft, and especially the team behind ASP.NET, has embraced an open source approach, and is actively listening to its user base.
Grunt code vs. Gulp code
Grunt is all about configuration over coding, while Gulp is all about configuration through code. This next example will show the same tasks to be run, but both written in their respective flavor.
Code Listing 58: gruntfile.js - /gruntfile.js
module.exports = function (grunt) { grunt.initConfig({ less: { development: { files: { "wwwroot/css/app.css": "Assets/*.less" } } }, autoprefixer: { options: { browsers: ['last 2 version'] }, single_file: { src: 'wwwroot/css/app.css', dest: 'wwwroot/css/single_file.css' }, } });
grunt.loadNpmTasks('grunt-contrib-less'); grunt.loadNpmTasks('grunt-autoprefixer'); grunt.registerTask('css:less', ['less', 'autoprefixer']); }; |
Code Listing 59: gulpfile.js - /gulpfile.js
var gulp = require('gulp'), less = require('gulp-less'), prefix = require('gulp-autoprefixer') gulp.task('css:less', function () { gulp.src('./Assets/*.less') .pipe(less()) .pipe(prefix({ browsers: ['last 2 versions'], cascade: true })) .pipe(gulp.dest('./wwwroot/css/')); }); |
You can see that Grunt files can become big pretty fast, and might need some considerable configuration steps. Gulp is fast, easy to write, and easy to understand with less syntax. On top of that, Gulp is seeing an increase in new plugins almost every day, making it a great tool to have on your belt.
Editors
The most-known editor from Microsoft is Visual Studio, currently branded Visual Studio 2015. There is a free community version available, and for heavy enterprise development and architectures, you might want to opt into using the full blown flagship version: Visual Studio 2015 Enterprise edition.
A little less known is the freely available Visual Studio Code edition. This is not just a trimmed-down version of Visual Studio 2015, but a separate editor. The best part is that there is a version for each of the three major OS platforms available: Windows, Mac OS X, and Linux.
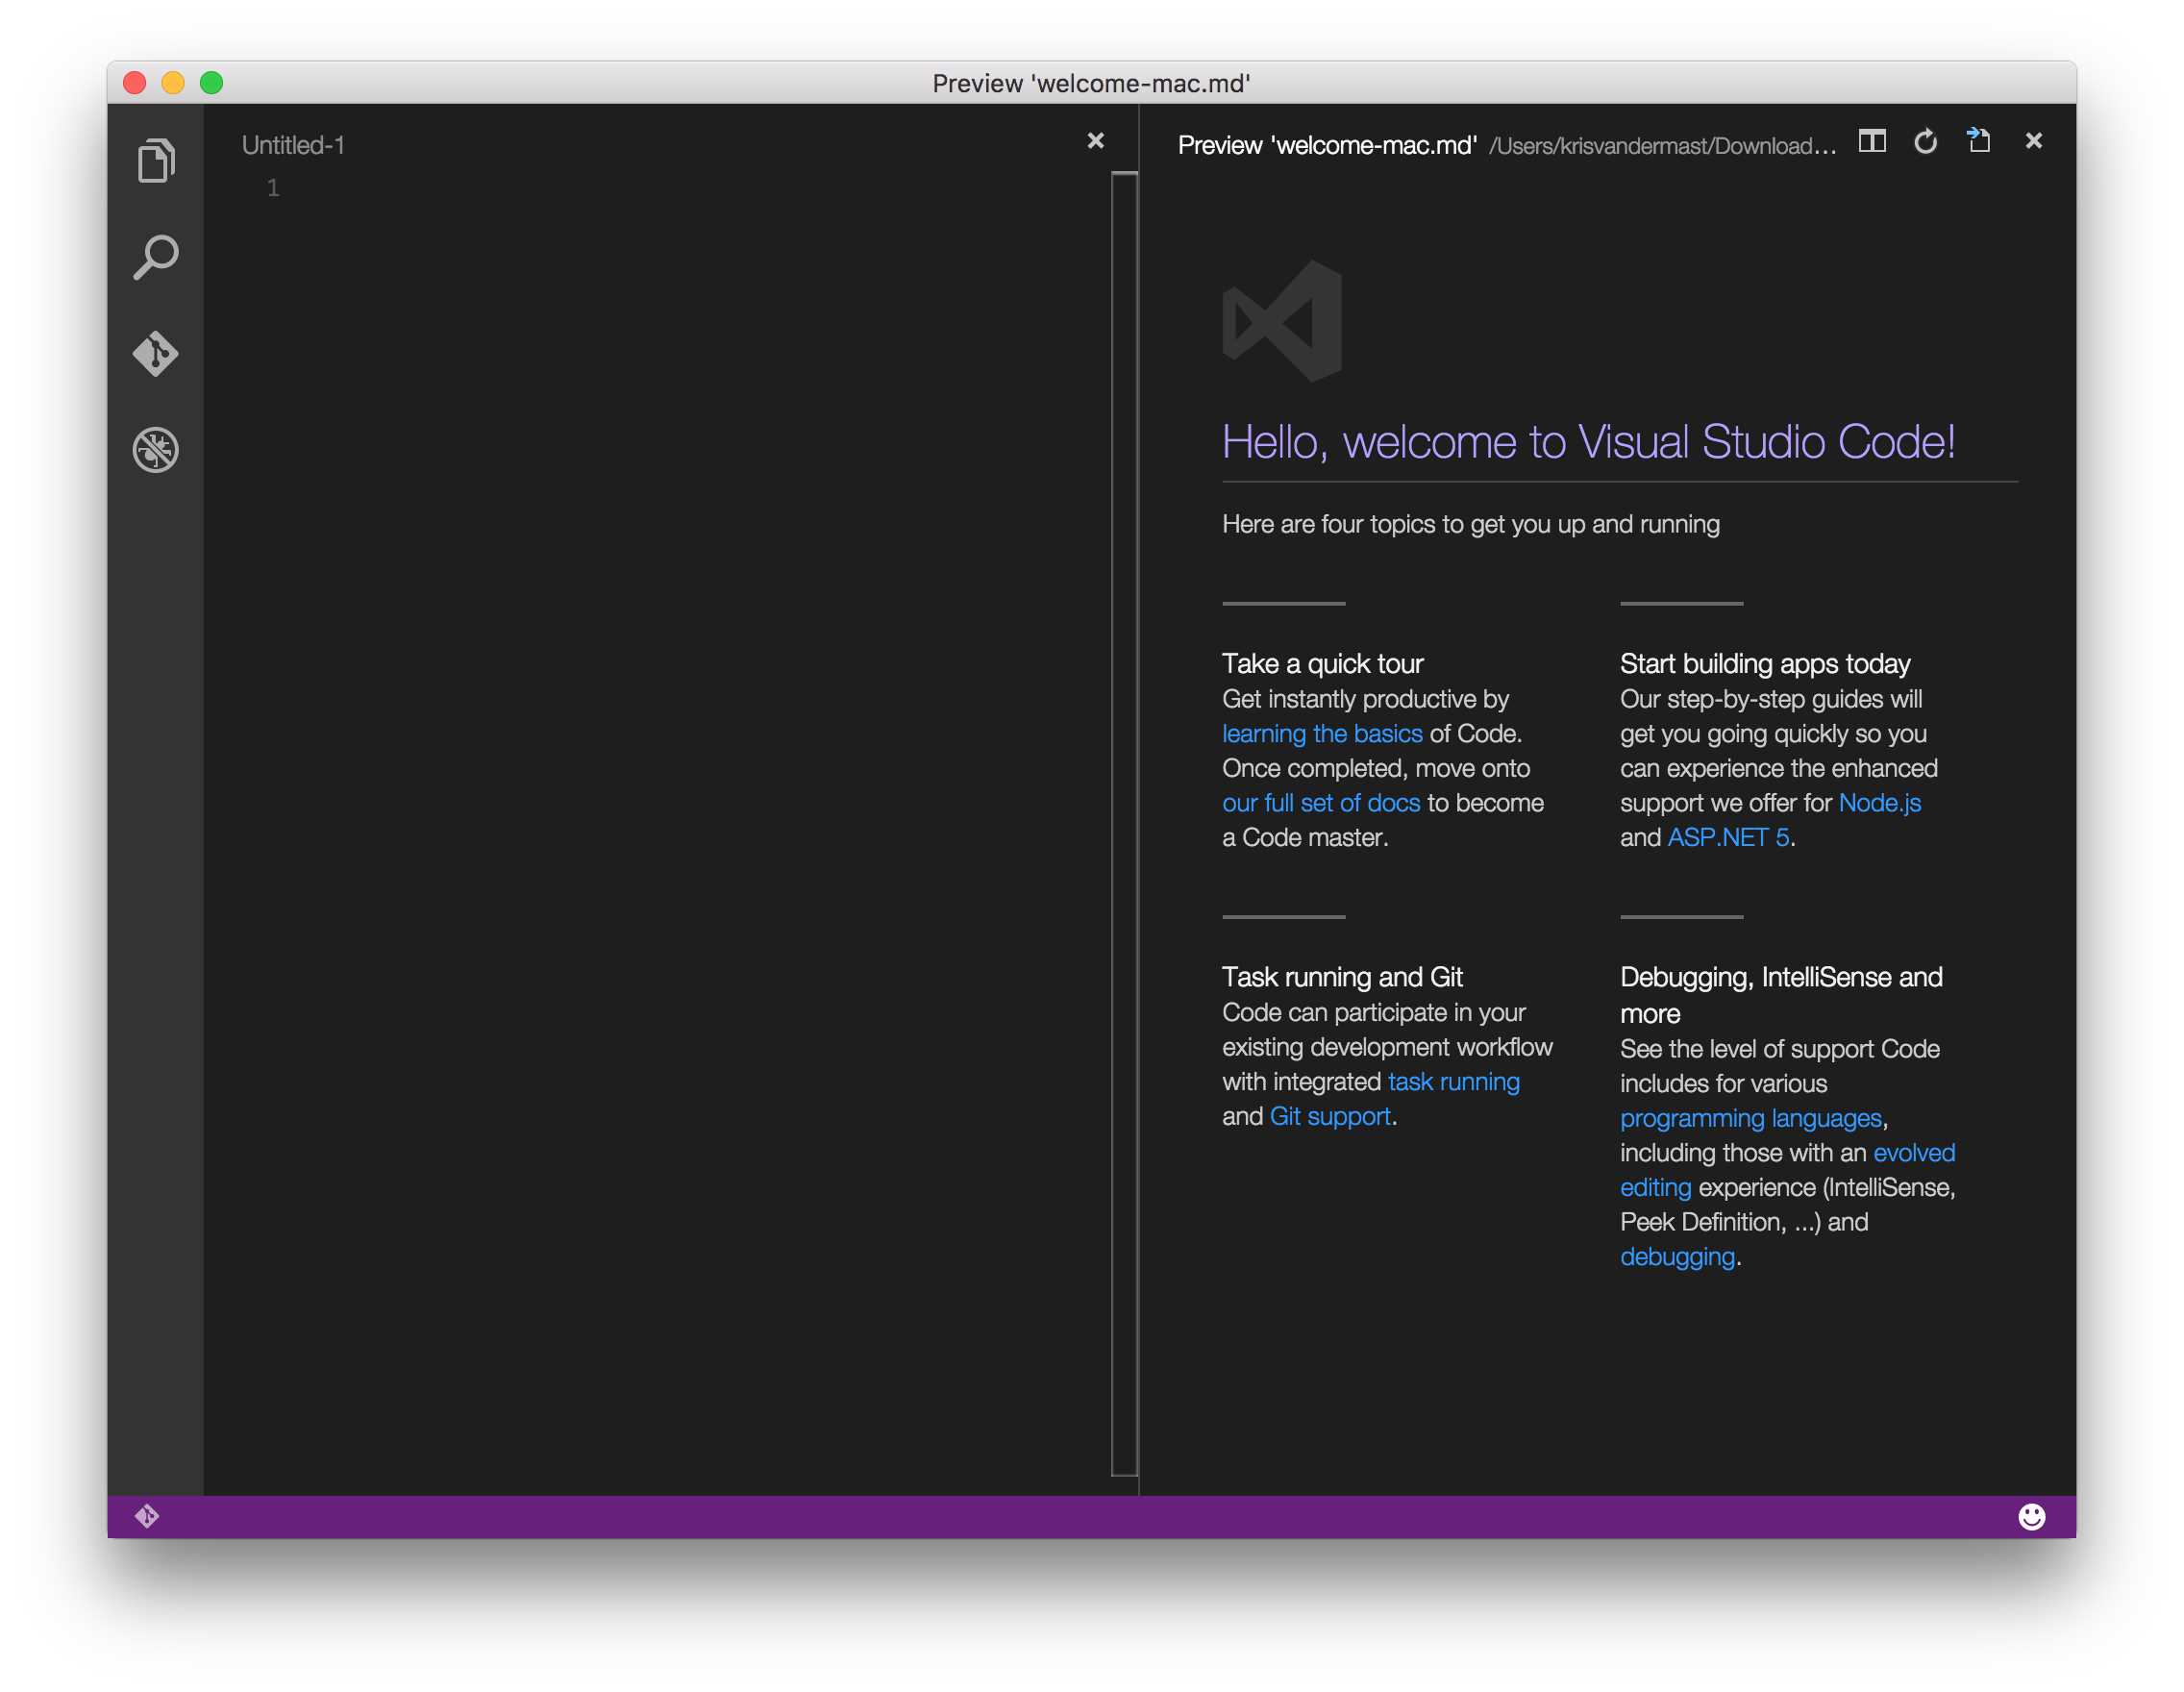
Figure 32: Visual Studio Code on Mac OS X
File New project
This time, we are moving to a machine that has Windows and Visual Studio 2015 installed. There are different flavors available, like the free community version up through the Enterprise edition.
After starting up Visual Studio 2015 (Figure 33), either make use of the menu and select File > New Project, or click New Project under Start on the first page you see after opening Visual Studio 2015.
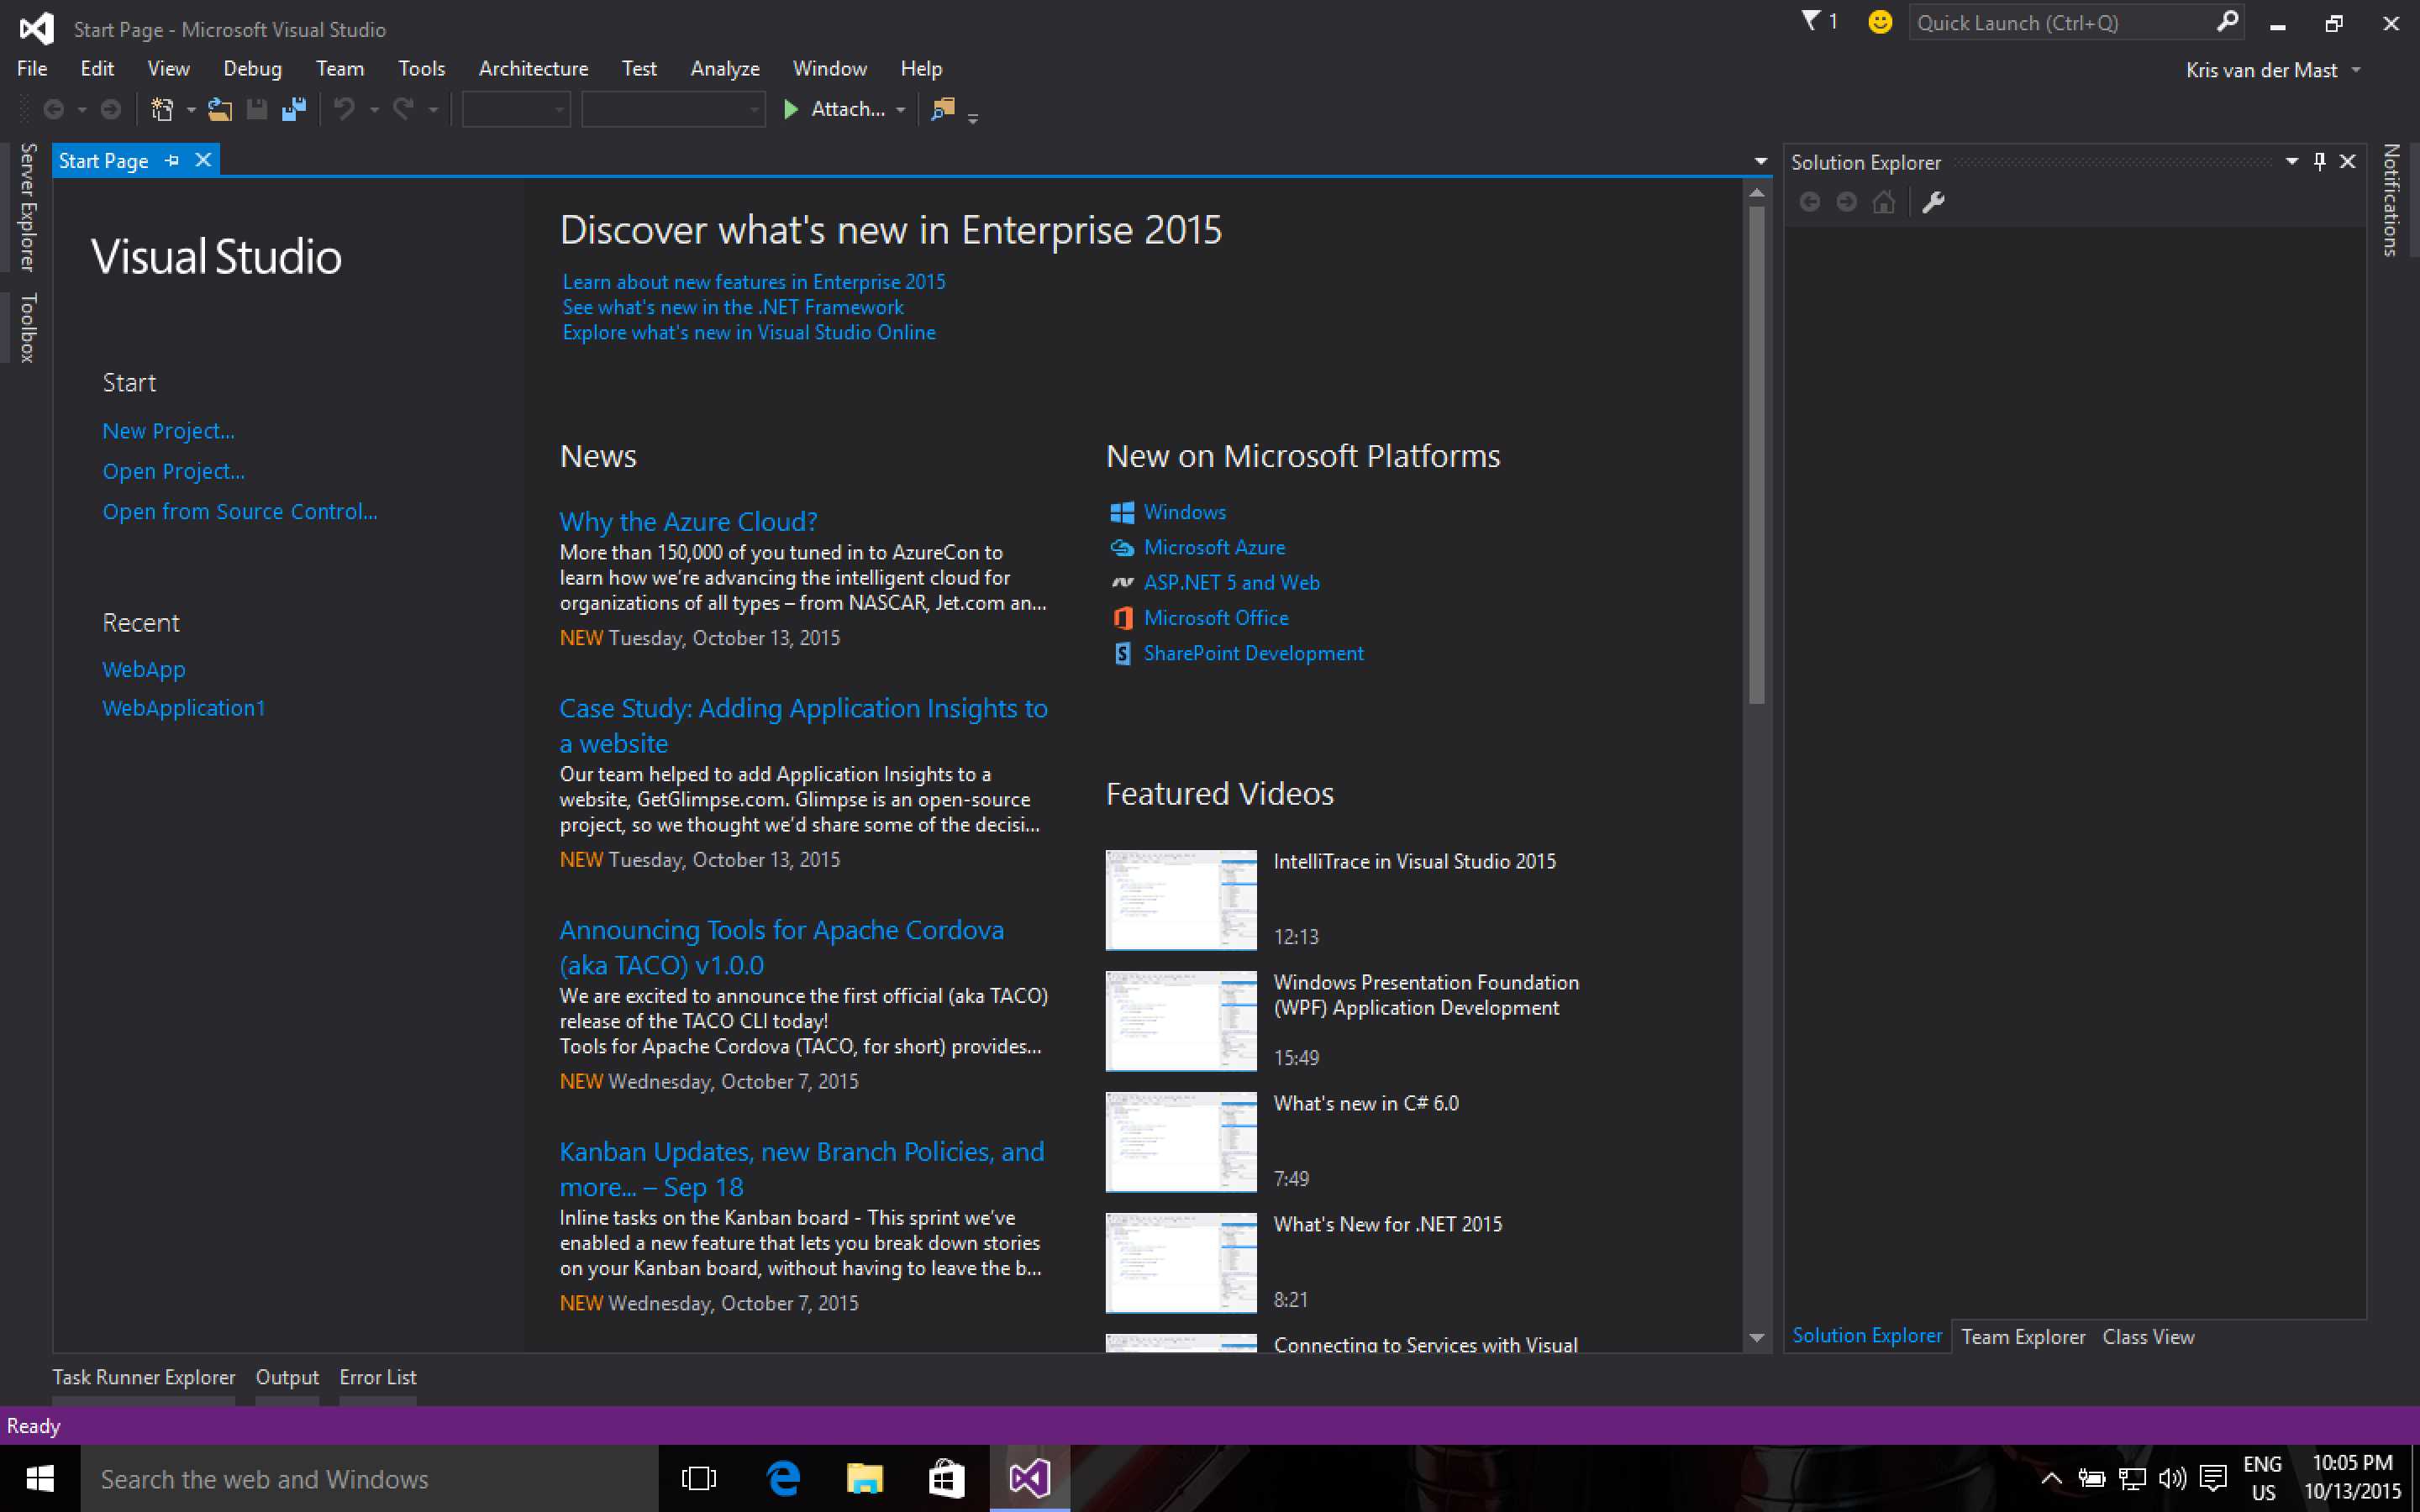
Figure 33: Visual Studio 2015 Start Screen
From the modal window that appears next (Figure 34), select ASP.NET Web Application. Give it a meaningful name and select a path on your machine. Make sure that the option Create directory for solution is checked.
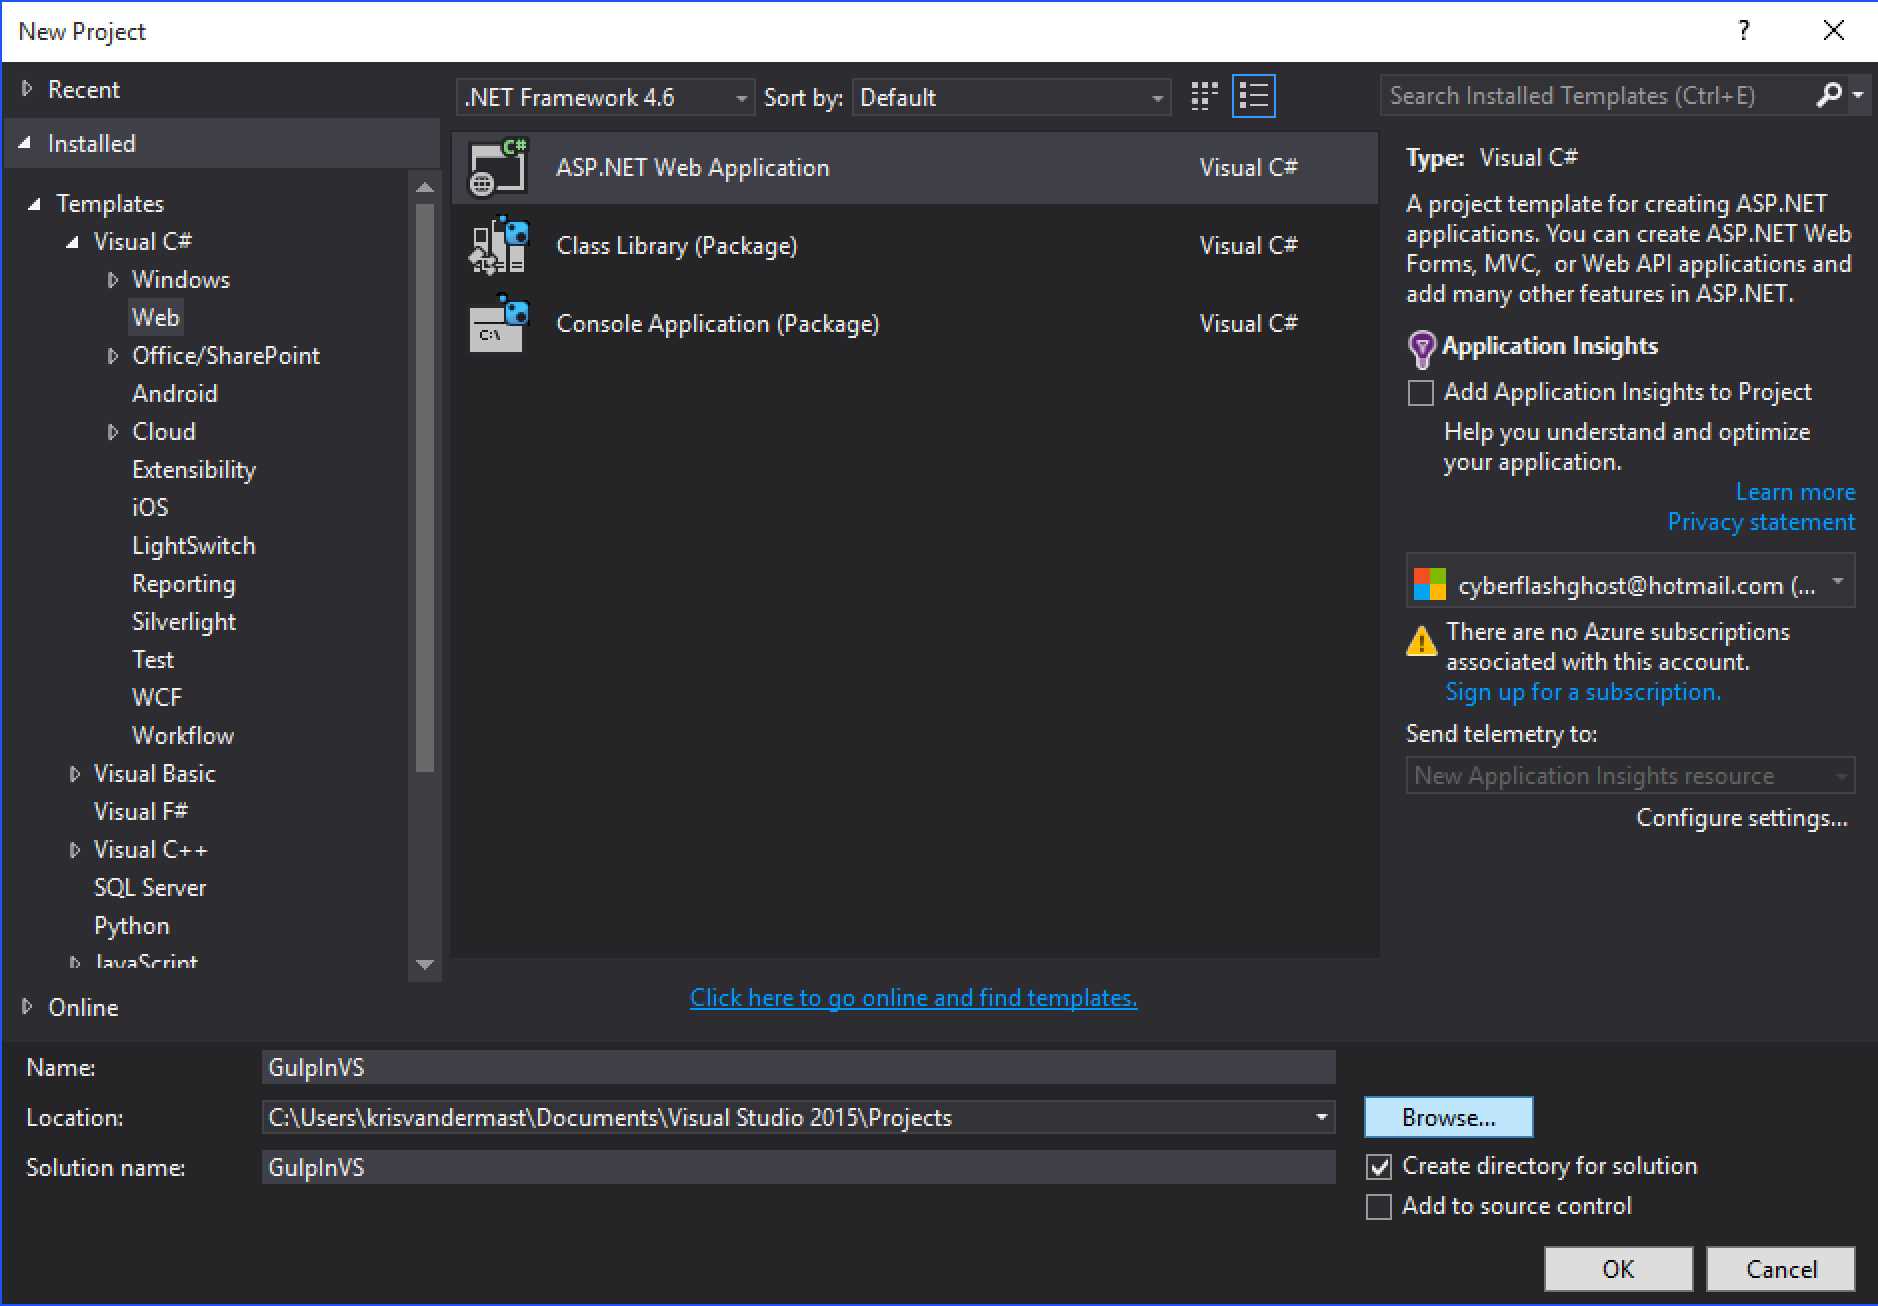
Figure 34: Select ASP.NET Web Application
After clicking the OK button, you will see a window like the one in Figure 35. Select from the ASP.NET 5 Preview Templates the third option, Web Application. Click OK.

Figure 35: Select an ASP.NET template to start from
Visual Studio 2015 will now create a new solution based on the chosen template. When you open the Solution Explorer in Visual Studio 2015, you will see something similar to the following:

Figure 36: The newly created solution
In the root of the project GulpInVS, you can see that the file gulpfile.js is also added to the solution. It already has some initial code set up for your convenience. We will see that next.
What’s already there out of the box
After creating a new ASP.NET 5 web application, there is already a gulpfile.js in the solution with the following content:
Code Listing 60: gulpfile.js content of a newly created ASP.NET 5 application - /gulpfile.js
/// <binding Clean='clean' /> var gulp = require("gulp"), rimraf = require("rimraf"), concat = require("gulp-concat"), cssmin = require("gulp-cssmin"), uglify = require("gulp-uglify"), project = require("./project.json"); var paths = { webroot: "./" + project.webroot + "/" }; paths.js = paths.webroot + "js/**/*.js"; paths.minJs = paths.webroot + "js/**/*.min.js"; paths.css = paths.webroot + "css/**/*.css"; paths.minCss = paths.webroot + "css/**/*.min.css"; paths.concatJsDest = paths.webroot + "js/site.min.js"; paths.concatCssDest = paths.webroot + "css/site.min.css"; gulp.task("clean:js", function (cb) { rimraf(paths.concatJsDest, cb); }); gulp.task("clean:css", function (cb) { rimraf(paths.concatCssDest, cb); }); gulp.task("clean", ["clean:js", "clean:css"]); gulp.task("min:js", function () { gulp.src([paths.js, "!" + paths.minJs], { base: "." }) .pipe(concat(paths.concatJsDest)) .pipe(uglify()) .pipe(gulp.dest(".")); }); gulp.task("min:css", function () { gulp.src([paths.css, "!" + paths.minCss]) .pipe(concat(paths.concatCssDest)) .pipe(cssmin()) .pipe(gulp.dest(".")); }); gulp.task("min", ["min:js", "min:css"]); |
A quick glance at the former Gulp file shows us that in the beginning, the definitions of Gulp and different plugins are being made (rimraf, concat, cssmin and uglify). We also see something peculiar:
project = require("./project.json");
Since node.js v0.5.2 was released, it’s become possible to load and cache .json files into a variable through require. This gives the benefit that configuration can be placed in another file. In this case, project.json.
The next thing in the Gulp file is a declaration of paths to make it easy to change throughout the rest of the Gulp file when needed at one convenient place. Note the project.webroot usage. webroot is parameter of the project.json file that we loaded in earlier.
The first three tasks we see are involved in cleaning out folders, one for CSS, and one for JavaScript. Note that both have a callback variable passed in, cb, to notify the calling task that their job has finished after they are run.
The next and last three tasks are all about concatenation and minification of JavaScript and CSS files. Note that it does not make use of globbing, but specifically handles one file. In particular, site.js and site.css.
project.webroot comes from the project.json file, which got loaded via the require statement. In that file, the definition is as follows: "webroot": "wwwroot". This is a new subfolder in ASP.NET 5 where all static items are put that need to be publicly available when published to a server or to the cloud. This particular setting holds a bit of significance, as it is also displayed in another window. You can see it by right-clicking the web project in the Solution Explorer and selecting Properties. That will open the window shown in Figure 37:

figure 37: The Web root parameter
Strangely enough, one can not change it in this screen, but only alter it in the project.json file.
Working with Gulp in ASP.NET 5 and Visual Studio 2015
Visual Studio has been known for years to be a great IDE. One of the reasons is the word “visual” in Visual Studio: developers can make use of menus or dedicated windows or panes to accomplish a task. Up until now in this book, we have run Gulp from a console window. That does not really correspond with the way that developers are used to from working in Visual Studio.
For Gulp, there is a dedicated pane in Visual Studio, which can be reached in several ways:
- Through the menu: First select the gulpfile.js file in the Solution Explorer and then go to Tools > Task Runner Explorer.
- Right-click on the gulpfile.js in the Solution Explorer, and from the context menu, select Task Runner Explorer.
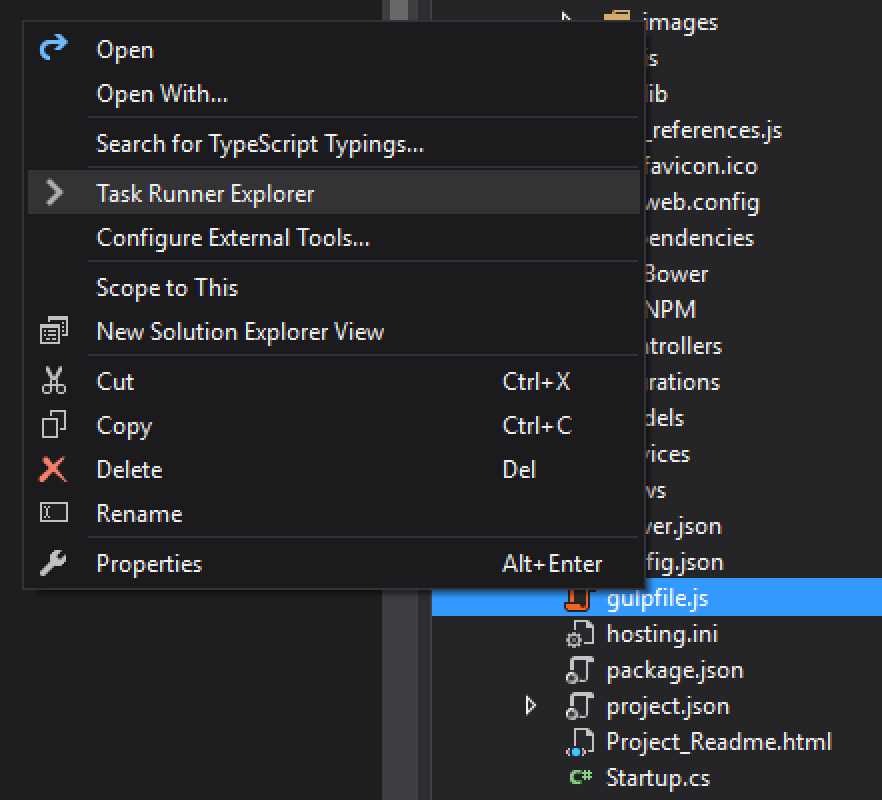
Figure 38: Open Task Runner Explorer
Once either of these methods have been used to open the Task Runner Explorer, we can see that there is already a binding for the Clean action:
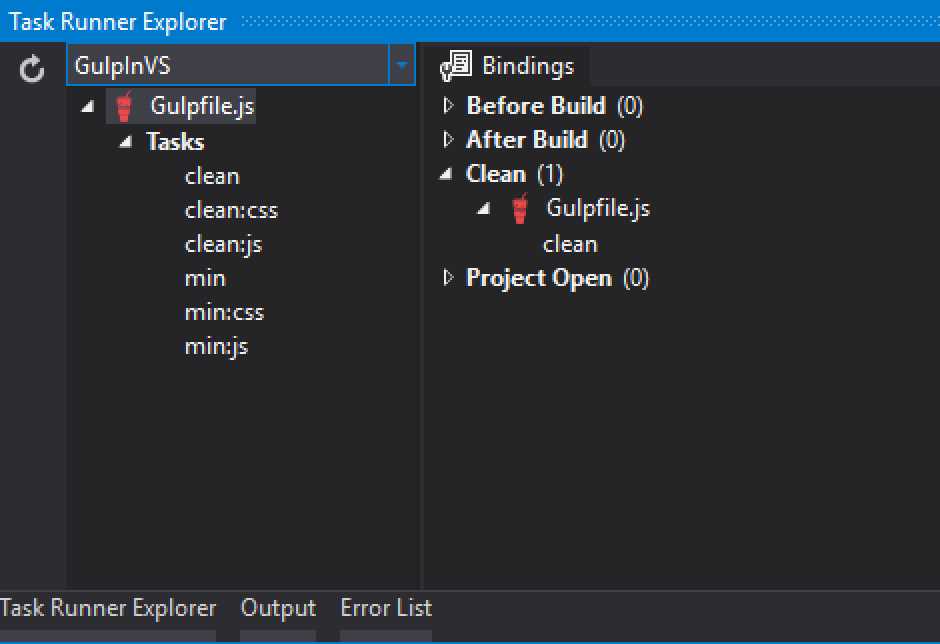
Figure 39: Task Runner Explorer
On the left side, we get to see the Gulpfile.js with the Gulp icon and underneath, the different, six tasks we saw in Code Listing 59. On the right side, we get to see some bindings. This is somewhat different than what we are used to so far, and is typical in Visual Studio.
The only binding we see now is the Clean binding, which, once executed, will run the Gulp clean task. To achieve this, make use of the menu and select Build > Clean Solution.
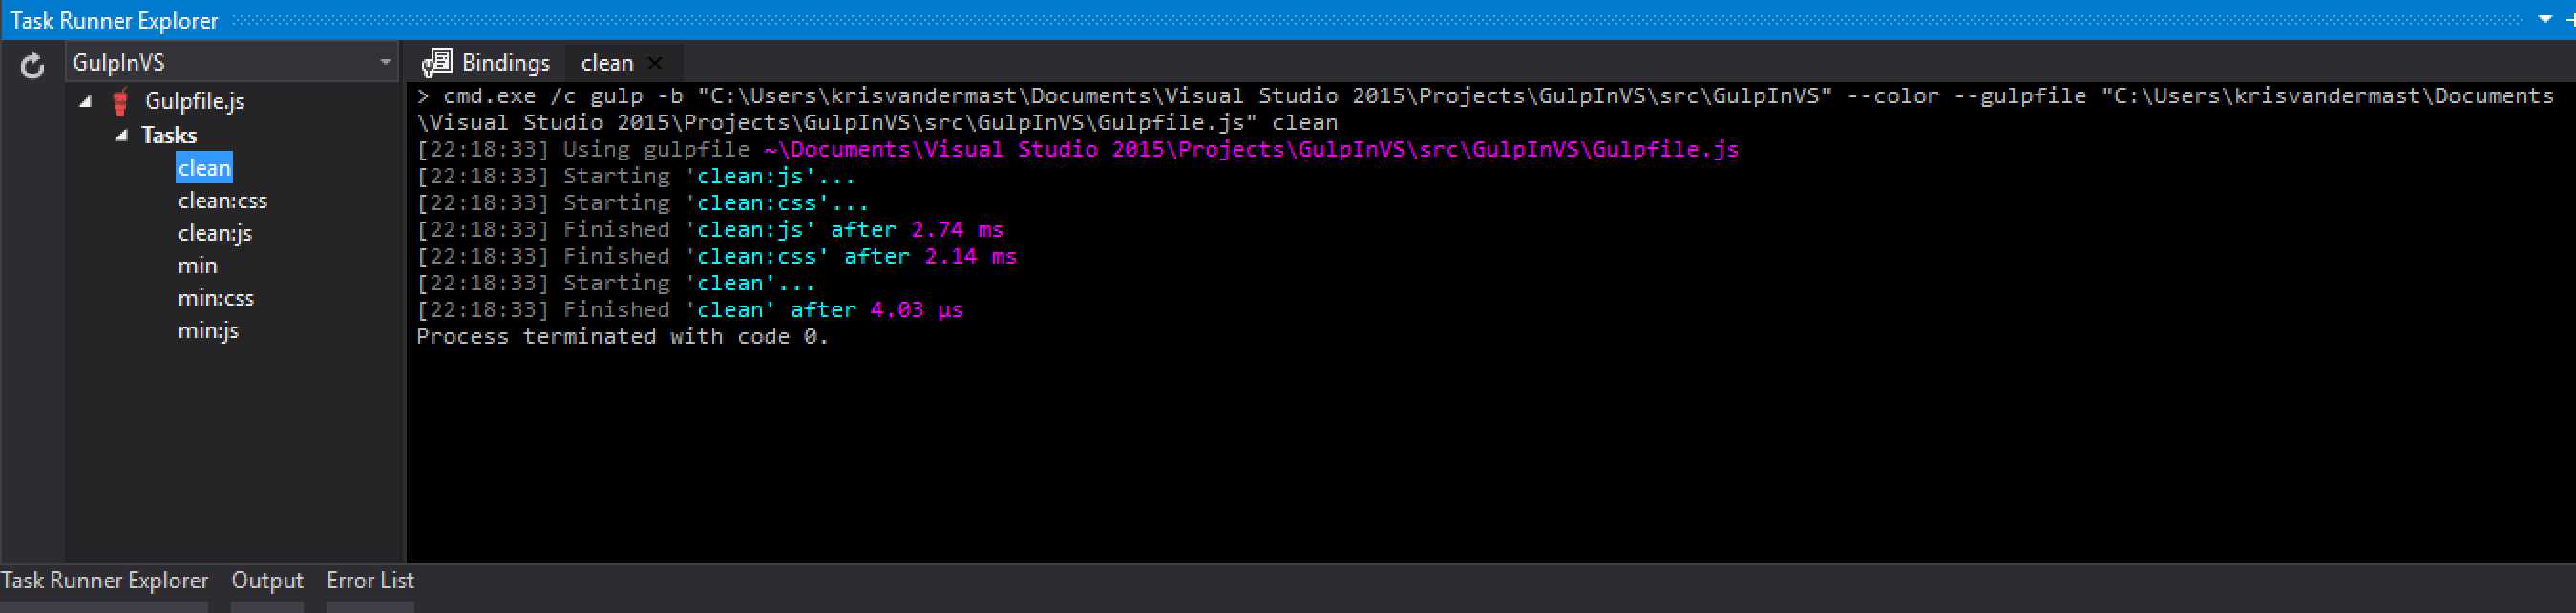
Figure 40: The Gulp clean task has run.
An alternative way to run the same task would be to right-click on the task in the left pane and select Run.
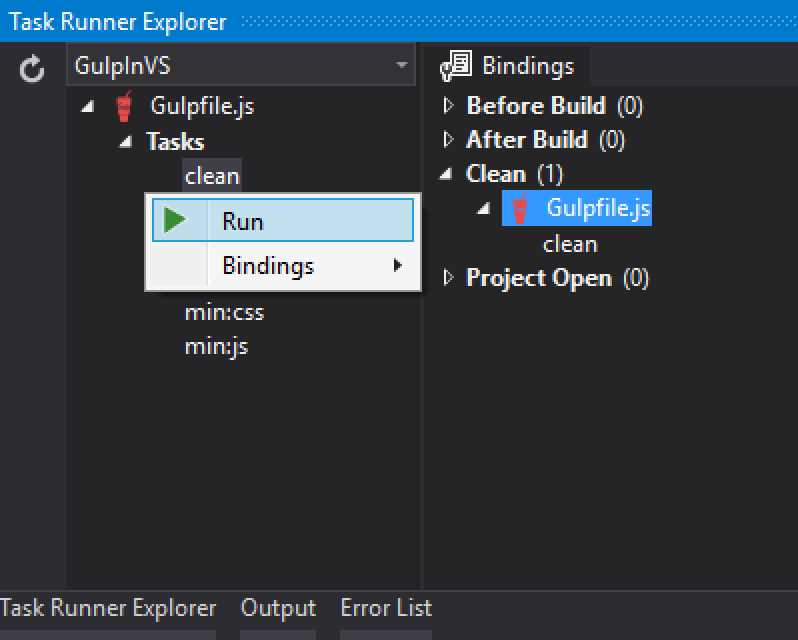
Figure 41: Running the Gulp clean task directly
When you take a look again at Code Listing 60, you will see the following line at the top of the file:
/// <binding Clean='clean' />
That looks familiar, and yes, this line makes up for the tooling being able to bind tasks to a binding in Visual Studio’s Task Runner Explorer. In this specific case, it binds the Gulp clean task to the Clean binding. You can easily test this by taking out the line in the gulpfile.js file, saving it, and opening the Task Runner Explorer again. The binding will have disappeared. By putting it back in in the gulpfile.js file and saving it, the binding will be restored.
You can add new bindings by changing the gulpfile.js file or by right clicking a Gulp task in the Task Runner Explorer and from the context menu choosing Bindings > and selecting one of the following four possibilities:
Table 1: Bindings in Visual Studio’s Task Runner Explorer
Bindings | |
|---|---|
Before Build | Runs a Gulp task before the build process has started |
After Build | Runs a Gulp task after the build process has finished |
Clean | Runs a Gulp task when a Clean Solution has been performed |
Project Open | Runs a Gulp task when the project is opened by Visual Studio |

Figure 42: Adding a binding to a Gulp task in Task Runner Explorer
Watching changes with Gulp in Visual Studio
What we saw in the former paragraph can be used to answer a question I got during the Web European Conference 2015 while presenting about Gulp: How do you watch files and run tasks when they change while using Visual Studio?
The answer can be seen by following some simple steps. We will be using gulp-sass to translate Sass files into corresponding CSS files. For that, create two Sass files underneath wwwroot/css/.
Code Listing 61: AnotherOne.scss
@mixin border-radius($radius) { -webkit-border-radius: $radius; -moz-border-radius: $radius; -ms-border-radius: $radius; border-radius: $radius; } .box { @include border-radius(10px); } |
Code Listing 62: Styles.scss
@import "AnotherOne.scss"; a.CoolLink { color: greenyellow; &:hover { text-decoration: underline; } &:visited { color: green; } } |
Code Listing 63: gulpfile.js
/// <binding Clean='clean' ProjectOpened='watch' /> var gulp = require("gulp"), sass = require('gulp-sass'), project = require("./project.json"); var paths = { webroot: "./" + project.webroot + "/" }; paths.js = paths.webroot + "js/**/*.js"; paths.sass = paths.webroot + "css/**/*.scss"; paths.sassToCss = paths.webroot + "css"; gulp.task("css:sass", function () { gulp.src(paths.sass) .pipe(sass()) .pipe(gulp.dest(paths.sassToCss)); }); gulp.task('watch', function () { gulp.watch(paths.sass, ['css:sass']); }); |
The gulpfile.js file is pretty much trimmed down to show the means to accomplish the task. The needed require statements are made and the paths set up. Two tasks are created: one css:sass to do the heavy lifting of translating the .scss files into .css files, and the watch task. This one will run the css:sass task whenever it sees a change in one of the .scss files under the wwwroot/css folder.
This is not something new, as we already discussed a similar approach in Chapter 3. The new part is the way that Visual Studio reacts. At the top of the gulpfile.js file, you can see the following line:
/// <binding Clean='clean' ProjectOpened='watch' />
That first part is familiar, as we saw it in the former example. With the tooling discussed before, the watch task has been coupled to the Project Open binding in the Task Runner Explorer, as shown in Figure 43.
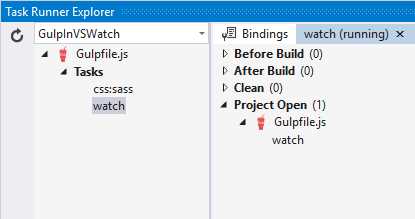
Figure 43: Gulp task watch coupled to Project Open binding
You can now either start the watch task manually or close Visual Studio. Open Visual Studio again and reopen the project. Directly after opening the project, take a look at the Task Runner Explorer. You will see that the watch task has run. Now, whenever you change an .scss file under the wwwroot/css folder, the css:sass task will be run when you save the changed file. Figure 44 shows the output of that in the Task Runner Explorer pane.
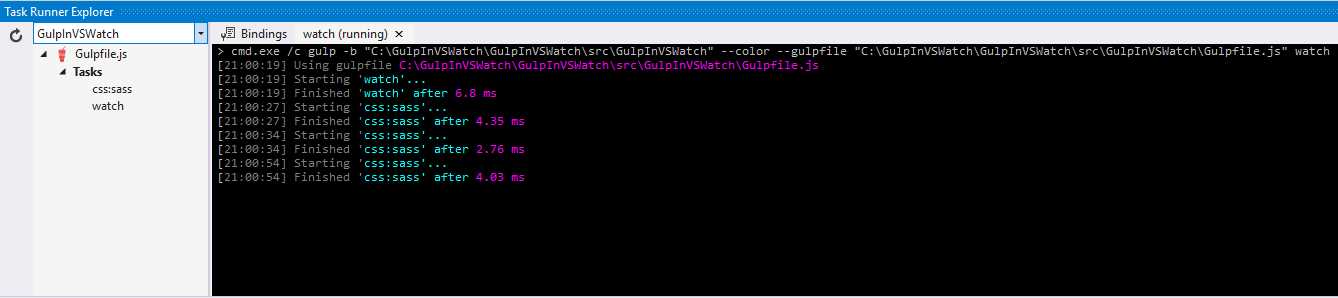
Figure 44: Watch task has run on opening the project, and after each save of an .scss file when it was changed.
Now now we have achieved the same as when we were using the simple console window, like in Chapter 3. This makes our development efforts in Visual Studio even more pleasant to code in.
The outcome to the Styles.css after some changes may look like the following listing:
Code Listing 64: Styles.css
.box { -webkit-border-radius: 10px; -moz-border-radius: 10px; -ms-border-radius: 10px; border-radius: 10px; } a.CoolLink { color: lawngreen; } a.CoolLink:hover { text-decoration: underline; } a.CoolLink:visited { color: green; } |
Upgrade version scripts and CSS with Gulp
Up until now, we have mainly seen how to make use of Gulp to bundle, minify, and translate scripts and CSS. Those are great features, and it takes away a lot of manual work from developers. We included the outcome of these directly into our HTML files and sent them to the browser to perform their job.
While developing, you actually will write code. Code that you might build, bundle, or minify continuously during that process of crafting the next great application. Making these updates will result in new files in the end, which we will want to include in our pages. Browsers, however, try to cache as much of the static content as possible. That’s what is wanted during the production cycle of your application, as you will see way fewer requests hitting your server, and as such, saving resources on it. During development or an upgrade of your deployed application on production, you will likely want to inform the browsers that they need to ignore the cached version they have and fetch the latest version.
There are several techniques, and the most common ones are to either put a version number inside the name of the file, or to add a unique querystring behind it to make it unique as a whole.
Because this is requested quite often, there are different Gulp plugins available that try to solve this common problem.
With the help of the plugin gulp-inject, we can accomplish our task. In the ASP.NET MVC application we made use of earlier (or a new one), we can adjust the _Layout.cshtml file by putting the following in the <head> section of that Razor page.
Code Listing 65: _Layout.cshtml head part
<head> <meta charset="utf-8" /> <meta name="viewport" content="width=device-width, initial-scale=1.0" /> <title>@ViewData["Title"] - GulpInVSWatch</title> <!-- inject:css --> <!-- endinject --> </head> |
In order to have it to work, we need to make up our gulpfile.js file like the following code snippet:
Code Listing 66: gulpfile.js for gulp-inject
var gulp = require("gulp"), inject = require('gulp-inject'); gulp.task("inject", function () { var target = gulp.src('./Views/Shared/_layout.cshtml'); var sources = gulp.src('./wwwroot/css/**/*.css'); return target .pipe(inject(sources)) .pipe(gulp.dest('./Views/Shared/')); }); |
This small piece of Gulp code does its magic in the inject task. It grabs the target file, in our case _Layout.cshtml. In this case, the sources will be all the .css files we can find in the subfolder wwwroot/css, and will get placed between the specially made up comment lines in the head section of the _Layout.cshtml file.
The next lines take the target file, inject the sources and write out the altered _Layout.cshtml file back to its original place under Views/Shared/.
The result of this operation can be seen in the following code listing. In the sample solution, I had three different .css files, which got all injected:
Code Listing 67: Result after injecting three .css files with gulp-inject
<head> <meta charset="utf-8" /> <meta name="viewport" content="width=device-width, initial-scale=1.0" /> <title>@ViewData["Title"] - GulpInVSWatch</title> <!-- inject:css --> <link rel="stylesheet" href="/wwwroot/css/AnotherOne.css"> <link rel="stylesheet" href="/wwwroot/css/site.css"> <link rel="stylesheet" href="/wwwroot/css/Styles.css"> <!-- endinject --> </head> |
This is working out nicely, but it’s not the full experience we were hoping for. Remember the versioning condition we talked about earlier in the paragraph? Well, it’s time to tackle that one as well. Luckily, there is no need for another Gulp plugin. The gulp-inject plugin has quite a few options that we can make use of and manipulate what is being injected.
From within a DOS box of the terminal window, we would now perform a npm install gulp-inject --save-dev command to get the package from npm so we can make use of it. In Visual Studio, it’s a bit different.
Open the package.json file and edit it. The great thing about Visual Studio is that it provides IntelliSense, also when editing the package.json file. In the devDependencies part, add a new line for gulp-inject. In the Solution Explorer, right-click on the npm node and select Restore packages.
Open the package.json file, as shown in Figure 45. You can add an extra line for gulp-inject and get IntelliSense for both the package name and the version. Now that is handy, no?

Figure 45: IntelliSense while editing package.json
It could well be that you already got an update of Visual Studio that loads the npm package automatically. If you didn’t, then you can take the next, easy step as shown in Figure 46:
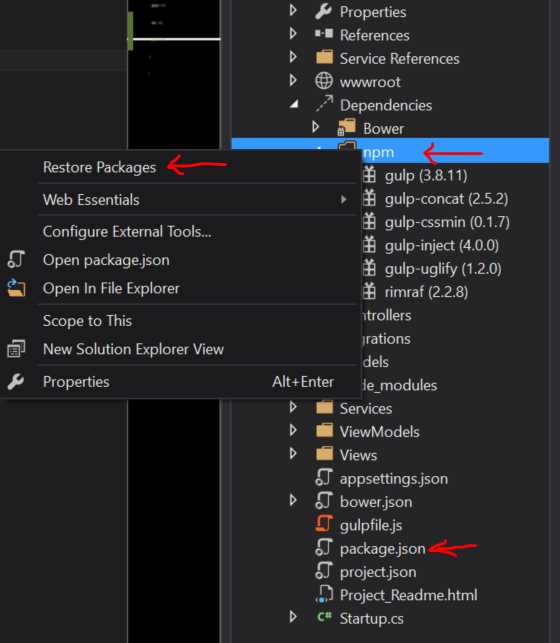
Figure 46: Restoring packages in Visual Studio
Change the gulpfile.js file accordingly to:
Code Listing 68: gulpfile.js to transform the injected files and add a querystring
var gulp = require("gulp"), inject = require('gulp-inject'); gulp.task("inject", function () { var target = gulp.src('./Views/Shared/_layout.cshtml'); var sources = gulp.src('./wwwroot/css/**/*.css'); var ticks = new Date().getTime(); return target .pipe(inject(sources, { transform: function (filepath) { arguments[0] = filepath + '?v=' + ticks; return inject.transform.apply(inject.transform, arguments); } })) .pipe(gulp.dest('./Views/Shared/')); }); |
Here we added an extra option to transform the filepath. It’s getting suffixed with ?v= and the number of ticks that we have filled up before the transformation with the amount of ticks of the current date. After this injection, the end result will look a bit different than before:
Code Listing 69: Result after injecting three .css files with gulp-inject and with added querystring
<head> <meta charset="utf-8" /> <meta name="viewport" content="width=device-width, initial-scale=1.0" /> <title>@ViewData["Title"] - GulpInVSWatch</title> <!-- inject:css --> <link rel="stylesheet" href="/wwwroot/css/AnotherOne.css?v=1448220822909"> <link rel="stylesheet" href="/wwwroot/css/site.css?v=1448220822909"> <link rel="stylesheet" href="/wwwroot/css/Styles.css?v=1448220822909"> <!-- endinject --> </head> |
This results in what we wanted from the beginning. Thanks to the transform option of the gulp-inject plugin, it becomes quite easy to manipulate the outcome of the injected filenames. Now couple this with the After Build binding in Visual Studio’s Task Runner Explorer, and you have a solid developer experience.
Summary
This chapter gave a good overview of the possibilities in working with Gulp in Visual Studio, the new Task Runner Explorer, and the way your Gulp tasks can be coupled to bindings to perform the heavy manual tasks you encounter while developing. We have also seen two dedicated solutions of common problems developers have while working with Visual Studio. These solutions were inspired by the questions I got after my presentation about Gulp at Web European Conference 2015 in Milan.
- 1800+ high-performance UI components.
- Includes popular controls such as Grid, Chart, Scheduler, and more.
- 24x5 unlimited support by developers.