
Google Maps API Succinctly®

CHAPTER 2
Getting Started
API keys
Before you can embed a Google map in your page, you need to request an API key. An API key is just a string of characters you need to embed in your code to use Google Maps in your own webpages. This enables Google to keep an eye on how many map requests you are serving and, if your application becomes super popular, to start charging you for access.
Google has a couple of different pricing plans, but you'll want to start off on their Standard plan, which is free until you incur over 25,000 map loads over a period of 24 hours. You are also limited as to the number of free requests for services such as Directions and Geocoding, which we’ll talk about later in this book. After that, you'll need to start paying Google for the privilege.
Rest assured that 25,000 map loads and 2,500 service requests is very generous, and you're unlikely to hit that quota until your app becomes quite popular (and is probably earning you money). If you're just following along with the examples in this book, those limits are not going to be a problem for you.
After that, you can either "pay as you go" or join their Premium plan, which enables you to purchase credits in advance and unlocks other benefits, such as support, a service-level agreement, and so on. You can find out more about their pricing options here.
Getting an API key
To get an API key, you must first have a Google account. Then:
- Visit http://console.developers.google.com.
- Sign in with your Google account user name and password.
- In the dashboard, under the list of APIs (there are loads), locate the library page on the left-hand side.

Figure 2: The Developer Console.
- Locate the Maps section of the page and click Google Maps JavaScript API. Or use the search dialog.
- When the summary page for the API displays, click Enable.

Figure 3: The Google Maps JavaScript API summary page.
- A dialog box appears, asking you to select a project. You don't have one yet, so go ahead and click the blue button to create one. I'm going to call mine gmaps-succinctly. After you have created the project, the summary page appears again. But this time, the name of the project that you created in the preceding step is shown at the top of the page.
- Click the blue Enable button again. You are redirected to the dashboard page, where you will be able to view usage information once your app is out there. Right now, you're probably being prompted to create credentials. If so, click Create Credentials.
- In the Credentials wizard, ensure that the Google Maps JavaScript API is selected in the drop-down list under the Which API are you using? header, and then click Which Credentials Do I Need?.
- The Credentials Wizard presents you with an API key—a string of alphanumeric characters (such as “AIzaTyD-2vJ3p_IpqyWPYmXtkFZwbI0juvKhBg4”) that you must embed in your code to use the API. Make a note of it somewhere, because you'll need it to follow along with the code examples in this book. Note the warning about restricting your key before using it in production. We won't do that in this book, but it is certainly something to keep in mind.

Figure 4: Your API key.
- Once you have made a note of your API key, click Done. If you ever lose the key, you can find it in the Credentials area of the Developer Console.
Creating your first map
Now that you have your API key, you are ready to build your first Google Maps JavaScript API application. Your application will be hosted in a webpage that contains the following elements:
- A <script> tag that loads the API itself using your API key.
- A <div> that acts as a placeholder for the map.
- Another <script> tag that contains some JavaScript code that you write yourself. This executes when the page loads to create the map and sets some initial options for its display.
- Some CSS to make sure all this stuff appears correctly.
Creating the webpage
Create a new HTML page with the code in Code Listing 1 and save it as Ch2_FirstMap.html in a directory that's associated with your web server (such as C:\inetpub\wwwroot\Gmaps on a Windows machine). This is “boilerplate” code that you will use as a starting point for many of the examples in this book, so you might want to create a copy of it somewhere.
Code Listing 1: Initial page HTML
<!DOCTYPE html> <html> <head> <title>Ch2 First Map</title> <meta name="viewport" content="initial-scale=1.0"> <meta charset="utf-8"> <style> #map { height: 100%; } html, body { height: 100%; margin: 0; padding: 0; } </style> </head> <body> <div id="map"></div> <script> // The code to create the map goes here. </script> <!-- Reference the API --> <script src="https://maps.googleapis.com/maps/api/js?key= YOUR API KEY&callback=initMap" async defer></script> </body> </html> |
Most of this is standard webpage stuff, so we'll just cover the interesting bits.
The first thing to note is the <div> with an id of map. When we create a map, the API needs to know where in the page to put it, and that location needs to be a <div> element.
The first <script> block is where we will write the JavaScript that will interact with the Google Maps API to create the map. We haven't written this code yet.
The second <script> block contains the bootstrap URL, which downloads the Google Maps API code to the browser. For this to work, you need to replace YOUR API KEY with your API key (including the square brackets).
To wire everything up, we use the callback query parameter within the Google Maps API bootstrap URL to specify the name of our JavaScript function that we want to execute when the API has loaded (we haven't written this yet, but we'll call it initMap()). We also add a couple of attributes to our <script> tag that specify how the API should be loaded.
The async attribute tells the browser to load the script behind the scenes (asynchronously), while the page itself is loading. This means that two things happen at once, resulting in better performance for our users. When the script has loaded, it is executed immediately.
The defer attribute is similar, but is put there as a safeguard for older browsers that might not recognize async. If async is not supported, then defer doesn’t execute the script until the page is loaded.
The point of doing all this is to allow the Maps API code to run the map initialization code as soon as it can, resulting in a better experience for your users.
Finally, we have a <style> tag where we provide a height for the map <div>, which in this case is 100 percent of the page height, thereby occupying the entire page.
Tip: If your map does not display and there are no errors on your page, ensure that you have specified a height for the <div> element that hosts the map. If you don't specify a height, the map will not appear.
Let's make sure the page is coded correctly by adding the initMap() function to the script block in which we'll be writing our Google Maps API code. Add the code in Code Listing 2 within the first <script> block.
Code Listing 2: Testing the callback function
<body> <div id="map"></div> <script> // The code to create the map goes here. function initMap() { alert("I'm ready to make a map!"); } </script> <!-- Reference the API --> <script src="https://maps.googleapis.com/maps/api/js?key= [YOUR API KEY]&callback=initMap" async defer></script> </body> |
Make sure that your web server is running, and then open the page in your browser. If everything is working correctly, the initMap() function should execute when the API has finished downloading, and you should see the message in Figure 5.
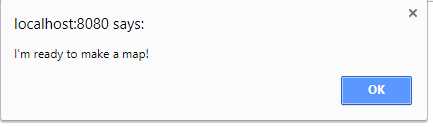
Figure 5: The initMap() function is working correctly.
Note: Most of the samples shown in this book will work just by opening the webpage itself, without hosting it on a web server. However, it is good practice to do so. If you don't yet have a web server, consider installing XAMPP, which includes the popular Apache web server. See this link to install XAMPP.
Writing the map initialization function
Now that we have access to the API and a function on our page that will be called when the API has loaded, it's time to create the map.
To create a map, we need to instantiate a new object of the google.maps.Map class, telling it where on our page it should appear, and providing it with some options that tell it how to display. We accomplish both of those tasks by passing parameters to the google.maps.Map constructor.
Let's have a look at the code in Code Listing 3 first, and then we'll talk about what it's doing.
Code Listing 3: Instantiating the google.maps.Map class
<div id="map"></div> <script> // The code to create the map goes here. function initMap() { var map; map = new google.maps.Map(document.getElementById('map'), { center: { lat: 51.503, lng: -0.135 }, zoom: 12 }); } </script> |
The first thing we did is declare a variable called map to store a reference to the new google.maps.Map object. We then created the google.maps.Map object, passing in two parameters.
The first parameter uses plain JavaScript to access the DOM element on our page named map, which is the <div> where we want the map to display.
The second is a map options object literal that contains the center and zoom properties for the map. There are many different properties that you can use to modify the way the map looks and works, and we'll consider many of them in this book. For our first map, however, we are only interested in two of those properties. The first is center, which is the geographic coordinate at the center of the map area that we want to show our users. The second is zoom, which represents the map scale at discrete intervals.
The center property's value is itself an object that has two properties, lat and lng, that represent the latitude and longitude of the map's center point, respectively. The zoom property accepts an integer value that can be between zero (for "zoomed all the way out") and a maximum value that depends on what imagery is available for the geographic area you are showing, and which represents "zoomed all the way in." Most roadmap imagery is between 0 and 18, for example, but the availability of satellite imagery varies widely. In this example, the zoom property is set to 12.
If you open the page in your browser, you'll see a map that occupies the entire page (as specified in the <style> attribute) and is focused on London, in the United Kingdom, as shown in Figure 6.

Figure 6: Your first map!
Congratulations! You just created your first map. Feel free to experiment with it, noting the default behavior: the availability of satellite imagery and street view, and the zoom in and out buttons in the bottom right-hand corner. We'll look at various ways of customizing this map as we progress through the book.
Setting the extent
The first customization you might want to make is changing the geographic extent of the map. To do that, you need to know the latitude and longitude of the map's center and the zoom level at which you want to display the area.
There are several websites that will help you determine what the latitude and longitude of a location is. The API itself provides a way to determine the zoom levels available for any location via the MaxZoomService (see this article for details).
However, I have an easier way for you to determine these details—one that will even create the code for you. If you follow this link, you'll find a little application of mine called Extent Finder. It enables you to pan and zoom the map around until you find the area you want to work with. You can then click Create MapOptions for this Location to access the Maps API code that you need to represent this area.
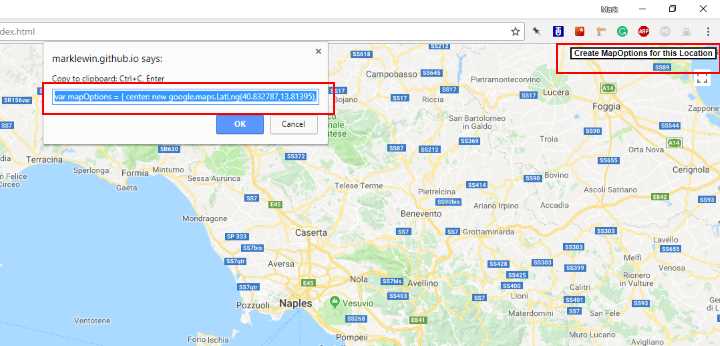
Figure 7: The Extent Finder application.
Press Ctrl + C to copy the highlighted code and paste it into your initMap() function just below the line of code that declares the map variable.
Now, you'll need to make a change to the way that you instantiate the map object for this to work. In our example, we used an object literal to define the map options object right within the call to the google.maps.Map class constructor. The code you generated in the Extent Finder application stores this options object within a variable called mapOptions, instead. And instead of using an object literal to specify the center coordinates, it creates an instance of the google.maps.LatLng class.
Generally, it doesn't really matter how you do it, but I prefer this approach in anything other than trivial use cases because I believe it makes the code easier to read.
Change your code to use the new mapOptions object for your area of choice as follows, and then test it to verify that the area displays correctly.
Code Listing 4: Setting the custom map extent
|
// The code to create the map goes here. function initMap() { var mapOptions = { center: new google.maps.LatLng(40.832787, 13.81395), zoom: 9 }; var map; map = new google.maps.Map(document.getElementById('map'), mapOptions); } </script> |
Trying different base maps
The Google Maps API gives you four different base map layers to choose from. They are roadmap, satellite, hybrid (a satellite map with labels), and terrain. If you don’t specify one at startup, you get roadmap by default.

Figure 8: The available base map layers.
If you want to specify a different base map for your application, you can set the mapTypeId option in the mapOptions object. For example, to use the hybrid base map, change your code as follows:
var mapOptions = {
center: new google.maps.LatLng(40.832787, 13.81395),
zoom: 9,
mapTypeId: 'hybrid'
};
You can also refer to a specific mapTypeId by the name of its constant, as follows:
var mapOptions = {
center: new google.maps.LatLng(40.832787, 13.81395),
zoom: 9,
mapTypeId: google.maps.MapTypeId.HYBRID
};
However, by default, the map displays the MapTypeControl, which allows your user to select any base map they want. This control is shown in Figure 9.
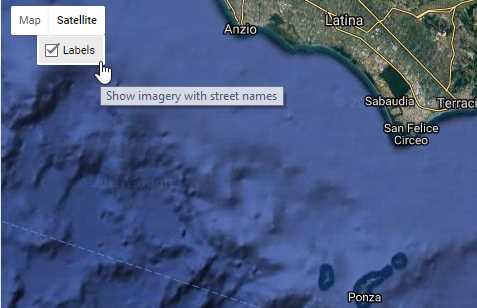
Figure 9: The MapTypeControl.
Suppose that you didn’t want users to have access to this control. Well, like all the controls in Google Maps, you can choose whether they are enabled or not. We’ll talk more about controls in the next section, but for now, just be aware that the visibility of controls can also be specified in the mapOptions object. To disable MapTypeControl, just set the MapTypeControl property to false in the map options object:
var mapOptions = {
center: new google.maps.LatLng(40.832787, 13.81395),
zoom: 9,
mapTypeId: 'hybrid',
mapTypeControl: false
};
Now, when you launch the application, the base map is set to hybrid, and there’s no way for the user to change it to anything else. Of course, you might want to provide an alternative method for the user to achieve this and, potentially, enable some base maps while hiding others. Let’s say, for example, that you wanted the user to choose the map type from a simple drop-down list instead of Google’s own MapTypeControl.
Make a copy of the Ch2_FirstMap.html file and call it Ch2_MapTypes.html. Change the contents of the <title> tag to reflect the new file name and add the mapTypeControl: false property assignment to the mapOptions object to hide Google’s base map switcher control.
Then, just above the map <div>, create an HTML <select> element, as shown in Code Listing 5, and give it an id property so that you can refer to the element from your JavaScript code. You can then use the value of the item that the user selects in the drop-down list and pass it to the map’s setMapTypeId() function to change the base map at runtime.
Code Listing 5: Changing the base map programmatically
Selecting a different value in the drop-down list causes its onChange event to fire, which we handle by calling setBaseMap(). We pass in to setBaseMap() the name of the MapType that corresponds to the user’s choice of map type, and use that in the map’s setMapTypeId() function to change the map. Note also that we have moved the map variable declaration outside of the initMap() function so that we can access the map object within our setBaseMap() function (and any other functions we might want to add later on).
Note: Find out more about the different map types and their capabilities in the API reference documentation here.
- 1800+ high-performance UI components.
- Includes popular controls such as Grid, Chart, Scheduler, and more.
- 24x5 unlimited support by developers.