
Go Web Development Succinctly®

CHAPTER 4
Templates
In the previous chapter, we connected to a data source, then displayed the results of queries to the user in HTML format. This HTML code was embedded directly within our source code, which is not desirable (except for very simple scenarios) because it makes the application very difficult to maintain.
Go comes to the rescue with a rather good templating engine. Not only does this enable us to separate our program code from the presentation markup, but it also provides some logical constructs such as loops, variables, and even functions that allow us to offload presentation logic to the template.
Introducing templates
First, let’s define a template.
Go template functionality is provided by the template package, which includes a number of methods, including Parse and ParseFile, for loading a template from a string or file, then Execute for merging the specific content from our application with the more general content provided by the template itself.
Note that templates typically exist within their own files, but this is not always the case. We can use template functionality directly within our program logic by encoding the template as a string, then using the Parse method to read from it. This is only a slight improvement on encoding everything as HTML, so in these examples we’ll use separate template files and ParseFile to read from them.
First, our template. As you can see, this is simply an HTML file with some special syntax so that our program knows what to insert and where to insert it.
Code Listing 10: Our HTML File
<html> <head> <title>Hello!</title> </head> <body> <h1>A warm hello to....</h1> <p> {{.Name}} </p> </body> </html> |
Everything should look familiar except the {{.Name}} entry. To Go templates, that is a variable. It’s contained within double curly braces, and its name (Name) is preceded by a dot.
The dot signifies the scope or context of the variable. In our case, the Name variable refers to the Name field of a Person struct, which will become apparent when you see the definition for it that we’ll use in our program logic:
type Person struct {
Name string
}
We can pass a Person struct to the template variable, and it will pull out the Name field and replace the variable definition in the template with it.
Note that any fields you refer to in the template must be exported. That is, they must begin with a capital letter. Unexported fields cause issues, as we’ll see in a bit.
Code Listing 11 shows the full program code.
Code Listing 11: Using the Template
package main import ( "log" "net/http" "text/template" ) type Person struct { Name string } func main() { http.HandleFunc("/", handler) err := http.ListenAndServe(":8999", nil) if err != nil { log.Fatal("ListenAndServe: ", err) } } func handler(w http.ResponseWriter, r *http.Request) { p := Person{Name: "John Smith"} t, _ := template.ParseFiles("hello.html") t.Execute(w, p) } |
The only code of note here is in the handler function that is invoked when a user visits the root of our web application at http://localhost:8999.
Handler creates a variable p of type Person and assigns “John Smith” to its Name field. We then use template.ParseFiles, passing in the name of the template file and assigning the results to variable t.
Having parsed the template file, we next need to perform the merge, which we do by calling Execute, which passes the http.ResponseWriter and the data item we want to merge with the template as parameters.
When we launch the application in a browser, we get Figure 15.

Figure 15: The Output of Our Simple Template
Reworking the data access application using a template
Let’s put our newfound knowledge of Go templates to work. First, we need to understand one of the many capabilities of a template—the ability to iterate over a set of results, then apply the appropriate formatting to each of them.
In order to achieve this, we must use the {{range}} {{end}} construct. We’ll use the following template to build out our table. Everything between {{range}} and {{end}} will be repeated once for every member of the object we pass into it.
Code Listing 12: The Template for Our “Cities” Database Application
<html> <head> <title>City Search</title> </head> <body> <h1>Search Results</h1> <table border='1'> <tr> <th>City</th> <th>Country Code</th> <th>Population</th> </tr> {{range .}} <tr> <td>{{.Name}}</td> <td>{{.CountryCode}}</td> <td>{{.Population}}</td> </tr> {{end}} </table> </body> </html> |
See the dot notation that appears just after the range keyword? That means “any object.”
Something important to note about using ranges in Go templates—they will only accept a single object. “What?” I hear you say. “Why would something that is supposed to iterate through a set of values only accept one?”
And you’d be right. But the range allows us to pass in an array or slice of values, then it will dig into that object to pull out its members.
So, in our database application, we simply need to do a bit of refactoring in order to ensure that each of our query results gets added to a slice—let’s call it Cities—and that we pass that slice into our template.
Code Listing 13: Using the Template in Our “Cities” Application
package main import ( "database/sql" "html/template" "log" "net/http" _ "github.com/go-sql-driver/mysql" ) type City struct { Name string CountryCode string Population int } var database *sql.DB func main() { db, err := sql.Open("mysql", "root:password@tcp(127.0.0.1:3306)/world") if err != nil { log.Println("Could not connect!") } database = db log.Println("Connected.") http.HandleFunc("/", showCity) http.ListenAndServe(":8999", nil) } func showCity(w http.ResponseWriter, r *http.Request) { var Cities = []City{} queryParam := "%" + r.URL.Path[1:] + "%" cities, err := database.Query("SELECT Name, CountryCode, Population FROM city WHERE Name LIKE ?", queryParam) if err != nil { log.Fatal(err) } defer cities.Close() for cities.Next() { theCity := City{} cities.Scan(&theCity.Name, &theCity.CountryCode, &theCity.Population) Cities = append(Cities, theCity) } t, _ := template.ParseFiles("results.html") t.Execute(w, Cities) } |
Next, we can execute the program and search for cities just as we did before.
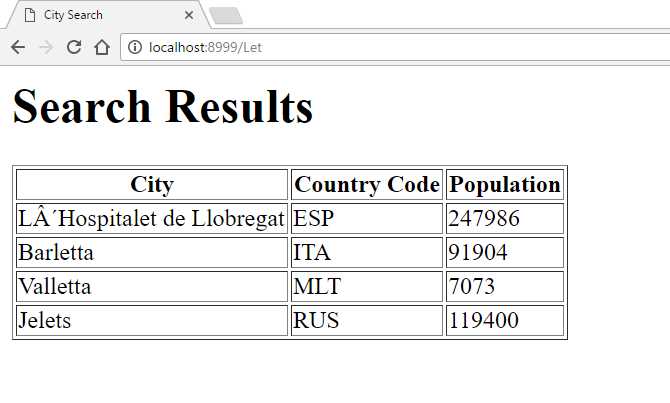
Figure 16: The Cities Application with Template
Let’s consider some of the benefits of using templates. First, our code is much neater. We don’t need to wade through long strings of tags in order to work out what’s going on.
Second, we can change the template at any time, no recompilation necessary.
Third, the template syntax is simple enough that we could hand it over to someone who knows nothing about Go, or about web development in general, but who might have a better handle on design than we do.
What else can we do with Go templates? Quite a lot, as it happens. Check out the official documentation for the definitive list. In the meantime, there are several features that are so useful it would be remiss of me not to at least mention them—embedded methods and conditionals.
Using embedded methods in templates
Let’s say we want to do something with our templated output. Perhaps we’d like to format the Population column in the preceding example in order to use a comma as a thousands separator.
Sure, we could add an extra string field in the City structure to display formatted output and write the formatted Population column figure to it each time we retrieve a row from the table. But, technically, that’s presentation, right? And haven’t we been keen to get as much presentation logic out of our main code as possible?
Also, this is especially cumbersome because Go’s fmt package doesn’t provide this functionality out of the box, which means we’ll have to roll our own.
So, let’s see if we can offload some of that responsibility to the template. In fact, we can do that by writing a method in our application that we’ll get the template to invoke. The best way to do that is to add a method directly to our City structure, as in Code Listing 14.
Code Listing 14: Adding a Custom Function to the City Struct
func (c City) FormatPopulation(n int, sep rune) string { s := strconv.Itoa(n) startOffset := 0 var buff bytes.Buffer if n < 0 { startOffset = 1 buff.WriteByte('-') } l := len(s) commaIndex := 3 - ((l - startOffset) % 3) if commaIndex == 3 { commaIndex = 0 } for i := startOffset; i < l; i++ { if commaIndex == 3 { buff.WriteRune(sep) commaIndex = 0 } commaIndex++ buff.WriteByte(s[i]) } return buff.String() } |
Note that the function accepts an integer value and a separator and returns a string (a tip of the hat to Ivan Tung for this function, which saved me having to write it myself!).
You can think of the Go rune keyword as an alias for a Unicode character, which is sometimes called a “code point” in Go terminology.
In order to call this function within our template, we simply specify its name followed by any parameters (not in parentheses), as shown in Code Listing 15.
Code Listing 15: Calling the FormatPopulation Function from the Template
<html> <head> <title>City Search</title> </head> <body> <h1>Search Results</h1> <table border='1'> <tr> <th>City</th> <th>Country Code</th> <th>Population</th> </tr> {{range .}} <tr> <td>{{.Name}}</td> <td>{{.CountryCode}}</td> <td>{{.FormatPopulation .Population}}</td> </tr> {{end}} </table> </body> </html> |
When we execute the application, we get nicely formatted population values, as in Figure 17.

Figure 16: The Population Values, Formatted by the Template
Using conditionals in templates
You can offload the evaluation of conditional expressions to your template using {{if}} {{else}} {{end}}.
Go supports several functions that support basic types, such as eq (equals), ne (not equal to), or gt (greater than) that you can use for building expressions.
The use of conditional expressions in templates is best demonstrated by an example.
Let’s say that we’re only interested in populations of less than 5,000,000. Everything else we’ll count as huge and won’t bother displaying the actual figure.
Code Listing 16 shows our template.
Code Listing 16: Template with Conditional Expression
<html> <head> <title>City Search</title> </head> <body> <h1>Search Results</h1> <table border='1'> <tr> <th>City</th> <th>Country Code</th> <th>Population</th> </tr> {{range .}} <tr> <td>{{.Name}}</td> <td>{{.CountryCode}}</td> <td>{{if gt .Population 5000000}} <b>HUGE</b> {{end}} </td> </tr> {{end}} </table> </body> </html> |
Figure 18 shows the result.
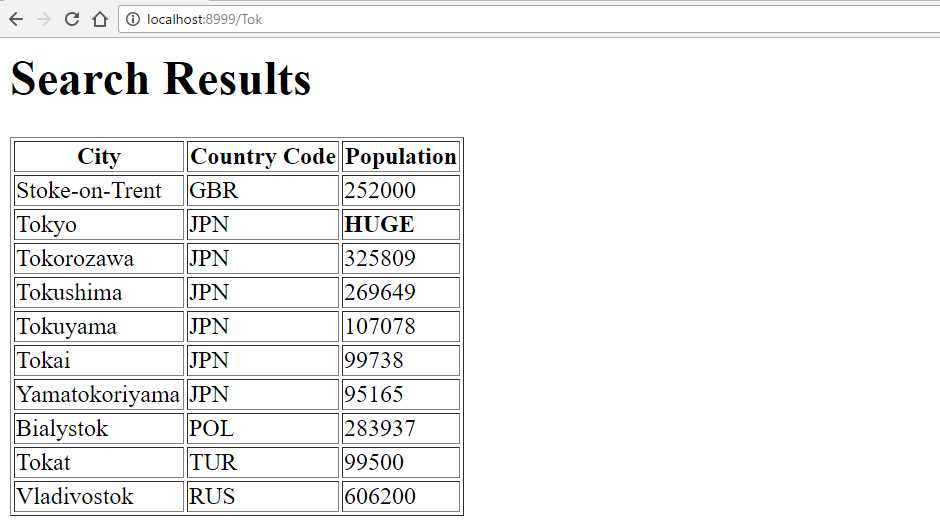
Figure 17: Displaying Population Values Using Conditionals in the Template
- 1800+ high-performance UI components.
- Includes popular controls such as Grid, Chart, Scheduler, and more.
- 24x5 unlimited support by developers.