
Go Web Development Succinctly®

CHAPTER 3
Accessing Data
In the previous chapter, we saw how Go can accept requests from different URLs and route them to an appropriate handler. So far, however, all of our responses to those requests have served only static content, which is not enough for today’s web applications. In this chapter, we’ll see how we can connect our Go web applications to a data source and serve dynamic data instead.
Getting a driver for your database
Go allows you to use any database for which a driver is available. A definitive list of drivers can be found at https://github.com/golang/go/wiki/SQLDrivers.
Unless you’re using something quite exotic, you should be able to find a driver for your database in the wiki.
MySQL is a fantastic open-source database and, although it has been around for quite a while, it continues to be extremely popular, so we’ll use that for our examples in this chapter. However, whichever database you choose, the steps you need to take will be similar, if not identical, to those shown here.
You can download the free community edition of MySQL Server from http://www.mysql.com. Follow the installation instructions for your platform. If you want to follow along with the examples in this chapter, you should also install the sample “world” database. There’s an option in the Windows installer for this, but with Mac and Linux you must download and install it manually from https://dev.mysql.com/doc/index-other.html.
Simply connect to the MySQL server using the command-line client (or MySQL Workbench, which you can also install if you prefer a GUI environment), then execute the following statement:
mysql> SOURCE < /path/to/world.sql
You can verify that the “world” database is installed by issuing the command in Figure 10 at the mysql> prompt.
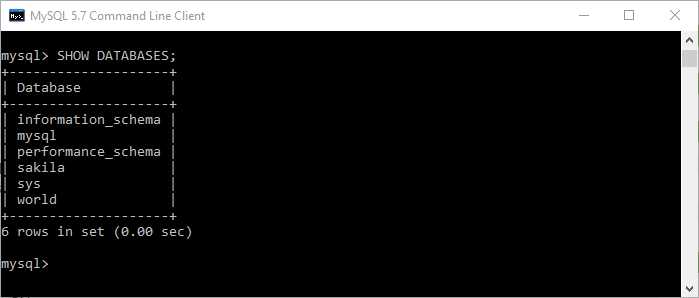
Figure 10: Verifying "World" Database Installation
When you’ve installed the database server, you need to install the driver for it. You can do this by using go get. I’m using the go-sql-driver in Figure 11.
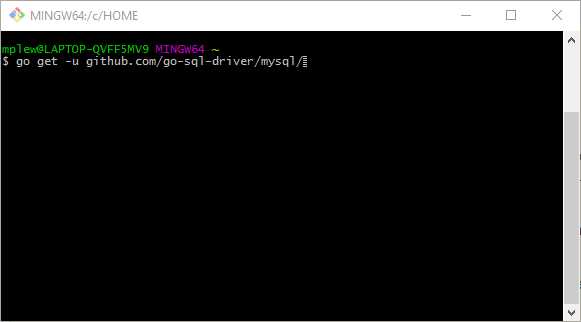
Figure 11: Installing the MySQL Driver for Go
When we’ve imported the driver specific to the database server, we’ll next need to reference both it and the generic database/sql package in our import statement. Note that we are preceding the driver import with an underscore (_). This tells the Go compiler that the package we are referencing is complementary to another package—in this instance, the database/sql package. We’re using it only for its initialization capability—what Go calls “side effects.”
import (
"database/sql"
"log"
_ "github.com/go-sql-driver/mysql"
)
Next, we need to specify the server host, port number, initial database, user name, and password that we’ll use to build the connection string.
db, err := sql.Open("mysql", "root:password@tcp(127.0.0.1:3306)/world")
There are three tables in the “world” database—Country, City, and CountryCode, the last of which links cities to countries. It’s a good idea to create types for each of the database tables in your application so that it will be easier to implement changes in the schema later.
Here is our Go struct for rows in the City table:
type City struct {
Name string
CountryCode string
District string
Population uint32
}
Next, let’s have a variable in which we store a handle to our database when we’re connected:
var database *sql.DB
Finally, we’re ready to connect to the database. We build up the connection string by serializing the server host, port number, initial database, and the user name and password strings.
Next, we attempt to connect by calling the database/sql.Open method, passing in the type of driver and the connection string:
dbConn := fmt.Sprintf("%s:%s@tcp(%s)/%s", dbUser, dbPass, dbHost, dbDatabase)
db, err := sql.Open("mysql", dbConn)
This returns an instance of sql.DB (about which we will have more to say later).
The full code is here in Code Listing 7.
Code Listing 7: Connecting to the Database
package main import ( "database/sql" "log" _ "github.com/go-sql-driver/mysql" ) var database *sql.DB func main() { db, err := sql.Open("mysql", "root:password@tcp(127.0.0.1:3306)/world") if err != nil { log.Println("Could not connect!") } database = db log.Println("Connected.") } |
If everything goes to plan, we should receive a message at the terminal prompt telling us that we are now connected to the MySQL server.
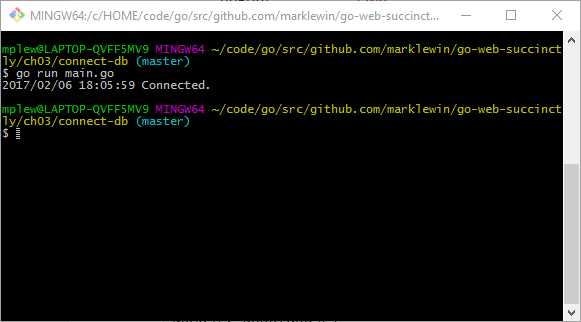
Figure 12: Verifying Connection to the Database
Now that we can connect to the “world” database, we can execute queries against it and display the results to our users. But first, let’s examine sql.DB.
sql.DB
Note from the previous code example that we are using the database variable that contains sql.DB to access the database.
The sql.DB is not the database connection—that’s stored in dbConn—instead, it’s the database/sql package’s abstraction of the database. In our example, it refers to the MySQL database, but because we can use database/sql to interface with many different data sources, it could just as easily be a local file or some sort of in-process data store such as memcache.
sql.DB takes care of a lot of things on your behalf, including the opening, closing, and pooling of database connections.
Don’t keep opening and closing databases unless your application requires it. The sql.DB object is designed to be long-lived, and all of your interaction with the database will come via sql.DB. However, you must be certain to close connections by using sql.DB.Close when you are finished with them so that they can be returned to the pool.
Tip: If you need to give short-lived function access to sql.DB, pass it to the function as a parameter instead of creating a new connection within the function.
We’re getting ahead of ourselves. We haven’t done anything with our database yet.
Let’s rectify that now.
Retrieving data from the database
The following code queries the “world” database’s City table based on whatever the user enters in the browser’s address bar after http://localhost:8999/.
Code Listing 8: Querying the Database
package main import ( "database/sql" "fmt" "log" "net/http" _ "github.com/go-sql-driver/mysql" ) type City struct { Name string CountryCode string Population int } var database *sql.DB func main() { db, err := sql.Open("mysql", "root:password@tcp(127.0.0.1:3306)/world") if err != nil { log.Println("Could not connect!") } database = db log.Println("Connected.") http.HandleFunc("/", showCity) http.ListenAndServe(":8999", nil) } func showCity(w http.ResponseWriter, r *http.Request) { city := City{} queryParam := "%" + r.URL.Path[1:] + "%" rows, err := database.Query("SELECT Name, CountryCode, Population FROM city WHERE Name LIKE ?", queryParam) if err != nil { log.Fatal(err) } defer rows.Close() for rows.Next() { err := rows.Scan(&city.Name, &city.CountryCode, &city.Population) if err != nil { log.Fatal(err) } fmt.Fprintf(w, "%s (%s), Population: %d \n", city.Name, city.CountryCode, city.Population) } err = rows.Err() if err != nil { log.Fatal(err) } } |
What we’re interested in here resides in the showCity function that gets called when the user visits the root of the web application.
In order to query the database, we call the Query method in sql.DB and pass in the required SQL. The nice thing about Query (and its counterpart, QueryRow, which retrieves only a single row) is that it is parameterized, which helps protect against SQL injection.
The query returns a collection of rows that we iterate over by using the Next method. For each row, we execute Scan to map the columns in the row to the City type we declared earlier. Next, it’s a simple matter of displaying the results to the user, as in Figure 13.
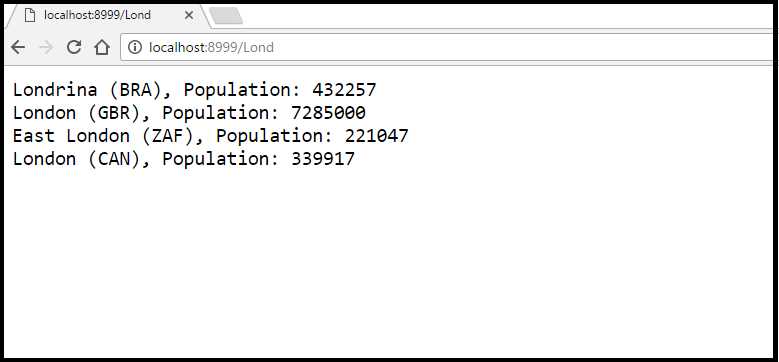
Figure 13: Displaying the Query Results
Tidying up the output
All we have now is some rather ugly text being dumped out to the browser. Let’s make it a little bit more pleasant to look at by displaying the query results in an HTML table. We do this simply by rewriting the code in our handler, as in Code Listing 9.
Code Listing 9: Using HTML to Format the Query Results
func showCity(w http.ResponseWriter, r *http.Request) { city := City{} queryParam := "%" + r.URL.Path[1:] + "%" rows, err := database.Query("SELECT Name, CountryCode, Population FROM city WHERE Name LIKE ?", queryParam) if err != nil { log.Fatal(err) } defer rows.Close() html := "<html><head><title>City Search</title></head><body><h1>Search for" + queryParam + "</h1><table border='1'><tr><th>City</th><th>Country Code</th><th>Population</th></tr>" for rows.Next() { err := rows.Scan(&city.Name, &city.CountryCode, &city.Population) if err != nil { log.Fatal(err) } html += fmt.Sprintf("<tr><td>%s</td><td>%s</td><td>%d</td></tr>", city.Name, city.CountryCode, city.Population) } err = rows.Err() if err != nil { log.Fatal(err) } else { html += "</table></body></html>" fmt.Fprintln(w, html) } } |
When we execute it, we get Figure 14.
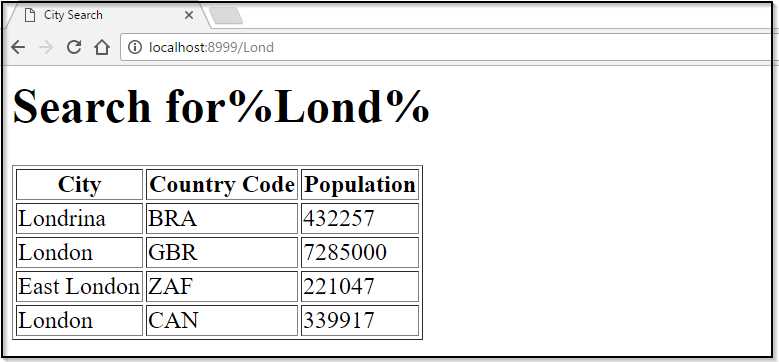
Figure 14: Displaying the Query Results in an HTML Table
Not exactly pretty, but a slight improvement. Of course, we can style this to our hearts’ content with some judicious use of CSS.
But wait a minute—at what expense does this come to our code? Our nice, neat program is now a mess of inline HTML. If it becomes more complex over time, we’d find it very difficult to maintain. What’s more, each time we want to make a trivial change, we would have to recompile our code.
We have now committed one of web development’s great cardinal sins—mixing logic and presentation in our source code. Thankfully, there’s a much better way to format the display. We’ll examine that in the next chapter.
- 1800+ high-performance UI components.
- Includes popular controls such as Grid, Chart, Scheduler, and more.
- 24x5 unlimited support by developers.