
GitHub Succinctly®

CHAPTER 8
Issues – In Detail
Issues are the collaboration component of GitHub, where people communicate about project activity. While Git and GitHub are powerful version control tools, the collaboration support available through issues and pull requests encourage people to work together to produce great software projects.
Creating an issue
From the project detail page, you can click on the Issues tab and click on the New issue button.

Figure 34: Issues tab
When you click on the New issue button, the following screen will appear to let you enter your issue details. You can use the Markdown syntax (see Appendix 1) to style your text.
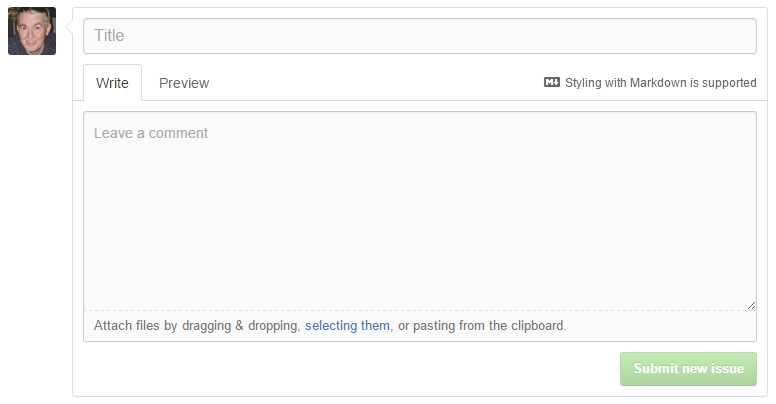
Figure 35: Writing an issue
You can use both Markdown and emoji in your body text to format the issue description. The Preview tab shows you what the issue will look like.
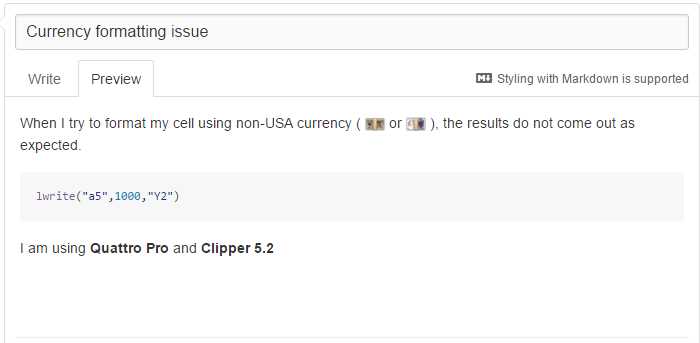
Figure 36: Issue preview
You can also attach files to the issue to help the repository author understand the issue clearly. Anyone watching the repository will now receive an email with the issue content.
Tip: Keep in mind that GitHub is international—be sure to express your issue as clearly as possible, since people from all over the world may be reviewing the issue.
In addition to Markdown, you can also use the @userName syntax to refer to a GitHub user and the #Issue syntax to reference another issue or pull request. This allows issues to be cross-referenced and to be linked with other user and issues.
When you are typing an issue, GitHub recognizes the @, #, and : characters, and will search for matches to make it easier. For example, typing the # brings up a list of other issues within the repository:

Figure 37: List of issues within edit window
The : (colon) will bring up a list of support emoji characters, and the @ symbol will bring up a list of users associated with the repository and issues.
Editing the issue
When the repository owner sees the issue, they will be able to start working with the issue. This allows them to categorize the issue, assign it to someone, marked it closed, and to comment about the issue.
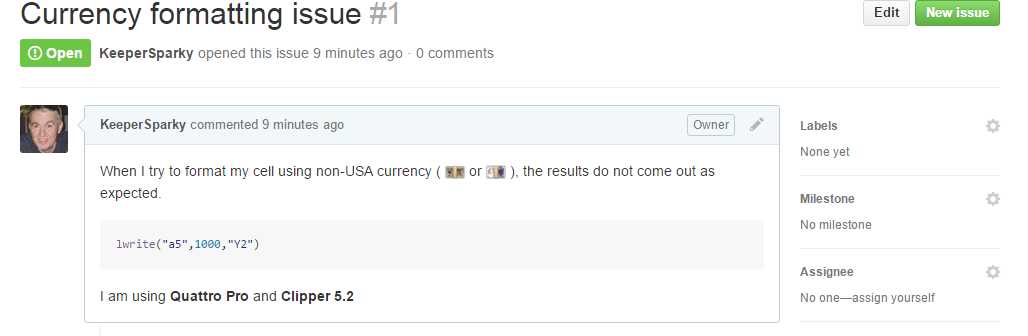
Figure 38: Owner view
Labeling the issue
Generally, the person reviewing the issue will first assign a label to it, such as bug or enhancement.
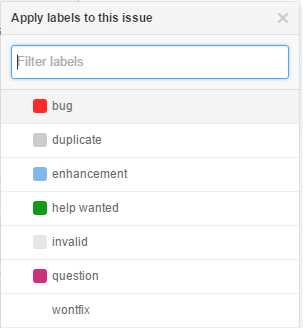
Figure 39: Labeling the issue
The seven items shown in Figure 39 are the default labels that GitHub offers. You can add new labels from the issue list by clicking on the Labels button.

Figure 40: Issues list
This will display a screen that allows you to edit labels, remove ones you don’t want, and add any new ones. When you add a new label, GitHub asks for the label name and has a color picker to let you choose a color to use for this issue.
![]()
Figure 41: New issue
Once you’ve added the new label, you can use that label for all new and existing issues.
Milestones
If you have a number of issues, you might want to group them into milestones. A milestone can be anything you want, such as:
- Sprint – Issues to work on in the next two weeks
- Beta release – Work for next major release
- Customer specific – Issues for a particular customer
You can create milestones similarly to how you create labels. The milestone will also allow you an optional due date to help with tracking.

Figure 42: Milestone screen
Assignee
The Assignee button lets you assign a person to work on this issue. It should be the owner or any collaborator. You can add a collaborator from the settings menu when you (the owner) are viewing the repository.
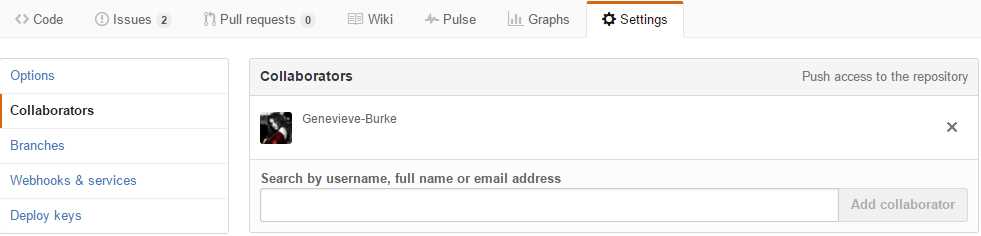
Figure 43: Collaborator
The collaborator can have tasks assigned to them. You can see the list of collaborators and add a new one by looking up user name, email address, or full name. You can use the X button to remove a collaborator from the project. A collaborator will also have push access to your project as well.
Viewings issues
As you work with issues, adding labels, assignees, etc., GitHub will display all of the information in the issue list

Figure 44: Issue list
You can use the various options across the top (author, labels, milestones, and assignee) to filter the issue list. You can also sort the list the using same options you can use while searching. GitHub makes tracking issues both simple and powerful.
Closing issues
When you are making a commit to the repository, you can close the issue via the commit message. GitHub recognizes the following words as meaning the issue is being closed. You should follow the keyword with the #issue number.
- Close
- Closes
- Closed
- Fix
- Fixes
- Fixed
- Resolve
- Resolves
- Resolved
When GitHub sees the pattern in the commit message, it will automatically close the issue. You can close multiple issues in one commit message as well. For example, the following commit message will automatically close issue #2.
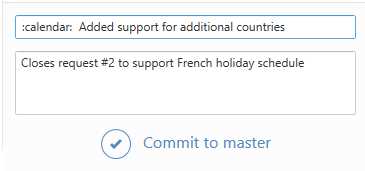
Figure 45: Closing an issue in commit message
Summary
The issue tracking and collaboration features of GitHub make it very useful as a tool to track development progress and work. It is a simple, yet powerful system to learn, and is very useful for management of projects with multiple people, multiple milestones, etc.
- 1800+ high-performance UI components.
- Includes popular controls such as Grid, Chart, Scheduler, and more.
- 24x5 unlimited support by developers.