
Getting the Most from LINQPad Succinctly®

CHAPTER 2
LINQPad and Entity Framework
LINQPad lets the user query Entity Framework models defined in Visual Studio. The process used to accomplish this action will be explained in this chapter. The examples in this chapter assume you have an existing SQL Server database named uspostalcodes. If you wish to run the examples, you can find the SQL scripts to create and populate the database here.
Creating an ADO.NET Entity Data Model
To explore the ability of LINQPad to query Entity Framework models, we need to create an ADO.NET Entity Data Model project in Visual Studio. To do this, open Visual Studio and select New Project from the File menu. Next, select the Class Library project type, as displayed in the following figure.
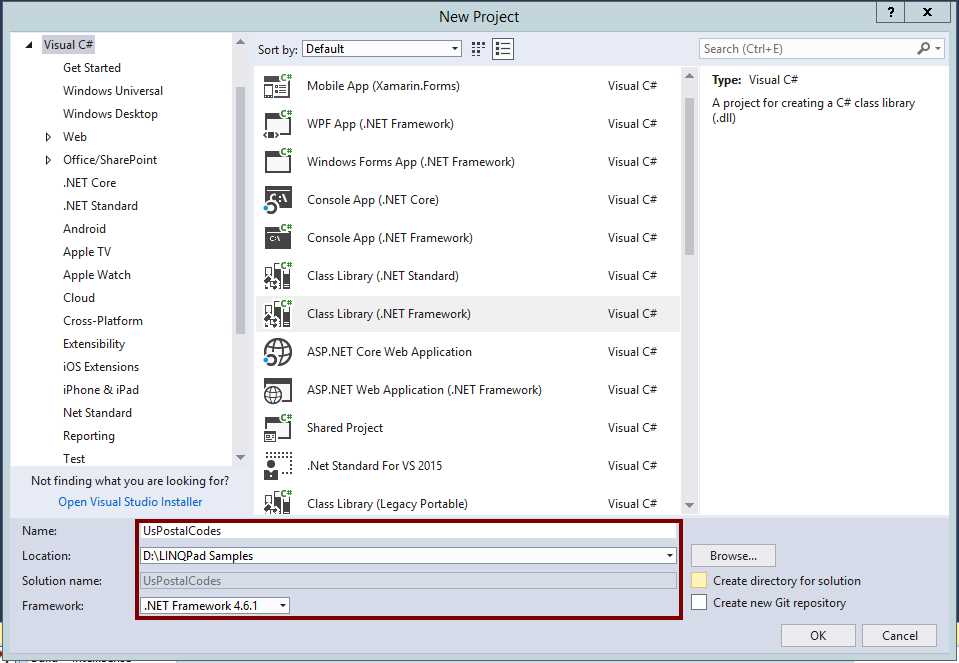
Figure 4: The UsPostalCodes Class Library Project
The project will be named UsPostalCodes, which is the name of the database that will be used to create the model. This project should be saved in the D:\LINQPad_Samples folder created for saving the samples discussed in this book.
Once the project is created, right-click the project’s name in the Solution Explorer and select Add > New Item.
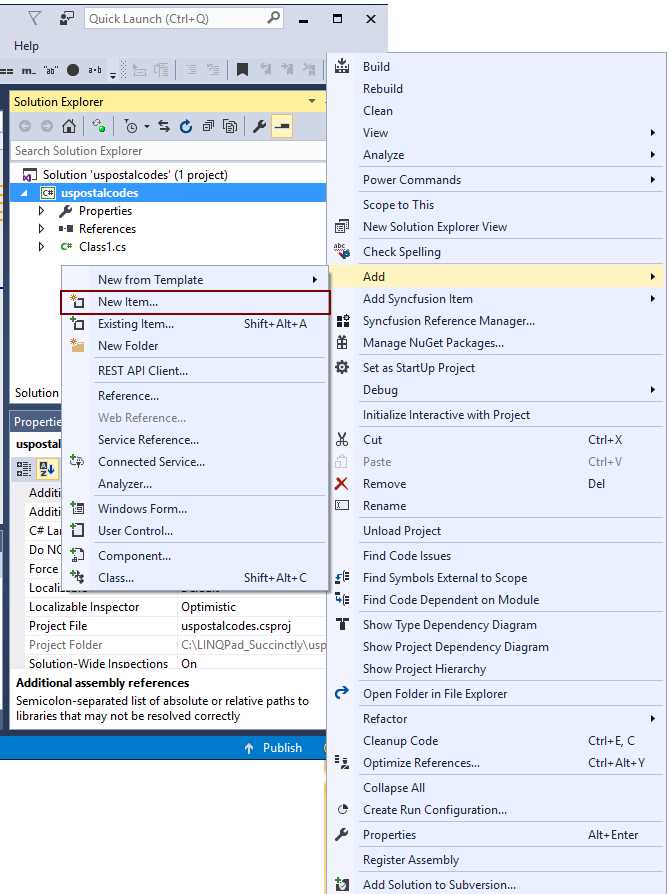
Figure 5: The New Item Command
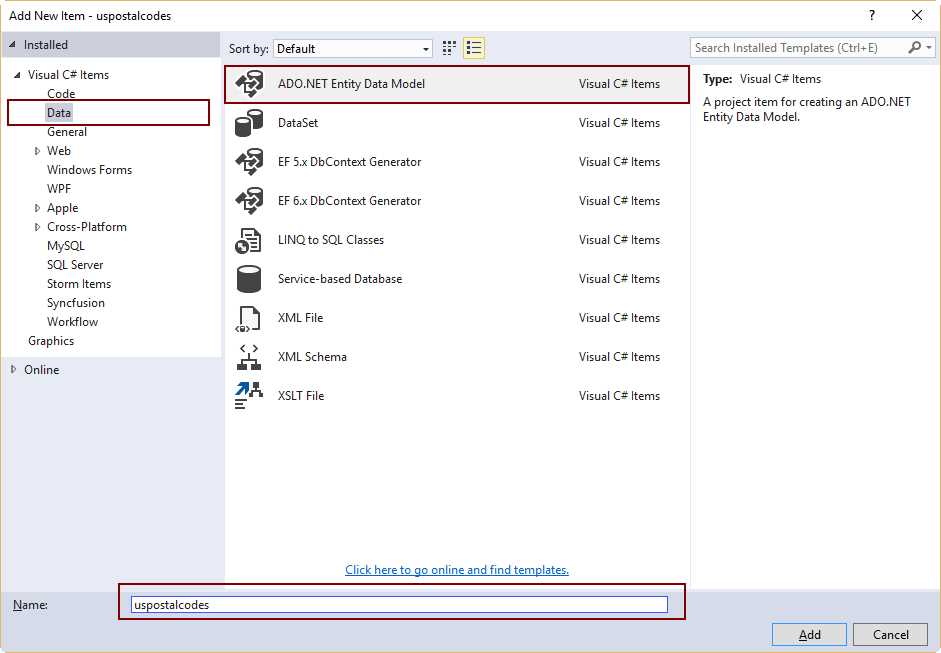
Figure 6: The Add New Item Dialog Box
In the Add New Item dialog box, select Data from the template groups list located on the left. Then, select ADO.NET Entity Data Model from the templates displayed at the right. The name for the model will be uspostalcodes, as will the database and project names. Click Add to continue.
Figure 7: The Entity Data Model Wizard
The Entity Data Model Wizard dialog will appear and will ask for the contents of the model. For the purposes of this project, the model contents will be EF Designer from database. A brief explanation about this kind of content appears in a frame located under the content options. After selecting EF Designer from database, click Next to continue.
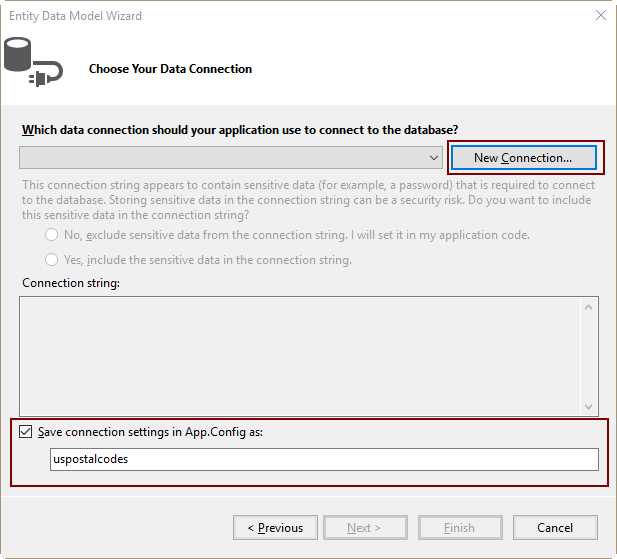
Figure 8: Choosing the Data Connection
Now, the wizard will ask about the data connection that will be used to generate the model. Since a connection isn’t defined yet, click New Connection. Then, enter the name uspostalcodes in the text box that will be displayed in order to save the connection settings in the App.Config file.
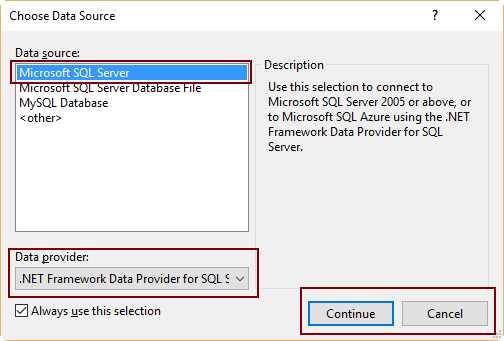
Figure 9: Choose Data Source Dialog Box
The next step is choosing the data source for the connection. In this case, we’ll use Microsoft SQL Server and the .NET Framework Data Provider for SQL Server. Click Continue to proceed.
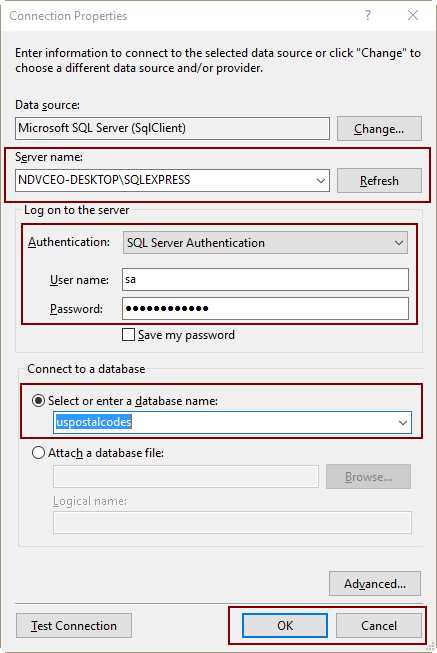
Figure 10: Connection Properties Dialog Box
Now we will set the connection properties. In this case, the connection will use an instance of SQL Server installed on the local computer, with SQL Server Authentication mode and the uspostalcodes database. Click OK to continue the process.
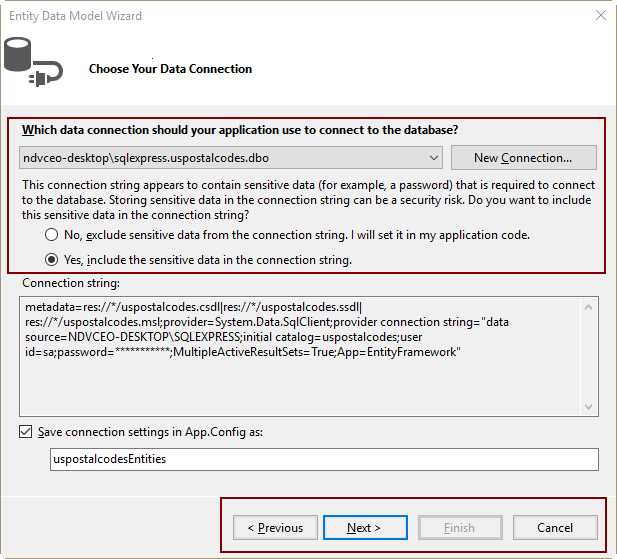
Figure 11: Entity Data Model Wizard Displaying the Connection String
The Entity Data Model Wizard will display the name of the connection selected, and the connection string that will be used to access the database. A group of option buttons and descriptive text appear under the name of the connection. The text suggests that sensitive data (such as the password to connect to the server) shouldn’t be included in the connection string. This is highly recommended for production environments, but for the purposes of this book, you can choose to include password information. Click Next to continue the process.
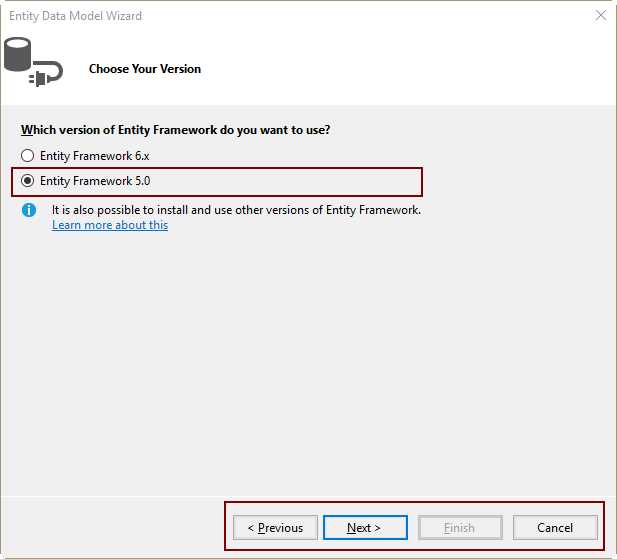
Figure 12: Selecting Entity Framework Version
The next dialog box asks for the version of Entity Framework to be used for model building. Choose Entity Framework 5.0 for this project.

Figure 13: Choosing Database Objects
The wizard asks us to choose our database objects and settings to include in the model. This project will use the three tables that are part of the database (counties, places, and states). As in LINQPad connections, the wizard can pluralize object names, and include the foreign key columns in the model. Both actions are checked by default. To start model building, click Finish.
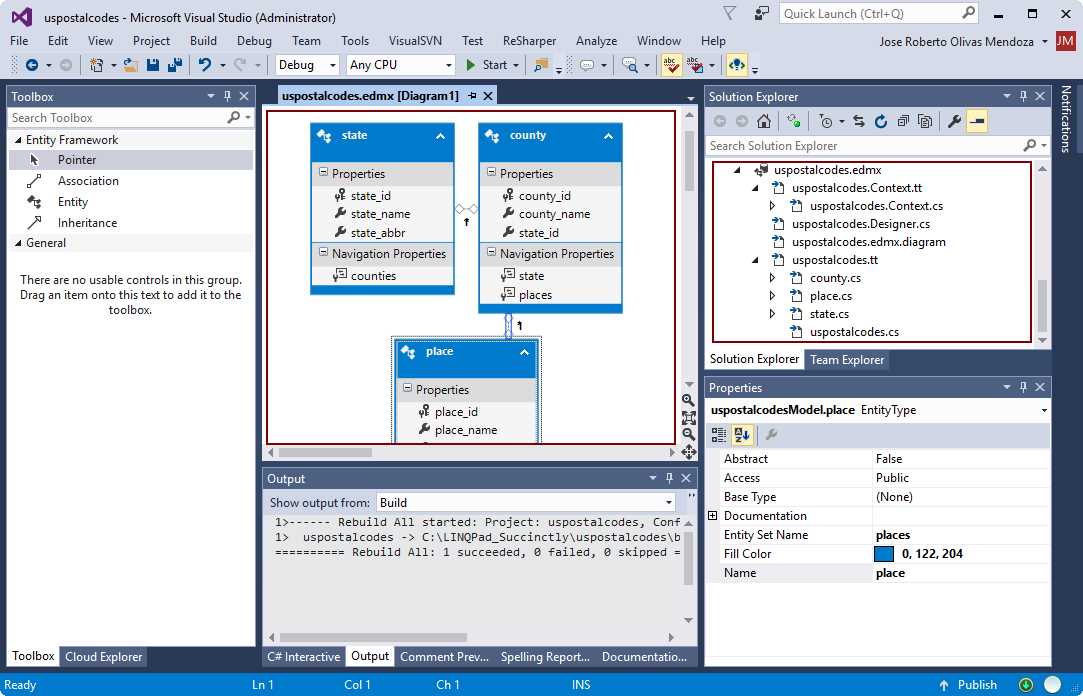
Figure 14: The Model Built as Part of the uspostalcodes Project
When the model finishes building, it is added to the project, appearing as a diagram, and all its components are displayed in the Solution Explorer.
The final step is building the assembly. To do this, click Build > Build Solution or Rebuild Solution in the Visual Studio menu bar.
Connecting to an Entity Data Model
LINQPad can connect to an Entity Data Model by adding a connection, just like LINQ to SQL connections.
Creating an Entity Data Model connection
Start by launching LINQPad, and then click the Add Connection hyperlink to bring up the Choose Data Context dialog.
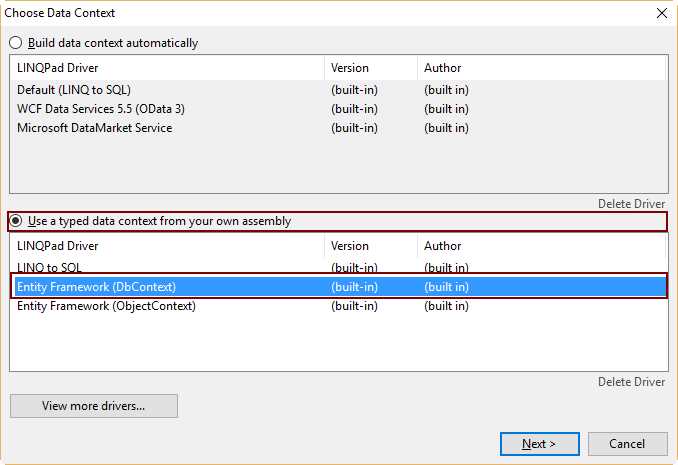
Figure 15: The Choose Data Context Dialog Settings to Query an Entity Framework Model
Select the Use a typed data context from your own assembly option, and then select the Entity Framework (DbContext) option from the list displayed under the option button. Click Next to continue.
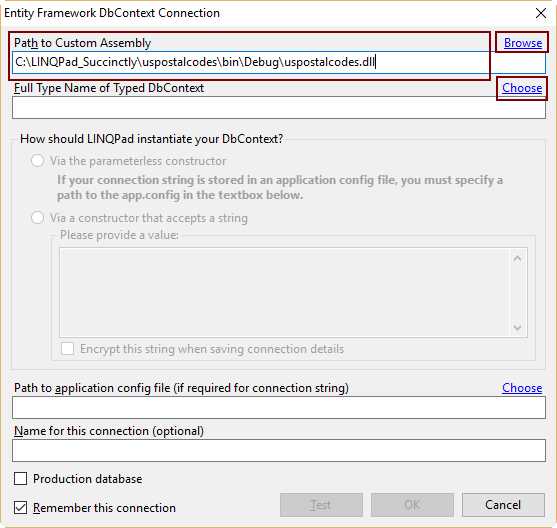
Figure 16: The Entity Framework DbContext Connection Dialog Box
Now, the Entity Framework DbContext Connection dialog box appears. To select the assembly containing the data model, you can either type the full path where the assembly is located, or click on the Browse hyperlink to locate the assembly file.
After the custom assembly is specified, select the typed DbContext from the Choose Custom Type dialog box. This dialog box appears automatically if you browse for the assembly. If you typed the path for the assembly directly, click the Choose hyperlink that is located to the right of the dialog box.

Figure 17: Choosing the Custom Type for the Data Model
The Choose Custom Type dialog box will display all typed DataContexts available in the assembly. For the uspostalcodes project, there’s only one typed DataContext, so it will appear selected by default, as displayed in Figure 17. You can select the DataContext by clicking OK.
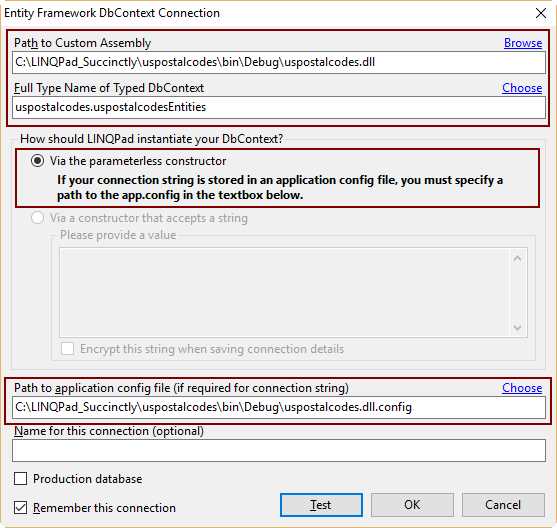
Figure 18: The Entity Framework DbContext Connection Dialog, after Typed DataContext Is Selected
The Entity Framework DbContext Connection dialog box displays the name of the custom type name and enables an option button that indicates LINQPad will instantiate the DbContext by creating a parameters constructor.
As indicated in the descriptive text below the option button, you must specify the path for the app.config file associated with the assembly. As noted in the previous figure, this config file is located in the same folder where the assembly is stored.
Click OK to save the connection. The connection is added to the Connection’s tree view area.
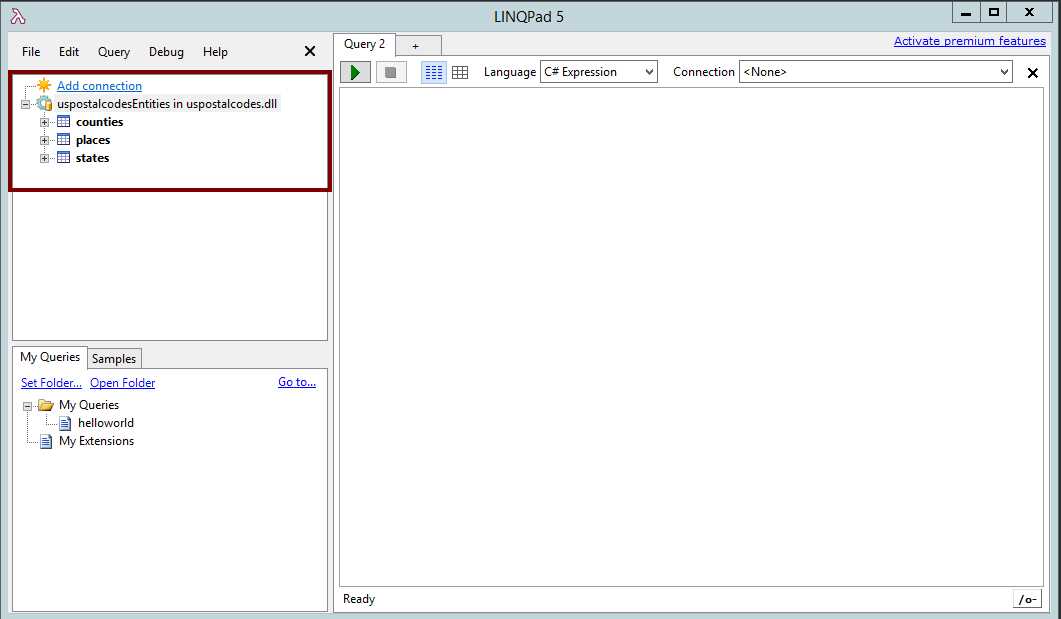
Figure 19: The Entity Framework Connection Displayed in LINQPad
The code for Entity Framework queries is like LINQ to SQL code. The following example selects the county_id and county_name columns from the counties entity, and then sorts the result by using the value stored in the county_name column.
Code Listing 1: An Entity Framework Query Example
var countiesTable = counties.Select(row => new {row.county_id, row.county_name}); countiesTable.OrderBy(row => row.county_name); countiesTable.Dump(); |
A few highlights about Entity Framework connections
When an Entity Framework connection is used, LINQPad offers the following features:
- The user can return to Visual Studio at any time and rebuild the assembly, because LINQPad doesn’t lock the file.
- LINQPad automatically refreshes the tree view and the auto-completion cache (applies for paid versions) whenever the assembly changes.
- If the assembly references other assemblies, LINQPad will pick these up too.
Chapter summary
This chapter explained how to query Entity Framework models created with Visual Studio.
An ADO.NET Entity Data Model project was created, using the uspostalcodes database. The result for this project was a custom assembly named uspostalcodes.dll, containing a custom typed DataContext named uspostalcodes.uspostalcodesEntities.
LINQPad can connect to an Entity Data Model by adding a connection, just like LINQ to SQL connections. To do so, click the Add Connection hyperlink to bring up the Choose Data Context dialog. Then, select the option Use a typed data context from your own assembly, along with the Entity Framework (DbContext) option. Next, specify the assembly containing the data model, either by typing the full path where the assembly is located, or by browsing the disk to locate it. After that, select the custom typed DbContext from the Choose Custom Type dialog box. To complete the process, you must specify the path for the app.config file associated with the assembly containing the data model.
The code for Entity Framework queries is like LINQ to SQL code, so all samples written for LINQ to SQL queries should work with Entity Framework, with a few changes.
Because LINQPad doesn’t lock the file, you can update and rebuild the assembly in Visual Studio at any time. If the assembly changes, LINQPad refreshes the Connection’s tree view automatically.
- 1800+ high-performance UI components.
- Includes popular controls such as Grid, Chart, Scheduler, and more.
- 24x5 unlimited support by developers.